background image

Manual Revision: 09/20/2013

For the most up-to-date information, please visit: www.startech.com

DE:

 Bedienungsanleitung - de.startech.com

FR:

 Guide de l'utilisateur - fr.startech.com

ES:

 Guía del usuario - es.startech.com

IT:

 Guida per l'uso - it.startech.com

NL:

 Gebruiksaanwijzing - nl.startech.com

PT:

 Guia do usuário - pt.startech.com
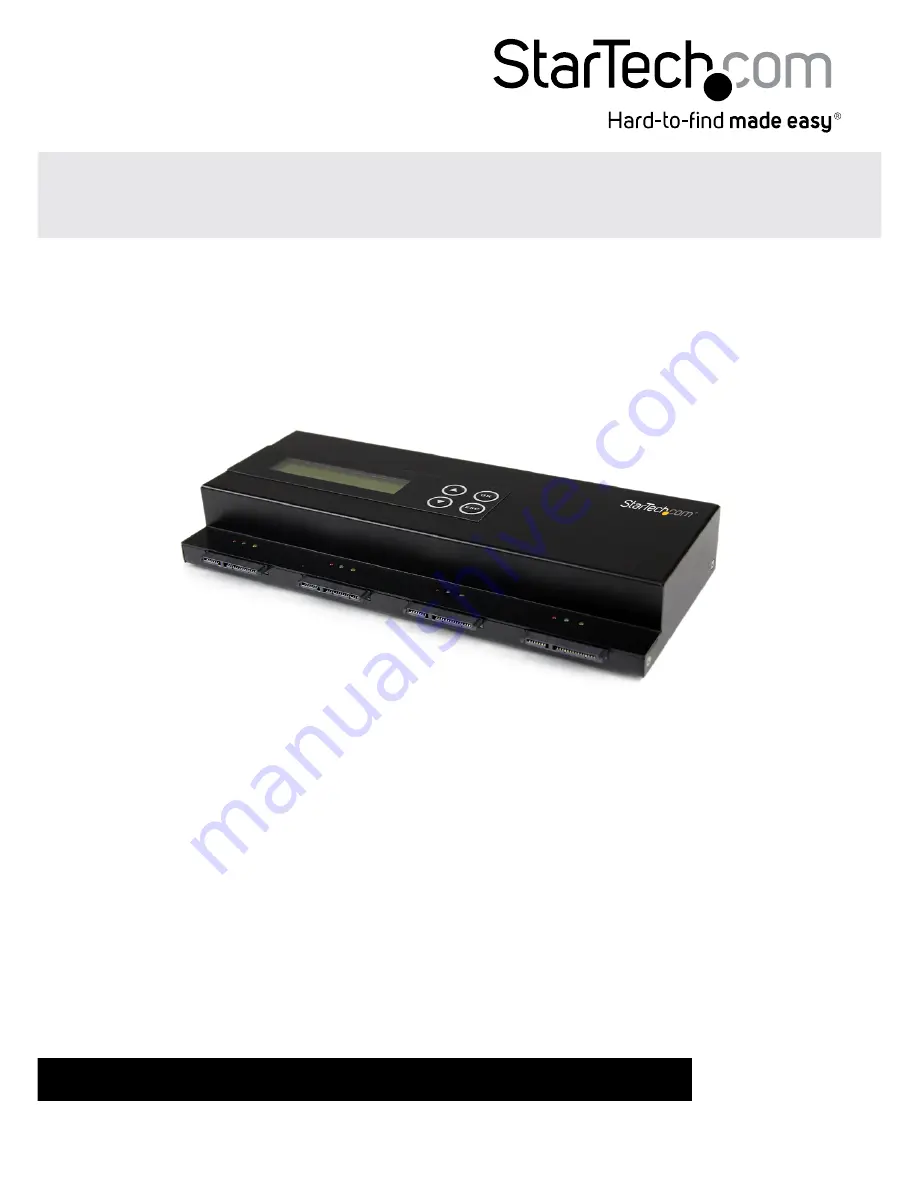
SATDUP13

1 to 3 Standalone Hard Drive Duplicator 

and Eraser

*actual product may vary from photos

Summary of Contents for SATDUP13

Page 1: ...anleitung de startech com FR Guide de l utilisateur fr startech com ES Guía del usuario es startech com IT Guida per l uso it startech com NL Gebruiksaanwijzing nl startech com PT Guia do usuário pt startech com SATDUP13 1 to 3 Standalone Hard Drive Duplicator and Eraser actual product may vary from photos ...

Page 2: ...receiving antenna Increase the separation between the equipment and receiver Connect the equipment into an outlet on a circuit different from that to which the receiver is connected Consult the dealer or an experienced radio TV technician for help Use ofTrademarks RegisteredTrademarks and other Protected Names and Symbols This manual may make reference to trademarks registered trademarks and other...

Page 3: ... Introduction 2 Packaging Contents 2 Hardware Installation 3 Hardware Operation 4 Hard Drive Duplication 4 Compare Duplicated Drives 5 Compare Duplicated Drives 5 Hard Drive Eraser 5 Utility Options 7 Advanced Configuration Using Setup 8 Technical Support 10 Warranty Information 10 ...

Page 4: ...ual 1 Product Diagram Front View 1 Display Screen 2 Navigation buttons 3 OK button 4 Esc button 5 SATA HDD source port 6 SATA HDD destination ports Rear View 1 Power Switch 2 Power Adapter Port 3 Daisy Chain ports 1 1 ...

Page 5: ...eful handling especially when being transported If you are not careful with your hard disk lost data may result Always handle your hard drive and storage device with caution Be sure that you are properly grounded by wearing an anti static strap when handling computer components or discharge yourself of any static electricity build up by touching a large grounded metal surface such as the computer ...

Page 6: ...ves should be connected from left to right leaving port s closest to the right unoccupied 4 Press the power switch to the On position the SATDUP13 is now ready to use Hardware Installation 1 Ensure the power switch is set in the off position Connect the included power adapter from an available AC power outlet to the Power Adapter Port on the back of the SATDUP13 2 Using an included SATA Cable atta...

Page 7: ...e all the targets are ready by verifying size Once the drives have been analyzed you will receive an indicator stating the duplicator is ready Press OK and the system will begin duplication automatically 3 Duplication will complete when the indicator reaches 100 The destination drives now contain identical data to the source drive Note If the destination drives are larger than the source drive a s...

Page 8: ...OK 2 The duplicator will analyze the source drive and ensure all the targets are ready by verifying size Once the drives have been analyzed you will receive an indicator stating the duplicator is ready Press OK and the system will begin duplication automatically 3 Duplication will complete when the indicator reaches 100 The destination drives now contain identical data to the source drive and the ...

Page 9: ...ge the data on the HDD so please make sure you have backed up all important data before using this function 4 3 DoD Erase DoD Erase is an erasing method that complies with the U S A Department of Defense DoD standard It can guarantee the data was fully deleted by erasing the HDD bit for bit three times DoD Erase will damage the data on the HDD so please make sure you have backed up all important d...

Page 10: ...ate to the device firmware is available on the StarTech com product page this option can be used to update the device The steps below outline the steps for executing a system update Note A firmware update should only be done if recommend by StarTech com The below steps should only be performed by advanced users Please contact StarTech com Technical Support for assistance a Format a blank hard driv...

Page 11: ...n Note The number 6 1 at the beginning of each option below represents the Copy Area heading on the main menu the numbers 1 2 3 etc indicate the option within the Copy Area sub menu 6 1 1 System and Files It will copy source HDD s System and Files instead of the whole HDD The system will analyze the source HDD and identify the data area to copy The copy will be completed as long as the source HDD ...

Page 12: ...e When the system finishes function executing the motor won t stop running immediately This function is used to set the time of motor stopping after finishing function executing 6 9 Advanced Setup From Advanced Setup you can adjust HDD Wait Time and lock the keys see details below a Select 6 9 Advanced setup using the navigation buttons b From the Advanced menu you can select your desired applicat...

Page 13: ...e returned for repair or replacement with equivalent products at our discretion The warranty covers parts and labor costs only StarTech com does not warrant its products from defects or damages arising from misuse abuse alteration or normal wear and tear Limitation of Liability In no event shall the liability of StarTech com Ltd and StarTech com USA LLP or their officers directors employees or age...

Page 14: ...rts and we quickly deliver them wherever they need to go Just talk to one of our tech advisors or visit our website You ll be connected to the products you need in no time Visit www startech com for complete information on all StarTech com products and to access exclusive resources and time saving tools StarTech com is an ISO 9001 Registered manufacturer of connectivity and technology parts StarTe...

Reviews: