background image

Manual Revision: 09/15/2017

For the latest information, technical specifications, and support for 

this product, please visit www.StarTech.com/ARMPIVOTHD.

FR:

 Guide de l’utilisateur - fr.startech.com

DE:

 Bedienungsanleitung - de.startech.com

ES:

 Guía del usuario - es.startech.com

NL:

 Gebruiksaanwijzing - nl.startech.com

PT:

 Guia do usuário - pt.startech.com

IT:

 Guida per l’uso - it.startech.com

ARMPIVOTHD

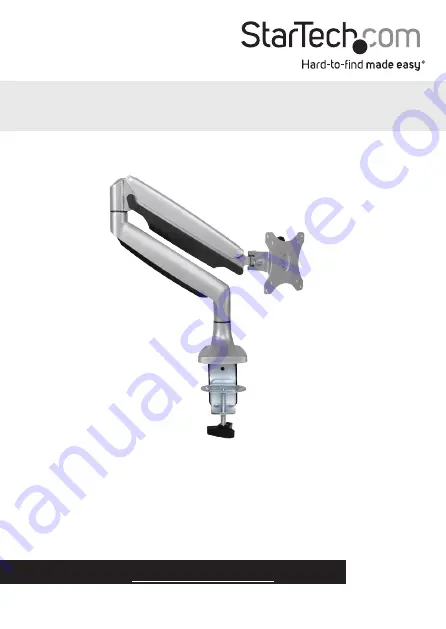
Single-Monitor Arm - One-Touch 

Height Adjustment - Heavy Duty

*actual product may vary from photos

Summary of Contents for ARMPIVOTHD

Page 1: ...ARMPIVOTHD FR Guide de l utilisateur fr startech com DE Bedienungsanleitung de startech com ES Guía del usuario es startech com NL Gebruiksaanwijzing nl startech com PT Guia do usuário pt startech com IT Guida per l uso it startech com ARMPIVOTHD Single Monitor Arm One Touch Height Adjustment Heavy Duty actual product may vary from photos ...

Page 2: ...rence received including interference that may cause undesired operation Changes or modifications not expressly approved by StarTech com could void the user s authority to operate the equipment Use ofTrademarks RegisteredTrademarks and other Protected Names and Symbols PHILLIPS is a registered trademark of Phillips Screw Company in the United States or other countries This manual may make referenc...

Page 3: ...m ferimentos pessoais ou danos de propriedade Certifique se de que o peso do monitor não excede a capacidade de peso deste produto Se exceder a capacidade de peso pode sofrer ferimentos pessoais ou danos no equipamento Este produto pode suportar o seguinte peso 9 kg Nunca opere este produto se faltarem peças ou estas estiverem danificadas Ao permitir que qualquer parte dos cabos do seu componente ...

Page 4: ...oduct dimensions 2 Technical specifications 3 Package contents 4 Requirements 7 Assembly 8 Attach the ARMPIVOTHD to your mounting surface 8 Attach a monitor 14 Adjust the spring arm 16 Route your cables 18 Adjust the position of ARMPIVOTHD 21 Technical support 22 Warranty information 22 ...

Page 5: ...tors up to 813 mm 32 in in size and 9 kg 19 8 lb in weight The height of the ARMPIVOTHD can easily be adjusted with one touch and the finish on the ARMPIVOTHD makes it an attractive addition to your workspace Product diagram VESA monitor mount Spring arm Desk clamp Hex key holder Lower cable cover Upper cable cover ...

Page 6: ...Instruction manual 2 Product dimensions 75 mm 100 mm 115 mm 75 mm 100 mm 115 mm min 170 mm to max 505 mm 80 mm min 255 mm to max 315 mm 210 mm min 10 mm to max 85 mm 100 mm ...

Page 7: ...nual 3 Technical specifications Type of measurement Measurement VESA mounting hole pattern 75x75 100x100 Weight capacity Up to 9 kg 19 8 lb Tilt 900 to 900 Screen size Maximum 813 mm 32 in Rotate 1800 Swivel 1800 kg ...

Page 8: ...Instruction manual 4 Package contents Spring arm Qty One VESA monitor mount Qty One Grommet base plate Qty One Grommet knob Qty One Grommet screw Qty One Grommet plate Qty One 2 1 3 4 6 5 ...

Page 9: ...Instruction manual 5 Rubber pads Qty Two Desk clamp Qty One L bracket Qty One Clamp screws Qty Five Hex key holder Qty One 4 mm hex key Qty One 8 7 9 10 11 12 ...

Page 10: ...Instruction manual 6 5 mm hex key Qty One 6 mm hex key Qty One M4x12 mm thumbscrews Qty Four M5x12 mm screws Qty Four Washers Qty Four Spacers Qty Four 13 14 16 15 17 18 ...

Page 11: ...quirements A monitor or display that s compatible with a VESA mount A Phillips screwdriver Requirements are subject to change For the latest requirements please visit www StarTech com ARMPIVOTHD Instruction manual Qty One 19 ...

Page 12: ...city of this product If you exceed the weight capacity you might experience personal injury or damage to the product This product can support the following weight Up to 9 kg 19 8 lb 1 Line up the three holes on the top of the L bracket 9 with the holes on the bottom of the spring arm 1 2 Insert three of the clamp screws 10 through the L bracket and into the bottom of the spring arm 3 Use the 4 mm ...

Page 13: ...and 2 2 in thick position the desk clamp 8 so that the holes on the desk clamp line up with the top two holes in the L bracket Insert two of the clamp screws through the L bracket and into the desk clamp Use the 4 mm hex key to tighten the clamp screws figure 3 If your mounting surface is between 50 and 85 mm 1 9 and 3 3 in thick position the desk clamp 8 so that the holes on the desk clamp line u...

Page 14: ...Instruction manual 10 figure 3 Desk clamp L bracket Clamp screw 4 mm hex key L bracket Clamp screw 10 to 55 mm 50 to 85 mm figure 4 4 mm hex key Desk clamp ...

Page 15: ...he desk clamp counterclockwise until you reach the thickness of the mounting surface that you re attaching the ARMPIVOTHD to 8 Slide the desk clamp over the edge of the mounting surface 9 Turn the knob clockwise to tighten the desk clamp figure 6 Hex key holder L bracket figure 5 figure 6 Desk clamp ...

Page 16: ...ing weight Up to 9 kg 19 8 lb 1 Insert the grommet screw 5 through the grommet base plate 3 figure 7 figure 7 Grommet screw Grommet base plate 2 Line up the three holes on the top of the grommet base plate with the holes on the bottom of the spring arm 1 3 Insert three of the clamp screws 10 through the grommet base plate and into the bottom of the spring arm 4 Use the 4 mm hex key 12 to tighten t...

Page 17: ...assembled spring arm and grommet screw over the grommet hole in your mounting surface 7 On the underside of the mounting surface thread the grommet plate 6 through the grommet screw so that the grommet plate is flush against the mounting surface 8 Screw the grommet knob 4 onto the grommet screw and turn the grommet knob clockwise to tighten it flush against the grommet plate figure 10 Grommet plat...

Page 18: ...n the VESA monitor mount 2 over the spacers Make sure that you position the VESA monitor mount so that the arrow on the back of the VESA monitor mount is pointed towards the top of the monitor Position the VESA monitor mount 2 over the mounting holes on the back of your monitor Make sure that you position the VESA monitor mount so that the arrow on the back of the VESA monitor mount is pointed tow...

Page 19: ...pring arm 1 and slide the VESA monitor mount and monitor into the mount on the spring arm figure 12 Spring arm VESA monitor mount figure 12 figure 11 Top of monitor VESA monitor mount Washer M4x12 mm thumbscrew OR M5x12 mm screw Spacer if required ...

Page 20: ...14 to turn the screw in the joint of the spring arm counterclockwise or clockwise figure 13 figure 13 2 To change the angle that the monitor is tilted at use the 6 mm hex key to turn the screw in the side of the mount counterclockwise When the screw is loose position the monitor at the angle that works best for you Use the 6 mm hex key to turn the screw clockwise to tighten it figure 14 figure 14 ...

Page 21: ...ou used the desk mount to mount the ARMPIVOTHD when you re done adjusting the ARMPIVOTHD you can store the hex keys in the hex key holder 11 on the side of the L bracket 9 figure 15 figure 15 Hex key holder 6 mm hex key 4 mm hex key ...

Page 22: ...slide the cable cover up and away from the spring arm figure 16 2 On the upper portion of the spring arm pull the ends of the cable cover away from the spring arm and remove the cable cover from the spring arm figure 17 figure 16 figure 17 Cable cover Cable cover Spring arm Spring arm ...

Page 23: ...r that you removed from the upper portion of the spring arm 4 To reattach the cable cover pull out the ends of the cable cover and insert the tabs on the inside of the cable cover into the holes on the spring arm figure 18 figure 18 Tabs Tabs Cable cover Spring arm Hole Hole ...

Page 24: ...n of the spring arm figure 19 6 Place the cable cover slightly higher than the cavity in the lower part of the spring arm and slide the cable cover down so that the hooks on the cable cover slide into the clips in the spring arm figure 20 Spring arm Hooks figure 19 figure 20 Cable cover Cable Spring arm Cable cover ...

Page 25: ...Instruction manual 21 Adjust the position of ARMPIVOTHD You can adjust ARMPIVOTHD in the following ways 180 180 90 90 360 270 ...

Page 26: ...rned for repair or replacement with equivalent products at our discretion The warranty covers parts and labor costs only StarTech com does not warrant its products from defects or damages arising from misuse abuse alteration or normal wear and tear Limitation of liability In no event shall the liability of StarTech com Ltd and StarTech com USA LLP or their officers directors employees or agents fo...

Page 27: ...rts and we quickly deliver them wherever they need to go Just talk to one of our tech advisors or visit our website You ll be connected to the products you need in no time Visit www startech com for complete information on all StarTech com products and to access exclusive resources and time saving tools StarTech com is an ISO 9001 Registered manufacturer of connectivity and technology parts StarTe...

Reviews: