StarHub SBG1000, Installation Manual
The Yamaha SBG1000 Use And Care Manual is a comprehensive guide for maintaining and operating your Yamaha SBG1000. Ensure the longevity of your musical journey with this essential manual. Download it for free from our website to conveniently access expert tips and instructions.
Share
Download


Reviews:
No comments
Related manuals for SBG1000

DAP-1320
Brand: D-Link Pages: 4

N300
Brand: D-Link Pages: 2

C54BRS4
Brand: Conceptronic Pages: 121

WP-300N
Brand: Cerio Pages: 13

CPE5450FIT
Brand: QWNET Pages: 23

TEW-2K1
Brand: TRENDnet Pages: 29

WA2612-AGN
Brand: H3C Pages: 447

NSW-R2
Brand: Gembird Pages: 57

iNavConnect
Brand: DIGITAL YACHT Pages: 6

AP-O235E
Brand: Arista Pages: 4

WLTMS-110_384041
Brand: Gemtek Systems Pages: 14

AC1750
Brand: Linksys Pages: 124
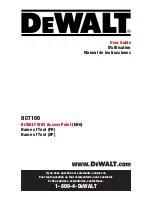
DCT100
Brand: DeWalt Pages: 8
D26670
Brand: DeWalt Pages: 7

DCP611
Brand: DeWalt Pages: 3

BED009
Brand: BlueExpert Pages: 4

NWAR3670
Brand: ADDON Pages: 8

ENS500-AC
Brand: EnGenius Pages: 2


