Mass Storage:
Computer USB Connection
Mass Storage:
Computer USB Connection
To connect to your Windows PC or Mac
Computer
Before connecting to a PC computer please make certain
you have installed the device drivers first (see page 6).
For connecting to a Macintosh computer with OS-X there is
no installation that is required.
Turn on the camera
Press the
m
MODE
button then select
the and choose the PC icon with the
v
w
buttons.
Select USB with the
v
w
buttons.
1. Connect the small end of the USB cable to
the USB port on the front panel of the
device.
2. Connect the large end of the USB cable to
a free USB port on the computer.
3. Upon first connection the hardware device
will be detected under Windows XP , Vista
and Mac OS-X. The hardware drivers will
automatically install. Click OK on the
Windows hardware wizard installation
screens.
4. A partition entitled "removable disc" will
automatically be mounted under the "My
Computer" Window. This partition will give
access to the Memory card(s) that is placed
in the camera.
On a Mac computer the memory card(s) will
appear under “devices” in the finder Window.
Double click the removable disk icons to
access, copy and manage the files in on
your camera.
To Disconnect from the Computer.
On Windows click this icon on the bottom task
bar labeled "Safely Remove Hardware."
A dialog box will appear "Safely Remove
Hardware."
Select USB Mass Storage Device and click
"STOP."
On the next dialog box click OK to remove the
storage device.
On the final dialog box select "CLOSE" and
disconnect the device from the computer. A
final message should appear under Windows
that says “Safe to Remove Hardware"
afterwhich you can remove the USB cable
from the device.
From a Mac computer highlight the disc icon
and click the “eject” icon.
Once the player / recorder has been
disconnected from the computer it will return
to normal operation
System Requirements
operating system
Microsoft windows
98SE/Me/2000/XP/Vista
CPU
Intel Pentium 4 2.8 GHz
or higher
Memory
More than 512 MB
RAM
CD-ROM
at least 4X speed
Disk
More than 100MB free
space
Connection
USB1.1 or USB2.0
To Connect to Television
1. Using the supplied AV connector insert the small
end of the cable into the front panel of the camera.
2. Connect the Yellow (video) and White (Audio)
connections on the other end of the cable to the
Video and Audio input connection on the back of
your television or VCR unit.
3. If you have an HD Television or DVD player with
an HDMI port you can use the supplied HDMI cable.
Connect one end of the cable to the HDMI port on
the front of the camera and connect the other end of
the cable to the HDMI port on your TV or DVD.
4.
Turn on the power to the camera by pressing the
θ
POWER
button or opening the LCD Panel and the
menu shown on the left will appear.
Press the
s
arrow on the camera back panel to
view the camera through the TV.
Turn on your TV and switch the input mode until you
get an image. Refer to your television owners
manual for guidance on setting the input.
NOTE: If you do not have RCA or HDMI connections
on your TV you will need to purchase an adapter at
your local electronics store.
Once connected to your TV use the controls on your
device to access features normally. Go to the
PLAYBACK mode on your camera to view the
photos and movies.
After disconnection of the cable the menu will
appear again. Select the
w
arrow to exit and the
view through the monitor on the camera.
To connect to your PC as a Web Camera
Before connecting to a PC computer please make certain you
have installed the device drivers first (see page 6). NOTE:
You
CAN NOT use this as a Web Cam on a Mac computer.
Turn on the camera
Press the
m
MODE
button then select the
PC
icon with the
v
w
buttons
Press
m
SET
to confirm
Select
PC CAM
with the
v
w
buttons
1. Connect the small end of the USB cable to the
USB port on the side panel of the device.
2. Connect the large end of the USB cable to a
free USB port on the computer.
3. Upon first connection the hardware device will
be detected under Windows XP and Vista. The
hardware drivers will automatically install. Click
OK on the hardware wizard installation screens.
NOTE: There are two installations one for
Coach Digital Camera and another
for Coach
Video Camera
4. After installation the Camera will be automati-
cally connected under Windows XP and Vista.
Go to the MY COMPUTER Window and look for
the icons entitled “Coach Video camera” and
“Coach Digital Camera” under the “Scanners
and Cameras” heading. Double click these
icons to access the features
This device complies with part 15 of the FCC rules. Operation is subject to the following two
conditions: (1) This device may not cause harmful interference and (2) this device must accept
any interference received, including interference that may cause undesired operation.
Technical Specifications
Troubleshooting
The SD card is loaded, but the camera does not capture or record
Check if the SD card is locked
Check if the SD card has enough space for storage
The camera turns off automatically
Check the battery level and charge the battery if necessary.
Check the power off settings on the camera and change to a longer time as needed (see page 13).
Image is not recorded when the shutter button is pressed
Check if the camera is set to the capture mode
Check if the flash mode is set to Auto, Force or Red-eye reduction. If the flash unit is turned on it
will take a longer amount of time to take photos since the flash needs to be charged each time
The color of the photo taken is abnormal
Reset the White Balance in the Camera menu.
The image is too bright or too dark
Reset the EV value in the Camera menu.
The flash does not go off
Check if the flash mode is set to “Auto”, “Force”, “Red-eye reduction”
The date displayed is not correct
Reset the date and time in Setup mode
Can not print the photos
Check if the camera is set to Print mode. If not, reset the camera to Print mode and then connect
the camera to the printer with the USB cable
For support, updates and answers that can not be answered by this
user manual please go to:
http://spectareproducts.com/support
MADE IN CHINA
LENS
f= 7.36 mm
SENSOR
5.1 Mega Pixels CMOS Sensor
LCD
3 inch LTPS LCD Display
Aperture
F/3.2
Sensitization
Auto
White Balance
Auto, Sunny, Cloudy, Tungsten, Fluorescent
Shutter Speed
1/10Sec - 1/2650Sec
Memory
32MB built in memory or SD card or MMC card
Maximum 8GB
Still Photo Resolution 1024x768, 2048x1536, 2592x1944, 3264x2448,
4000x3000
Video Resolution
1280x720, 720x480, 640x480, 320x240
Digital Zoom
1~8× Digital Zoom
Normal Distance
1m~∞
Close Focus Distance 12” - 15”
Self-timer
10sec Self-timer, 20 sec Self-timer
Flash Mode
Off/Auto/Red-eye reduction /Force
TV-Out
NTSC/PAL
USB
USB 2.0
POWER
Li-Battery or AAA x 4 alkaline batteries
Size
5”x 2.5” x 2”
Weight
11 oz. (without battery and SD card)
Game Mode
Remote Control
PC Web Camera
Connecting to a Printer
Connecting to a TV
e-Book Mode
Camera Mode
Using the Menu
Installing the Software Drivers
RESTART
COMPUTER
then
Product Description
What’s Included
Product Description
FRONT
BACK
Entering CAMERA Mode:
Flip out the LCD panel and the camera will automatically turn on.
Press the
m
MODE
button and use the
v
w
buttons to choose the
CAMERA icon, then press the
m
SET
button to enter CAMERA mode.
Taking Photos:
press the
>
SHUTTER
button take the image
Camera Controls:
Press the
W / T
switch on the top of the camera to zoom in and out.
Press the
w
button on the back panel to change the flash setting.
(On, Off, Auto, Red-eye reduction)
NOTE: the flash will be disabled when the lens is set to close focus.
Press the
v
button on the back panel to change the self timer setting.
(Single frame shooting, continuous shooting, 10 sec self timer, 20 second self timer)
`
Change the focus on the lens as needed
select for normal photos or for close up photos from 12” to 15”
Press the
m
SET
button on the back panel to select photo frame border.
Camera Menu options:
(see page 10 on how to enter and use the menu)
Resolution:
Choose from 1 MegaPixel to 12 MP resolution.
Quality:
Choose fine or normal quality.
WB:
Choose Auto White Balance or a color setting based on lighting conditions.
EV:
Allows manual control of the exposure (darker or lighter) from +2 to -2.
Color Effect:
Choose normal, black and white or sepia color effect.
Self Timer:
Choose off, 10 sec or 20 sec self timer mode.
Driver Mode:
Choose single frame or continuos shooting modes.
Date stamp:
Turn on or off the date stamp to appear on the image.
Video Mode
Installing the Software Tools
Playback Mode
Audio Record Mode
Music Mode
To access the set up menus:
Press the
m
MENU
button when the camera is set to Camera, Video or
Playback mode.
There is a specific set up menu for each of the modes plus a General
Settings menu. For example when you are in the Video mode you
will have access to a Video settings menu plus the General Settings
Menu.
Then use the
v
w
buttons to toggle between the specific mode menu
or the General Settings menu.
Use the
s
r
buttons to highlight the setting you wish to change.
Press the
m
SET
button to choose the setting and bring up the options.
Press the
s
r
to change the setting options.
Press the
m
SET
button again to confirm your choice.
Press the
m
MENU
button to return to normal operation.
General Settings Menu:
Beep:
Turn on or off the button beep.
Animation:
Turn the start up animation on or off
Frequency:
Choose 50Hz for EU voltage or 60 Hz for USA
Format:
Choose this option to reformat the memory on the camera. NOTE: All files will
be deleted.
Default:
Return settings to the factory default values.
Language:
Set the interface language.
Auto Power Off:
Time for auto shut off if the camera is inactive.
Date / Time:
Change the time and date by using the arrow buttons.
TV Out:
Choose the TV output setting : NTSC for USA; PAL for EU.
Version:
Use this setting only if you have received a firmware upgrade from Spectare
Products Support.
Card Select:
Select the card for viewing and/or capturing files to
Card Copy:
Choose to copy files from one card to the other
Entering VIDEO Mode:
Press the
m
MODE
button and use the
v
w
buttons to choose the
VIDEO icon, then press the
m
SET
button to enter VIDEO mode.
Taking Video:
press the
>
SHUTTER
button start the Video recording. A red dot will appear
when the camera is recording.
press the
>
SHUTTER
button again to stop the recording
VIDEO Controls:
Press the
W / T
switch on the top of the camera to zoom in and out
Press the
LIGHT
button to turn on or off the fill light. This will enhance
the video under low light conditions
Change the focus on the lens as needed:
select for normal photos
select for close up photos from 12” to 15”
Changing VIDEO Settings:
(see page 10 on how to enter and use the menu)
Resolution:
Choose from VGA (640x480), D1 (720x480), or HD (1280x720)
Quality:
Choose fine or normal quality.
WB:
Choose Auto White Balance or a color setting based on lighting conditions.
EV:
Allows manual control of the exposure (darker or lighter) from +2 to -2
Color Effect:
Choose normal, black and white or sepia color effect.
Frame Rate:
Choose a frame rate of 15 frames per sec. or 30 frames per sec.
Audio:
Turns the microphone on or off.
Entering MUSIC Mode:
Press the
m
MODE
button and use the
v
w
buttons to choose the
MUSIC icon, then press the
m
SET
button to enter the MUSIC mode.
NOTE: Standard .MP3 files should be copied to the memory card that is
inserted into the camera in order to be played by the camera. The camera
can not play .WMA or protected MP3 files-- See page 15 for details.
MUSIC Controls
Press the
s
r
buttons to select the song from the list.
Press the
v
w
buttons to adjust the volume during playback.
Press the
m
SET
button to play or pause the playback of the selected song.
Press the
m
MENU
button repeatedly to select the repeat mode as:
Repeat ALL > Repeat Once > Do not Repeat.
Note that the icon will
change on the right side of the screen.
Headphone connection
1. Open the connection cover on the front panel of
the camera
Connect the headphone to the audio/video output
connection.
2. After connection of the earphones a menu will
appear to choose the type of output.
Press the
r
arrow on the back panel to hear the
sound through the earphones.
After disconnection of the headphones the menu
will appear again. Select the
w
arrow to exit
and listen through the speakers on the camera.
Music Mode
Copying and Playing
MP3 Files:
To play music on your 70-HD Player you can simply copy the files directly onto a
memory card that is inserted into the player.
* Connect the camera to the computer using the USB cable as described on
page 20. The camera's memory or a memory card on the camera will mount
as a drive on your computer.
* Once it is connected you can copy files onto the player by simply dragging
and dropping them onto the window for the player. You may also use the
BlazeVideo Magic Software to covert and copy files for playback on your
70-HD Player.
* After the files have been copied disconnect the camera from the computer.
* Turn on the camera and go to the Music Player from the main menu to
playback the files.
The 70-HD Player will play all "standard MP3 files" (non-rights protected music).
There are other music file formats that are available on other sites that will
not play such as .WMA and other formats. If you have music in a format
other than .MP3 you will need to convert it with the BlazeVideo Magic
Software. Please refer to the User Manual provided on the CD ROM for
instructions on converting file types
If you purchase Music from the Apple iTunes
®
store it will not be recognized since
Apple
®
will only allow their files to be played on iPods
®
. There are also
other sites that when you download it will set privacy restrictions that will not
allow it to play on some players or only on the computer you download it on.
There many sites that you can purchase and download standard MP3 files
that can be played directly on the 70-HD player. Make certain you are
downloading a “STANDARD.MP3” file that is not limited for playback on your
computer only or certain MP3 Players.
NOTE: Download and use 3rd party software and enter web sites at your
own risk. Spectare Products is not responsible for any damage caused by
the use of software provided by other companies.
Entering eBOOK Mode:
Press the
m
MODE
button and use the
v
w
buttons to choose eBOOK
icon, then press the
m
SET
button to enter eBOOK mode.
Choosing the Text File
Use the
s
r
buttons to choose the file you want to read that has been
copied to the memory card on your camera.
NOTE: .txt files should be copied to a memory card that is inserted into
the camera in order to be read-- See “Connection to Computer for the
procedures on copying files.
Press the
m
SET
button to Read the file
Press the
s
r
to Page UP or Page DOWN on the Text File
Press the
m
MENU
button to return back and choose another file
Entering GAME Mode:
Press the
m
MODE
button and use the
v
w
buttons to choose GAME
icon, then press the
m
SET
button to enter GAME mode.
Playing the games
Press the
m
SET
button to Start
Press the
r
button to trasmute
Press the
s
button to speed up
Press the
v
w
button to move
Press the
m
SET
button to Pause / Start
Press the
m
MODE
button to return back to the mode menu.
Entering AUDIO RECORD Mode:
Press the
m
MODE
button and use the
v
w
buttons to choose RECORD
icon, then press the
m
SET
button to enter RECORD mode.
Making a Audio Recording:
press the
>
SHUTTER
button start the recording, The Red dot will change to
a square and the counter will begin
press the
>
SHUTTER
button again to stop the recording, The square will
change back the red dot and the counter will stop.
To Playback and Audio Recording:
Press the
u
playback button on the back panel to enter the Playback
mode.
Use the
s
button to enter the thumbnail view and then use the arrow
buttons
v
w
to highlight the audio recording you wish to listen to.
Press the
m
SET
button to select the audio recording
Press the
m
SET
button again to listen
Press the
w
button to hear the next file
Press the
m
MODE
button to return to the Audio record mode and record
again.
IMPORTANT: INSTALL THE DRIVER
SOFTWARE BEFORE CONNECTING THE
CAMERA FOR THE FIRST TIME.
Insert the software CD into your
Windows PC computer and the
installer application will run automati-
cally. (If the CD does not run
automatically, double click
Bdvdarun.Exe in the CD root folder)
NOTE: The drivers are for Windows PC
computers only, there are no drivers needed
for Mac computers.
On the Main Menu screen of the CD click:
“Install Device Driver”
Follow the on Screen instructions to
install the drivers onto your computer
system
NOTE: You must agree to the License
Agreement and accept the terms to
continue the installation
Click “Finish” to complete installation
Restart your computer
After Restart connect the 70-HD
Camera using the USB Cable provided
upon the first connection the Hardware
Wizard will automatically launch.
Follow the on Screen instructions to
install the drivers onto your system.
From the CD ROM main menu interface:
Click on “Install Photo Editing Tools” and
follow the on screen instructions. This
will install the BlazePhoto software that
will allow you to edit and organize your
photos.
Click on “Install Video Player Tools” and
follow the on screen instructions. This
will install the BlazeVideo Media Player
software that will allow you playback
movies and other media on your
computer.
Click on “Install Media Converter” and follow
the on screen instructions. This will
install the BlazeVideo Magic software
that will allow you convert movies and
other media into specific formats.
These programs will be automatically
installed into your programs menu. To
use these programs click on the START
button and choose the desired
application
Please refer to the user manual that is
included on the CD ROM for instructions
on the use of these software applica-
tions or go to:
http://www.blazevideo.com/support.htm
for technical support on this software.
On-Screen Display:
1. Battery level
2. Close Focus Indication
3. White Balance Setting
4. Flash Mode
5. Camera mode: Single or continuous shooting
6. Image Resolution (MP)
7. Image Quality: normal or fine
8. Counter(Recorded/Allowance)
Entering PLAYBACK Mode:
Press the
u
playback button on the back panel to enter Playback mode
Thumbnail view:
Press the
s
button for the thumbnail view
Choose a file you want to view with the
v
w
buttons
then press the
m
SET
button to select the chosen thumbnail for full screen.
Full Screen View:
Press the
v
w
buttons to move forward and back through the files.
If the file is movie or audio recording, press the
m
SET
button to start the
movie or playback file, then press it again to stop.
If the file is an image press the
r
button to enter Zoom mode,
When in Zoom Mode press the
v
w
buttons to enlarge or minimize the
image and press
s
r
to Pan the Image, press the
m
SET
button to
return.
To delete a file press the
DELETE
button on the side panel, then select the
check mark box using the
s
r
buttons and press
m
SET
to delete.
Playback Menu Settings:
(see page 10 on how to enter and use the menu)
Delete files:
Choose to delete only the selected file, all files or cancel.
Slideshow:
Turns on/off the slideshow playback.
Crop:
To crop an image, bring up the image in full screen view and then select this
feature. After selection use the
s
r
v
w
buttons to choose the area to
crop and press the
m
SET
to confirm.
Lock:
Use this feature to lock or unlock images and prevent them from deletion.
Logo:
This will turn on or off the start up screen.
Rotate:
To rotate an image bring up the image in full screen view and then select this
feature. Use the
v
w
buttons to rotate and press
m
SET
to confirm. .
Print:
See page 19 for more details.
The camera can print photos directly by connecting it to a printer by
following these steps.
NOTE: The printer must have a standard USB connection in order
to be used for direct printing from a camera. Please refer to your
printer’s user manual for specific instructions on connecting a
camera to your printer.
Press the
u
playback button on the back panel to enter Playback
mode
Select a photo to be printed using the
W
v
w
T
buttons
Press the
m
MENU
button and select the PRINT function from the
general settings menu (see page 10).
Select YES on PRINT option of the menu
Connect the camera to the printer with the USB cable and the file will
be printed directly.
5
4
3
2
1
6 7 8
On-Screen Display:
1. Battery level
2. White Balance Setting
3. Video Mode
4. Video Resolution
5. Recording time
On-Screen Display:
1. Battery level
2. Recording Time
3. Audio Mode
3
2
1
3
2
1
4 5
7
1
3
2
1
3
4
2
4
Quick Start Guide:
Installing the battery and cards
Quick Start Guide:
Charging the battery
To begin using your Spectare 70-HD
Camera / Player / Recorder follow these
simple instructions:
1. Press the button marked “open” on
the top of the camera as shown to
access the battery compartment.
2. Insert the Lithium rechargeable
battery included in the package into
battery compartment as shown.
NOTE: Please ensure the battery is in
the position shown on the left before
inserting into the camera.
Alternately, you can insert 4 AAA
batteries (not included) into the battery
compartment as shown.
3. Turn the camera over on the bottom
and press the bottom panel in the
direction of the arrow to release the
door to the memory card slots.
Insert one or two SD Cards (not
included) into either or both of the
memory slots in the bottom of the
camera. The cards can only be placed
in one direction so if they do not fit then
turn them around. Press to “click” them
in place then close the door.
4. With the Lithium rechargeable battery
installed, open the connection cover on
the front panel and plug in the SMALL end
of the USB cable into the camera.
5. Plug in the AC Adapter to a wall outlet
and then plug in the LARGE end of the
USB cable into bottom of the AC Adapter
6. When the camera battery is charging a
red light will be illuminated on the back
panel.
Let the camera battery charge for 24
hours before the first use
NOTE: You may use the camera normally
while it is connected to the AC power
adapter and the battery is charging.
7. Alternately, you can charge the camera
battery by connecting the large end of the
USB cable to a computer. Before
connecting the camera to the computer
please follow the steps on page 8 to install
the drivers. However, while connected to
a PC the camera monitor will go blank and
you will not be able to use the camera.
After you have completed these steps
turn on the camera and go to the General
Settings Menu to set the date and time
(see page 10)
For questions and support on this product that can not be solved
by your retailer please contact:
Spectare Products
6081 Meridian Ave Suite 70-308
San Jose, CA 95120
http://spectareproducts.com
The Spectare Logo and the Spectare brand are trademarked by SuMaWah LLC, San Jose, CA.
Copyright 2009 SuMaWah LLC, All Rights Reserved Worldwide.
6
5
4
1
3
2
>
SHUTTER
:
Takes the photo in Camera mode, stops
and starts the recording in Video and
Audio Record modes.
m
MODE
: Change from Camera, Video, Music....
m
MENU
: Access to the settings menu
m
u
: Enters the playback mode
m
DISPLAY
: Changes the on-screen display
LED Indicators
: Indicates battery charging and power to
the camera.
r
: Upward Selection
Selects the item above or has specific
functions depending on the mode.
v
: Left Selection
Selects the left item or has specific
functions depending on the mode.
m
SET
: SET
Confirms the selection or has specific
functions depending on the mode.
w
: Right Selection
Selects the right item or has specific
functions depending on the mode.
s
: Down Selection
Selects the item below or has specific
functions depending on the mode.
Light for Video
: Fill light for video
Flash
: Flash for still image Capture
HDMI Video Connection
Audio/ Video Out:
USB
: Access to USB / power connector
SIDE: camera closed
Normal / Far Focus
(over 15”)
Close Focus
(12” to 15”)
SIDE: inside panel
LIGHT
Press for video fill light
DELETE
Press to delete images in
playback mode
θ
POWER
Press and hold to turn on/off
TOP
Battery Cover Access
Zoom Control
W:
Press and hold for wide angle
T:
Press and hold for telephoto
BOTTOM
SD Memory card access
Tripod socket
CAMERA
: Changes to the Camera mode
VIDEO
: Changes to the Video Mode
θ
POWER
: Press and hold to turn on
PLAY
: Changes to Playback Mode
>
REC /SHUTTER
: Take the photo in Camera mode /
Start and Stop the recording in Video mode
r
: Upward Selection
w
: Right Selection
m
SET
: SET
s
: Down Selection
v
: Upward Selection
1
2
Contact
Contents
Important Notes ............................................................... 2
What’s Included ............................................................. 3
Product Description .......................................................... 4
Quick Start Guide ............................................................ 6
Installing the Software Drivers ......................................... 8
Installing the Software Tools ........................................... 9
Using the Menu ............................................................. 10
Capture Mode ................................................................. 11
Video Mode .................................................................... 12
Audio Record Mode .................................................... 13
Music Mode ................................................................... 14
Playback Mode ............................................................. 16
e-Book Mode ................................................................. 17
Game Mode ................................................................... 17
Connecting to a TV ....................................................... 18
Remote Control ............................................................. 19
Connecting to a Printer ................................................... 19
Mass Storage: USB Connection ..................................... 20
PC Web Cam ................................................................. 22
Troubleshooting .............................................................. 23
Technical Specifications ................................................. 24
Spectare is a registered trademark of SuMaWah LLC. © 2009
www.spectareproducts.com
Warranty
Please contact the original retail location where this product was
purchased to obtain warranty information and service.
User Guide
Model: SP 02070
The following items should be included:
Please contact your retailer if you have not received any of these items
Discarded electric appliances are recyclable and should not be discarded in
domestic waste. Please actively support us in conserving resources and
protecting the environment by returning this appliance to the collection
centers (if available).
Battery Disposal: Do not incinerate, disassemble or short circuit the battery.
Do not expose the battery to temperatures above
113
o
Fahrenheit.
Please observe the local regulations regarding the
disposal of exhausted batteries and old equipment.
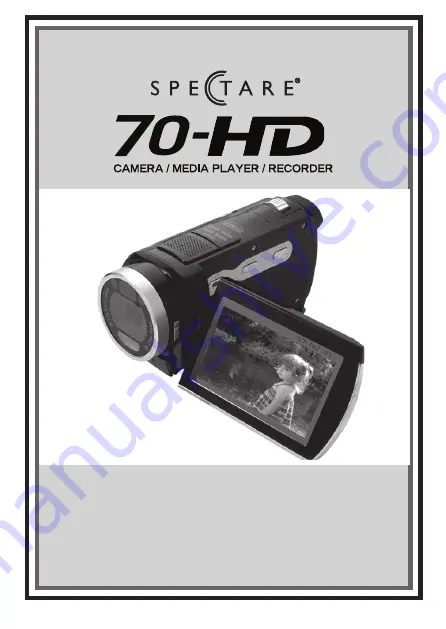
Thank you for purchasing the Spectare 70-HD Camera / Player / Recorder. Please
take some time to read through and follow these important safety and
operation instructions.
WARNING: TO REDUCE THE RISK OF FIRE OR SHOCK HAZARD, DO NOT
EXPOSE THIS PRODUCT TO RAIN OR MOISTURE.
CAUTION: RISK OF ELECTRIC SHOCK. DO NOT DISASSEMBLE THIS UNIT.
TO PREVENT THE RISK OF ELECTRIC SHOCK, DO NOT REMOVE
COVER. NO USER- SERVICEABLE PARTS INSIDE. REFER
SERVICING TO QUALIFIED PERSONNEL.
VENTILATION - The device should be situated so that its location or position does
not interfere with its proper ventilation. For example, the unit should
not be situated on a bed, sofa, rug or similar surface that may block
the ventilation openings.
HEAT - The device should be situated away from sources of high heat such as
radiators or stoves.
POWER SOURCE - The device should be connected to a power supply only of
the type described in the technical specification of this user guide.
CLEANING - The device should be cleaned gently using a soft cloth dampened
with lens cleaning fluid (not included). Do not clean the inside.
NON USE PERIOD - The power cord for the device should be unplugged from the
outlet when the unit is left unused for a long period of time.
AVOIDING SURGES- For added protection during a lightning storm, unplug the
device from wall outlets to prevent damage to the product due to
power line surges.
OVERLOADING - Do not overload wall outlets or extension cords, as this may
result in fire or electrical shock
SERVICING - The user should not attempt to service the device beyond those
means described in the operating instructions. All other servicing
should be referred to qualified service personnel.
Earphones
AC Adapter Plug
Audio/ Video Cable USB Cable
Battery Soft Case
Remote control
HDMI Video Cable
CD ROM 70-HD Camera
Spectare 70-HD Camera / Player / Recorder
23
user's guide
21
user's guide
19
user's guide
17
user's guide
15
user's guide
13
user's guide
7
user's guide
9
user's guide
11
user's guide
5
user's guide
3
user's guide
1
user's guide
22
25
user's guide
Spectare 70-HD Camera / Player / Recorder
20
Spectare 70-HD Camera / Player / Recorder
18
Spectare 70-HD Camera / Player / Recorder
16
Spectare 70-HD Camera / Player / Recorder
14
Spectare 70-HD Camera / Player / Recorder
12
Spectare 70-HD Camera / Player / Recorder
6
Spectare 70-HD Camera / Player / Recorder
8
Spectare 70-HD Camera / Player / Recorder
10
Spectare 70-HD Camera / Player / Recorder
4
Spectare 70-HD Camera / Player / Recorder
2
Spectare 70-HD Camera / Player / Recorder
24
Spectare 70-HD Camera / Player / Recorder
FRONT
inside
1
2
3
4
5
6
7
17
8
9
10
11
12
13
14
15
16
18
19
20
21
22
23
24
25
BACK
Summary of Contents for 70-HD
Page 1: ...User Guide Model SP 02070...
Page 27: ...25 user s guide...
Page 58: ...BlazeVideo Media Player User s Guide...