Sony Trinitron KV-HW21, Operating Instructions Manual
The Sony Trinitron KV-HW21 Operating Instructions Manual is available for free download at manualshive.com. Easily access the comprehensive manual to set up and operate your Sony Trinitron KV-HW21 television. Maximize your viewing experience with step-by-step instructions and helpful tips provided in this user-friendly manual.
Share
Download


Reviews:
No comments
Related manuals for Trinitron KV-HW21

S451
Brand: TCL Pages: 19

55ePlay6100-U
Brand: Allview Pages: 54

F5410AW
Brand: Samsung Pages: 195

DW21G5VDX/XEF
Brand: Samsung Pages: 82

FP9ATSCF-2.101
Brand: Samsung Pages: 91

LED2440A
Brand: Curtis Pages: 35
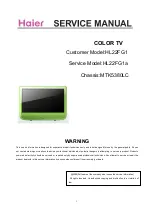
HL22FG1
Brand: Haier Pages: 50

HL22FG1
Brand: Haier Pages: 84

CL21B501HL
Brand: Samsung Pages: 23

CL21K30MQ6TXAP
Brand: Samsung Pages: 28

CL15K5MNFX
Brand: Samsung Pages: 23

CL21A11MQKXXAX
Brand: Samsung Pages: 31

CL-25D4W
Brand: Samsung Pages: 50

CL21K3WDX/STR
Brand: Samsung Pages: 62

CL21M21MQUXXAZ
Brand: Samsung Pages: 63

CL21A8W7X/DRI
Brand: Samsung Pages: 81

27LB052B5
Brand: THOMSON Pages: 21

CHASSIS MT62L
Brand: THOMSON Pages: 42


