Sony SGP511, User Manual
The Sony SGP511 user manual is available for free download on our website. This comprehensive manual provides detailed instructions and helpful tips to maximize your experience with the Sony SGP511. Download the manual now from our website manualshive.com and unlock the full potential of this exceptional product.
Share
Download


Reviews:
No comments
Related manuals for SGP511
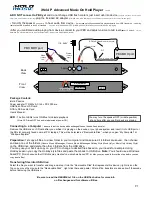
P
Brand: iHold Music Pages: 2

MD 700
Brand: PANODIC Pages: 8

JTA-222
Brand: Jensen Pages: 8

VT32
Brand: ClearClick Pages: 18

T101/HM-1048Q
Brand: WeiHeng Digital Pages: 43

GV-PS733
Brand: Groove Pages: 10
ICON MP7QCFS
Brand: NANJING WANLIDA TECHNOLOGY Pages: 22

AP906
Brand: Acepen Pages: 26

TT54
Brand: ClearClick Pages: 15

L-101
Brand: LENCO Pages: 78

RP 4000 MK2
Brand: Reloop Pages: 20

A7 Internet Tablet
Brand: Elocity Pages: 28

DT301A
Brand: DT Research Pages: 10

TAB1012
Brand: Salora Pages: 37

galaxy tab 4 nook 10.1
Brand: Samsung Pages: 17

Galaxy Tab 7.7 GT-P6800
Brand: Samsung Pages: 29

A3LSMT395C
Brand: Samsung Pages: 57

GALAXY TAB 5
Brand: Samsung Pages: 104


