Sony PXW-Z190T, Operating Instructions Manual
The Sony PXW-Z190T is a professional-grade camcorder designed to capture stunning footage with exceptional clarity. With its advanced features and user-friendly interface, this camera delivers unparalleled performance. To fully unlock its potential, make sure to check out our website for free download of the comprehensive Service Manual for the Sony PXW-Z190T.
Share
Download


Reviews:
No comments
Related manuals for PXW-Z190T

DXG-301V
Brand: DXG Pages: 54

GR-AX275
Brand: JVC Pages: 44

GR-AX47
Brand: JVC Pages: 56

GR-AX260
Brand: JVC Pages: 48

GR-AX280
Brand: JVC Pages: 60

GR-AX410U
Brand: JVC Pages: 13

Weisscam HS-1
Brand: P+S Technik Pages: 66

UDWC23
Brand: Uniden Pages: 12

CAMTVI5
Brand: Velleman Pages: 46

AVCCAM AG-AC8PJ
Brand: Panasonic Pages: 125

MD120
Brand: Canon Pages: 63
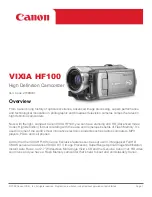
VIXIA HF100
Brand: Canon Pages: 23

VIXIA HF11
Brand: Canon Pages: 154

Vixia mini X
Brand: Canon Pages: 322

VM E 2
Brand: Canon Pages: 56

VIXIA HFR60
Brand: Canon Pages: 306

Vixia HV30
Brand: Canon Pages: 24

VIXIA HFS200
Brand: Canon Pages: 17


