background image

4-170-099-12(1)

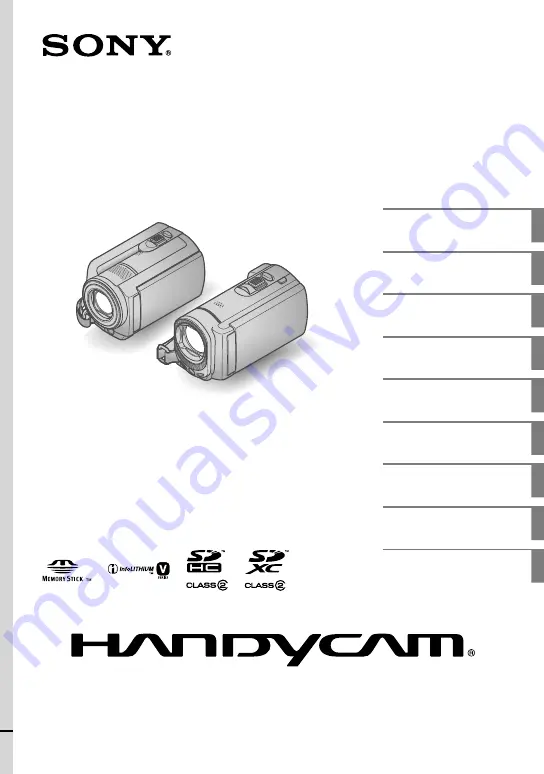
Digital Video Camera Recorder

Operating Guide

 2010 Sony Corporation

DCR-SR58E/SR68E/SR78E/ 

SR88E/SX33E/SX34E/SX43E/ 

SX44E/SX53E/SX63E

Table of contents

10

Getting started

12

Recording/Playback

20

Making good use of your 
camcorder

31

Saving movies and photos 
with a computer

33

Saving images with an 
external device

40

Customizing your 
camcorder

48

Additional information

55

Quick reference

63

Summary of Contents for DCRSR68ES

Page 1: ...8E SR88E SX33E SX34E SX43E SX44E SX53E SX63E Table of contents 10 Getting started 12 Recording Playback 20 Making good use of your camcorder 31 Saving movies and photos with a computer 33 Saving images with an external device 40 Customizing your camcorder 48 Additional information 55 Quick reference 63 ...

Page 2: ...e or injury may result AC Adaptor Do not use the AC Adaptor placed in a narrow space such as between a wall and furniture Use the nearby wall outlet wall socket when using the AC Adaptor Disconnect the AC Adaptor from the wall outlet wall socket immediately if any malfunction occurs while using your camcorder Even if your camcorder is turned off AC power source mains is still supplied to it while ...

Page 3: ... waste batteries applicable in the European Union and other European countries with separate collection systems This symbol on the battery or on the packaging indicates that the battery provided with this product shall not be treated as household waste On certain batteries this symbol might be used in combination with a chemical symbol The chemical symbols for mercury Hg or lead Pb are added if th...

Page 4: ...n of Conformity Trade Name SONY Model No DCR SX63E Responsible Party Sony Electronics Inc Address 16530 Via Esprillo San Diego CA 92127 U S A Telephone No 858 942 2230 This device complies with Part 15 of the FCC Rules Operation is subject to the following two conditions 1 This device may not cause harmful interference and 2 this device must accept any interference received including interference ...

Page 5: ...quipment and receiver Connect the equipment into an outlet on a circuit different from that to which the receiver is connected Consult the dealer or an experienced radio TV technician for help The supplied interface cable must be used with the equipment in order to comply with the limits for a digital device pursuant to Subpart B of Part 15 of FCC Rules Battery pack This device complies with Part ...

Page 6: ...ms Compensation for the contents of recordings cannot be provided even if recording or playback is not possible due to a malfunction of the camcorder storage media etc TV color systems differ depending on the country region To view your recordings on a TV you need a PAL system based TV Television programs films video tapes and other materials may be copyrighted Unauthorized recording of such mater...

Page 7: ... into the lens Notes on optional accessories We recommend using genuine Sony accessories Availability of such products is subject to country region About images illustrations and screen displays of this manual The example images used in this manual for illustration purposes are captured using a digital still camera and therefore may appear different from images and screen indicators that actually ...

Page 8: ...the camcorder against an object Do not use your camcorder in very loud areas On the drop sensor DCR SR58E SR68E SR78E SR88E To protect the internal hard disk from shock by dropping the camcorder has a drop sensor function When a drop occurs or under a non gravity condition the block noise made when this function is activated by the camcorder may also be recorded If the drop sensor catches a drop r...

Page 9: ...photos p 24 Playing movies and photos Playback on the camcorder p 25 Playing images on a TV p 28 Saving images Saving movies and photos with a computer p 33 Saving movies and photos in external media p 40 Saving images with a DVD writer recorder p 42 Deleting movies and photos p 31 If you delete the image data that has been saved on your computer or a disc you can record new images on the free med...

Page 10: ...E SX34E SX44E SX53E SX63E 19 Recording Playback Recording 20 Playback on the camcorder 25 Playing images on a TV 28 Making good use of your camcorder Deleting movies and photos 31 Saving movies and photos with a computer Preparing a computer Windows 33 When using a Macintosh 33 Starting PMB Picture Motion Browser 36 Creating a disc with one touch One Touch Disc Burn 36 Importing movies and photos ...

Page 11: ...ng your camcorder Using menus 48 Getting detailed information from the Handycam Handbook 54 Additional information Troubleshooting 55 Precautions 57 Specifications 59 Quick reference Screen indicators 63 Parts and controls 64 Index 67 ...

Page 12: ...R78E SR88E DCR SX33E SX34E SX43E SX44E SX53E SX63E Battery pack DC IN jack DC plug AC Adaptor Power cord Mains lead CHG charge lamp To the wall outlet wall socket Battery pack DC IN jack CHG charge lamp DC plug AC Adaptor To the wall outlet wall socket Power cord Mains lead ...

Page 13: ...et wall socket Align the mark on the DC plug with that on the DC IN jack The CHG charge lamp lights up and charging starts The CHG charge lamp turns off when the battery pack is fully charged 4 When the battery is charged disconnect the AC Adaptor from the DC IN jack of your camcorder Tips See page 61 on recording and playing time When your camcorder is on you can check the approximate amount of r...

Page 14: ...he following conditions The battery pack is not attached correctly The battery pack is damaged The temperature of the battery pack is low Remove the battery pack from your camcorder and put it in a warm place The temperature of the battery pack is high Remove the battery pack from your camcorder and put it in a cool place In the default setting the power turns off automatically if you leave your c...

Page 15: ...s POWER 2 Select the desired geographical area with then touch NEXT To set the date and time again touch MENU Show others CLOCK LANG under GENERAL SET category CLOCK SET When an item is not on the screen touch until the item appears 3 Set SUMMERTIME date and time then touch The clock starts If you set SUMMERTIME to ON the clock advances 1 hour MODE lamp POWER button Touch the button on the LCD scr...

Page 16: ...GENERAL SET category BEEP OFF If the button you touch does not react correctly calibrate the touch panel To turn off the power Close the LCD screen The Movie lamp flashes for a few seconds and the power is turned off Tips You can turn off your camcorder also by pressing POWER When POWER ON BY LCD is set to OFF turn off your camcorder by pressing POWER Changing the language setting You can change t...

Page 17: ...cording playback and editing operations on the selected medium Tips See page 61 for the recordable time of movies Selecting the recording media for movies DCR SR58E SR68E SR78E SR88E SX34E SX44E SX53E SX63E Touch MENU Show others MEDIA SETTINGS under MANAGE MEDIA category MOVIE MEDIA SET The MOVIE MEDIA SET screen appears Touch the desired recording media Touch YES The recording medium is changed ...

Page 18: ...een tested and proven to operate with your camcorder In this manual Memory Stick PRO Duo media and Memory Stick PRO HG Duo media are called Memory Stick PRO Duo media and SD memory cards SDHC memory cards and SDXC memory cards are called SD memory cards Notes MultiMediaCard cannot be used Images recorded on SDXC memory cards cannot be played back or imported on non exFAT compatible computers AV co...

Page 19: ...t enough free space is displayed initialize the memory card by touching MENU Show others MEDIA FORMAT under MANAGE MEDIA category MEMORY CARD DCR SR58E SR68E SR78E SR88E SX34E SX44E SX53E SX63E YES YES To eject the memory card Open the cover and lightly push the memory card in once Do not open the cover during recording When inserting or ejecting the memory card be careful so that the memory card ...

Page 20: ...R68E SR78E SR88E Internal hard disk Tips See page 17 on changing the recording media DCR SR58E SR68E SR78E SR88E SX34E SX44E SX53E SX63E To open the lens cover Slide the LENS COVER switch to open Tips When you finish recording or when you play back images close the lens cover 1 Fasten the grip belt DCR SR58E SR68E SR78E SR88E DCR SR58E SR68E SR78E SR88E DCR SX33E SX34E SX43E SX44E SX53E SX63E ...

Page 21: ...en the LCD screen is already open press POWER p 15 You can switch recording modes by pressing MODE Press MODE to light up the desired recording mode lamp DCR SR58E SR68E SR78E SR88E DCR SX33E SX34E SX43E SX44E SX53E SX63E Movie When recording a movie Photo When shooting a photo MODE button MODE button Movie When recording a movie Photo When shooting a photo ...

Page 22: ...k modes To display the icons and indicators again touch anywhere on the screen except the rec zoom buttons on the LCD Notes If you close the LCD screen while recording movies the camcorder stops recording The maximum continuous recordable time of movies is about 13 hours When a movie file exceeds 2 GB the next movie file is created automatically It will take several seconds until you can start rec...

Page 23: ...NFO under MANAGE MEDIA category The LCD screen of your camcorder can display recording images across the entire screen full pixel display However this may cause slight trimming of the top bottom right and left edges of images when played back on a TV which is not compatible with full pixel display In this case set GUIDEFRAME to ON and record images using the outer frame displayed on the screen as ...

Page 24: ... on the Photo lamp The LCD screen display switches for photo recording mode and the screen aspect ratio becomes 4 3 Press PHOTO lightly to adjust the focus then press it fully You can record photos also by touching on the LCD screen When disappears the photo is recorded Tips To change the image size touch MENU Show others IMAGE SIZE under PHOTO SETTINGS category a desired setting You can check the...

Page 25: ...58E SR68E SR78E SR88E SX34E SX44E SX53E SX63E 1 Open the LCD screen of your camcorder Your camcorder turns on To turn on your camcorder when the LCD screen is already open press POWER p 15 2 Press VIEW IMAGES The VISUAL INDEX screen appears after some seconds You can display the VISUAL INDEX screen also by touching VIEW IMAGES on the LCD screen 3 Touch Movie a desired movie to play back a movie To...

Page 26: ...he screen returns to the VISUAL INDEX screen Touch during pause to play back movies slowly As you repeat touching during playback movies are played as fast as about 5 times about 10 times about 30 times about 60 times You can display the VISUAL INDEX by touching MENU Show others VISUAL INDEX under PLAYBACK category The recording date time and shooting conditions are recorded automatically during r...

Page 27: ... GB Viewing photos Your camcorder displays the selected photo Tips When viewing photos recorded on a memory card playback folder appears on the screen Previous To the VISUAL INDEX screen To start stop slide show Next OPTION ...

Page 28: ...nother device via the S VIDEO jack by using an A V connecting cable with an S VIDEO cable sold separately higher quality images can be produced than with an A V connecting cable Connect the white and red plugs left right audio and the S VIDEO plug S VIDEO channel of the A V connecting cable with an S VIDEO cable sold separately The yellow plug connection is not necessary Connecting only the S VIDE...

Page 29: ...c When your TV is monaural When your TV has only one audio input jack Connect the yellow plug of the A V connecting cable to the video input jack and connect the white left channel or red right channel plug to the audio input jack of your TV or VCR If your TV VCR has a 21 pin adaptor EUROCONNECTOR Use a 21 pin adaptor sold separately to view playback pictures Notes When you set TV TYPE to 4 3 the ...

Page 30: ...30 GB Tips To check information counter etc on the screen of the monitor touch MENU Show others OUTPUT SETTINGS under GENERAL SET category DISP OUTPUT V OUT PANEL ...

Page 31: ... screen from OPTION MENU To delete all images recorded in the recording media and recover all the recordable space of the media format the media Reduced size images which enable you to view many images at the same time on an index screen are called thumbnails 1 Touch MENU Show others DELETE under EDIT category 2 To delete movies touch DELETE DELETE To delete photos touch DELETE DELETE 3 Touch and ...

Page 32: ...32 GB Touch to select the recording date of the desired movies photos then touch Touch the image down on the LCD screen to confirm the image Touch to return to the previous screen Touch YES ...

Page 33: ...necessary when creating DVD discs Display Minimum 1 024 768 dots Others USB port this must be provided as standard Hi Speed USB USB 2 0 compatible DVD burner CD ROM drive is necessary for installation 1 Standard installation is required Operation is not assured if the OS has been upgraded or in a multi boot environment 2 64 bit editions and Starter Edition are not supported Windows Image Mastering...

Page 34: ...the next screen Read the terms of the license agreement carefully If you agree to the terms change to and then click Next Install Turn on your camcorder then connect the camcorder to the computer using the supplied USB cable The USB SELECT screen appears on the camcorder screen automatically Touch the one of the media types displayed on the screen to make the computer recognize your camcorder USB ...

Page 35: ... screen and install it following the procedures displayed The computer must be connected to the internet for the installation You may install Image Mastering API v2 0 for Windows XP in response to the message displayed when you try to start those functions To disconnect your camcorder from the computer Click the icon at the bottom right of the desktop of the computer Safely remove USB Mass Storage...

Page 36: ...n the DVD drive See page 33 for the type of discs you can use If any other software than PMB starts automatically shut it down 2 Turn on your camcorder then connect the camcorder to the computer using the supplied USB cable 3 Press DISC BURN Starting PMB Picture Motion Browser Double click the PMB short cut icon on the computer screen Notes If the icon is not displayed on the computer screen click...

Page 37: ...cket using the supplied AC Adaptor for this operation p 14 1 Turn on your camcorder then connect the camcorder to the computer using the supplied USB cable The USB SELECT screen appears on the camcorder screen 2 Touch the recording media that contains the images you want to save on the camcorder screen USB CONNECT Internal hard disk USB CONNECT Internal memory USB CONNECT Memory card The displayed...

Page 38: ... side in the window and select the folder or date then select the movies To select plural movies hold the Ctrl key down and click thumbnails 4 At the top of the window click Create DVD Video Format Discs STD The window used to select movies appears To add movies to the previously selected ones select the movies in the main window and drag and drop onto the window for selecting movies 3 Click Impor...

Page 39: ...sc Copier help on the operation Editing movies You can cut out only necessary parts from a movie and save it as another file Double click the movie to be edited on PMB then click Show Edit Palette on the right side of the screen Trim Video or select the Manipulate menu Edit Trim Video See PMB Help p 36 for details Capturing photos from a movie You can save a frame of a movie as a photo file Double...

Page 40: ...s connected to your camcorder The format screen may appear even in the case of media utilizing the FAT file system Operation is not assured with every connectable device Connect your camcorder to the wall outlet wall socket using the supplied AC adaptor p 14 Refer to the instruction manual supplied with the external media Refer to the Sony support page for your country region for details on extern...

Page 41: ... screen To save desired movies and photos You can also save images recorded on memory cards Notes You cannot search or copy photos recorded on memory card by recording date Touch Play without copying in step 5 above The VISUAL INDEX screen of the external media is displayed Touch MENU Show others MOVIE DUB when selecting movies PHOTO COPY when selecting photos Follow the on screen instructions to ...

Page 42: ...ated DVD writer DVDirect Express You can create a disc or play back the images on a created disc by using the dedicated DVD writer DVDirect Express sold separately Refer also to the instruction manual supplied with the DVD writer Notes Connect your camcorder to the wall outlet wall socket using the supplied AC Adaptor for this operation p 14 Only unused discs of the following types can be used 12c...

Page 43: ...mcorder screen To create another disc of the same contents insert a new disc and touch CREATE SAME DISC After the operation is completed touch EXIT END on the camcorder screen Disconnect the USB cable from your camcorder Insert an unused disc into the DVD writer and close the disc tray The DISC BURN screen appears on the camcorder screen Press DISC BURN on the DVD writer Movies recorded on the int...

Page 44: ...your camcorder If Failed or DISC BURN failed appears on the screen insert another disc into the DVD writer and perform the DISC BURN operation again Tips If the total memory size of movies to be burnt by the DISC BURN operation exceeds that of the disc disc creation stops when the limit is reached The last movie on the disc may be cut off Disc creation time to dub movies to the limit of the disc i...

Page 45: ...ting to another device via the S VIDEO jack by using an A V connecting cable with an S VIDEO cable sold separately higher quality images can be produced than with an A V connecting cable Connect the white and red plug left right audio and the S VIDEO plug S VIDEO channel of the A V connecting cable with an S VIDEO cable If you connect the S VIDEO plug only you will hear no sound The yellow plug vi...

Page 46: ...cording device and then your camcorder Notes Since dubbing is performed via analog data transfer the image quality may deteriorate To hide the screen indicators such as a counter etc on the screen of the monitor device connected touch MENU Show others OUTPUT SETTINGS under GENERAL SET category DISP OUTPUT LCD PANEL the default setting To record the date time or camera settings data touch MENU Show...

Page 47: ... is 4 3 touch MENU Show others OUTPUT SETTINGS under GENERAL SET category TV TYPE 4 3 When you connect a monaural device connect the yellow plug of the A V connecting cable to the video input jack and the white left channel or the red right channel plug to the audio input jack on the device ...

Page 48: ... media p 52 GENERAL SET Other setup items p 53 Menu items are described in more details in the Handycam Handbook Setting menus Touch Touch Show others on the MY MENU screen See the next page for details on MY MENU Touch the central part in the left side of screen to change the display Touch the menu item to be changed After changing the setting touch To finish setting the menu touch To return to t...

Page 49: ...use the menu items more easily by registering the menu items you use most often on MY MENU You can register 6 menu items on each MY MENU of the MOVIE PHOTO and PLAYBACK Example deleting SPOT MTR FCS and registering FADER Touch Touch MY MENU SETTING Touch MOVIE Touch SPOT MTR FCS Touch Touch FADER under MANUAL SETTINGS category When MY MENU is displayed touch Repeat the same steps above to register...

Page 50: ...and the menu items you can change in the context appear Touch OPTION Touch the desired tab the item to change the setting After completing the setting touch Notes Grayed out menu items or settings are not available When the item you want is not on the screen touch another tab There may be no tab The tabs and items that appear on the screen depend on the recording playback status of your camcorder ...

Page 51: ...vertical STEADYSHOT Sets the SteadyShot function when recording movies AUTO SLW SHUTTR Adjusts the shutter speed automatically FACE DETECTION Adjusts the image quality of the face s automatically AUDIO REC SET BLT IN ZOOM MIC Records movies with vivid sound appropriate to the zoom position MICREF LEVEL Sets the microphone level OTHER REC SET DIGITAL ZOOM Sets the maximum zoom level of the digital ...

Page 52: ...rases movies from a playlist ERASE ALL Erases all movies from a playlist MOVE Changes the order of movies in a playlist OTHERS category USB CONNECT USB CONNECT 1 Connects the internal hard disk via USB USB CONNECT 2 Connects the internal memory via USB USB CONNECT Connects the memory card via USB DISC BURN Allows you to save images onto discs by pressing the DISC BURN button p 36 BATTERY INFO Disp...

Page 53: ...or indicators are displayed on the LCD screen OUTPUT SETTINGS TV TYPE Converts the signal depending on the TV connected p 28 DISP OUTPUT Sets whether the on screen displays appears on the TV screen or not CLOCK LANG CLOCK SET Sets the date and time p 15 AREA SET Adjusts for a time difference without stopping the clock p 15 SUMMERTIME Sets the summertime p 15 LANGUAGE SET Sets the display language ...

Page 54: ...Handbook 3 Select the desired language and the model name of your camcorder then click Install Install by following the instructions on the screen The model name of your camcorder is printed on its bottom surface To view the Handycam Handbook double click the short cut icon on the computer screen When using a Macintosh open the Handbook GB folder in the CD ROM then copy Handbook pdf You need Adobe...

Page 55: ...2 Connect the plug of the AC Adaptor to the wall outlet wall socket p 14 The camcorder does not operate even when the power is set to on It takes a few seconds for your camcorder to be ready to shoot after the power is turned on This is not a malfunction Disconnect the AC Adaptor from the wall outlet wall socket or remove the battery pack then reconnect it after about 1 minute If your camcorder st...

Page 56: ...them all the numbers of the error code beginning with C or E C 04 The battery pack is not an InfoLITHIUM battery pack V series Use an InfoLITHIUM battery pack V series p 12 Connect the DC plug of the AC Adaptor to your camcorder securely p 12 C 06 The battery pack temperature is high Change the battery pack or place it in a cool place C 13 C 32 Remove the power source Reconnect it and operate your...

Page 57: ...radiation The camcorder may not be able to record properly Near AM receivers and video equipment Noise may occur On a sandy beach or anywhere dusty If sand or dust gets in your camcorder it may malfunction Sometimes this malfunction cannot be repaired Near windows or outdoors where the LCD screen or the lens may be exposed to direct sunlight This damages the inside of the LCD screen Operate your c...

Page 58: ...id the following to avoid damage to the finish Using chemicals such as thinner benzine alcohol chemical cloths repellent insecticide and sunscreen Handling the camcorder with above substances on your hands Leaving the casing in contact with rubber or vinyl objects for a long period of time About care and storage of the lens Wipe the surface of the lens clean with a soft cloth in the following inst...

Page 59: ...PAL color CCIR standards Movie recording format Video MPEG 2 PS Audio recording system Dolby Digital 2ch Dolby Digital Stereo Creator Photo file format DCF Ver 2 0 Compatible Exif Ver 2 21 Compatible MPF Baseline Compatible Recording media Movie Photo Internal hard disk DCR SR58E SR68E 80 GB DCR SR78E SR88E 120 GB Internal memory DCR SX34E SX44E 4 GB DCR SX53E SX63E 16 GB Memory Stick PRO Duo medi...

Page 60: ...ing the projecting parts 50 55 112 mm 2 2 1 4 4 1 2 in w h d including the projecting parts and the supplied rechargeable battery pack attached Mass approx DCR SR58E SR68E SR78E SR88E 280 g 9 oz main unit only 320 g 11 oz including the supplied rechargeable battery pack DCR SX33E SX34E SX43E SX44E SX53E SX63E 190 g 6 oz main unit only 230 g 8 oz including the supplied rechargeable battery pack and...

Page 61: ... under SHOOTING SET category In the default setting the recording mode is SP p 51 Internal hard disk 80 GB DCR SR58E SR68E Recording mode Recording time HQ 1220 SP 1750 LP 3660 Internal hard disk 120 GB DCR SR78E SR88E Recording mode Recording time HQ 1830 SP 2630 LP 5510 Internal memory 4 GB DCR SX34E SX44E Recording mode Recording time HQ 55 SP 80 LP 175 Internal memory 16 GB DCR SX53E SX63E Rec...

Page 62: ...crosoft Corporation in the United States and or other countries Macintosh and Mac OS are registered trademarks of Apple Inc in the U S and other countries Intel Intel Core and Pentium are trademarks or registered trademarks of Intel Corporation or its subsidiaries in the United States and other countries Adobe the Adobe logo and Adobe Acrobat are either registered trademarks or trademarks of Adobe...

Page 63: ...ding remaining time FADER Drop sensor off Drop sensor activated 9999 9999 9999 Approximate number of recordable photos and recording media Playback folder of memory card 100 112 Current playing movie or photo Number of total recorded movies or photos Bottom Indicator Meaning FACE DETECTION set to OFF Manual focus SCENE SELECTION White balance SteadyShot off SPOT MTR FCS SPOT METER EXPOSURE TELE MA...

Page 64: ...panel If you rotate the LCD panel 180 degrees you can close the LCD panel with the LCD screen facing out This is convenient during playback operations DCR SR58E SR68E SR78E SR88E Speaker VIEW IMAGES button 25 DISC BURN button 36 POWER button 15 RESET button Press RESET using a pointed object Press RESET to initialize all the settings including the clock setting PHOTO button 24 movie photo lamp 21 ...

Page 65: ...k 34 36 37 40 42 DCR SX33E SX34E SX53E output only DCR SR58E SR68E SR78E SR88E Power zoom lever PHOTO button 24 CHG charge lamp 12 Battery pack 12 DC IN jack 12 START STOP button 22 Grip belt 20 Hook for a shoulder belt BATT battery release lever 13 Tripod receptacle Attach a tripod sold separately to the tripod receptacle using a tripod screw sold separately the length of the screw must be less t...

Page 66: ...jack 12 Memory card slot 18 BATT battery release lever 13 A V Remote Connector 28 Tripod receptacle Attach a tripod sold separately to the tripod receptacle using a tripod screw sold separately the length of the screw must be less than 5 5 mm 7 32 in Access lamp memory card 18 While the lamp is lit or flashing the camcorder is reading or writing data ...

Page 67: ...ages in external media 40 Screen indicators 63 Self diagnosis display 56 Setting the date and time 15 Software 33 Specifications 59 Supplied items 5 T Thumbnail 31 Troubleshooting 55 Turning the power on 15 TV 28 TV TYPE 28 U USB cable 42 44 USB CONNECT 42 44 V VIEW IMAGES 25 VISUAL INDEX 25 Volume 26 W Wall outlet wall socket 12 Warning indicators 56 Windows 33 Z Zoom 22 Symbols 16 9 29 4 3 29 A ...

Page 68: ...GB Additional information on this product and answers to frequently asked questions can be found at our Customer Support Website http www sony net Printed in China ...

Reviews: