background image

2-635-482-

11

(1)

© 2005 Sony Corporation

Additional information on this product and answers 

to frequently asked questions can be found at our 

Customer Support Website.

Printed in Japan

Printed on 100% recycled paper using VOC (Volatile 
Organic Compound)-free vegetable oil based ink.

2635482110

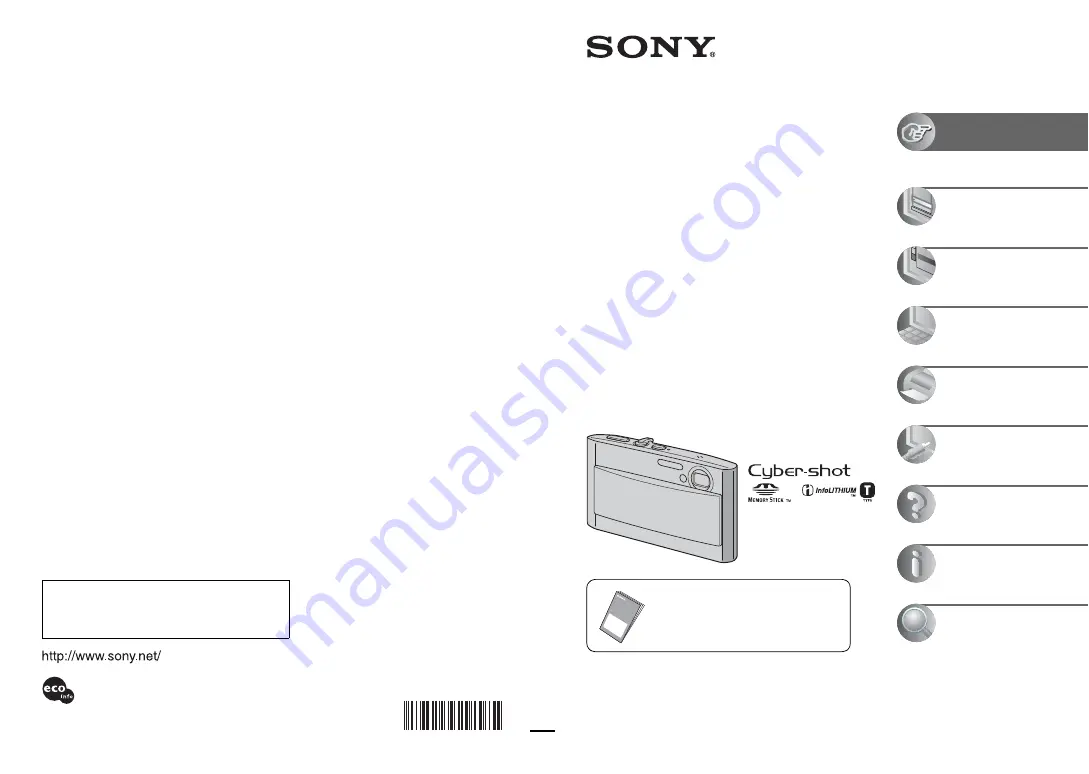
Digital Still Camera

User’s Guide/
Troubleshooting

Operating Instructions

Before operating the unit, please read this manual and 
“Read This First” (separate volume) thoroughly, and retain 
them for future reference.

Owner’s Record

The model and serial numbers are located on the bottom. 
Record the serial number in the space provided below. 
Refer to these numbers whenever you call upon your Sony 
dealer regarding this product.

Model No. DSC-T5

Serial No.  ___________________________

DSC-T5

“Read This First” (separate volume)

Explains the set-up and basic operations for 
shooting/playback with your camera.

Enjoying the 
camera

Using the menu

Using the Setup screen

Using your computer

Printing still images

Connecting your 
camera to your TV

Troubleshooting

Others

Index

Summary of Contents for Cyber-shot DSC-T5

Page 1: ...This First separate volume thoroughly and retain them for future reference Owner s Record The model and serial numbers are located on the bottom Record the serial number in the space provided below Refer to these numbers whenever you call upon your Sony dealer regarding this product Model No DSC T5 Serial No ___________________________ DSC T5 Read This First separate volume Explains the set up and...

Page 2: ...e instructions may cause harmful interference to radio communications However there is no guarantee that interference will not occur in a particular installation If this equipment does cause harmful interference to radio or television reception which can be determined by turning the equipment off and on the user is encouraged to try to correct the interference by one or more of the following measu...

Page 3: ... treated as household waste Instead it shall be handed over to the applicable collection point for the recycling of electrical and electronic equipment By ensuring this product is disposed of correctly you will help prevent potential negative consequences for the environment and human health which could otherwise be caused by inappropriate waste handling of this product The recycling of materials ...

Page 4: ...he usable battery pack see page 95 Carl Zeiss lens This camera is equipped with a Carl Zeiss lens which is capable of reproducing sharp images with excellent contrast The lens for this camera has been produced under a quality assurance system certified by Carl Zeiss in accordance with the quality standards of Carl Zeiss in Germany No compensation for contents of the recording The contents of the r...

Page 5: ... points are normal in the manufacturing process and do not affect the recording in any way Exposing the LCD screen the finder or the lens to direct sunlight for long periods may cause malfunctions Be careful when placing the camera near a window or outdoors Do not press against the LCD screen The screen may be discolored and that may cause a malfunction Images may trail across on the LCD screen in...

Page 6: ...oot still images Scene Selection 6 View delete images Get more friendly with your camera This manual Shoot with your favorite settings Program auto shooting t page 24 Enjoy various shooting playback using the menu t page 26 Change the default settings t page 44 Connect your camera to a PC or a printer This manual Copy your images to a computer and enjoy editing them in various ways t page 55 Print...

Page 7: ... Changing the screen display 20 Number of still images and recording time of movies 21 When you do not have a Memory Stick Duo Recording with the internal memory 22 Battery life and number of images that can be recorded viewed 23 Using the mode switch 24 Using menu items 26 Menu items 27 Shooting menu 29 Camera EV 9 Focus Metering Mode WB White Bal ISO P Quality Mode REC Mode BRK Bracket Step Inte...

Page 8: ...Digital Zoom Date Time Red Eye Reduction AF Illuminator Auto Review Camera 2 48 Enlarged Icon Internal Memory Tool 49 Format Memory Stick Tool 50 Format Create REC Folder Change REC Folder Copy Setup 1 52 LCD Backlight Beep Language Initialize Setup 2 53 File Number USB Connect Video Out Clock Set Using the Setup screen 1 2 1 2 ...

Page 9: ... to print still images 69 Printing images directly using a PictBridge compliant printer 70 Printing at a shop 74 Viewing images on a TV screen 76 Troubleshooting 78 Warning indicators and messages 90 On the Memory Stick 93 On the InfoLITHIUM battery pack 95 On the battery charger 96 Precautions 97 Specifications 99 Using your computer Printing still images Connecting your camera to your TV Trouble...

Page 10: ...t successfully Press the shutter button fully down straight away Press the shutter button halfway down Flashing indicator Indicator lit beeps Then press the shutter button fully down Hints for preventing blur Hold the camera steadily keeping your arms at your side Also you can stabilize the camera by leaning against a tree or a building beside you Using a tripod and using the flash in dark places ...

Page 11: ...he exposure is automatically set to the proper value in the auto adjustment mode However you can adjust it manually using the functions below EV Allows you to adjust the exposure that has been determined by the camera t page 29 Metering Mode Allows you to change the part of the subject to be measured to determine the exposure t page 32 Correct exposure Underexposure too little light Darker image H...

Page 12: ... image is displayed in fine detail Image size is shown by the number of pixels Although you cannot see the differences on the screen of the camera the fine detail and data processing time differ when the image is printed or displayed on a computer screen Description of the pixels and the image size Color On the effects of lighting Weather lighting Daylight Cloudy Fluorescent Incandescent Character...

Page 13: ...pression ratio the image lacks the fineness of detail but has a smaller file size Pixel Many pixels Fine image quality and large file size Example Printing in up to A4 size Few pixels Rough image quality but small file size Example An attached image to be sent by e mail Image size Usage guidelines 5M 2592 1944 Larger Smaller For printing in A4 size or high density images in A5 size 3 2 2592 1728 3...

Page 14: ...ge t step 5 in Read This First B LCD screen 20 C Screen display on off button 20 D MENU button 26 E Image Size Delete button t step 4 and 6 in Read This First F For shooting Zoom W T button t step 5 in Read This First For viewing Playback zoom button Index button t step 6 in Read This First G Hook for wrist strap t Read This First H Speaker I Battery Memory Stick Duo cover t step 1 and 3 in Read T...

Page 15: ...ti connector bottom When using an AC LS5K AC Adaptor not supplied P Tripod receptacle bottom Use a tripod with a screw length of less than 5 5 mm 7 32 inch You will be unable to firmly secure the camera to tripods having screws longer than 5 5 mm 7 32 inch and may damage the camera 2 To the multi connector 1 To DC IN jack 3 To wall outlet v mark Cable for multi use terminal supplied ...

Page 16: ...ording mode 24 33 White balance 32 STBY REC Standby Recording a movie t step 5 in Read This First Camera mode Scene Selection t step 5 in Read This First Camera mode Program 24 Flash mode t step 5 in Read This First Zoom scaling t 45 step 5 in Read This First Red eye reduction 46 Sharpness 36 Saturation 36 Contrast 36 AF illuminator 47 Metering mode 32 Picture effect 35 Display Indication Macro t ...

Page 17: ... 6 4 0 STD 6 4 0 1 6 0 101 Display Indication Vibration warning 10 Indicates vibration may prevent you from shooting clear images due to insufficient lighting Even if the vibration warning appears you can still shoot images However we recommend using the flash for better lighting or using a tripod or other means to stabilize the camera E Low battery warning 23 90 Spot metering cross hair 32 AF ran...

Page 18: ...in Read This First Recording mode 24 33 N Playback t step 6 in Read This First Volume t step 6 in Read This First Protect 38 Print order DPOF mark 74 Change folder 37 This does not appear when using internal memory Zoom scaling t step 6 in Read This First Step 12 16 Frame by frame playback 33 Display Indication 101 0012 Folder file number 37 Playback bar t step 6 in Read This First 60min 3 2 5M 3M...

Page 19: ...sis display 90 00 00 12 Counter t step 6 in Read This First Display Indication Do not disconnect the cable for multi use terminal 72 2 0EV Exposure Value 29 ISO number 33 Metering mode 32 Flash White balance 32 500 Shutter speed F3 5 Aperture value Playback image t step 6 in Read This First 101 101 WB Display Indication Histogram 20 29 appears when histogram display is disabled 2005 1 1 9 30 AM Re...

Page 20: ...u is displayed Recording movies During playback The menu is displayed In index mode You are using playback zoom You are rotating still images Playback of movies A large difference in the histogram displayed when shooting and during playback may occur when The flash strobes The shutter speed is slow or high The histogram may not appear for images recorded using other cameras S AF VGA 96 S AF VGA 96...

Page 21: ...es later Resize page 40 The recording time of movies Units hour minute second Movies with the size set to 640 Fine can only be recorded on a Memory Stick PRO Duo For image size and image quality see page 12 When images recorded using earlier Sony models are played back on this camera the display may differ from the actual image size Capacity Size 32MB 64MB 128MB 256MB 512MB 1GB 2GB 5M 12 25 51 92 ...

Page 22: ...to 62 without a Memory Stick Duo inserted in the camera You cannot move image data on a Memory Stick Duo to the internal memory By connecting the camera and a computer with a cable for multi use terminal you can copy data stored in the internal memory to a computer but you cannot copy data on a computer to the internal memory When a Memory Stick Duo not supplied is inserted Recording Images are re...

Page 23: ...ure is low The flash is used The camera has been turned on and off many times The zoom is used frequently LCD Backlight is set to Bright AF Mode is set to Monitor The battery power is low When shooting still images Shooting in the following situations P Quality is set to Fine AF Mode is set to Single Shooting once every 30 seconds The zoom is switched alternately between the W and T ends The flash...

Page 24: ...ng mode Allows you to shoot with the exposure adjusted automatically both the shutter speed and the aperture value Also you can select various settings using the menu For details on the functions available t page 27 Scene Selection mode Allows you to shoot with preset settings according to the scene t step 5 in Read This First Control button Mode switch Shooting movies t step 5 in Read This First ...

Page 25: ...mage appropriately according to the scene condition a combination of functions is determined by the camera you can select the desired setting Macro Flash AF range finder Focus preset Bracket Step White Balance Flash level Burst Exposure Bracket Multi Burst Auto Center AF 0 5m 1 0m 3 0m 7 0m SL WB ...

Page 26: ... item appears on the screen Press z after selecting an item when the mode switch is set to 4 Select the setting with v V The setting you select is zoomed and is set 5 Press MENU to turn off the menu If there is an item that is not displayed an v V mark appears on the edges of the location where menu items usually appear To display an item that is not displayed select the mark with the control butt...

Page 27: ...he mode switch position Only the available items are displayed on the screen available Mode switch position Auto Program Scene Menu for shooting page 29 Camera EV 9 Focus Metering Mode WB White Bal ISO P Quality Mode REC Mode BRK Bracket Step Interval Flash Level PFX P Effect Saturation Contrast Sharpness Setup M ...

Page 28: ... the operation t page 26 The operation is limited according to the Scene mode page 25 Available only during enlarged playback Menu for viewing page 37 Folder Protect DPOF Print Slide Resize Rotate Divide Setup Trimming ...

Page 29: ...A histogram is a graph showing the brightness of an image Press Screen display on off repeatedly to display the histogram inside the screen The graph display indicates a bright image when skewed to the right side and a dark image when skewed to the left side Set the mode switch to and adjust EV while checking the exposure with the histogram A Number of pixels B Brightness The histogram also appear...

Page 30: ...n extremely small subject or a narrow area Use together with the AF lock function lets you shoot in the desired image composition Take care to hold the camera steady so that the subject does not deviate from the range finder frame Center AF Focuses automatically on a subject in the center of the finder frame Using this with the AF lock function lets you shoot in the desired image composition Multi...

Page 31: ...nding on the Scene mode page 25 z If the subject is out of focus When shooting with the subject at the edge of the frame or the screen or when using Center AF or Spot AF the camera may not focus on a subject at the edge of the frame In such cases do as follows 1 Recompose the shot so that the subject is centered in the AF range finder and press the shutter button halfway down to focus on the subje...

Page 32: ...nly a part of the subject This function is useful when the subject is backlit or when there is strong contrast between the subject and the background Center Center weighted metering Measures the center of the image and determines the exposure based on the brightness of the subject there Multi Multi pattern metering Divides into multiple regions and measures each region The camera determines a well...

Page 33: ...0 64 Auto P Quality Fine FINE Records with high quality low compression Standard STD Records with standard quality high compression Mode REC Mode Multi Burst Records 16 frames in succession as a still image file when you press the shutter button This is convenient for checking your form in sports for example You can select the Multi Burst shutter interval in Interval mode page 35 Exp Brktg BRK Rec...

Page 34: ...able to shoot images in the Multi Burst mode depending on the Scene mode page 25 On the Exp Brktg The flash is set to No flash The focus and white balance are adjusted for the first image and these settings are also used for the other images When the exposure is manually adjusted page 29 the exposure is shifted based on the adjusted brightness The recording interval is approximately 0 7 second If ...

Page 35: ...llows you to shoot an image with special effects This setting is not maintained when the power is turned off BRK Bracket Step 1 0EV Shifts the exposure value by plus or minus 1 0EV 0 7EV Shifts the exposure value by plus or minus 0 7EV 0 3EV Shifts the exposure value by plus or minus 0 3EV Interval 1 7 5 1 7 5 This setting cannot be made when Mode REC Mode in the menu is set to other than Multi Bu...

Page 36: ...he contrast of the image Adjusts the sharpness of the image See page 44 Saturation Toward Brightens the color Normal Toward Darkens the color Contrast Toward Enhances the contrast Normal Toward Reduces the contrast Sharpness Toward Sharpens the image Normal Toward Softens the image Setup ...

Page 37: ...page 50 You can change the folder or create a new one To create a new folder t Create REC Folder page 50 To change the folder for recording images t Change REC Folder page 51 When multiple folders are created in the Memory Stick Duo and the first or last image in the folder is displayed the following indicators appear Moves to the previous folder Moves to the next folder Moves to either the previo...

Page 38: ...he index screen 2 Press MENU to display the menu 3 Select Protect with b B on the control button then press z 4 Select Select with v V then press z 5 Select the image you want to protect with v V b B then press z A green indicator appears on the selected image 6 Repeat step 5 to protect other images 7 Press MENU 8 Select OK with B then press z The indicator turns white The selected images are prot...

Page 39: ...ith B and then press z To cancel protection of all images in the folder Select All In This Folder in step 4 of To protect images in index mode and press z Select Off with B then press z Note that formatting the internal memory or Memory Stick Duo erases all the data stored on the recording media even if images are protected and these images cannot be recovered It may take some time to protect an i...

Page 40: ...ss z 4 Select the desired size with v V then press z The resized image is recorded in the recording folder as the newest file For details on Image Size t step 4 in Read This First You cannot change the size of movies or Multi Burst images When you change from a small size to a large size the image quality deteriorates You cannot resize to an image size of 3 2 or 16 9 When you resize a 3 2 or 16 9 ...

Page 41: ...ages on a computer the image rotation information may not be reflected depending on the software Cuts movies or deletes unnecessary portions of movies This is the recommended function to use when the internal memory or Memory Stick Duo capacity is insufficient or when you attach movies to your e mail messages Note that the original movie is deleted and that number is skipped Also note that you can...

Page 42: ...scene B Divide 101_0005 is divided into 101_0006 and 101_0007 3 Deleting scenes A and B if they are unnecessary Delete Delete 4 Only the desired scenes remain Procedure 1 Display the movie to be divided 2 Press MENU to display the menu 3 Select Divide with b B on the control button then press z 4 Select OK with v then press z The playback of the movie starts 1 2 101_0002 101_0003 3 101_0001 1 2 3 ...

Page 43: ...h to cut shorter than about two seconds Protected movies page 38 See page 44 Records an enlarged image t step 6 in Read This First as a new file 1 Press MENU during playback zoom to display the menu 2 Select Trimming with B on the control button then press z 3 Select the image size with v V then press z The image is recorded and the original image is displayed again The trimmed image is recorded a...

Page 44: ...set The frame of the selected item turns yellow 5 Press z to enter the setting To turn off the Setup screen press MENU To return to the menu from the Setup screen press b on the control button repeatedly To cancel the Setup setting Select Cancel if it appears then press z on the control button If it does not appear select the previous setting again This setting is maintained even when the power is...

Page 45: ...g stationary subjects Monitor M AF Automatically adjusts the focus before the shutter button is pressed and held halfway down This mode shortens the time needed for focusing Battery consumption is faster than in Single mode Digital Zoom Smart Smart zoom Enlarges the image digitally with almost no distortion This is not available when the image size is set to 5M or 3 2 The maximum zoom scale of Sma...

Page 46: ...cannot insert the date and time into movies or images in the Multi Burst mode The date and time superimposed cannot be removed later Reduces the red eye phenomenon when using the flash Select this before shooting Because it takes about a second until the shutter clicks hold the camera firmly to prevent the effects of vibration Also do not let the subject move Red eye reduction may not produce the ...

Page 47: ...et page 30 AF Illuminator does not function The AF range finder frame does not appear The or indicator flashes and AF operates with priority on subjects located near the center of the frame The AF illuminator does not operate when Twilight mode Landscape mode High speed shutter mode or Fireworks mode is selected in the Scene mode The AF illuminator emits very bright light Although there are no pro...

Page 48: ...tion t page 44 Camera 2 2 The default settings are marked with Enlarges the setting indicator temporarily when you press Flash mode Self timer or Macro Enlarged Icon On Enlarges the indicators Off Does not enlarge the indicators ...

Page 49: ...marked with Formats the internal memory Note that formatting irrevocably erases all data in the internal memory including even protected images 1 Select OK with v on the control button then press z The message All data in internal memory will be erased Ready appears 2 Select OK with v then press z The format is complete Format OK See the following procedure Cancel Cancels the formatting ...

Page 50: ... with v then press z A new folder is created with a number incremented one higher than the largest number and the folder becomes the current recording folder For details on the folder see page 37 When not creating a new folder the 101MSDCF folder is selected as the recording folder You can create folders designated up to 999MSDCF Images are recorded in the newly created folder until a different fo...

Page 51: ... fully charged battery pack or the AC Adaptor not supplied If you attempt to copy image files using a battery pack with little remaining charge the battery pack may run out causing copying to fail or possibly corrupting the data You cannot copy individual images The original images in the internal memory are retained even after copying To delete the contents of the internal memory remove the Memor...

Page 52: ...to the default setting 1 Select OK with v on the control button then press z The message Initialize all settings Ready appears 2 Select OK with v then press z The settings are reset to the default setting Make sure that the power is not disconnected during resetting LCD Backlight Bright Brightens Normal Beep Shutter Turns on the shutter sound when you press the shutter button On Turns on the beep ...

Page 53: ...ecording folder contains a file a number one higher than the largest number is assigned USB Connect PictBridge Connects the camera to a PictBridge compliant printer page 70 PTP When PTP Picture Transfer Protocol is set and the camera is connected to a computer the images in the recording folder on the camera are copied to the computer Compatible with Windows XP and Mac OS X Mass Storage Establishe...

Page 54: ... screen check page 77 for the TV color system of the country or region where the camera is used Sets the date and time Video Out NTSC Sets the video output signal to NTSC mode e g for the USA Japan PAL Sets the video output signal to PAL mode e g for Europe Clock Set OK Select OK with v on the control button and press z Then perform the procedure explained in Set the clock t step 2 in Read This Fi...

Page 55: ...ur computer Installing the USB driver Installation of the USB driver is not needed when using Windows XP Enjoying images using PicturePackage page 65 Viewing images saved on your computer Installing PicturePackage page 65 Storing images on a CD R Creating a Music Video Slideshow Printing images Creating a video CD using ImageMixer page 65 Creating a video CD ImageMixer VCD2 is installed automatica...

Page 56: ...er CPU is required When using ImageMixer VCD2 a Pentium III 800 MHz or faster CPU is recommended This software is compatible with DirectX technology DirectX must be installed for use A separate software application for operating the recording device is required in order to write to CD Rs Notes on connecting your camera to a computer Operations are not guaranteed for all the recommended computer en...

Page 57: ...e properly When using Windows XP start from Stage 2 When PicturePackage is already installed start from Stage 2 NOTE Do not connect the camera to the computer at this time 1 Shut down all application software in use In Windows 2000 log on as Administrator authorized Administrators 2 Insert the CD ROM into the computer then click USB Driver when the install menu screen appears The InstallShield Wiz...

Page 58: ... the camera or connect the camera to a wall outlet wall socket with the AC Adaptor not supplied When you copy images to your computer using a battery pack with little remaining charge copying may fail or image data may become corrupted if the battery pack shuts down too soon 3 Set the mode switch to then turn on the camera and the computer Stage 2 Preparing the camera and the computer ...

Page 59: ...ode Mass Storage does not appear set USB Connect to Mass Storage page 53 For Windows 98 98SE 2000 Me follow the procedure explained in Stage 4 B Copying images to a Computer on page 61 For Windows XP when the wizard screen does not appear automatically follow the procedure explained in Stage 4 B Copying images to a Computer on page 61 This section describes an example of copying images to a My Doc...

Page 60: ...memory appear 3 Click the check box of unwanted images to remove the checkmark so they are not copied then click Next The Picture Name and Destination screen appears 4 Select a name and destination for the images then click Next Image copying starts When the copying is completed the Other Options screen appears This section describes an example of copying images to the My Documents folder 5 Click ...

Page 61: ...This section describes an example of copying images to the My Documents folder 1 Double click My Computer t Removable Disk t DCIM If the Removable Disk icon is not displayed see page 84 2 Double click the folder where the image files you want to copy are stored Then right click an image file to display the menu and click Copy 3 Double click the My Documents folder Then right click on the My Docume...

Page 62: ...rt t My Documents The contents of the My Documents folder are displayed If you are not using Windows XP double click My Documents on the desktop 2 Double click the desired image file The image is displayed Perform the procedures listed below beforehand when Disconnecting the cable for multi use terminal Removing a Memory Stick Duo Inserting a Memory Stick Duo into the camera after copying images f...

Page 63: ...ly Internal memory 101_SONY only C Folder containing movie data etc recorded using a camera not equipped with the folder creating function You cannot record any images to the 100MSDCF folder The images in these folders are available only for viewing You cannot record playback any images to the MSSONY folder Image files are named as follows ssss stands for any number within the range from 0001 to 9...

Page 64: ...ur camera playback on your camera is not guaranteed When there is no folder first create a folder with your camera page 50 and then copy the image file 1 Right click the image file then click Rename Change the file name to DSC0ssss Enter a number from 0001 to 9999 for ssss If the overwrite confirmation message appears enter a different number An extension may be displayed depending on the computer...

Page 65: ...XP log on as Administrator When PicturePackage is installed the USB driver is installed automatically 1 Turn on your computer and insert the CD ROM supplied into the CD ROM drive The installation menu screen appears If it does not appear double click My Computer t PICTUREPACKAGE 2 Click PicturePackage The Choose Setup Language screen appears 3 Select the desired language then click Next twice This...

Page 66: ...software Double click the PicturePackage Menu icon on the desktop For information on the use of the software Click at the upper right corner of each screen to show the on line help Technical support for PicturePackage ImageMixer VCD2 is provided by the Pixela User Support Center For more support information refer to the leaflet in the supplied CD ROM package ...

Page 67: ...onnecting your camera using a USB interface that is compatible with Hi Speed USB USB 2 0 compliant allows advanced transfer high speed transfer as this camera is compatible with Hi Speed USB USB 2 0 compliant There are three modes for a USB connection when connecting a computer Auto default setting Mass Storage and PTP modes This section describes the Auto and Mass Storage as examples For details ...

Page 68: ...Shut down all other application software before you install ImageMixer VCD2 The display settings should be 1024 768 dots or higher and 32 000 colors or higher 1 Turn on your Macintosh computer and insert the CD ROM supplied into the CD ROM drive 2 Double click the CD ROM icon 3 Copy the IMXINST SIT file in the MAC folder to the hard disk icon 4 Double click the IMXINST SIT file in the copy to fold...

Page 69: ...nt printer Printing directly using a Memory Stick compliant printer You can print images with a Memory Stick compliant printer For details see the operating instructions supplied with the printer Printing using a computer You can copy images to a computer using the supplied PicturePackage software and print the images Printing at a shop page 74 You can take a Memory Stick Duo containing images sho...

Page 70: ... printed as an index image differ depending on the printer You cannot print movies If the indicator flashes on the screen of the camera for about five seconds error notification check the connected printer Prepare the camera to connect it to the printer with the cable for multi use terminal When connecting the camera to a printer that is recognized when USB Connect is set to Auto Stage 1 is unnece...

Page 71: ... Select the desired printing method with v V on the control button then press z All In This Folder Prints all the images in the folder DPOF image Prints all the images with a Print order mark page 74 regardless of the displayed image Select Selects images and prints all the selected images 1Select the image you want to print with b B then press z The mark appears on the selected image To select ot...

Page 72: ...side on a sheet as an index image The designated number of images may not all fit onto a single sheet depending on the quantity of images 3 Select OK with V B then press z The image is printed Do not disconnect the cable for multi use terminal while the Do not disconnect the cable for multi use terminal indicator appears on the screen To print other images After step 3 select Select and the desire...

Page 73: ... print with v V b B then press z to display the mark Repeat this procedure to select other images Then press MENU DPOF image Prints all the images with a Print order mark regardless of the displayed image All In This Folder Prints all the images in the folder 5 Perform steps 2 and 3 of Stage 3 Printing page 71 ...

Page 74: ...dard or using a PictBridge compliant printer You cannot mark movies When you mark images shot in Multi Burst mode all the images are printed on one sheet divided into 16 panels When taking a Memory Stick Duo to a shop Consult your photo printing service shop as to what types of Memory Stick Duo they handle If a Memory Stick Duo is not handled by your photo printing service shop copy the images you...

Page 75: ... A green mark appears on the selected image 6 Repeat step 5 to mark other images 7 Press MENU 8 Select OK with B then press z The mark turns white To cancel select Cancel in step 4 or select Exit in step 8 then press z To remove the mark in index mode Select the images from which you want to remove the mark in step 5 then press z To remove all the marks in the folder Select All In This Folder in s...

Page 76: ... 2 Set the switch on the cable for multi use terminal to TV 3 Turn on the TV and set the TV video input switch to video For details see the operating instructions supplied with the TV 4 Set the mode switch to and turn on the camera Images shot with the camera appear on the TV screen Press b B on the control button to select the desired image When using your camera abroad it may be necessary to swi...

Page 77: ...s used NTSC system Bahama Islands Bolivia Canada Central America Chile Colombia Ecuador Jamaica Japan Korea Mexico Peru Surinam Taiwan the Philippines the U S A Venezuela etc PAL system Australia Austria Belgium China Czech Republic Denmark Finland Germany Holland Hong Kong Hungary Italy Kuwait Malaysia New Zealand Norway Poland Portugal Singapore Slovak Republic Spain Sweden Switzerland Thailand ...

Page 78: ...internal memory may be checked when you send your camera to be repaired 1 Check the items on pages 79 to 89 If a code such as C E ss ss appears on the screen see page 90 2 Remove the battery pack and insert the battery pack again after about one minute and turn on the power 3 Initialize the settings page 52 4 Consult your Sony dealer or local authorized Sony service facility ...

Page 79: ... is dead page 95 Replace it with new one The battery pack runs down too quickly Charge it sufficiently t step 1 in Read This First You are using the camera in an extremely cold location page 95 The battery terminal is dirty Clean the battery terminal with a cotton swab etc and charge the battery pack The battery pack is dead page 95 Replace it with new one Cannot turn on the camera Install the bat...

Page 80: ... function is activated page 17 This is not a malfunction The image is out of focus The subject is too close Record in the close up Macro recording mode Make sure to position the lens farther away from the subject than the shortest shooting distance approximately 8 cm 3 1 4 inches W 25 cm 9 7 8 inches T when shooting Or select Magnifying glass mode and focus from a distance of approx 1 cm to 20 cm ...

Page 81: ...he flash light and appeared in the image This is not a malfunction The close up Macro function does not work Magnifying glass mode Twilight mode Landscape mode Candle mode or Fireworks mode is selected in the Scene mode page 25 The date and time are recorded incorrectly Set the correct date and time t step 2 in Read This First The F value and shutter speed flash when you press and hold the shutter...

Page 82: ... and shoot the subject Dots appear and remain on the screen This is not a malfunction These dots are not recorded page 5 t Read This First Cannot shoot images in succession The internal memory or Memory Stick Duo is full Delete unnecessary images t step 6 in Read This First The battery level is low Install charged battery pack Refer to Computers page 84 in conjunction with the following items Your...

Page 83: ... You are using the Memory Stick Duo with the write protect switch and the switch is set to the LOCK position Set the switch to the recording position page 93 You have deleted an image by mistake Once you have deleted an image you cannot restore it We recommend that you protect images page 38 or use the Memory Stick Duo with the write protect switch and set the switch to the LOCK position page 93 t...

Page 84: ...nnect all equipment other than the camera the keyboard and the mouse from the USB connectors of your computer Connect the camera directly to your computer without passing through a USB hub or other device page 59 The USB driver is not installed Install the USB driver page 57 Your computer does not properly recognize the device because you connected the camera and your computer with the cable for m...

Page 85: ...he image and sound are interrupted by noise when you view a movie on a computer You are playing back the movie directly from the internal memory or Memory Stick Duo Copy the movie to the hard disk of your computer then play back the movie from the hard disk page 57 You cannot print an image Check the printer settings Images once copied to a computer cannot be viewed on the camera Copy them to a fo...

Page 86: ...ra to the computer pages 57 to 59 The computer recognizes the Memory Stick PRO Duo The camera or your computer cannot play back the data in the internal memory There is a Memory Stick Duo inserted in the camera Remove it t step 4 in Read This First Cannot record images using the internal memory There is a Memory Stick Duo inserted in the camera Remove it t step 4 in Read This First The free capaci...

Page 87: ...nnect and connect the cable for multi use terminal again If an error message is indicated on the printer refer to the operating instructions supplied with the printer Nothing appears on the camera screen when a USB connection is made The switch on the cable for multi use terminal is set to TV Set to CAMERA page 71 Cannot print images Check that the camera and the printer are properly connected usi...

Page 88: ...te to Off and print the image again page 72 Cannot select the print size Consult the printer manufacturer as to whether the printer can provide the desired size Cannot print the image at the size selected Disconnect the cable for multi use terminal and reconnect it whenever you change the paper size after the printer has been connected to the camera The print setting of the camera differs from tha...

Page 89: ...ing properly Remove the battery pack and then after one minute insert the battery pack and turn on the camera Cannot identify an indicator on the screen See page 16 The lens gets fogged Moisture condensation has occurred Turn off the camera and leave it for about an hour before using it page 97 The camera becomes warm when you use it for a long time This is not a malfunction The Clock Set screen a...

Page 90: ...ck Duo page 93 E 61 ss E 91 ss A camera malfunction has occurred Initialize the camera page 52 then turn the power on again If the following messages appear follow the instructions E The battery level is low Charge the battery pack t step 1 in Read This First Depending on the conditions of use or the type of battery pack the indicator may flash even though there are still 5 to 10 minutes of remain...

Page 91: ...Cannot create more folders The folder with a name beginning with 999 exists on the Memory Stick Duo You cannot create any folders if this is the case Cannot record The camera cannot record images in the selected folder Select a different folder page 51 File error An error occurred while playing back the image File protect Release the protection page 39 Image size over You are playing back an image...

Page 92: ...o a PictBridge compliant printer No printable image You tried to execute DPOF image without placing a DPOF Print order mark on the image s You tried to execute All In This Folder while a folder that holds only movies was selected You cannot print movies Printer busy Paper error No Paper Ink error Low Ink No Ink Check the printer Printer error Check the printer Check if the image you want to print ...

Page 93: ...g on the Memory Stick Duo you use Do not remove the Memory Stick Duo while reading or writing data Data may be corrupted in the following cases When the Memory Stick Duo is removed or the camera is turned off during a read or write operation When the Memory Stick Duo is used in locations subject to static electricity or electrical noise We recommend backing up important data Do not press down hard...

Page 94: ...ve it from the device When inserting a Memory Stick Duo into a Memory Stick Duo Adaptor make sure the Memory Stick Duo is inserted facing in the correct direction then insert it all the way in Incorrect insertion may result in a malfunction When using a Memory Stick Duo inserted into a Memory Stick Duo Adaptor with a Memory Stick compliant device make sure that the Memory Stick Duo is inserted fac...

Page 95: ...is not water resistant Do not leave the battery pack in extremely hot places such as in a car or under direct sunlight On the remaining battery time indicator The power may go off although the battery remaining indicator shows there is enough power to operate Use the battery pack up and charge the battery pack fully again so that the indication on the battery remaining indicator is correct Note ho...

Page 96: ... there is a danger of leaks excessive heat explosions or electric shock When the CHARGE lamp flashes this may indicate a battery error or that a battery pack other than the specified type have been inserted Check that the battery pack is the specified type If the battery pack is the specified type remove the battery pack replace it with new one or another one and check if the battery charger opera...

Page 97: ...hey may damage the finish or the casing Chemical products such as thinner benzine alcohol disposable cloths insect repellent sunscreen or insecticide etc Do not touch the camera with the above on your hand Do not leave the camera in contact with rubber or vinyl for a long time x On operating temperatures Your camera is designed for use under the temperatures between 0 C and 40 C 32 F and 104 F Sho...

Page 98: ... all for about one month it becomes completely discharged In this case be sure to charge this rechargeable battery before using the camera However even if this rechargeable battery is not charged you can still use the camera as long as you do not record the date and time Charging method of the internal rechargeable battery Insert charged battery pack in the camera or connect the camera to a wall o...

Page 99: ... set to Auto approx 0 1 m to 2 5 m 3 15 16 inches to 8 feet 2 7 16 inches W approx 0 5 m to 2 0 m 1 feet 7 11 16 inches to 6 feet 6 3 4 inches T Input and Output connectors Multi connector USB communication Hi Speed USB USB 2 0 compliant LCD screen LCD panel 6 2 cm 2 5 type TFT drive Total number of dots 230 400 960 240 dots Power general Power Rechargeable battery pack NP FT1 3 6 V AC LS5K AC Ada...

Page 100: ... F to 104 F Storage temperature 20 C to 60 C 4 F to 140 F Dimensions Approx 66 23 91 mm 2 5 8 29 32 3 5 8 inches W H D Mass Approx 70 g 2 7 oz Rechargeable battery pack NP FT1 Used battery Lithium ion battery Maximum voltage DC 4 2 V Nominal voltage DC 3 6 V Capacity 2 4 Wh 680 mAh Design and specifications are subject to change without notice ...

Page 101: ...59 71 76 Camera 1 45 Camera 2 48 Candle mode t step 5 in Read This First CD ROM 57 68 Center AF 30 Center weighted metering 32 Change REC Folder 51 Charging battery pack t step 1 in Read This First Cleaning 97 Clock Set 54 Cloudy 32 Color 12 Compression ratio 13 Computer 55 Copying images 57 67 Macintosh 67 Recommended environment 56 67 Software 65 Viewing image files stored on a computer with you...

Page 102: ...Read This First Language 52 t step 2 in Read This First LCD Backlight 52 LCD screen see Screen M M AF 45 Macintosh computer 67 Recommended environment 67 Macro t step 5 in Read This First Magnifying glass mode t step 5 in Read This First Mass Storage 53 Memory Stick Duo 93 Insert Remove t step 3 and 4 in Read This First Number of images recording time 21 Write protect switch 93 Memory Stick Tool 5...

Page 103: ... 53 Setup 1 52 Setup 2 53 Sharpness 36 Shooting Movie t step 5 in Read This First Still image t step 5 in Read This First Shooting menu 29 Shooting movies t step 5 in Read This First Shutter speed 11 Single 45 Single image mode printing 70 Slide 39 Slow synchro t step 5 in Read This First Smart zoom 45 Snow mode t step 5 in Read This First Soft snap mode t step 5 in Read This First Software 65 Spe...

Page 104: ...104 W Warning indicators and messages 90 WB 32 White balance 32 Windows computer 55 Recommended environment 56 Wrist strap t in Read This First Write protect switch 93 Z Zoom t step 5 in Read This First ...

Page 105: ...nited States and or other countries Macintosh Mac OS QuickTime iMac iBook PowerBook Power Mac and eMac are trademarks or registered trademarks of Apple Computer Inc Macromedia and Flash are trademarks or registered trademarks of Macromedia Inc in the United States and or other countries Intel MMX and Pentium are trademarks or registered trademarks of Intel Corporation In addition system and produc...

Page 106: ......

Page 107: ......

Reviews: