background image

Special Instructions for Tempo HD (Without Drive, Windows Version)

You Should Have (Part Number THD-W)

In addition to the parts listed on the Tempo HD quick start guide, the following
items should be included in your product package:

• 4 hard drive mounting screws

The following item is required for installation of a 2.5 inch hard drive to the
Tempo HD:

• Medium Phillips screwdriver

The following items may be required for installation of a 2.5 inch hard drive:

• Small flat blade screwdriver 

• Needle-nose pliers

Installation Preparation:

Prior to installing a hard drive onto the Tempo HD, you may need to prepare the
drive by installing, moving or removing jumpers.
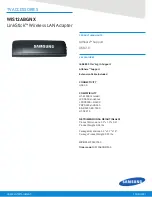
1.

Remove your 2.5 inch hard drive from its packaging.

2.

Locate the jumper block on your hard drive. 

Figure 1

shows the most com-

mon jumper block location.

2.5 Inch Hard Drive Installation Steps

This section covers the configuration, and the installation one 2.5 inch hard drive
onto your Tempo HD card.

1.

Move, install, or remove jumpers (as necessary) on the hard drive to the
master setting.

2.

Remove the Tempo HD card from its anti-static packaging, and lay it on a
flat surface with the surface-mounted connector face up. 
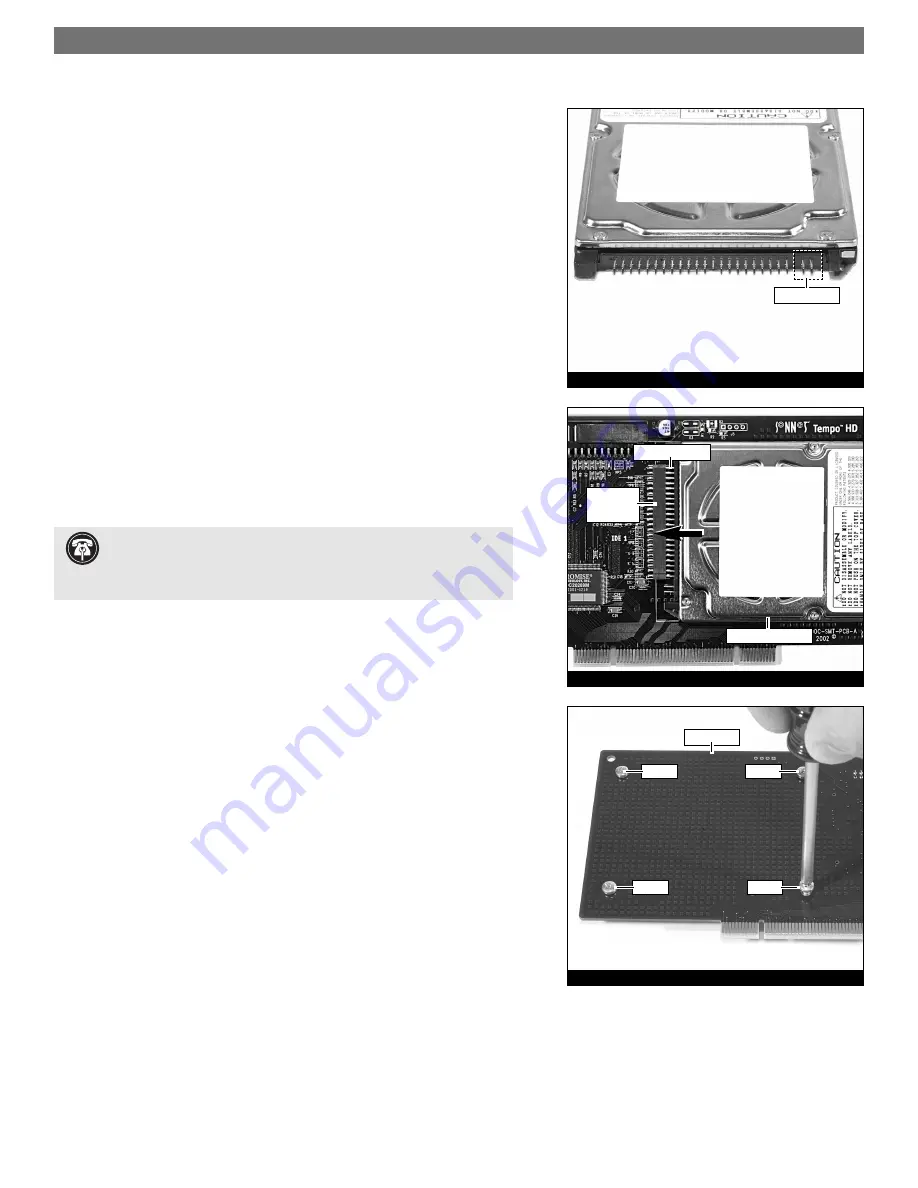
3.

Lay the 2.5 inch hard drive on the card within the rectangle imprinted on
the Tempo HD card, and align the hard drive’s pins with the Tempo HD
card’s surface-mounted connector 

(Figure 2)

. Push the hard drive’s pins into

the Tempo HD card's connector until the drive is completely seated.

4.

Holding the drive against the card, flip the assembly over. Using the 4 screws
provided, secure the hard drive to the Tempo HD; 

be sure to use the correct

holes, and do not overtighten the screws

(Figure 3)

.

5.

Follow the instructions in the attached quick start guide to install the Tempo
HD into your system. Please note, you will need to format the drive you just
installed. Refer to the drive formatting information sections of the Quick
Start Guide for specific information.

.

Support Note:

Refer to the hard drive user’s manual for jumper 

setting information specific to your drive

. Alternately, you may find 

jumper setting information printed on your hard drive’s labels. Make sure the
drive is oriented the same way as the illustration before moving jumpers.

Figure 1

Figure 2

Figure 3

screw

screw

surface-

mounted

connector

screw

screw

2.5 inch hard drive

hard drive’s pins

Tempo HD

jumper block

Summary of Contents for TEMPO HD

Page 1: ...its anti static packaging and lay it on a flat surface with the surface mounted connector face up 3 Lay the 2 5 inch hard drive on the card within the rectangle imprinted on the Tempo HD card and align the hard drive s pins with the Tempo HD card s surface mounted connector Figure 2 Push the hard drive s pins into the Tempo HD card s connector until the drive is completely seated 4 Holding the dri...

Page 2: ......

Page 3: ...rom the Sonnet web site at www sonnettech com Online support form available at http supportform sonnettech com Sonnet Technologies Customer Service hours are Mon Fri 7 a m 5 p m Pacific Time Customer Service Phone 1 949 472 2772 E mail support sonnettech com Sonnet Technologies Inc 15 Whatney Irvine California 92618 2808 USA Tel 1 949 587 3500 Fax 1 949 457 6350 2002 SonnetTechnologies Inc All rig...

Page 4: ...ation Preparation and Hard Drive Installation Steps on page 4 7 Close your computer Windows 98SE and Windows Me Driver Installation This section describes the installation of drivers to support the Tempo HD in sys tems running Windows 98SE or Windows Me If your system is running Windows 2000 or Windows XP skip to the next page 1 Turn on your computer during Windows startup the New Hardware Found w...

Page 5: ...s click Next 8 When the Digital Signature Not Found window appears click Yes the appro priate driver will be installed 9 When the Completing the Found New Hardware Wizard window appears click Finish you must now format the attached drive Skip to Drive Formatting Windows 2000 and Windows XP on page 7 Windows XP Driver Installation This section describes the installation of drivers to support the Te...

Page 6: ...rd drives jumpers as follows When installing one drive you must set its jumpers to the single setting when available or the master setting when not When connecting two drives you must set the jumpers on one drive to the master setting and to the slave setting on the other 4 Install the hard drives into your computer s expansion bays Depending on your computer model drive mounting brackets carriers...

Page 7: ... HD and the hard drives 10 Close your computer and carefully replace its cover be very careful not to crimp the cables Drive Formatting Windows 98SE and Windows Me Formatting prepares a hard drive for use by dividing the data area into tracks and sectors enabling your computer to store and retrieve data from the drive This section describes the process of formatting hard drives connected to the Te...

Page 8: ...en appears instructing you to restart your system press Esc two times 12 At the DOS prompt type EXIT and then press Enter 13 From the taskbar select Start Shut Down When the Shut Down window appears select Restart and then click OK 14 After your computer restarts double click My Computer 15 Right click on the new drive and select Format Figure 6 16 When the Format window appears select Full under ...

Page 9: ...ol Panel window double click Administrative Tools 4 In the Administrative Tools window double click Computer Management 5 In the Computer Management window double click Storage in the right win dow pane Figure 9 6 In the right pane of the Computer Management window double click Disk Management Local the Write Signature and Upgrade Disk Wizard will appear Figure 10 Click Next to continue 7 In the S...

Page 10: ... complete the formatting procedure Once the formatting procedure is fin ished your installation is complete you may access your newly formatted drive through your applications as well as My Computer Please note depending on the capacity of the drive you are working with the formatting procedure may take anywhere from a few seconds to a few minutes to complete WARNING By default NTFS will be select...

Page 11: ...Performance and Maintenance 4 In the Performance and Maintenance window click Administrative Tools 5 In the Administrative Tools window double click the Computer Management shortcut Figure 15 6 In the left pane of the Computer Management window double click Disk Management the Initialize and Convert Disk Wizard will appear Figure 16 Click Next to continue 7 In the Select Disks to Initialize window...

Page 12: ...plete the formatting procedure Once the formatting procedure finishes your installation is complete you may access your newly formatted drive through your applications as well as My Computer Please note depending on the capacity of the drive you are working with the formatting procedure may take anywhere from a few seconds to a few minutes to complete WARNING By default NTFS will be selected as th...

Reviews: