background image


Document Revision:   1.C 

Auto Discovery 

Template Revision:  62 


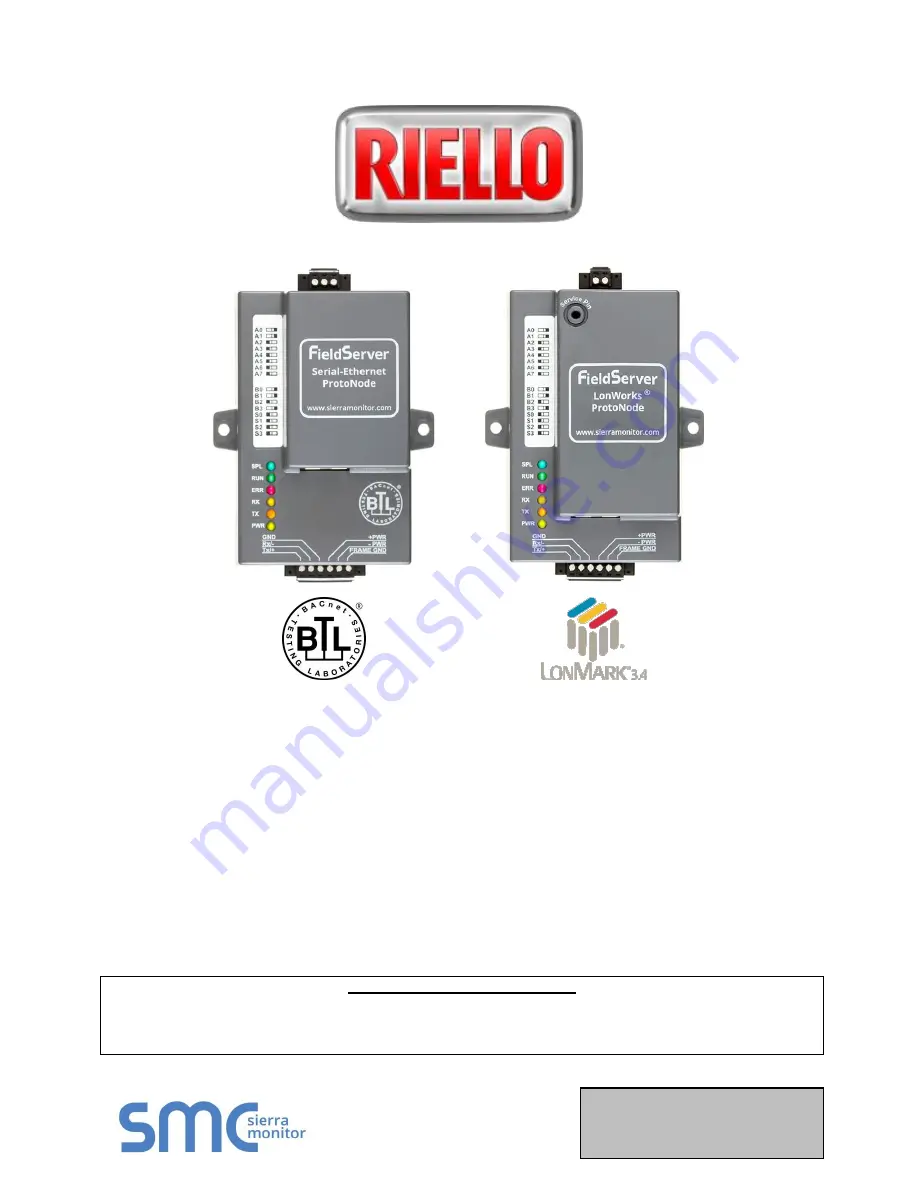
ProtoNode FPC-N38 and ProtoNode FPC-N39 


Start-up Guide 

For Interfacing Riello Array Boilers: 905 

To Building Automation Systems:  

BACnet MS/TP, BACnet/IP, Modbus TCP/IP, Metasys N2 

and LonWorks 


APPLICABILITY & EFFECTIVITY 

Explains ProtoNode hardware and installation.  

The instructions are effective for the above as of November 2016. 

Summary of Contents for FPC-N38

Page 1: ...FPC N39 Start up Guide For Interfacing Riello Array Boilers 905 To Building Automation Systems BACnet MS TP BACnet IP Modbus TCP IP Metasys N2 and LonWorks APPLICABILITY EFFECTIVITY Explains ProtoNode hardware and installation The instructions are effective for the above as of November 2016 ...

Page 2: ...Technical support of the ProtoNode product SMC does not provide direct support If Riello needs to escalate the concern they will contact Sierra Monitor Corporation for assistance Support Contact Information Riello North America 2165 Meadowpine Blvd Mississauga ON L5N 6H6 Canada Customer Service 800 474 3556 Website www rielloboilers com ...

Page 3: ...on 4 2 8 Connect ProtoNode FPC N38 s 3 pin RS 485 port to the Field Protocol cabling Section 4 3 or connect ProtoNode FPC N39 s 2 pin LonWorks port to the Field Protocol cabling Section 4 4 9 Connect Power to ProtoNode s 6 pin connector Section 4 5 10 When power is applied it will take about 3 minutes for all the devices to be discovered and the configuration file to be built Once Auto Discovery i...

Page 4: ... Turn Off to Save Configuration 18 5 BACnet IP or Modbus TCP IP Change the Protonode IP Address 19 5 1 Connect the PC to ProtoNode via the Ethernet Port 19 5 2 BACnet IP and Modbus TCP IP Setting IP Address for Field Network 20 6 BACnet MS TP and BACnet IP Setting Node_Offset to Assign Specific Device Instances 22 7 How to Start the Installation Over Clearing Profiles 23 8 LonWorks FPC N39 Commiss...

Page 5: ...5 Field Network 16 Figure 13 RS 485 BMS Network EOL Switch 16 Figure 14 LonWorks Terminal 16 Figure 15 Required current draw for the ProtoNode 17 Figure 16 Power Connections 17 Figure 17 S3 DIP Switch setting for Auto Discovering Devices 18 Figure 18 Web Configurator Screen 20 Figure 19 Changing IP Address via FS GUI 21 Figure 20 Web Configurator Screen with Active Profiles 22 Figure 21 LonWorks S...

Page 6: ...et btl for more information about the BACnet Testing Laboratory Click here for BACnet PIC Statement LonMark International is the recognized authority for certification education and promotion of interoperability standards for the benefit of manufacturers integrators and end users LonMark International has developed extensive product certification standards and tests to provide the integrator and u...

Page 7: ...d device connected to the ProtoNode and automatically configures them for BACnet MS TP BACnet IP Metasys 2 N2 by JCI Modbus TCP IP or LonWorks 3 It is not necessary to download any configuration files to support the required applications The ProtoNode is pre loaded with tested Profiles Configurations for the supported devices 2 Metasys is a registered trademark of Johnson Controls Inc 3 LonWorks i...

Page 8: ...8 1526 ProtoNode N39 FPC N39 1527 Figure 1 ProtoNode Part Numbers FPC N38 units have the following 3 ports RS 232 Ethernet RS 485 FPC N39 units have the following 3 ports LonWorks Ethernet RS 232 3 2 Point Count Capacity and Registers per Device The total number of Registers presented by all of the devices attached to the ProtoNode cannot exceed Part number Total Registers FPC N38 1526 1 500 FPC N...

Page 9: ...TU Baud Rate 9600 Parity None Data Bits 8 Stop Bits 2 Figure 4 Modbus COM Settings 3 3 2 Set Modbus RTU Node ID for each Device attached to the ProtoNode Set Modbus Node ID for each of the devices attached to ProtoNode The Modbus Node ID s need to be uniquely assigned between 1 and 255 o The Modbus Node ID that is assigned for each device needs to be documented The Modbus Node ID s assigned are us...

Page 10: ...outside of the box ProtoNode FPC N39 units do not use the S bank DIP switches S0 S2 to select a Field Protocol o On ProtoNode FPC N39 units these switches are disabled the Field Protocol is always LonWorks NOTE When setting DIP Switches ensure that power to the board is OFF ProtoNode FPC N38 S Bank DIP Switches Profile S0 S1 S2 BACnet IP Off Off Off BACnet MS TP On Off Off Metasys N2 Off On Off Mo...

Page 11: ...Node and to save the recently discovered configuration o See the table in Figure 6 for the switch setting to enable Auto Discovery o If the ProtoNode is being installed for the first time set S3 to the ON position to enable Auto Discovery o The ON position is when the DIP switches are set closest to the inside of the box S3 DIP Switch Auto Discovery Mode S3 Auto Discovery ON Build New Configuratio...

Page 12: ... auto discovery NOTE Never set a BACnet MS TP MAC Address from 128 to 255 Addresses from 128 to 255 are Slave Addresses and can not be discovered by BMS Front Ends that support auto discovery of BACnet MS TP devices Set A bank DIP switches A0 A7 to assign a MAC Address to the ProtoNode for BACnet MS TP Refer to Appendix C 1 for the complete range of MAC Addresses and DIP switch settings NOTE When ...

Page 13: ...t MS TP The baud rate on ProtoNode for Metasys N2 is set for 9600 B bank DIP switches B0 B3 are disabled for Metasys N2 on ProtoNode FPC N38 B bank DIP switches B0 B3 are disabled on ProtoNode FPC N39 LonWorks B0 B1 B2 B3 Off On 3 5 2 1 Baud Rate DIP Switch Selection Baud B0 B1 B2 B3 9600 On On On Off 19200 Off Off Off On 38400 On On Off On 57600 Off Off On On 76800 On Off On On Figure 9 BMS Baud ...

Page 14: ...Riello ProtoNode Start up Guide Page 14 of 43 4 INTERFACING PROTONODE TO DEVICES 4 1 ProtoNode FPC N38 and FPC N39 Showing Connection Ports Figure 10 ProtoNode FPC N38 upper and ProtoNode FPC N39 lower ...

Page 15: ...net and FPC N39 LonWorks Pins 1 through 3 are for RS 232 devices o Use standard grounding principles for RS 232 GND Pins 4 through 6 are for power Do not connect power until Section 4 5 Device Pins ProtoNode Pin Pin assignment Pin RS 232 Pin 1 RS 232 Pin RS 232 Pin 2 RS 232 Pin GND Pin 3 RS 232 GND Power In Pin 4 V Power In Pin 5 V Frame Ground Pin 6 FRAME GND Figure 11 Power and RS 232 Connection...

Page 16: ...on Switch needs to be enabled Figure 13 o The default setting from the factory is OFF switch position right side o To enable the EOL Termination turn the EOL switch ON switch position left side 4 4 LonWorks FPC N39 Wiring LonWorks Devices to the LonWorks Terminal Wire the LonWorks device network to the ProtoNode LonWorks Terminal o Use approved cable per the FT 10 installation guidelines LonWorks ...

Page 17: ... These values are nominal and a safety margin should be added to the power supply of the host system A safety margin of 25 is recommended Figure 15 Required current draw for the ProtoNode Apply power to ProtoNode as show below in Figure 16 Ensure that the power supply used complies with the specifications provided in Appendix D 1 ProtoNode accepts either 9 30VDC or 12 24 VAC on pins 4 and 5 Frame ...

Page 18: ... to a ProtoNode that is set to Enable Auto Discovery it will take 3 minutes to complete the discovery of all of the RS 485 devices attached to the ProtoNode The TX LED will flash during Auto Discovery The TX LED will stop flashing when completed Once the ProtoNode has discovered all of the RS 485 devices set the S3 DIP switch to the OFF position to save the current configuration Then turn the powe...

Page 19: ...d ProtoNode The Default IP Address of ProtoNode is 192 168 1 24 Subnet Mask is 255 255 255 0 If the PC and ProtoNode are on different IP Networks assign a static IP Address to the PC on the 192 168 1 xxx network For Windows XP Go to Right click on Local Area Connection Properties Highlight For Windows 7 or later Go to Right click on Local Area Connection Properties Highlight For Windows XP and Win...

Page 20: ...nstructions The Web Configurator is displayed as the landing page Figure 18 NOTE Below the Active profiles heading are listed the profiles for connected devices If no profiles are present then the wiring baud rate and DIP switch settings must be checked because there is a problem with device communications All the active profiles must show the correct Node ID s before proceeding NOTE If multiple d...

Page 21: ...IP Gateway Default Gateway field Type in a new IP Gateway NOTE If the ProtoNode is connected to a router the IP Gateway of the ProtoNode should be set to the IP Address as the router Reset ProtoNode Unplug Ethernet cable from PC and connect it to the network hub or router Record the IP Address assigned to the ProtoNode for future reference NOTE For FieldPoP information refer to the FieldPoP Device...

Page 22: ...om 1 to 4 194 303 To assign a specific Device Instance or range change the Node_Offset value as needed using the calculation below Device Instance desired Node_Offset Modbus Node_ID For example if the desired Device Instance for the 1 st device is 1 001 and the following is true Device 1 has a Modbus Node ID of 1 Device 2 has a Modbus Node ID of 22 Device 3 has a Modbus Node ID of 33 Then plug the...

Page 23: ...default address is 192 168 1 24 If the IP Address of the ProtoNode has been changed by previous configuration the assigned IP Address will need to be obtained from the network administrator The Web Configurator is displayed as the landing page At the bottom left of the page click the Clear Profiles and Restart button Once restart is complete all past profiles discovered and or added via Web config...

Page 24: ...s Network Management Tool If an XIF file is required see steps in Section 8 1 1 to generate XIF 8 1 1 Instructions to Download XIF File from ProtoNode FPC N39 Using Browser Connect a CAT5 Ethernet cable Straight through or Cross Over between the PC and ProtoNode The Default IP Address of ProtoNode is 192 168 1 24 Subnet Mask is 255 255 255 0 If the PC and ProtoNode are on different IP Networks ass...

Page 25: ...wser and go to the following address IP Address of ProtoNode fserver xif o Example 192 168 1 24 fserver xif If the web browser prompts to save the file save the file onto the local PC If the web browser displays the xif file as a web page save the file onto the local PC as fserver xif Figure 22 Sample of Fserver XIF File Generated ...

Page 26: ...oad the BACnet Explorer Start up Guide For purchasing information look up the BACnet Explorer page on the Sierra Monitor website www sierramonitor com connect all protocol gateway products bacnet explorer and click on the BUY NOW tab Multi Port Switch BACnet MS TP BACnet IP PC Connected to BACnet Explorer s Web Browser BACnet IP BACnet Explorer Modbus RTU up to 32 BACnet MS TP devices BACnet Route...

Page 27: ...tor com customer care resource center filters software downloads Extract the executable file and complete the installation Disable any wireless Ethernet adapters on the PC Laptop Disable firewall and virus protection software if possible Connect a standard CAT5 Ethernet cable between the PC and ProtoNode Double click on the FS Toolbox Utility Check IP Addresses from the Device listings Correct IP ...

Page 28: ...rotoNode into the web browser or use the FieldServer Toolbox to connect to the ProtoNode Click on Diagnostics and Debugging Button then click on view and then on connections If there are any errors showing on the Connection page refer to Appendix A 3 for the relevant wiring and settings Figure 25 Error messages screen ...

Page 29: ... bits o Check Modbus device address o Verify wiring o Verify Modbus device is connected to the same subnet as the ProtoNode o Verify the Modbus device was discovered in Web Configurator Section 5 2 Field COM problems o If Ethernet protocols are used observe Ethernet LEDs on the ProtoNode Appendix A 4 o Check dipswitch settings using correct baud rate and device instance o Verify IP Address setting...

Page 30: ...ill go on solid 15 seconds after power up It will turn off after 5 seconds A steady red light will indicate there is a system error on the unit If this occurs immediately report the related system error shown in the error screen of the FS GUI interface to support for evaluation RX The RX LED will flash when a message is received on the serial port on the 6 pin connector If the serial port is not u...

Page 31: ...he Sierra Monitor Corporation web page under Customer Care Resource Center Software Downloads http www sierramonitor com customer care resource center filters software downloads Extract the executable file and complete the installation Disable any wireless Ethernet adapters on the PC Laptop Disable firewall and virus protection software if possible Connect a standard Cat5 Ethernet cable between th...

Page 32: ... up Guide Page 32 of 43 o Select full Diagnostic NOTE If desired the default capture period can be changed o Click on Start Diagnostic o Wait for Capture period to finish then the Diagnostic Test Complete window will appear ...

Page 33: ... of 43 Step 2 Send Log o Once the Diagnostic test is complete a zip file is saved on the PC o Choose Open to launch explorer and have it point directly at the correct folder o Contact Riello customer service to review the Diagnostic zip file ...

Page 34: ...lowing a Click on Setup b Click on File Transfer c Click on the Firmware tab 5 In the Firmware tab click on Choose Files and select the firmware file extracted in step 1 6 Click on the orange Submit button 7 When the download is complete click on the System Restart button Appendix A 7 BACnet Setting Network_Number for more than one ProtoNode on Subnet For both BACnet MS TP and BACnet IP if more th...

Page 35: ...e Admin account has unrestricted access to the ProtoNode The User account can view any ProtoNode information but cannot make any changes or restart the ProtoNode The password needs to be a minimum of eight characters and is case sensitive If the password is lost click cancel on the password authentication popup window and contact Riello customer service to receive a temporary password Access the P...

Page 36: ... SNVT_switch Boiler 7 Available Present BI 21 DI 21 nvoB7Avail_XXX SNVT_switch Boiler 8 Available Present BI 22 DI 22 nvoB8Avail_XXX SNVT_switch Boiler 1 Is Active Heating BI 23 DI 23 nvoB1ActHt_XXX SNVT_switch Boiler 2 Is Active Heating BI 24 DI 24 nvoB2ActHt_XXX SNVT_switch Boiler 3 Is Active Heating BI 25 DI 25 nvoB3ActHt_XXX SNVT_switch Boiler 4 Is Active Heating BI 26 DI 26 nvoB4ActHt_XXX SNV...

Page 37: ...X SNVT_temp_p Module Burner 2 Flue Sensor Temp AI 84 AI 84 nvoM2FlSenTp_XXX SNVT_temp_p Module Burner 2 Total Burn Hours AI 85 AI 85 nvoM2TotBnHr_XXX SNVT_time_hour Module Burner 3 Current State AI 86 AI 86 nvoM3CurSt_XXX SNVT_count_f Module Burner 3 Error AI 87 AI 87 nvoM3Err_XXX SNVT_count_f Module Burner 3 Supply SP AI 88 AI 88 nvoM3SupSP_XXX SNVT_temp_p Module Burner 3 Power Level AI 89 AI 89 ...

Page 38: ..._p Module Burner 7 Return Sensor Temp AI 138 AI 138 nvoM7RetSnTp_XXX SNVT_temp_p Module Burner 7 Flue Sensor Temp AI 139 AI 139 nvoM7FlSenTp_XXX SNVT_temp_p Module Burner 7 Total Burn Hours AI 140 AI 140 nvoM7TotBnHr_XXX SNVT_time_hour Module Burner 8 Current State AI 141 AI 141 nvoM8CurSt_XXX SNVT_count_f Module Burner 8 Error AI 142 AI 142 nvoM8Err_XXX SNVT_count_f Module Burner 8 Supply SP AI 1...

Page 39: ... Off On Off On Off Off 42 Off On Off On Off On Off Off 43 On On Off On Off On Off Off 44 Off Off On On Off On Off Off 45 On Off On On Off On Off Off 46 Off On On On Off On Off Off Address A0 A1 A2 A3 A4 A5 A6 A7 47 On On On On Off On Off Off 48 Off Off Off Off On On Off Off 49 On Off Off Off On On Off Off 50 Off On Off Off On On Off Off 51 On On Off Off On On Off Off 52 Off Off On Off On On Off Of...

Page 40: ...Off On Off On Off Off Off On 139 On On Off On Off Off Off On 140 Off Off On On Off Off Off On 141 On Off On On Off Off Off On Address A0 A1 A2 A3 A4 A5 A6 A7 142 Off On On On Off Off Off On 143 On On On On Off Off Off On 144 Off Off Off Off On Off Off On 145 On Off Off Off On Off Off On 146 Off On Off Off On Off Off On 147 On On Off Off On Off Off On 148 Off Off On Off On Off Off On 149 On Off On ...

Page 41: ...n On 219 On On Off On On Off On On 220 Off Off On On On Off On On 221 On Off On On On Off On On 222 Off On On On On Off On On 223 On On On On On Off On On 224 Off Off Off Off Off On On On 225 On Off Off Off Off On On On 226 Off On Off Off Off On On On 227 On On Off Off Off On On On 228 Off Off On Off Off On On On 229 On Off On Off Off On On On 230 Off On On Off Off On On On 231 On On On Off Off On...

Page 42: ... to 75 C 40 F to167 F Surge Suppression EN61000 4 2 ESD EN61000 4 3 EMC EN61000 4 4 EFT Humidity 5 90 RH non condensing Specifications subject to change without notice Figure 29 Specifications Appendix D 1 1 Compliance with UL Regulations For UL compliance the following instructions must be met when operating ProtoNode The units shall be powered by listed LPS or Class 2 power supply suited to the ...

Page 43: ...ion or on which original identification marks have been removed or altered This Limited Warranty also will not apply to interconnecting cables or wires consumables or to any damage resulting from battery leakage In all cases Sierra Monitor Corporation s responsibility and liability under this warranty shall be limited to the cost of the equipment The purchaser must obtain shipping instructions for...

Reviews: