Shining 3D FreeScan UE Pro, User Manual
The Shining 3D FreeScan UE Pro is a cutting-edge 3D scanning device for professionals. Capture high-precision, detailed scans easily with this user-friendly tool. Enhance your scanning experience by downloading the comprehensive user manual for free from our website. Unlock the full potential of your device and get started today!
Share
Download


Reviews:
No comments
Related manuals for FreeScan UE Pro

easy-scan
Brand: Easy Pix Pages: 2

VersaMax GFK-2721A
Brand: GE Pages: 62

DocketPORT 468
Brand: Docucap Pages: 12

IS4320 ScanGlove
Brand: Metrologic Pages: 48

KV-SS50
Brand: Panasonic Pages: 1

KV-SS25D
Brand: Panasonic Pages: 1

KV-SS25D
Brand: Panasonic Pages: 4

KV-SS25
Brand: Panasonic Pages: 2

KV-S7075C
Brand: Panasonic Pages: 2

KV-S7075C
Brand: Panasonic Pages: 4

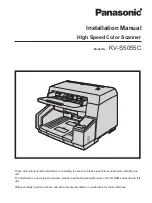
KV-S5055C
Brand: Panasonic Pages: 6

KV-SS25D
Brand: Panasonic Pages: 20

KV-S6040W - Document Scanner
Brand: Panasonic Pages: 8

KV-SS25
Brand: Panasonic Pages: 20

KV-S7075C
Brand: Panasonic Pages: 20

KV-SS080
Brand: Panasonic Pages: 32
KV-S5055C
Brand: Panasonic Pages: 24

KV-S7077
Brand: Panasonic Pages: 53


