background image

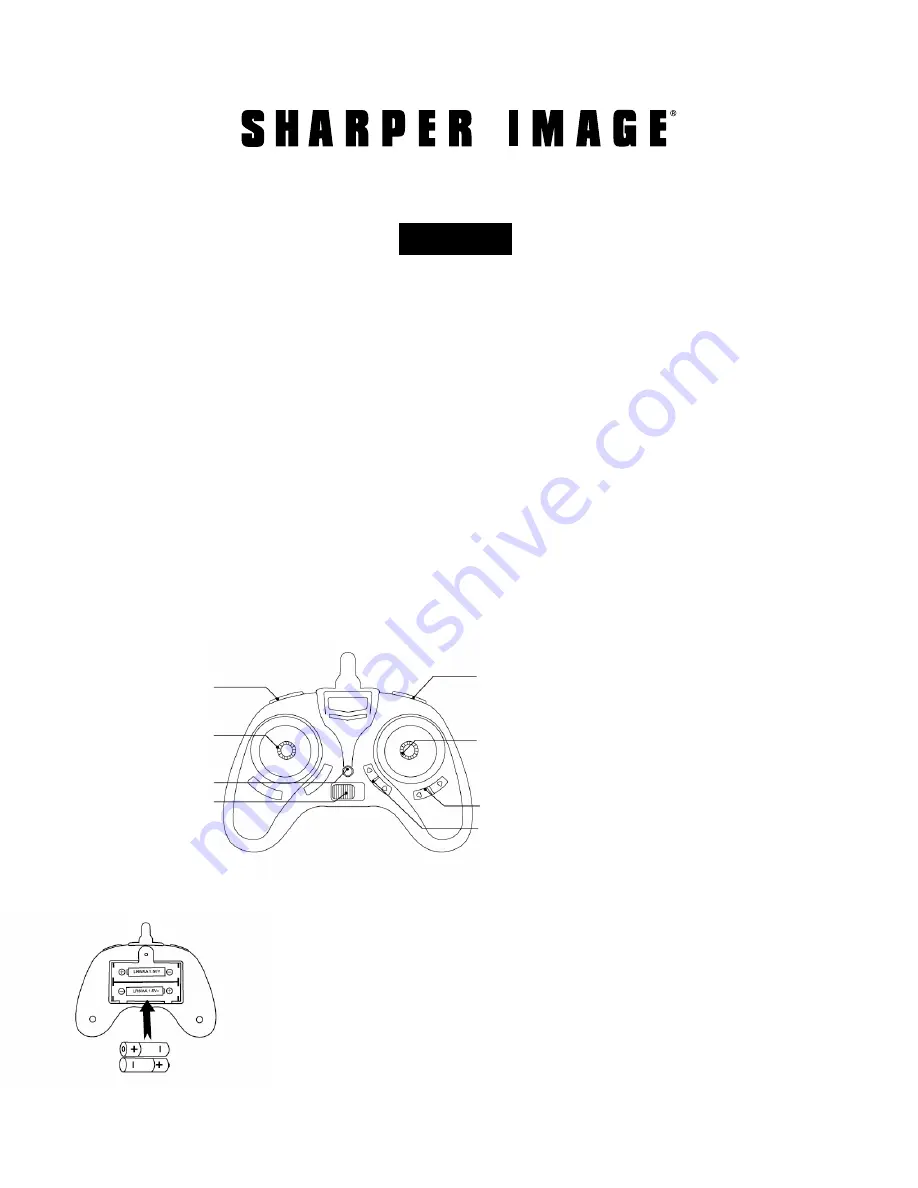
Photo button

Throttle lever  

(with speed control button) 

Indicator light

Power switch


Video button

Forward/backward lever
Flip button 

Aileron trim (left/right) 

Elevator trim (forward/backward)

- 1 -

FEATURES 

• 

Reliable 2.4 gHz RF communication

• 

Built-in gyro for smooth flying

• 

Indoor/outdoor use 

• 

3 speed levels (40%, 75%, 100%)

• 

Shoots high definition AVI video (1280x720P)

• 

Shoots high-quality JPEG images 

CONTROLLER COMPONENTS  

SETTING UP THE CONTROLLER 

1.  Unscrew the battery cover.
2.  Insert 2 AA batteries, making sure you follow the correct polarity (“+” 

or “-”) as indicated in the battery compartment. 

3.  Re-attach the battery cover. 

NOTE: Always use alkaline batteries. Do not mix old and new batteries. 
Keep batteries out of reach of children at all times. Always have an adult 
install the batteries. 

• 

360° flips

• 

Flight range: 60 ft.

• 

LED lights

• 

Charge time: approximately  


50 minutes

• 

Flight time: approximately 5 minutes

Item No. 206003 

MOSQUITO HD VIDEO DRONE WITH LED LIGHTS

User Manual 

Thank you for purchasing the Sharper Image Mosquito HD Video Drone with LED Lights.  

This advanced nano quadcopter is designed for all skill levels. 

Summary of Contents for Mosquito

Page 1: ... battery cover 2 Insert 2 AA batteries making sure you follow the correct polarity or as indicated in the battery compartment 3 Re attach the battery cover NOTE Always use alkaline batteries Do not mix old and new batteries Keep batteries out of reach of children at all times Always have an adult install the batteries 360 flips Flight range 60 ft LED lights Charge time approximately 50 minutes Fli...

Page 2: ...d socket See illustration below Never try to force the connection If the pins are bent do not attempt to charge the battery Consult Sharper Image Customer Service 7 Connect the other end of the charging cable into a COMPUTER USB PORT ONLY Do not use a mobile phone charging adapter 8 The LED on the USB charging cable will light up RED when it is charging and will turn OFF when it is fully charged 9...

Page 3: ...32GB SHOOTING PHOTOS AND VIDEO 1 The LED on the front of the drone will start to flash Place the drone down on a flat level surface 2 Ensure that the Up Down lever on the controller the LEFT stick is in the fully down position Then turn on the controller power switch To pair the controller and the drone raise the Up Down lever on the controller all the way up to the top position then lower it all ...

Page 4: ...osquito Drone Control Guide Direction Drone View Instructions Controller View Ascending and Descending Push up on the throttle lever left stick to go up Do this slowly at first until you learn the instrument s sensitivity When you push down on this lever the drone will start to go down Spin Right and Spin Left Push left on the throttle lever to spin the drone left Push right to spin the drone righ...

Page 5: ...it drifts FORWARD Press the Forward Backward Trim Button Down till the drone stops flying forwards 5 It may be necessary to adjust the trim fine tune the controls before a flight When you lift off your Mosquito Drone into the air and don t use any other control levers it should just hover in one spot If it doesn t you can follow the instructions below to bring your drone to a perfect hover TRIMMIN...

Page 6: ...sh up to perform a forward flip push down to perform a backward flip push right to perform a rifght flip and push left to perform a left flip 4 After one flip the controller reverts to normal flying mode HOW TO PERFORM A 360 STUNT FLIP When you first set up your Mosquito Drone it will automatically be set to Speed 1 which is the slowest speed and great for indoor flying To change speeds press the ...

Page 7: ...lies with Part 15 of the FCC Rules Operation is subject to the following two conditions 1 This device may not cause harmful interference and 2 This device must accept any interference received including interference that may cause undesired operation Note This equipment has been tested and found to comply with the limits for a Class B digital device pursuant to part 15 of the FCC Rules These limit...

Page 8: ... Image branded items purchased from SharperImage com include a 1 year limited replacement warranty For Customer Service please call 1 877 210 3449 The SHARPER IMAGE name and logo are registered trademarks Sharper Image All Rights Reserved ...

Reviews: