background image

IMPORTANT

PLEASE KEEP THE EXTERNAL & INTERNAL PACKAGING SAFE.

 PLEASE DO NOT THROW IT AWAY.

IN THE UNLIKELY EVENT OF A HARDWARE FAILURE, OUR 

REPAIR CENTRE WILL ASK YOU TO PUT YOUR SHARP 

FACSIMILE IN THIS BOX.

 THANK YOU FOR YOUR ASSISTANCE. 
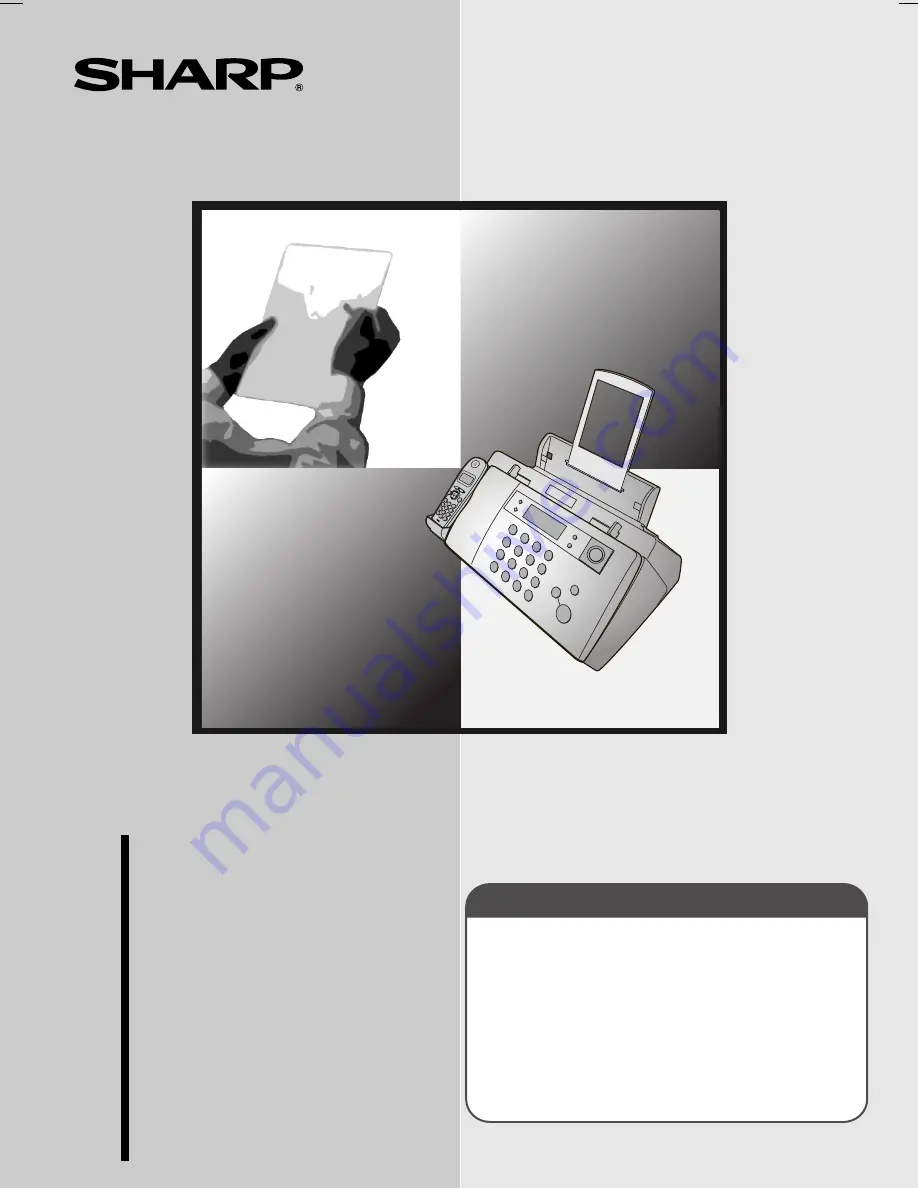
FACSIMILE

OPERATION MANUAL

UX-BD80H_ENGLISH_E4473

MODEL

UX-BD80/UX-BD90

UX-BD80/BD90

F

A

CSIMILE

1. Installation

2. Using the Cordless Handset

3. SMS Text Messaging

4. Using the Answering Machine

5. Sending Faxes

6. Receiving Faxes

7. Making Copies

8. Special Functions

9. Printing Lists

10. Maintenance

11. Troubleshooting

Summary of Contents for UX-BD80

Page 1: ...E WILL ASK YOU TO PUT YOUR SHARP FACSIMILE IN THIS BOX THANK YOU FOR YOUR ASSISTANCE FACSIMILE OPERATION MANUAL MODEL UX BD80 UX BD90 1 Installation 2 Using the Cordless Handset 3 SMS Text Messaging 4 Using the Answering Machine 5 Sending Faxes 6 Receiving Faxes 7 Making Copies 8 Special Functions 9 Printing Lists 10 Maintenance 11 Troubleshooting ...

Page 2: ...yellow The wire which is coloured BLUE must be connected to the terminal which is marked with the letter N or coloured black The wire which is coloured BROWN must be connected to the terminal which is marked with the letter L or coloured red This apparatus must be protected by a 13A fuse in the mains plug or distribution board WARNING THIS APPARATUS MUST BE EARTHED This equipment complies with the...

Page 3: ...width 203 mm max Memory size 448 KB approx 24 average pages with ECM turned off 20 minutes of voice messages including OGMs Automatic dialling 30 numbers Welcome and thank you for choosing a SHARP fax machine and cordless handset In addition to the cordless handset s included with the machine two cordless handsets are included with the UX BD90 one cordless handset is included with the UX BD80 othe...

Page 4: ...ut document size Automatic feeding Width 148 to 216 mm Length 140 to 297 mm Manual feeding Width 148 to 216 mm Length 140 to 600 mm Effective scanning width 210 mm max Scanning Resolution Horizontal 8 lines mm Vertical Standard 3 85 lines mm Fine Halftone 7 7 lines mm Super fine 15 4 lines mm Halftone grayscale 64 levels Contrast control Automatic Dark selectable Copy function Single Multi Sort 99...

Page 5: ... DECT Digital Enhanced Cordless Telecommunications GAP Generic Access Profile Frequency 1 88 to 1 9 GHz Duplex operation TDMA Time Division Multiple Access Dimensions Width 51 mm Depth 29 mm Height 145 mm Weight Approx 130 g with battery Battery 1 2 V Ni MH battery capacity 630 mAh x 3 pcs min 600 mAh Power consumption Initial charging Battery life Battery life in standby mode Approx 1 0 W in stan...

Page 6: ...machine from the power outlet and telephone socket and consult a qualified service representative if any of the following situations occur Liquid has been spilled into the machine or the machine has been exposed to rain or water The machine produces odors smoke or unusual noises The power cord is frayed or damaged The machine has been dropped or the housing damaged Do not allow anything to rest on...

Page 7: ...nd cause injury or burns to the eyes and skin The fluid may be toxic if swallowed In case of contact with eyes flush with clean water do not rub and seek medical attention immediately Do not store or carry a battery with other metal objects such as keys or pins These may short the battery and cause it to overheat Do not allow a battery to become wet Do not dispose of a battery in a fire or heat a ...

Page 8: ... 39 Volume Adjustment on the Machine 40 2 Using the Cordless Handset 44 About the Cordless Handset System 44 Making a Phone Call 46 Receiving a Phone Call 47 Receiving a Fax Using the Cordless Handset 48 Storing and Using Auto Dial Numbers 48 Dialling From the Incoming Outgoing Call List Redial 54 Using the Intercom Feature 55 Transferring Calls 57 Adjusting the Ringing Melody and Volume 60 Other ...

Page 9: ...g 110 Sending a Fax by Automatic Dialling 111 Using the Speakerphone to Make a Phone Call 120 Batch Page Numbering 121 Sending a Fax From Memory 122 6 Receiving Faxes 125 Using TEL FAX Mode 125 Using A M Mode 126 Using FAX Mode 127 Using TEL Mode 128 Optional Reception Settings 130 Substitute Reception to Memory 132 7 Making Copies 133 8 Special Functions 136 Caller ID Requires Subscription to Ser...

Page 10: ...ing the Machine 148 Improving Print Quality 151 Replacing the Cordless Handset Batteries 156 11 Troubleshooting 158 Problems and Solutions 158 Messages and Signals 165 Clearing Paper Jams 170 Quick Reference Guide 172 Index 174 ...

Page 11: ...d prompts to help you operate the machine R key If you are on a Flash type PBX use this key to dial out first press the R key and then dial the number page 110 RESOLUTION RECEPTION key When a document is in the feeder press this key to adjust the resolution for faxing or copying page 108 At any other time press this key to select the reception mode the selected reception mode will appear in the di...

Page 12: ...t a distance of about 50 cm to 1m page 120 This key can also be used to listen to the line and fax tones through the speaker when faxing a document page 110 This key also functions as a delete key when composing an SMS message STOP key Press this key to cancel an operation before it is completed START MEMORY key Press this key after dialling to begin fax transmission page 111 Press this key before...

Page 13: ...L and FAX icons appear when the reception mode is set to TEL FAX The envelope icon appears while an SMS message is being received The exclamation point icon appears when the inbox is full When checking the messages in your outbox this appears if the message being viewed was not sent successfully TEL FAX TEL 01 JAN 10 30 01 JAN 12 00 TEL The microphone is located here Speak facing this location whe...

Page 14: ...u have Caller ID you can hold down the key to access the Caller ID list in the fax machine During a phone conversation this key can be pressed to issue a flash signal If you are on a flash type PBX this key can be used to dial out key and key Receiver volume When talking on the cordless handset press these keys to adjust the receiver volume Scroll through option settings When not talking on the co...

Page 15: ...hold this key down until a hyphen appears to insert a pause between digits key Use this key to search for an auto dial number press key and then press key and key to scroll through your auto dial numbers If you hear a fax tone when you answer a call press this key to begin fax reception TALK key Press this key to make or answer a call To turn on the power of the cordless handset when it is off hol...

Page 16: ...es when is pressed on the cordless handset and blinks when a call comes in This appears when a new SMS message has been received in the machine this changes to when all SMS messages have been read Note that the cordless handset cannot be used to read SMS messages This appears when new messages have been received in the fax machine s answering system This appears when the cordless handset and the f...

Page 17: ...ax machine Cordless handset space Fax machine Note that lower case letters in the fax machine display will appear as upper case letters in the cordless handset display and a letter with an umlaut will appear as a space In addition the following characters appear differently in the fax machine and cordless handset displays Characters that appear in the cordless handset display ...

Page 18: ...lowing items If any are missing contact your dealer or retailer Operation manual Cordless handset Telephone line cord Print cartridge Paper tray Paper tray extension Battery cover Rechargeable batteries 3 Cordless handset charger UX BD90 only Note The UX BD90 comes with 2 cordless handsets ...

Page 19: ...ation away from obstructions such as walls Keep the machine away from other electrical appliances such as TVs microwave ovens computers and other cordless phones High and central location with no obstructions Do not place the machine in direct sunlight Do not place the machine near heaters or air conditioners Keep dust away from the machine Keep the area around the machine clear ...

Page 20: ...Setting Up 18 1 Open the operation panel 2 Open the print compartment cover 3 Remove the tape 4 Close the print compartment cover and then the operation panel Removing the packing tape ...

Page 21: ... tray extension Click Note The paper tray extension has a top side and a bottom side If the tabs do not go into the holes turn the support over Insert horizontally and rotate up Caution Do not pull out the black plastic strip shown below If the strip is pulled out paper will not feed correctly ...

Page 22: ...ges are even 2 Insert the stack of paper into the tray PRINT SIDE UP If paper remains in the tray take it out and combine it into a single stack with the new paper Be sure to load the paper so that printing takes place on the print side of the paper Printing on the reverse side may result in poor print quality GENTLY LOAD PAPER INTO THE PAPER TRAY DO NOT FORCE IT DOWN INTO THE FEED SLOT Note Do no...

Page 23: ... surge protectors for the power and telephone lines Surge protectors can be purchased at most telephone specialty stores CHECK CARTRIDGE normally appears in the display the first time you plug in the machine This message appears until you install the print cartridge The machine does not have a power on off switch so the power is turned on and off by simply plugging in or unplugging the power cord ...

Page 24: ...ode ON Approx 200 A4 pages Replacement cartridge SHARP UX C70B Quality mode OFF Approx 600 A4 pages Quality mode ON Approx 400 A4 pages Quality mode is initially turned off To turn on Quality mode see page 27 Caution Do not open the print compartment cover or insert your hand in the machine while it is printing Note Keep print cartridges sealed in their packages until you are ready to install them...

Page 25: ...effect The print cartridge holder moves to the cartridge replacement position 2 Open the operation panel 3 Open the print compartment cover 4 Remove only the tape from the new cartridge Important Make sure you remove all of the tape CAUTION DO NOT touch the gold contact area on the cartridge INK INK Display 29 MAY 12 00 PRESS INK KEY 29 MAY 12 00 REPLACE INK ...

Page 26: ... inside the cartridge holder or pull on the cable that is connected to the cartridge holder 6 Insert the new print cartridge into the cartridge holder 7 Place your index finger on the tab as shown and close the cartridge holder cover with your thumb Make sure the cover clicks into place Gold contact area Note If the print compartment cover is left open for approximately 30 minutes with a cartridge...

Page 27: ...0 Press to make the print cartridge holder return to its home position 11 Press NEW if the cartridge you installed is new Press OLD if the cartridge you installed is old INK Display when NEW is selected Display 29 MAY 12 00 PRESS INK KEY 29 MAY 12 00 REPLACE INK 29 MAY 12 00 1 NEW 2 OLD 29 MAY 12 00 CHANGE CARTRIDGE 29 MAY 12 00 OK PRESS START 29 MAY 12 00 NEW CART OK ...

Page 28: ... right Continue with the following steps to align the print cartridge 13 Press to print an alignment page To enter an alignment value without printing an alignment page press 14 In the alignment page that the machine prints locate the line that comes closest to forming a completely straight line START MEMORY In this example 15 comes closest to forming a straight line After the alignment page is pr...

Page 29: ...f the tray is empty add paper If there is paper in the tray take it out and then reinsert it When you are finished press START MEMORY Quality mode using more less ink If you prefer a higher quality image when printing faxes and copies turn on Quality mode If you wish to use less ink or speed up ink drying time turn off Quality mode Quality mode is initially turned off 1 Press once and 3 times 2 Pr...

Page 30: ...you prefer a faster printing speed over image quality turn off the setting Important This setting is only effective when Quality mode page 27 is turned on Note This setting only affects the printing speed It does not affect the amount of ink used The high quality fax print setting is initially turned on 1 Press once and 3 times 2 Press once and 3 times 3 Press once 4 Press YES to turn on high qual...

Page 31: ...d of the line cord into the socket on the back of the machine marked TEL LINE Insert the other end into a wall telephone socket Extension phone optional If desired you can connect an extension phone to the TEL SET socket on the fax machine 1 Remove the seal covering the TEL SET socket TEL SET TEL LINE ...

Page 32: ...he battery precautions on page 5 1 Insert the batteries into the cordless handset making sure that the and sides are placed correctly 2 Connect the extension phone line to the TEL SET socket using an appropriate adapter please purchase an adapter separately Eire Insert the extension phone line directly into the TEL SET socket TEL LINE TEL SET ...

Page 33: ...annot be overcharged When not using the cordless handset keep it in the cradle to ensure that it is always charged When the batteries need charging will blink in the display and you will hear beeps during a phone conversation If you need to continue the conversation transfer the call to the machine or to another cordless handset see page 57 Place the cordless handset in the cradle and let it charg...

Page 34: ...h a second cordless handset If your model includes a charger and a second cordless handset install the batteries in the second cordless handset as explained in the previous section and then use the charger to charge the second cordless handset as explained below 1 Plug the AC adapter into a standard 230 V AC outlet Important Never cover the charger and AC adapter with a blanket cloth or other mate...

Page 35: ...is information it will automatically appear at the top of each fax page you send 1 Press once and 3 times 2 Press once 3 Press once 4 Enter your fax number by pressing the number keys max 20 digits To insert a space between digits press To enter press To clear a mistake press DIGITAL SPEAKERPHONE Display Z A REC MEMO DELETE REPEAT SKIP INK POLL RESOLUTION RECEPTION PLAY HOLD R DIGITAL SPEAKERPHONE...

Page 36: ...hat require the same key press after entering the first letter To clear a mistake press To enter a lower case letter continue pressing the key for the letter until the lower case letter appears To enter one of the following symbols press or repeatedly 7 Press 8 Press to return to the date and time display START MEMORY DIGITAL SPEAKERPHONE START MEMORY Display A B C D E F G H I J K L M N O P Q R S ...

Page 37: ...once and once 3 Press once 4 Enter a two digit number for the day 01 to 31 Example the 5th To correct a mistake press to move the cursor back to the mistake and then enter the correct number Z A REC MEMO DELETE REPEAT SKIP INK POLL RESOLUTION RECEPTION PLAY HOLD R DIGITAL SPEAKERPHONE START MEMORY DATE TIME SET Display ENTRY MODE The currently set date appears example DATE TIME SET DATE 15 08 2004...

Page 38: ... four digits Example 2004 7 Enter a two digit number for the hour 00 to 23 and a two digit number for the minute 00 to 59 Example 9 25 8 Press to start the clock 9 Press to return to the date and time display START MEMORY The currently set time appears example DATE TIME SET DATE 05 01 2004 DATE TIME SET TIME 12 19 05 JAN 09 25 PRESS START KEY ANTI JUNK ...

Page 39: ...answering on the cordless handset TEL FAX mode This mode is convenient for receiving both faxes and voice calls When a call comes in the machine will detect whether it is a voice call including manually dialled faxes or an automatically dialled fax If it is a voice call the machine will make a special ringing sound to alert you to answer If it is an automatically dialled fax reception will begin a...

Page 40: ...tting the reception mode Make sure a document is not loaded in the document feeder and then press until the desired mode appears in the display RESOLUTION RECEPTION Z A POLL RESOLUTION RECEPTION PLAY HOLD R DIGITAL SPEAKERPHONE REC MEMO DELETE REPEAT SKIP INK RESOLUTION RECEPTION RESOLUTION RECEPTION 02 JAN 10 30 02 JAN 10 30 02 JAN 10 30 02 JAN 10 30 FAX TEL FAX TEL ...

Page 41: ...connect to an outside line you must select the appropriate Flash Select setting depending on whether your PBX line is a normal telephone line or a high speed line 1 Press once and 4 times 2 Press once and 4 times 3 Press once 4 Select SHORT TIME if your PBX line is a normal telephone line Select LONG TIME if your PBX line is a high speed line 5 Press to return to the date and time display The disp...

Page 42: ...just the volume of the cordless handset receiver see page 46 To adjust the volume of the cordless handset ringer see page 60 1 Press 2 Press or to select the desired volume level Press again to turn off the speaker DIGITAL SPEAKERPHONE DIGITAL SPEAKERPHONE Speaker Z A POLL RESOLUTION RECEPTION PLAY HOLD R DIGITAL SPEAKERPHONE REC MEMO DELETE REPEAT SKIP INK DIGITAL SPEAKERPHONE ...

Page 43: ... pressed and a document is not loaded in the feeder The ringer will ring once at the selected level 2 If you selected RINGER OFF OK to turn off the ringer press DIGITAL SPEAKERPHONE START MEMORY Machine ringer Display 29 MAY 12 00 RINGER HIGH 29 MAY 12 00 RINGER MIDDLE 29 MAY 12 00 RINGER LOW 29 MAY 12 00 RINGER OFF OK ...

Page 44: ... once 4 Press to turn on the error beep or to turn off the error beep 5 Press to return to the date and time display The display briefly shows your selection then End beep off The fax machine normally sounds one long beep when transmission reception or copying ends normally for an SMS message the end beep only sounds when a message is received not when a message is sent If you wish to turn off the...

Page 45: ...normally sounds a beep key tone each time you press a key on the operation panel If you wish to turn off the key tone follow the steps below 1 Press once and 4 times 2 Press once and once 3 Press once 4 Press to turn on the key tone or to turn off the key tone 5 Press to return to the date and time display The display briefly shows your selection then END BEEP 1 YES 2 NO KEY TONE Display OPTION SE...

Page 46: ...ss handsets are included with the UX BD90 one cordless handset is included with the UX BD80 other cordless handsets that support the DECT GAP standard can also be added The total number of cordless handsets that can be used with the machine is six The UX BD80 90 base the machine complies with the GAP Generic Access Prophile standard and supports the following functions Outgoing calls incoming call...

Page 47: ...d Note that once a cordless handset receives a call it must remain within the communication range of the base that is transmitting the call A call can only be transferred from a cordless handset to the base that it is currently using or to another cordless handset that is using the same base To use a cordless handset with additional bases the cordless handset must be registered in each of those ba...

Page 48: ...are on a Flash type PBX and are dialing out press wait for the connection to the outside line and then dial the number 3 When you are ready to end the call press If the END CALL setting is set to ON see page 63 you can also end the call by simply placing the cordless handset in the cradle or charger if you have one Cordless handset receiver volume To adjust the volume of the cordless handset recei...

Page 49: ... you are ready to resume the call press once again If the END CALL setting is set to ON see page 63 placing the cordless handset in the cradle or charger if applicable will end the call even if the call is on hold If the END CALL setting is set to OFF placing the cordless handset in the cradle or charger if applicable will not break the connection while a call is on hold and thus phone charges may...

Page 50: ... reception for more information see page 129 Storing and Using Auto Dial Numbers You can store your most frequently dialed numbers for automatic dialing Numbers can be stored in the cordless handset or in the machine To store a number in the cordless handset follow the steps below Up to 20 numbers can be stored in the phone book in the cordless handset Numbers stored in the cordless handset can on...

Page 51: ... needed between any of the digits to access an outside line or a special service hold down until appears Several pauses can be entered in a row If you are on a PBX that requires dialing a number to dial out and are storing a number for an outside line enter the number hold down until appears to insert a pause and then enter the phone number When you dial the auto dial number you will automatically...

Page 52: ...with that letter until the letter appears in the display and then press until the desired name appears To check the number of a name in the display press If you wish to dial an auto dial number that is stored in the machine press until BASE appears in the display press and then press or until the desired number appears Note that auto dial numbers in the machine that begin with an R to dial out fro...

Page 53: ...tters you can press and then enter one letter If a different name appears in the display press or until the desired name appears 2 The name of the auto dial number that begins with those 3 letters appears If there is no name that begins with those letters the closest name will appear If the correct name does not appear press or until it appears 3 Press The number is automatically dialed Quick Sear...

Page 54: ...rs in the display 5 Press 6 Edit the name Press to delete letters hold down to delete all the letters Press the number keys to enter new letters see Step 4 on page 49 If you do not wish to change the name go directly to Step 7 7 Press 8 Edit the number Press to delete digits hold down to delete all digits Press the number keys to enter new digits If a pause is required between any of the digits to...

Page 55: ...Press 2 Press and then 3 Press The name of one of your stored auto dial numbers appears 4 Press or until the number that you wish to delete appears in the display 5 Press 6 Press repeatedly to exit If you do not wish to change the number go directly to Step 9 9 Press 10 Press repeatedly to exit Cordless handset display 1 PHONE BK 13 DELETE DONE DONE ...

Page 56: ...the most recent 30 calls received by the machine see page 138 1 To view the incoming outgoing call list in the cordless handset press do not hold down Note You can also hold down until the first number in the list appears in the display To view the Caller ID list in the fax machine hold down until CALLS and then a name appears in the display 2 Press or until the name that you wish to call appears ...

Page 57: ...a loud howling sound Paging the machine or another cordless handset from a cordless handset 1 Enter the number 1 to 6 of the cordless handset that you wish to page or press to page all cordless handsets To page the machine press 0 Cordless handset display example of paging the fax machine Deleting all calls from the incoming outgoing list To delete all calls from the incoming outgoing list in the ...

Page 58: ...ed cordless handset rings This allows you to locate the cordless handset if you have misplaced it 3 The other person presses on the cordless handset to answer Machine display 2 Press appears in the display If the number of the cordless handset or machine 0 to 6 is stored in the cordless handset s phonebook with a name the name will appear 3 The paged device rings and the other person answers To an...

Page 59: ... press 3 Press to transfer the call to the machine The other person presses on the machine to answer DIGITAL SPEAKERPHONE If a call comes in while the Intercom feature is being used If an outside call comes in while you are using the Intercom feature the person who wishes to take the call should first stop the Intercom call press on the cordless handset or press or on the machine and then answer t...

Page 60: ...ransfer and return to the initial caller press 3 Press You can speak to the person who answers on the cordless phone When finished press to complete the transfer To complete the transfer without speaking to the person who answers press If nobody answers press to return to the initial caller The display will return to the standby display If nobody answers within 30 seconds all cordless handsets wil...

Page 61: ...will appear 2 Enter the number of the cordless handset to which you wish to transfer the call Press to page all cordless handsets Example 3 The selected cordless handset rings and the other person answers Press to complete the transfer If nobody answers press or to return to the initial caller DIGITAL SPEAKERPHONE Machine display Machine display CALL TRANSFER 3 29 MAY 12 00 PRESS HANDSET 29 MAY 12...

Page 62: ...ecting a ringing melody 1 Press 3 times 2 Press once 3 Press once 4 Enter the number from 1 to 6 of the desired melody or press or until the desired number appears and press The selected melody will sound To select a different melody repeat steps 3 and 4 5 Press repeatedly to exit Cordless handset display 3 RING 31 MELODY 1 DONE Adjusting the ringer volume 1 Press 3 times Cordless handset display ...

Page 63: ...urning off the cordless handset ringer If you do not wish the cordless handset to ring when a call is received follow these steps to turn the ringer off When this is done will appear in the display This will also turn off the beep that is sounded each time a key is pressed on the cordless phone 1 Press 3 times 2 Press once and then twice 3 Press once 4 Press or to select ON or OFF and then press 5...

Page 64: ...hese steps 1 Press 3 times 2 Press once and then once 3 Press once 4 Press or to select ON or OFF and then press 5 Press repeatedly to exit Cordless handset display 3 RING 34 BEEPS ON DONE Other Features Call time To check the duration of your most recent call follow these steps 1 Press twice 2 Press once and then once Cordless handset display 2 CALLS 22 TIME ...

Page 65: ...d on hold 1 Press 3 times 2 Press once 3 Press once 4 Press or to select ON or OFF and then press 5 Press repeatedly to exit Cordless handset display 4 SET 41 END CALL Turning the cordless handset power on and off To conserve battery power you can turn the cordless handset off To turn off the power hold down until the display goes blank To turn the power on hold down until the display turns on The...

Page 66: ... the messages from your cordless handset follow the steps below 1 Press once 2 Press once 3 Press to play all messages in the answering system or to play only new messages To repeat a message press To skip a message press To delete a message press while the message is playing To stop playback press 4 When finished press repeatedly to exit Cordless handset display 6 ANSWER ANSWER ...

Page 67: ...stration and does not require entering the System PIN number Use custom registration when the system PIN number has been changed to a number other than 0000 The system PIN number must be entered during registration A cordless handset can be registered in up to four bases To register the cordless handset in multiple bases repeat the custom registration procedure using each base To select which base...

Page 68: ...s finished the machine and cordless handset will show the messages at right Note the number that is assigned to the cordless handset 2 is shown as an example Press on the machine to exit START MEMORY Machine display Cordless handset display The cordless handset display changes as follows each time you press 5 BASE 51 REGIST AUTO REGIST 2 HS 2 REGISTERED HS ENTRY WAITING HS ENTRY ...

Page 69: ... a system PIN in the machine To prevent other people from adding cordless handsets without your authorization it is recommend that you change the system PIN to a number other than 0000 Note that it is also necessary to enter the system PIN in order to delete a cordless handset 1 On the machine press once and twice 2 Press once and once 3 Press once 4 Enter the current system PIN 4 digits The syste...

Page 70: ...set when the system PIN in the machine has been set to other than 0000 or when you are registering the cordless handset in multiple bases On the fax machine 1 Press once and twice 2 Press once 3 Press once 4 Press On the cordless handset 5 Press repeatedly until the display at right appears START MEMORY 5 BASE Cordless handset display Machine display DECT SETTING HS ENTRY HS ENTRY PRESS START KEY ...

Page 71: ...ultiple bases Press to enter the number 9 Enter the 4 digit system PIN number that is programmed in the machine 10 Press 11 Enter the number that you would like to assign to the cordless handset 12 When registration is finished the machine and cordless handset will show the messages at right the handset number 2 is shown as an example Press on the machine to exit CUSTOM CODE REGIST Cordless handse...

Page 72: ...th the first base that is powered on 1 On the cordless handset press repeatedly until the display at right appears 2 Press once and once 3 Press once NONE or the number of the currently selected base appears in the display 4 Enter the number 1 to 4 of the base to be given priority The number is the number that was assigned to the base during custom registration of the cordless handset To select NO...

Page 73: ... once 4 Press or until the desired language appears in the display 5 Press 6 Press to return to the date and time display START MEMORY Cordless handset display language Use this setting to select the language used in the cordless handset display This setting is selected on the machine Machine display DECT SETTING HS LANGUAGE ...

Page 74: ...e system PIN was not changed from the initial factory setting enter 0000 If you have forgotten the system PIN it will not be possible to delete the cordless handset 7 Press 8 Press to return to the date and time display START MEMORY START MEMORY Deleting a cordless handset Follow these steps if you need to delete a cordless handset cancel the registration in the machine HS DELETE PRESS HANDSET Mac...

Page 75: ... As the British Telecom service requires recognition of your telephone number to provide the SMS service 1470 release number withheld is automatically dialled before the number programmed into the Center Outbox You can still withhold your number for normal telephone or fax calls Have Caller ID service activated on your telephone line Important This machine is designed for use with British Telecom ...

Page 76: ... once and twice Note If you have an unread received message the message will appear when you press Read the message first see page 79 and then perform this procedure 2 Press 3 Press 4 Enter the number of the recipient Up to 20 digits can be entered Note that a space cannot be entered Important The number must include the area code To clear a mistake press If a pause is required between any of the ...

Page 77: ...he message you will return to Step 4 To clear a mistake press You can also move the cursor to a mistake and then enter the correct character The new character will replace the mistake If you wish to insert a character between characters press first and then enter the character you wish to insert To enter a lower case letter continue pressing the key for the letter until the lower case letter appea...

Page 78: ...RT MEMORY Sending an SMS message using an auto dial number If the number of the recipient has been stored as an auto dial number you can use the auto dial number to send an SMS message The procedure for storing auto dial numbers is explained on page 111 1 Press once and twice Note If you have an unread received message the message will appear when you press Read the message first see page 79 and t...

Page 79: ...he cursor is at the very first character of the message you will return to Step 4 To clear a mistake press You can also move the cursor to a mistake and then enter the correct character The new character will replace the mistake If you wish to insert a character between characters press first and then enter the character you wish to insert To enter a lower case letter continue pressing the key for...

Page 80: ...fully the fax machine will make 3 attempts at 5 minute intervals to resend the message see page 118 and an exclamation mark will appear with the message when you view it in the outbox see page 81 No exclamation mark will appear if the message was sent successfully POLL START MEMORY If a message is cancelled before being sent If a message is cancelled due to interruption by fax reception or because...

Page 81: ...ad messages pressing once displays the SMS menu For more information on viewing messages in the inbox see the following procedure The envelope appears while a message is being received 01 JAN 12 00 TEL Viewing messages in the inbox Follow the steps below to view messages in the inbox 1 Press Your most recently received unread message appears in the display If you have no unread messages the displa...

Page 82: ...e finished reading the message you can do any of the following Reply To reply to the sender press twice The number of the sender appears in the display Continue from Step 5 on page 74 Delete To delete the message press and then Print To print the message press Read other messages To return to the message list press Exit To return to the date and time display press START MEMORY POLL START MEMORY PO...

Page 83: ...es When the inbox is full an exclamation mark will appear in the date and time display appears when the inbox is full Viewing the Outbox You can view the most recent 10 messages that you have sent in the outbox If a message appears in the outbox with an exclamation mark it was not sent successfully and will need to be resent 1 Press once and once 2 Press Your most recently sent message appears in ...

Page 84: ...s in the display or press to print the message 4 If you wish to read or resend a message that appears in the display press The text of the message appears Press or as needed to scroll through the message 5 When you have finished reading the message you can do any of the following Edit resend To resend and edit if needed the message press twice The number of the recipient appears in the display Con...

Page 85: ...o print all messages in the inbox or to print all messages in the outbox 4 Press START MEMORY 1 Press once and twice 2 Press 3 Press to delete all messages from the inbox or to delete all messages from the outbox 4 Press START MEMORY Display Deleting all messages Follow these steps to delete all messages from the inbox or outbox Display 1 INBOX 2 OUTBOX ALL PRINT OK 1 INBOX 2 OUTBOX ALL DELETE OK ...

Page 86: ...ervice Normally the settings do not need to be changed SMS Receive function The SMS Receive function allows you to receive SMS messages This function is initially turned on If you wish to refuse reception of all SMS messages you can turn this function off Note Turning off this setting only turns off SMS message reception SMS message transmission is still possible The display briefly shows your sel...

Page 87: ...d to receive SMS messages When your SMS center calls your fax machine to send an SMS message your fax machine checks the caller s number transmitted to your fax machine by Caller ID against this stored number This allows your fax machine to verify that the SMS center is sending a message 1 Press and once 2 Press 3 Press 4 Press to enter the outgoing number or to enter the incoming number 5 Enter t...

Page 88: ...ecord an outgoing message When you go out turn on the answering machine by setting the reception mode to A M Recording an Outgoing Message The outgoing message OGM is the greeting that the machine plays after answering a call to inform callers that they can leave a message or send a fax Follow the steps below to record a message Example Hello You ve reached ______ No one is available to take your ...

Page 89: ...tivating the answering machine To turn on the answering machine so that callers can leave messages press until appears in the display PLAY HOLD RESOLUTION RECEPTION RESOLUTION RECEPTION It will not be possible to set the reception mode to A M if an outgoing message has not been recorded Note In A M mode the machine will automatically switch to fax reception if it detects six seconds of silence aft...

Page 90: ...on is turned on and if it is on whether you have messages The Toll Saver function is initially turned on ON OFF No received messages 4 Rings Received messages 2 Rings Toll Saver Toll Saver NOTHING Hello Hi Hi Ring Ring Ring Ring Ring Ring Ring Ring Ring Ring Answer according to NUMBER OF RINGS setting To adjust the NUMBER OF RINGS setting see page 127 To turn off the Toll Saver function see page 9...

Page 91: ...ssage plays the date and time of recording will appear briefly in the display If no messages were received NO MESSAGES will appear Repeat To listen to a message a second time press before playback of that message ends To move back to the previous message press within 3 seconds of the beginning of the current message Skip To skip forward to the next message press Note Playback will stop if you rece...

Page 92: ...START MEMORY DELETE Recording memos You can record memos for yourself and other users of the machine These will be played back together with incoming messages when is pressed Note Make sure that no other cordless handsets are in use when recording the memo the conversation on the cordless handset may also be recorded PLAY HOLD 1 Press once and once 2 Pick up the cordless handset press and speak in...

Page 93: ...essage If desired you can change this setting to 15 30 or 60 seconds Display The display briefly shows your selection then FAX mode on A M failure If the memory for recording incoming messages becomes full while you are out the answering machine will no longer be able to record messages The ON A M FAILURE setting is used to choose the response of the machine to incoming calls when this happens YES...

Page 94: ... wait until it answers listen to your messages and then erase them see Remote Operations on page 97 The initial setting is NO If you want to change the setting to YES press the panel keys as follows OGM only mode If needed you can turn off recording of incoming messages In this case your outgoing message will play but callers will not be able to leave a message The machine will still receive faxes...

Page 95: ...nction you must first program the number that you wish the machine to call the transfer number and record the transfer message that plays when you answer the phone at the remote location When you go out and wish to use the transfer function turn it on When you return and no longer wish to use the transfer function turn it off Programming the transfer number To use the Transfer function you must fi...

Page 96: ...fer message follow the steps below The following is an example Hello This is a transfer call for YOUR NAME Enter your remote code number now Note Make sure that no other cordless handsets are in use when recording the message the conversation on the cordless handset may also be recorded 1 Press once and twice 2 Press once 3 Pick up the cordless handset and press 4 Speak into the cordless handset t...

Page 97: ...sage or to erase the message PLAY HOLD DELETE Turning the Transfer function on and off When you go out and wish to use the Transfer function turn it on as follows 1 Press once and once 2 Press once and 3 times 3 Press once 4 Press to turn on the Transfer function Press to turn the function off 5 Press to return to the date and time display The display briefly shows your selection then Display A M ...

Page 98: ...r see page 97 and The machine will play back your messages You can also perform any of the remote operations described in Remote Operations later in this chapter see page 97 Note When you hang up after a transfer call the machine will not immediately resume normal operation If you want the machine to accept calls immediately after a transfer call enter twice before hanging up if you want to hang u...

Page 99: ...e out you can call the machine from any tone dial telephone and play back your messages using the remote commands You can also use these commands to change the reception mode and other settings Remote code number To access the machine to perform remote operations you must first enter your remote code number The remote code number has been set to 001 at the factory If you wish to use a different nu...

Page 100: ...ng up before it answers saving yourself the cost of that call If you do not want to use the Toll Saver function you can turn it off by following the steps below In this case the machine will answer after the number of rings set with the NUMBER OF RINGS setting see Changing the number of rings on page 127 1 Press once and once 2 Press once 3 Press once 4 Press to turn on the Toll Saver function or ...

Page 101: ...ave been played back you will hear a long beep If no messages have been received you will hear a short beep You can either hang up or perform any of the operations described in the following section Other remote operations 3 While the messages are playing you can do any of the following Repeat To listen to a message a second time press and on the telephone before that message ends To move back to ...

Page 102: ...tion Other remote operations Hang up If you do not erase your messages first they will be saved and any new messages will be recorded after them If you want the machine to resume normal operation immediately press twice before hanging up in some cases particularly when the Transfer function is used the machine may not accept new calls for one or two minutes after you hang up unless you press twice...

Page 103: ...ring your remote code number the line will be disconnected This prevents unauthorized people from attempting to guess your remote code number Other remote operations After listening to your messages you can perform any of the following operations by pressing the appropriate keys on the telephone Note The following commands cannot be entered while messages are being played back If you do not want t...

Page 104: ...s silence after you finish speaking you will hear a beep and the new message will be played back 4 Turning the Transfer function on or off To turn Transfer on Press and on the telephone To turn Transfer off Press and on the telephone 9 1 9 2 Changing the transfer telephone number 1 Press and on the telephone 2 After you hear a short beep enter the new telephone number When finished press To insert...

Page 105: ...cording a new transfer message 1 Press and on the telephone 2 When you hear a short beep speak into the telephone to record the new message The time for the transfer message is fixed at 15 seconds After 15 seconds or earlier if the machine detects silence after you finish speaking you will hear a beep and the new message will be played back automatically 9 3 OGM only mode To turn on OGM only mode ...

Page 106: ...sheet at a time manual feeding Size 210 x 600 mm Weight 157 g m2 Maximum document size The maximum size and weight of documents that you can load in the document feeder depend on how many sheets you load 140 mm 148 mm Letters or graphics within 4 mm of the top and bottom edges of a document will not be scanned Letters in the shaded area will not be scanned 210 mm 4 mm 4 mm ...

Page 107: ...ize sheets can be placed in the feeder at once The sheets will automatically feed into the machine starting from the bottom sheet If you need to send or copy more than the maximum number of sheets place the additional sheets gently and carefully in the feeder just before the last sheet is scanned Do not try to force them in as this may cause double feeding or jamming If your document consists of s...

Page 108: ... document from the feeder If you need to remove a document from the feeder open the operation panel Important Do not try to remove a document without opening the operation panel This may damage the feeder mechanism 1 Open the operation panel 2 Remove the document 3 Close the operation panel pressing down firmly on both front corners to make sure it clicks into place ...

Page 109: ...s are only effective for sending a document They are not effective for receiving a document Resolution settings Contrast settings STANDARD Use STANDARD for ordinary documents This setting gives you the fastest and most economical transmission FINE Use FINE for documents containing small letters or fine drawings SUPER FINE Use SUPER FINE for documents containing very small letters or very fine draw...

Page 110: ...ast can be adjusted 2 Press one or more times until the desired resolution and contrast settings appear in the display The first time you move through the list of resolution settings the contrast setting AUTO will appear next to each resolution setting The second time you move through the list the contrast setting DARK will appear RESOLUTION RECEPTION Display 29 MAY 12 00 STANDARD AUTO 29 MAY 12 0...

Page 111: ...or faxing documents to FINE Follow the steps below 1 Press once and 4 times 2 Press once 3 Press once 4 Press to set the default resolution to FINE or to set it to STANDARD 5 Press to return to the date and time display The display briefly shows your selection then Display OPTION SETTING FINE PRIORITY FINE PRIORITY 1 YES 2 NO NUMBER OF RING ...

Page 112: ... number RESOLUTION RECEPTION DIGITAL SPEAKERPHONE R Sending a Fax by Normal Dialling With Normal Dialling you press and dial by pressing the number keys If a person answers you can talk with them through the speakerphone before sending the fax Normal Dialling allows you to listen to the line and make sure the other fax machine is responding DIGITAL PEAKERPHON DELETE REPEAT SKIP 29 MAY 12 00 READY ...

Page 113: ...mission is completed successfully the machine will beep once If an error occurs the machine will beep three times and print a Transaction Report to inform you of the problem see page 146 Note If the transmission is unsuccessful and DOCUMENT JAMMED appears in the display remove the document as explained on page 170 This may occur if the other fax machine doesn t respond properly when you attempt to...

Page 114: ...tered in a row If you are on a Flash type PBX and are storing a number for an outside line press press to insert a pause and then enter the fax or voice number When you dial the auto dial number you will automatically dial out without the need to press the key If you are on a PBX that requires dialing a number to dial out and are storing a number for an outside line enter the number to dial out pr...

Page 115: ... key press after entering the first letter To enter a lower case letter continue pressing the key for the letter until the lower case letter appears To enter one of the following symbols press or repeatedly 6 Press 7 Return to Step 2 to store another number or press to return to the date and time display To confirm that an auto dial number has been stored correctly print out the Telephone Number L...

Page 116: ...ar appears in the display 3 Press 4 Press for EDIT or for CLEAR If you selected CLEAR go to Step 8 5 If you selected EDIT make the desired changes to the number Press or to move the cursor to the digit or digits you wish to change and then enter the new digit The new digit will replace the old digit If you do not wish to change the number go directly to Step 6 6 Press START MEMORY Display NEW NUMB...

Page 117: ...you wish to change and then press the appropriate number key repeatedly until the desired letter appears see Step 5 on page 113 The new letter will replace the old letter If you do not wish to change the name go directly to Step 8 8 Press 9 Return to Step 2 to edit or clear another number or press to return to the date and time display START MEMORY ...

Page 118: ...t If the transmission is completed successfully the machine will beep once If an error occurs the machine will beep three times and print a Transaction Report to inform you of the problem see page 146 RESOLUTION RECEPTION START MEMORY Using an auto dial number to send a fax Follow the steps below to use an auto dial number to send a fax To use an auto dial number to send an SMS message see page 76...

Page 119: ...ceiving machine If you are on a PBX and must dial a number to dial out enter the number press to insert a pause and then enter the number of the receiving machine 3 Check the display If the number of the receiving machine shown is correct press If the number is not correct press to backspace and clear one digit at a time and then re enter the correct digit s RESOLUTION RECEPTION R START MEMORY 29 ...

Page 120: ...d the document RESOLUTION RECEPTION START MEMORY Redial You can automatically redial the last number dialled on the fax machine Follow the steps below to send a fax using redial To make a phone call on the speakerphone using redial see page 120 Automatic redialling If you use automatic dialling including Direct Keypad Dialling to send a fax and the line is busy the fax machine will automatically r...

Page 121: ...the receiving end This function is called Error Correction Mode ECM ECM is effective for both transmissions and receptions and is only effective when the other fax machine has ECM as well When there is considerable noise on the line you may find that transmission with ECM turned on takes longer than normal If you prefer a faster transmission time you can try turning ECM off 1 Press once and 4 time...

Page 122: ...ed redial and press 3 When the other party answers speak facing the operation panel at a distance of about 50 cm to 1m 4 When you are ready to end the call press DIGITAL SPEAKERPHONE START MEMORY START MEMORY DIGITAL SPEAKERPHONE Placing a call on hold During a call on the speakerphone you can press to place the call on hold To take the call off hold press once again PLAY HOLD PLAY HOLD Note If a ...

Page 123: ...once 3 Press once 4 Enter the total number of pages 01 to 99 by pressing the numeric keys Example 5 pages 5 If desired press to set the resolution and or contrast 6 Dial the receiving machine and send the fax If you need to cancel a batch number entry remove the document from the feeder or press If the number of pages actually transmitted does not coincide with the batch number entered the alarm w...

Page 124: ...to repeat the operation Broadcasting sending a fax to multiple destinations This function allows you to send the same fax to as many as 20 different destinations in just one operation When sending to multiple destinations only auto dial numbers can be used to dial the numbers of the receiving machines 1 Load the document s If desired press to set the resolution and or contrast 2 Press 3 Press or u...

Page 125: ...e a communication error code If so send the document to those destinations again START MEMORY Memory transmission You can also send a fax through memory when sending to a single destination This is convenient when sending to destinations where the line is often busy as it saves you from waiting to pick up the original document and frees the feeder for other operations To send a fax through memory ...

Page 126: ...you want to transmit the pages which have been stored up to that point in memory The remaining pages will be ejected from the feeder After transmission the memory will be cleared and you can transmit the remaining pages You will also need to transmit the page which was being scanned when the memory filled up Press if you want to cancel the entire transmission START MEMORY ...

Page 127: ...achine detects a fax tone this means that the call is an automatically dialled fax it will automatically begin reception of the incoming document If the machine doesn t detect a fax tone this means that the call is a voice call or manually dialled fax it will make a light ringing sound called pseudo ringing for 15 seconds to alert you to answer the duration of pseudo ringing can be changed as expl...

Page 128: ... 5 Press to return to the date and time display 15 seconds 30 seconds 60 seconds 120 seconds The display briefly shows your selection then Using A M Mode To select A M mode press until appears in the display RESOLUTION RECEPTION In A M mode your fax machine will automatically receive voice messages and faxes See Chapter 4 for more details RESOLUTION RECEPTION 01 JAN 12 00 Display OPTION SETTING PS...

Page 129: ...u can talk to the other party and or receive a fax as explained in Using TEL Mode on page 128 Make sure the operation panel is closed or the paper may jam when received faxes are printed Changing the number of rings If desired you can change the number of rings on which the machine answers incoming calls in FAX and TEL FAX mode Any number from 1 to 6 can be selected 1 Press once and 4 times 01 JAN...

Page 130: ...time display Using TEL Mode To select TEL mode press until TEL appears in the display RESOLUTION RECEPTION The display briefly shows your selection then When the reception mode is set to TEL you must answer all calls even faxes by pressing on the machine or by answering on the cordless handset DIGITAL SPEAKERPHONE 01 JAN 12 00 TEL NUMBER OF RING NUMBER OF RING ENTER 1 6 1 TRANSACTION ...

Page 131: ...cradle if you used it Note If the Remote Fax Reception setting has been set to NO page 130 it will not be possible to press on the cordless handset to begin fax reception In this case transfer the call to machine page 57 and then press on the machine DIGITAL SPEAKERPHONE START MEMORY START MEMORY Receiving faxes in TEL mode Important If a document is loaded in the machine s feeder remove it before...

Page 132: ...uments on the same line you must turn this function off in order to prevent the machine from mistakenly attempting to receive documents from the computer fax modem Follow the steps below to change the setting The display briefly shows your selection then Display OPTION SETTING FAX SIGNAL RX FAX SIGNAL RX 1 YES 2 NO CALLER ID Remote Fax Reception If you hear a fax tone after answering a call on the...

Page 133: ...inted on a second page In this case the cut off point may occur in the middle of a line Automatic reduction may not be possible if the received document is too large contains too many fine graphics or images or is sent at high resolution In this case the remainder of the document will be printed on a second page 1 Press once and 3 times Display PRINT SET UP 1 On the fax machine press once and twic...

Page 134: ...press or clear the jam or replace the print cartridge the stored documents will automatically print out If you received documents in memory because the fax ran out of paper be sure to add paper which is the same size as the paper previously used If not the document print out size may not match the size of the printing paper Caution When documents are stored in memory do not turn the power off This...

Page 135: ...the display Settings are 100 125 135 200 70 88 94 and AUTO automatic adjustment to match the size of the paper The default setting is 100 Example Press twice Number of copies per original Press the number keys to enter a number from 1 to 99 The default setting is 1 Example Press for two copies Sorted copies To sort the copies as shown below under Sorted first set the number of copies per original ...

Page 136: ... setting is used and or the original contains so much detailed content that the memory becomes full before scanning finishes If a call comes in while making a copy If a call comes in while the machine is making a copy you must press to stop copying before answering the call Copy Cut off When making a copy of a document that is longer than the printing paper use the copy cut off setting to select w...

Page 137: ...ng speed It does not affect the amount of ink used The high quality copy setting is initially turned off 1 Press once and 3 times 2 Press once and 3 times 3 Press once 4 Press to turn on high quality copy or to turn it off 5 Press to return to the date and time display The display briefly shows your selection then 4 Press to set copy cut off to YES the remaining part of the document will not be pr...

Page 138: ... a call Important To use this function you must subscribe to a caller identification service from your telephone company Note that your fax may not be compatible with some caller identification services 1 Press once and 4 times 2 Press once and 5 times 3 Press once 4 Press YES to turn on Caller ID To turn off Caller ID press 5 Press to return to the date and time display Display OPTION SETTING CAL...

Page 139: ...lowing messages will appear while the fax rings if caller information is not available NO SERVICE No caller information was received from your telephone company Make sure that the telephone company has activated your service CALLER ID ERROR Noise on the telephone line prevented reception of caller information OUT OF AREA The call was made from an area which does not have a caller identification se...

Page 140: ...r ID List in the display If desired you can immediately dial a number when it appears To dial a number in the Caller ID list using the cordless phone see page 54 1 Press twice 2 Press or to scroll through the list 3 If you wish to dial one of the numbers in the list scroll through the list until the number appears in the display Fax If you wish to send a fax load the document and then press Dialli...

Page 141: ...lear a previously stored number press and go to Step 6 5 Enter the number by pressing the number keys max 20 digits 6 Press to store or clear the number 7 Press to return to the date and time display START MEMORY Priority Call If you have turned on Caller ID you can set the machine to make a special ringing sound when you receive a call from a designated phone number This lets you know immediately...

Page 142: ...s from your specified Anti Junk Number In this case when a voice call or a fax transmission comes in from the number you have specified as a Junk Number your fax will break the connection as soon as it receives the calling phone number from the caller ID service before the first ring To use this function enter the number that you wish to block as explained in Blocking Reception of Unwanted Faxes s...

Page 143: ...mber keys max 20 digits 6 Press and then press to return to the date and time display START MEMORY Blocking Reception of Unwanted Faxes The Anti Junk Fax function allows you to block reception of faxes from a party that you specify This saves paper by not printing out unwanted junk faxes To use this function follow the steps below to enter the fax number from which you do not wish to receive faxes...

Page 144: ...e to bear the cost of the call To use the polling function the other machine must be capable of being polled Before polling make sure the other machine is set up to receive your polling request Your machine is not capable of being polled 1 Dial the fax machine that you wish to poll using one of the following methods Enter the full number using the numeric keys Press and dial the full number Wait f...

Page 145: ...hine or on the cordless handset This puts the other party on hold 2 When you hear the dial tone dial the number of the third party for the enquiry call 3 When you have finished the enquiry call you will be automatically returned to the original caller as soon as the third party hangs up R Transferring calls 1 During the telephone conversation press on the machine or on the cordless handset This pu...

Page 146: ...he fax machine The lists are described below To print a list follow these steps 1 Press once and twice 2 Press once 3 Press or until the desired list appears in the display 4 Press once 5 Press to print the list START MEMORY Display LISTING MODE TEL LIST TEL LIST PRESS START KEY Example ...

Page 147: ...ows information about the messages currently recorded in the answering machine including the date and time each message was recorded the length and the type Caller ID List This list shows information on your 30 most recently received calls and faxes This list is only available if you are using the Caller ID function Help List This list provides a brief guide to the operation of the machine Press w...

Page 148: ...itted received NOTE One of the following notes will appear under NOTE in the report to indicate whether the transaction was successful and if not the reason for the failure OK Transmission reception was successful P FAIL A power failure prevented the transaction JAM The printing paper or document jammed preventing the transaction BUSY The fax was not sent because the line was busy COM E X Where X ...

Page 149: ... return to the date and time display ALWAYS PRINT A report will be printed after each transmission reception or error ERROR MEMORY A report will be printed after an error or a memory operation SEND ONLY A report will be printed after each transmission ERROR ONLY A report will be printed only when an error occurs NEVER PRINT A report will never be printed The display briefly shows your selection th...

Page 150: ...smitted images and copies 1 Open the operation panel 2 Push the green lever at the side of the white roller slightly to the right and then pull it forward and down 3 Pull the left side of the white roller up and then pull the roller to the left and out of the machine Place the roller in a stable position where it will not accidentally fall to the ground 1 2 ...

Page 151: ...o clean If you find it difficult to remove dirt from the scanning glass you can try moistening the cloth with isopropyl alcohol or denatured alcohol Take care that no alcohol gets on the rollers 5 Replace the white roller inserting the right end first When re inserting the roller do not use excessive force to locate the right hand end This may result in damage to the machine 6 Push the green lever...

Page 152: ...prevent the paper from feeding correctly To clean the roller first remove the paper tray The roller will be visible in the opening in the rear of the machine Hold the roller by pressing down on the white part with your finger and wipe the black part with a clean dry cloth Rotate the roller as needed to wipe the entire surface of the black part If you find it difficult to remove dirt from the rolle...

Page 153: ... Press once and twice 3 Press once 4 Press to print an alignment page To enter an alignment value without printing an alignment page press 5 In the alignment page that the machine prints locate the line that comes closest to forming a completely straight line In this example 15 comes closest to forming a straight line Display PRINT SET UP ALIGN CART ALIGN CART 1 PRINT 2 SET After printing the alig...

Page 154: ...Y Cleaning the print cartridge nozzles If print quality is still not satisfactory after aligning the print cartridge follow these steps to clean the print cartridge nozzles 1 Press once and 3 times 2 Press once and once 3 Press once 4 Press The machine prints a test pattern similar to the one shown in the following step START MEMORY CLEAN NOZZLES Display PRINT SET UP CLEAN NOZZLES CLEAN NOZZLES PR...

Page 155: ...y after running the nozzle test three times the nozzles are clean If the print quality is still not satisfactory after running the test a third time continue with Step 7 7 Press open the operation panel open the print compartment cover and remove and then reinstall the print cartridge see the procedure beginning on page 23 8 Repeat the nozzle test If the lines are still broken wipe the nozzles as ...

Page 156: ...ingers 2 Dampen a clean cloth with water and gently wipe the nozzles and the gold coloured area around the nozzles Wipe in one direction only To dissolve dried ink hold the damp cloth against the nozzles for about three seconds Gently blot and wipe dry When finished allow the gold coloured area to dry 3 Dampen another section of clean cloth with water and gently wipe the contacts and the gold colo...

Page 157: ...ee the procedure beginning on page 23 Wipe on the holder with a damp cloth INK 1 About the lithium battery The fax machine uses a lithium battery to retain settings and information programmed in the machine when the power is turned off Battery power is consumed primarily when the power is off With the power kept continuously off the life of the battery is about 5 years If the battery dies have you...

Page 158: ...after the batteries are charged replace them with the following batteries Replacement batteries Use only 1 2 V Ni MH batteries with a capacity of 630 mAh min of 600 mAh type AAA Caution Danger of explosion if batteries are incorrectly replaced Replace only with the same or equivalent type recommended by the manufacturer Dispose of used batteries according to the manufacturer s instructions 1 Remov...

Page 159: ...at least 12 hours Battery disposal The batteries are Nickel Metal Hydride batteries The batteries must be disposed of properly Contact local agencies for information on recycling and disposal plans in your area Wiping the charger contacts To ensure that the battery charges properly wipe the charger contacts on the cordless handset and in the machine cradle and in the separate charger if your model...

Page 160: ...n again If the error persists check the following Check the connection The cord from the TEL LINE socket to the wall socket should be no longer than two meters Make sure there are no modem devices sharing the same telephone line Check with the other party to make sure their fax machine is functioning properly Have your telephone line checked for line noise Try connecting the fax machine to a diffe...

Page 161: ...ne has paper Make sure that the telephone line cord is plugged into the TEL LINE socket and not the TEL SET socket If the receiving machine is in manual mode with no attendant reception will not be possible Check the display for error messages Press and check for a dial tone Dial the receiving machine manually and make sure that it is responding you should hear a fax tone Nothing is printed at the...

Page 162: ...need alignment or cleaning See page 151 The received document is faint Ask the other party to send higher contrast documents The print cartridge may need replacement Make a copy or print a report to check your machine s printing ability Received images are distorted Noise on the telephone line may cause distortion Have the other party try sending the document again Make a copy or print a report on...

Page 163: ...r ID list Check this number against your entered center number and correct the latter if needed To receive SMS messages you must subscribe to a Caller ID service Is the inbox full If so delete one or more messages see page 83 Is the SMS Receive function turned on This function must be turned on to receive SMS messages see page 84 When sending an SMS message OVER 20 DIGITS appears when you enter th...

Page 164: ...e received Problem Solution A loud howling sound occurs when you use the speakerphone Turn down the speaker volume press while the speakerphone is on Nothing appears in the display Make sure the power cord is properly plugged into a power outlet Connect another electrical appliance to the outlet to see if it has power The machine does not respond when you press any of its keys If a beep sound is n...

Page 165: ... correctly you should hear a dial tone when you press on the machine The batteries may be low Place the cordless handset in the cradle or charger if applicable and let it charge Calls cannot be made or received while the machine is being used while BUSY appears in the cordless handset display Wait until the machine is no longer being used Calls cannot be made or received during a power failure You...

Page 166: ...facing forward Wipe the charger contacts with a cotton swab Make sure the batteries are correctly inserted in the cordless handset see page 30 The batteries may need replacement see page 151 You hear beeps during a call You will hear beeps during a call and will blink in the display if the batteries are low Place the cordless handset in the charger or cradle if applicable and let it recharge If yo...

Page 167: ... turned on see page 93 CALL TRANSFER A call is being transferred On occasion this may also appear while paging the cordless handset for an intercom call CHANGE CARTRIDGE This message appears after you install or replace the print cartridge see page 25 CHECK CARTRIDGE The print cartridge is missing and must be installed or is not installed correctly DECT HS IN USE The cordless handset is in use Wai...

Page 168: ... will print out automatically when the problem is fixed FUNCTION MODE has been pressed INK NEAR EMPTY The cartridge is nearly empty approximately one eighth of the ink remains INTERCOM A cordless handset is paging the fax machine press to talk or the fax machine is paging a cordless handset The number of the cordless handset appears with INTERCOM LINE ERROR Transmission or reception was not succes...

Page 169: ...r the jam READY TO SEND A document has been loaded and the fax machine is waiting for you to begin faxing or copying RECALLING This appears if you attempt to send a fax by automatic dialling and the line is busy or the receiving fax machine does not answer Your fax machine will automatically reattempt the call See Automatic redialling on page 118 SPEAKER PHONE the digitial speakerphone key has bee...

Page 170: ...CALLS This appears when you access the Caller ID list in the machine by holding down only if you have Caller ID EMPTY This appears if you access the machine s phone book or Caller ID list and there are no numbers 0 6 a number from 0 to 6 appears Your cordless handset is being paged press to answer or your cordless handset is paging the fax machine or another cordless handset blinking The cordless ...

Page 171: ...Trouble shooting Audible signals Continuous tone 3 seconds Indicates the end of transmission reception or copying Intermittent tone 3 beeps 5 seconds 1 second on 1 second off Indicates incomplete transmission reception or copying ...

Page 172: ...irst try pressing If the document doesn t feed out remove it as explained below Important Do not try to remove a jammed document without releasing it as explained below This may damage the feeder mechanism START MEMORY 1 Open the operation panel 2 Gently remove the document Be careful not to tear the document 3 Close the operation panel pressing down firmly to make sure it clicks into place ...

Page 173: ...printing paper Gently pull the jammed paper out of the machine taking care not to tear it After removing the jammed paper press to clear the error message PAPER JAMMED from the display Normal operation cannot be resumed until you press to clear the error message ...

Page 174: ... the display FAX mode The fax machine automatically answers and receives faxes TEL mode Answer all calls even faxes on the cordless handset To begin fax reception press TEL FAX mode The fax machine automatically answers and receives faxes Voice calls are signalled by a special ringing sound A M mode Select this mode when you go out to receive both voice messages and faxes Storing Auto Dial Numbers...

Page 175: ...aks to you and then wants to send a fax press Storing auto dial numbers 1 Press and then press twice 2 Enter a name for the auto dial number To enter each letter hold down the key for the letter as shown in the chart below until the letter appears in the display 3 Press 4 Enter the full fax phone number To clear a mistake press To insert a pause hold down until appears 5 Press and then repeatedly ...

Page 176: ...0 Power 63 Quick Search 51 Receiver volume 46 Receiving a call 47 Redial 54 Remote Fax Reception setting 130 Ringer volume 60 System PIN 67 Talking range 32 Turning off ringer 61 Viewing calls 54 D Date setting 35 36 Dialling Automatic 50 116 Direct Keypad 117 Normal 46 110 Direct Keypad Dialling 117 Display messages 137 165 Document feeder 105 Document guides 105 Document restrictions 105 Documen...

Page 177: ...learing 170 Paper trays 19 Paper loading 20 Polling 142 Power cord 21 Print cartridge Aligning 151 152 Cleaning nozzles 152 Installing 22 27 Wiping nozzles 154 Print cartridge holder wiping 155 Priority Call 139 Pseudo Ring Duration 126 R Reception mode A M mode 37 87 FAX mode 37 127 TEL mode 37 128 TEL FAX mode 37 125 Reception Ratio setting 131 Redialling 118 Redialling automatic 118 Remote code...

Page 178: ...E socket 29 TEL SET socket 29 TEL FAX reception mode 37 125 Telephone line cord 29 Telephone Number List 145 Time setting 35 36 Toll Saver function 88 98 Transaction Report 146 Setting print condition 147 Transfer Function 93 Transferring calls 57 ...

Page 179: ......

Page 180: ......

Page 181: ...r remote code 3 Press 4 After listening to your messages you can either hang up to save them or enter one of the commands on the reverse side REMOTE OPERATION CARD The card below is provided as a quick guide to remote operation Cut it out and carry it with you when you go out Remote Operation Guide ...

Page 182: ...nsfer number 9 0 Tel No Record transfer OGM 9 3 To quickly disconnect OGM ONLY MODE Turn on 1 1 Turn off 1 2 PLAYBACK Play messages 7 Move backward repeat 2 Skip forward 5 Stop 0 Play new messages only 6 first stop playback ERASING MESSAGES Erase single message 3 Erase all messages 3 3 RECORDING A MEMO Start End 0 RECORDING A NEW OGM Start 4 ...

Page 183: ...PRINTED IN THAILAND TINSE4473XHTZ SHARP ELECTRONICS UK LTD Sharp House Thorp Road Newton Heath Manchester M40 5BE SHARP CORPORATION ...

Reviews: