Sharp DV-SL1300W, Operation Manual
The Sharp DV-SL1300W Operation Manual is a comprehensive guide that provides step-by-step instructions on effectively using this high-quality product. Easily accessible on our website, users can download this manual for free, ensuring an enhanced and hassle-free user experience.
Share
Download


Reviews:
No comments
Related manuals for DV-SL1300W

S500
Brand: NAD Pages: 32

DP-77
Brand: Accuphase Pages: 26

PLAYER ONE
Brand: Ecler Pages: 17

CS-55CD
Brand: Cayin Pages: 10

SDVD1111
Brand: Sylvania Pages: 32

AZ7000 - Cd Personal
Brand: Magnavox Pages: 22

MP510
Brand: Curtis Pages: 13

T557C
Brand: NAD Pages: 160

CDN77
Brand: Numark Pages: 3

VDP 01-MP3
Brand: Velocity Pages: 22

SE-603-N
Brand: IBASE Technology Pages: 73

LifeBook S-4572
Brand: Fujitsu Pages: 38

CMP616FSL
Brand: Craig Pages: 21

SL-XP505
Brand: Technics Pages: 20
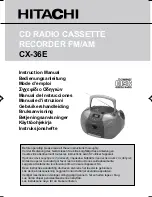
CX-36E
Brand: Hitachi Pages: 76

CX-41E
Brand: Hitachi Pages: 88

CX-40E
Brand: Hitachi Pages: 24

PDV-701S
Brand: Hitachi Pages: 36


