Seagull 2C-LP427B, User Manual
Introducing the Seagull 2C-LP427B - an innovative device designed to simplify your life. With its sleek design and advanced features, this product is a must-have. For your convenience, a comprehensive User Manual is available for free download at manualshive.com, providing step-by-step instructions for optimal usage.
Share
Download


Reviews:
No comments
Related manuals for 2C-LP427B

Matrix 300N
Brand: Datalogic Pages: 2

MCR20E2140S
Brand: Clas Ohlson Pages: 4

SocketScan S730
Brand: Socket Pages: 50

IP-BC-BT
Brand: Infinite Peripherals Pages: 19

KP-2004
Brand: Toshiba Pages: 20
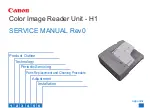
H1
Brand: Canon Pages: 112

OrbitCG MS7180
Brand: Honeywell Pages: 52

IT3800
Brand: Honeywell Pages: 13

I-Class Mark II
Brand: Honeywell Pages: 2

Metrologic 3780
Brand: Honeywell Pages: 4

IS4225 ScanGlove
Brand: Honeywell Pages: 36

8670
Brand: Honeywell Pages: 17

IS4920
Brand: Honeywell Pages: 2

Orbit MS7120
Brand: Honeywell Pages: 2

Hyperion 1300G
Brand: Honeywell Pages: 192

Genesis 7580
Brand: Honeywell Pages: 68

IS4920
Brand: Honeywell Pages: 61

Orbit MS7120
Brand: Honeywell Pages: 53


