


NAS-20 Quick Installation Guide
1.
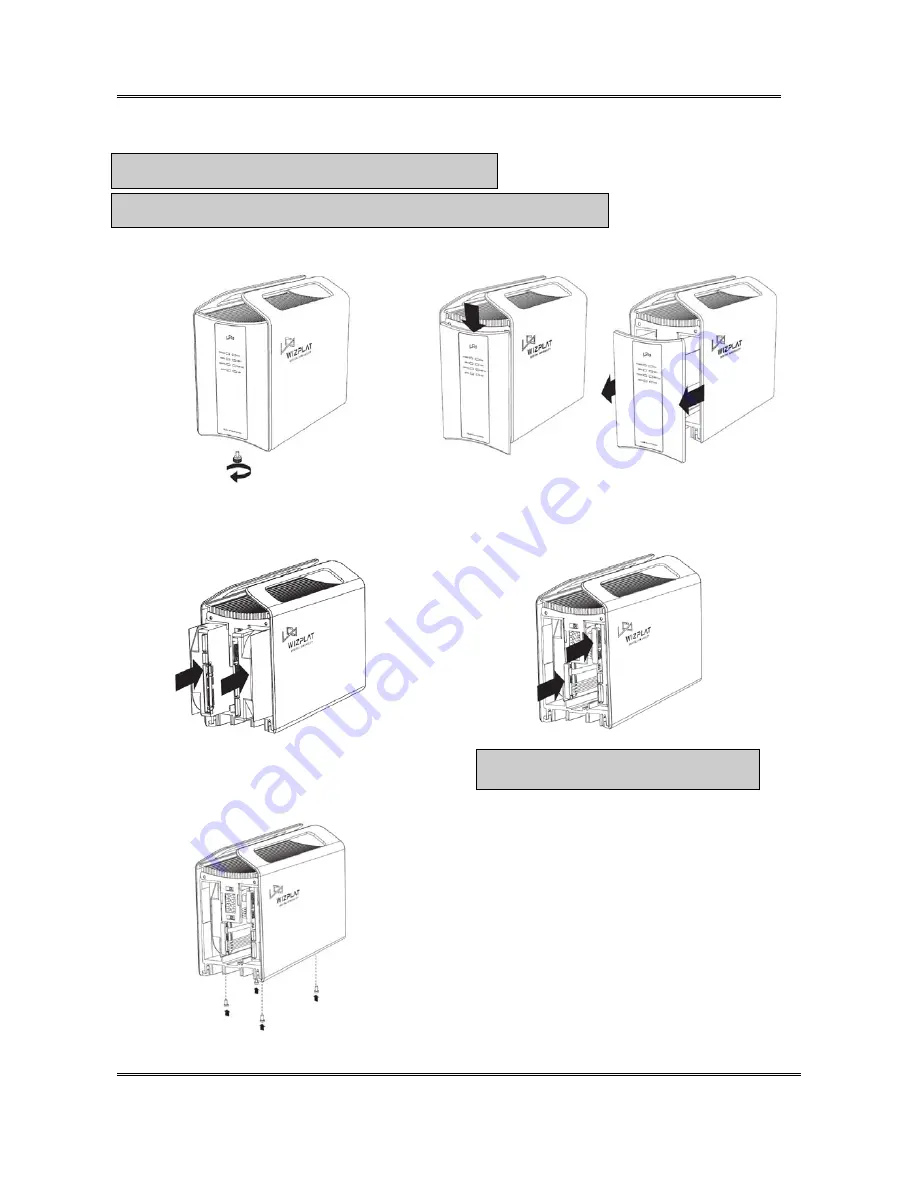
How to mount HDDs
※
Reference :
This user guide is for not mounting Hard Disk.
※
Note :
Please disconnect AC power cord, when replacing the hard disk drive.
1)
Turn the screw which is on lower part of the product
with the direction of the picture.
2)
Push down and pull lightly to front the panel to separate from
main body.
3)
Please check HDDs direction like the picture and put
in.
4) Connect SATA cables to HDDs. Connect SATA cables of “HDD0-
LEFT sticker shape” in the left side HDD of the picture, and connect
“HDD1-RIGHT sticker shape” in the right side.
※
Notice :
The shape of SATA cables are different
please pay attention to connect.
5)
Screw lower part of product and HDDs together.
6)
Push the front panel and fix with screw.
Sarotech Co., Ltd.
- 1 -


