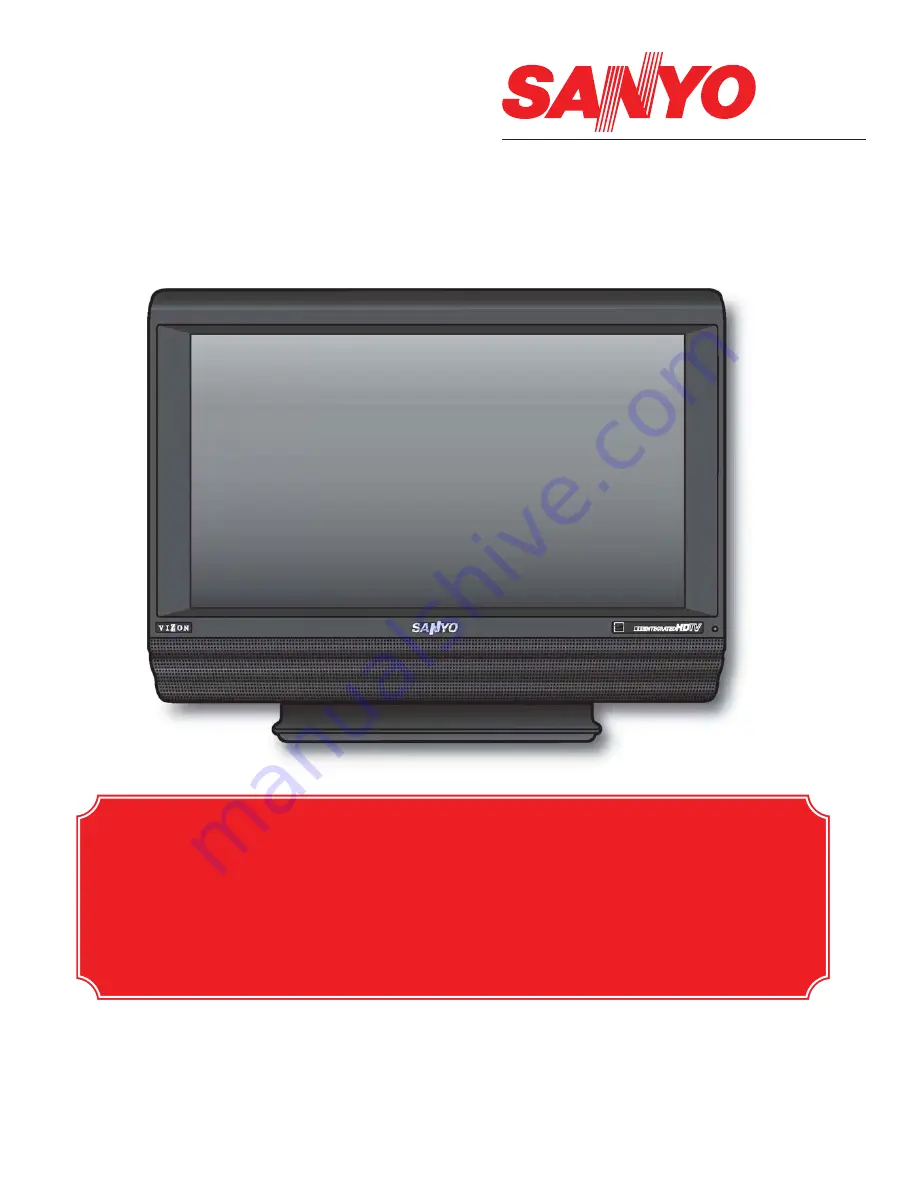
background image

Model No:

DP26647

Owner’s Manual

Table of Contents . . . . . . . . . . . 5

Frequent Asked 

Questions (FAQ) . . . . . . . . . . . 47

© 2007 Sanyo Manufacturing Corporation

If you need additional assistance? 

Call toll free 1.800.877.5032

We can Help!

For more HOOKUP OPTIONS go to our web site at: 

www.sanyoctv.com/entertainment/televisions. 

Click

on  

Hookup Diagrams

in the box to the right.

On the HookUp Diagrams page, 

click

on LCD HDTV to CABLE, DVD, and

SATELLITE to view hookup diagrams specific to LCD models.

Summary of Contents for DP26647

Page 1: ...u need additional assistance Call toll free 1 800 877 5032 We can Help For more HOOKUP OPTIONS go to our web site at www sanyoctv com entertainment televisions Click on Hookup Diagrams in the box to the right On the HookUp Diagrams page click on LCD HDTV to CABLE DVD and SATELLITE to view hookup diagrams specific to LCD models ...

Page 2: ...ters stoves or other appa ratus including amplifiers that produce heat 9 Do not defeat the safety purpose of the polarized or grounding type plug A polarized plug has two blades with one wider than the other A grounding type plug has two blades and a third grounding prong The wide blade or the third prong are provided for your safety If the pro vided plug does not fit fully into your outlet consul...

Page 3: ...ith them might be fatal 17 Wall or Ceiling Mounting The product should be mounted to a wall or ceiling only as recom mended by the manufacturer 18 Apparatus shall not be exposed to dripping or splashing and no objects filled with liquids such as vases shall be placed on the apparatus 19 When the MAINS plug is used as the disconnect device the disconnect device shall remain readily operable CAUTION...

Page 4: ...ons in the Helpful Hints sections of this manual If the problem still persists please call 1 800 877 5032 We can help TO THE OWNER The screen is likely to be damaged if it is not maintained properly Do not use hard objects such as hard cloth or paper Do not use excessive pressure when cleaning the screen excessive pres sure can cause permanent discoloration or dark spots NEVER spray liquids on the...

Page 5: ...s 24 Connecting a Stereo Amplifier 25 Helpful Hints for Analog Audio Out connections 25 Remote Control Keys functions 26 29 Helpful Hints for Remote Control 29 How to Operate the On Screen Menu 30 Menu Navigation Map 30 All Channel Search 31 Digital Cable Search Optional 32 Helpful Hints for Digital Cable Search 32 Digital Add On Search 33 Helpful Hints for Digital Add On Search 33 Analog Antenna ...

Page 6: ... PIX1 PIX4 Audio Format Dolby Digital for ATSC DTV and Analog for NTSC Receivable Formats Digital Tuner for ATSC terrestrial broadcasts and nonscrambled ClearQAM cable channels NTSC analog tuner for VHF UHF or CATV Channel Scan Memory Receives 181 Analog Channels VHF 2 13 and UHF 14 69 Cable 14 125 and 99 Digital Channels XDS Extended Data Services displays station call letters title of show and r...

Page 7: ... Sound with HDCP SIZE AND WEIGHT APPROXIMATELY Horizontal Dim Width 26 7 in 678mm Vertical Dim Height 21 1 in 537mm Depth Dim Thickness 6 9 in 176mm Weight 23 6 lbs 10 7 Kg Specifications are subject to change without notice CAUTION FCC Regulations state that improper modifications or un authorized changes to this unit may void the user s authority to operate the unit This symbol on the nameplate ...

Page 8: ...ewdriver Important Note Place DTV face down on a padded or cushioned surface to protect the screen and finish Handling by more than two people is recommended 1 Remove four 4 screws from the metal bracket CAUTION Hold the stand firmly as you remove the last screw 2Carefully remove the DTV stand DTV BACK VIEW POSITIONING THE LCD DTV Always use an appropriate table or stand when positioning your DTV ...

Page 9: ...9 RIGHT SIDE PANEL VIEWED FROM FRONT These keys operate exactly like the Remote Control keys Go to page 26 for more detail information if needed POWER VOLUME CHANNEL ...

Page 10: ...uipment S Video connection will override a connection to the Video input jack VIDEO1 See PAGES 21 and 23 for S Video connections Analog Digital Antenna Input Connect an RF antenna or Analog Cable system to this jack See PAGE 14 for Signal connection Component Video Input VIDEO2 or VIDEO3 Connect digital video equipment to the Y green Pb blue Pr red and Audio L R jacks These jacks will automaticall...

Page 11: ...arate audio con nection and an adapter are required for DVI device See PAGES 16 and 17 for HDMI DVI connection Audio Video Input VIDEO1 Connect analog video equipment here See PAGES 21 22 and 23 for AV VIDEO1 jack connection Note S Video connection overrides the Video1 com posite video connection Digital Audio Output Use a Phono Type Coaxial Digital Audio Out Cable to connect Digital Audio Output ...

Page 12: ...r resolu tion and better picture quality Use this cable instead of the regular composite video cable RCA type when available NOTE None of these cables are sup plied with this DTV Audio Cables Provides analog left right audio for your external equipment connections Component Y Pb Pr Use these cables to connect your component equipment This connection provides the best picture but does not include s...

Page 13: ...tent Requires separate audio connections COMPONENT VIDEO CABLE COMPOSITE VIDEO OR S VIDEO IN 21 22 23 DIGITAL AUDIO OUT Only available when received as part of the Digital RF signal dis played on screen COAXIAL DIGITAL CABLE 24 ANALOG AUDIO OUT JACKS 25 AUDIO CABLE S VIDEO CABLE Analog Signal Compatible External Cables Needed Go to Connections Equipment Not Supplied Page COMPOSITE VIDEO CABLE AV R...

Page 14: ... moisture or heat RF ANTENNA CABLE OR CABLE BOX OR SATELLITE BOX OR ANALOG DIGITAL ANTENNA IN THE TUNER IN THIS DTV CAN RECEIVE 1 Digital and or Analog Off Air Signals from an RF antenna OR 2 Analog or ClearQAM cable channels Note You must search for ClearQAM channels using the Digital Cable Search menu option OR 3 The output from an external device such as a VCR or cable box Signals from a Set to...

Page 15: ...ls but not at the same time If after two searches the DTV still fails to detect any channels the DTV will tune to Video1 ANALOG CHANNELS Note If EXIT is pressed the DTV will skip Channel Search and tune to Video1 without storing any channels in the Channel Map databases DIGITAL CHANNELS To 120V AC outlet GETTING STARTED REQUIRED INITIAL SETUP Continued INITIAL ON SCREEN ALL CHANNEL SEARCH 4 Press ...

Page 16: ...having an additional feature for DVI connection Compatible video devices can be connected to either set of jacks Refer to the owner s manuals and user s guides that came with your external equipment for connection options HELPFUL HINTS PROBLEMS SOLUTIONS SYMPTOM CHECK THESE CONDITIONS TRY THESE SOLUTIONS No Signal will appear randomly on the screen when no signal is detected at the HDMI jack Check...

Page 17: ...vice OPERATING TIPS The VIDEO 3 audio jacks are used to receive the audio from the DVI device These video jacks cannot be used when a DVI device is connected Refer to the owner s manuals and user s guides that came with your external equip ment for connection options HELPFUL HINTS PROBLEMS SOLUTIONS SYMPTOM CHECK THESE CONDITIONS TRY THESE SOLUTIONS No Signal will appear randomly on the screen whe...

Page 18: ...TOP STB DTV VIDEO2 AUDIO L R JACKS OPERATING TIP Refer to the owner s manuals and user s guides that came with your external equipment for connection options HELPFUL HINTS PROBLEMS SOLUTIONS SYMPTOM CHECK THESE CONDITIONS TRY THESE SOLUTIONS No Signal will appear randomly on the screen when no signal is detected at the video jack Check Audio Video connections Check external equipment connections C...

Page 19: ...IP Refer to the owner s manuals and user s guides that came with your external equipment for connection options VIDEO2 3 COMPONENT JACKS Connection Option 2 HELPFUL HINTS PROBLEMS SOLUTIONS SYMPTOM CHECK THESE CONDITIONS TRY THESE SOLUTIONS No Signal will appear randomly on the screen when no signal is detected at the video jack Check Audio Video connections Check external equipment connections Ch...

Page 20: ...functions Compatible video devices can be connected to either or both sets of jacks Refer to the owner s manuals and user s guides that came with your external equipment for connection options SYMPTOM CHECK THESE CONDITIONS TRY THESE SOLUTIONS No Signal will appear randomly on the screen when no signal is detected at the video jack Check Audio Video connections Check external equipment connections...

Page 21: ...e DTV remote control IMPORTANT FACTS Composite jacks offer only 480i SDTV resolution No Signal will appear randomly on the screen when no signal is detected at the video jack Check Audio Video connections Check external equipment connections Check external equipment setting Press the INPUT key Switch on external equipment Set external equipment output connections to match input connections SYMPTOM...

Page 22: ...olution YELLOW WHITE RED AV JACKS No Signal will appear randomly on the screen when no signal is detected at the video jack Check Audio Video connections Check external equipment connections Check external equipment setting Press the INPUT key Switch on external equipment Set external equipment output connections to match input connections HELPFUL HINTS PROBLEMS SOLUTIONS SYMPTOM CHECK THESE CONDI...

Page 23: ...xternal equipment output connections to match input connections SYMPTOM CHECK THESE CONDITIONS TRY THESE SOLUTIONS If you continue to experience problems please call toll free 1 800 877 5032 We can Help HELPFUL HINTS PROBLEMS SOLUTIONS OPERATING TIP Refer to the owner s manuals and user s guides that came with your external equipment for connection options DTV VIDEO1 1 Connect DVD to the TV S Vide...

Page 24: ... please call toll free 1 800 877 5032 We can Help OPERATING TIP Refer to the owner s manual that came with your external equipment for connection options AUDIO OUT For Stereo Sound 1 Connect a Coaxial Digital Audio cable from the DTV Digital Audio Output jack to a Coaxial Digital Audio In jack on an AV Receiver 2 Connect an Audio cable from the DTV Audio Out jacks to Audio In jacks on the AV Recei...

Page 25: ...DTV DTV AUDIO OUT JACKS ANALOG HELPFUL HINTS PROBLEMS SOLUTIONS SYMPTOM CHECK THESE CONDITIONS TRY THESE SOLUTIONS No Sound or Poor Sound Check external equipment connections Switch on external equipment If you continue to experience problems please call toll free 1 800 877 5032 We can Help OPERATING TIP Refer to the owner s manual that came with your external equipment for connection options ...

Page 26: ...or up down keys Press these keys to move the cursor up and down within the menu Cursor left right keys Press these keys to move the cursor left and right within the menu Enter Key Press to select an option from the menu system when required Exit Key Press to exit from the menu system Channel Scanning CH Keys Press to scan through the channels in memory and external inputs Volume Keys Press VOL to ...

Page 27: ...press the other two numbers Caption Key Captioning is text information transmit ted along with the picture and sound so it can be displayed on the TV screen Press CAPTION to select mode options Digital CC1 Digital CC6 or Analog CC1 CC4 OFF or QuikCap QuikCap switches captions on and off with the Mute function The appearance of Digital Captions can be changed using the menu settings Reset Key Press...

Page 28: ...et the Sleep Off Timer Time can be set in 30 minute increments up to 3 hours Note The Sleep Timer cancels when the TV is turned off or if a power failure occurs 12 13 Mute Key Press once to mute the sound Press again to restore the sound 12 13 CONTINUED ON NEXT PAGE POINT TOWARDS TV ...

Page 29: ...ront of TV SYMPTOM CHECK THESE CONDITIONS TRY THESE SOLUTIONS If you continue to experience problems please call toll free 1 800 877 5032 We can Help HELPFUL HINTS PROBLEMS SOLUTIONS 14 Audio Key Press to select the desired audio mode if available as part of the broadcast signal DIGITAL AUDIO MODE SELECTIONS ANALOG AUDIO MODE SELECTIONS 14 POINT TOWARDS TV ...

Page 30: ...eys to select or adjust menu item 4 Press ENTER to activate setting if needed 5When you have finished making adjustments press the EXIT key to return to normal TV viewing Note For menu items that have sub menus follow on screen instructions to select and make adjustments REMOTE CONTROL NAVIGATION KEYS MENU options Along with the on screen instructions each menu feature is explained in detail on th...

Page 31: ... air digital and analog channels and analog cable channels The DTV can receive cable or off air channels but not at the same time If after two searches the DTV still fails to detect any channels the DTV will tune to Video1 OPERATING TIPS DTV will select the correct Antenna mode for the type of signal connected automatically If you move the DTV to a new location press the RESET key twice after conn...

Page 32: ...e ClearQAM digital channels Digital Cable Search process will take about 10 minutes please be patient NOTE After Channel Search is complete the DTV will tune to the lowest Digital Cable channel 4 Use the CURSOR key to select Yes Press ENTER SYMPTOM CHECK THESE CONDITIONS TRY THESE SOLUTIONS HELPFUL HINTS PROBLEMS SOLUTIONS Cannot select menu option DIGITAL CABLE SEARCH Did the word Not Available a...

Page 33: ...new digital channels to the existing antenna channel database use Digital Add on Search Also use this feature to add channels when broadcast towers are in multiple directions from your location For more info go to www antennaweb org and type in your zip code to obtain specific tower and antenna infor mation Then adjust your antenna and repeat the Digital Add on Search 4 Use the CURSOR key to selec...

Page 34: ...hannels OK Did the word Not Available appear on screen Cable Channel Indicator C should appear next to channel number Cable Channel Indicator C should not appear next to the channel number Press INPUT Key to select TV Analog mode Switch Menu option Analog Antenna Signal selection to CABLE Switch Menu option Analog antenna signal to VHF UHF If you continue to experience problems please call toll fr...

Page 35: ...free 1 800 877 5032 We can Help 3 Use the CHANNEL CH keys or numerical 0 9 keys to select desired channel 4 Press the ENTER key to delete the channel The display will change to deleted 1 Press the MENU key to display the Main menu 2 Use the CURSOR keys to highlight Channel Scan Memory Press ENTER DELETING ANALOG OR DIGITAL CHANNELS FROM MEMORY Channel Scan Memory is a list of active channels that ...

Page 36: ...ce problems please call toll free 1 800 877 5032 We can Help 3 Use the CHANNEL CH keys or numerical 0 9 keys to select desired channel 4 Press the ENTER key to add the channel The display will change to added 1 Press the MENU key to display the Main menu 2 Use the CURSOR keys to highlight Channel Scan Memory Press ENTER ADDING DIGITAL OR ANALOG CHANNELS TO MEMORY Channel Scan Memory is a list of a...

Page 37: ...ers decide which caption signals to transmit The appearance of Digital Captions can be changed using the menu settings as shown CONTINUED ON NEXT PAGE 5 Use the CURSOR keys to select the desired effect OPERATING TIPS If Background Opacity is set to transparent captions may be difficult to see Only true EIA 708B Digital Closed Captions are affected by all of these settings QUIKCAP OPERATION QuikCap...

Page 38: ...aptioning Press CAPTION key to select Analog captioning SYMPTOM CHECK THESE CONDITIONS TRY THESE SOLUTIONS If you continue to experience problems please call toll free 1 800 877 5032 We can Help TO VIEW CAPTIONS Press the CAPTION key to select caption modes HELPFUL HINTS PROBLEMS SOLUTIONS Digital modes Digital CC1 through Digital CC6 QuikCap and Off Analog modes CC1 through CC4 QuikCap and Off CA...

Page 39: ...ock the program depending upon choices you make when setting up the V Guide system TO BLOCK MOVIE OR TV PROGRAM 1 Press the MENU key to display the Main menu 2 Use the CURSOR keys to highlight V Guide Press ENTER 3 Use the CURSOR keys to select ON Press ENTER 5 Press CURSOR and keys to select MOVIE TV Rating or Content Ratings A green square will appear beside the selected item 6 Press the ENTER k...

Page 40: ...efer to your external device s owner s manual for instructions on setting V Guide Limits MENU OPTION V GUIDE PARENTAL CONTROL Continued ON SCREEN VIEW OF BLOCKED TV PROGRAM TO TEMPORARILY UNBLOCK MOVIE OR TV PROGRAM 1 Press the MENU key to display the Main menu 2 Use the CURSOR keys to highlight V Guide Press ENTER 3 Use the CURSOR keys to select OFF Press ENTER This will temporarily set V Guide t...

Page 41: ... for children under 14 years of age Parents are strongly urged to use caution against letting children under age 14 watch unattended Material contains intense violence V intense sexual situations S strong coarse language L or intensely suggestive dialogue D MATURE AUDIENCE ONLY Program is designed to be viewed by adults and there fore may be unsuitable for children under 17 years of age TV RATINGS...

Page 42: ...cture Sound Press ENTER 3 Use the CURSOR keys to highlight Auto factory preset settings or Manual Press ENTER MENU OPTION PICTURE SOUND CONTINUED ON NEXT PAGE MANUAL ADJUSTMENTS 4 Use the CURSOR keys to select the option you want to adjust 5 Then use the CURSOR keys to make an adjustment ...

Page 43: ...t MUTE function may be on Check if program is in color Check antenna external connections Color or Tint misadjusted May be station trouble May be MUTE function is on Adjust antenna Install booster Press the RESET key to restart channel search Try a different channel Adjust Volume Try a different channel Adjust antenna Press the RESET key to restart channel search SYMPTOM CHECK THESE CONDITIONS TRY...

Page 44: ...44 MENU OPTION MENU LANGUAGE 1 Press the MENU key to display the Main menu 2 Use the CURSOR keys to highlight Menu Language Press ENTER 3 Use the CURSOR keys to select English Español or Français ...

Page 45: ... and the power consumption is normal LOW power saving level is low and the brightness level is lower than normal HIGH power saving level is high and the brightness is set to the lowest level 1 Press the MENU key to display the Main menu 2 Use the CURSOR keys to highlight Energy Saver Press ENTER 3 Use the CURSOR keys to highlight desired option ...

Page 46: ...ake one frame of video or one complete image Letter Box This term is used to describe a 16 9 ratio image being displayed on a 4 3 ratio display device Black bands appear at the top and bottom of the screen MPEG2 A compression scheme for moving images and audio It was developed by the Motion Picture Experts Group This makes HDTV and multicasting possible Multicasting The dividing of a station s bro...

Page 47: ...tion being used If the sound is associated with component jacks on a DVD player it may be necessary to access the DVD menu to select the component outputs or S Video output 9 There is no sound picture is clear If you are connecting your television through the Composite jacks Video1 S Video jack Video1 or Component jacks Video2 or Video3 the matching audio jacks must also be connected 10 The pictur...

Page 48: ...re proper warranty application keep the original dated sales receipt for evidence of purchase Return the defective TV to the retailer along with the receipt and the included accessories such as the remote control The defective TV will be exchanged for the same model or a replacement model of equal value if necessary Replacement model will be contingent on availability and at the sole discretion of...

Reviews: