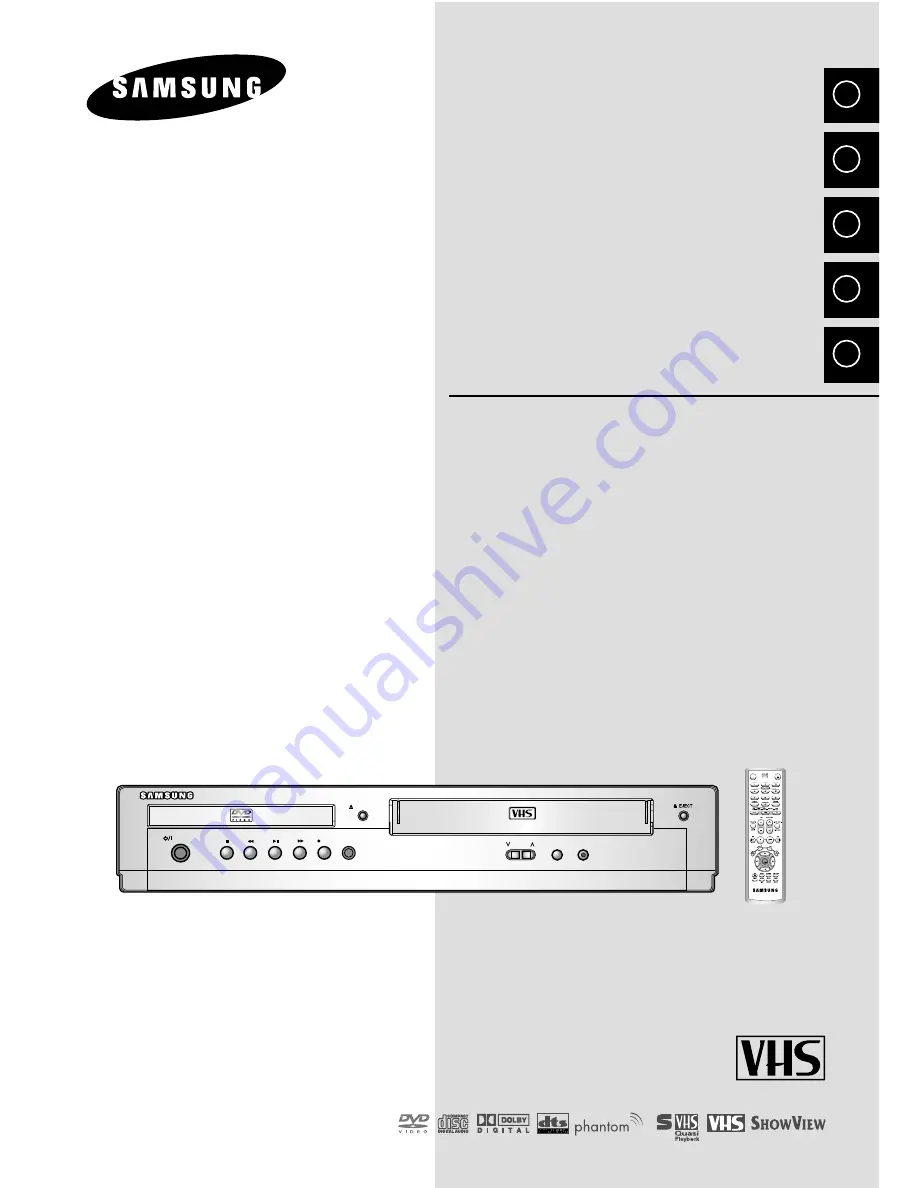
background image

DVD-VCR

Kombigerät DVD-Player /Videorecorder

Magnétoscope Lecteur DVD

DVD-VCR

DVD/Video

SV-DVD940

PAL

DVD/VCR

PROG

STANDBY/ON

REC

EZ VIEW

DVI VIDEO

OPEN/CLOSE

 OPEN/CLOSE

STANDBY/ON

OK

Instruction Manual

Bedienungsanleitung

Mode d’emploi

Istruzioni per l’uso

Gebruiksaanwijzing

F

I

NL

D

GB

www.samsungvcr.com
Deutsche Homepage: www.samsung.de
www.samsung.fr

PAL

Summary of Contents for SV-DVD940

Page 1: ...D Video SV DVD940 PAL DVD VCR PROG STANDBY ON REC EZ VIEW DVI VIDEO OPEN CLOSE OPEN CLOSE STANDBY ON OK Instruction Manual Bedienungsanleitung Mode d emploi Istruzioni per l uso Gebruiksaanwijzing F I NL D GB www samsungvcr com Deutsche Homepage www samsung de www samsung fr PAL ...

Page 2: ... a Satellite Receiver or Other Equipment 12 Plug Auto Set Up 13 Deck Control Keys 14 Basic TV Tuner Operations 15 Inserting Batteries in the Remote Control 16 Setting the Date and Time 16 Menu Language 17 SETTING UP YOUR DVD VCR Presetting the Stations Automatically 18 Presetting the Stations Manually 19 Clearing a Preset Station 20 Changing the Preset Station Table 21 Selecting the Colour Mode 22...

Page 3: ...ame 36 Playing a Sequence at Variable Speeds 36 Searching for a Specific Sequence 37 Using the Tape Counter 39 Using the Assemble Edit Function 40 Recording from Another VCR or Camcorder 40 DVD FUNCTIONS Using the TV Buttons on the Remote Control 41 Choosing a Connection 42 Setting Up the Language Features 44 Setting Up the Audio Options 46 Setting Up the Display Options 47 Setting Up the Parental...

Page 4: ...ing either the or symbols or the header of the chapter DVD VCR This product incorporates copyright protection technology that is protected by method claims of certain U S patents and other intellectual property rights owned by Macrovision Corporation and other rights owners Use of this copyright protection technology must by authorized by Macrovision Corporized by Macrovision Corporation and is in...

Page 5: ...ndi tions below 5 C and above 40 C or to extreme humidity conditions less than 10 and more than 75 Do NOT expose the DVD VCR to direct sunlight Do NOT expose the DVD VCR to any liquids Do NOT place any objects on the DVD VCR or remote control During a storm and or light ning unplug the DVD VCR from the mains socket and aerial If the remote control is not used for a long period of time remove the b...

Page 6: ... play If the codes do not match the disc will not play The Region Number for this player is described on the rear panel of the player Playback Region Number PAL 12 Cm 8 Cm Single sided 240 min Double sided 480 min Single sided 80 min Double sided 160 min Audio Video Audio DVD contains excellent sound and video due to Dolby Digital and MPEG 2 system Various screen and audio functions can be easily ...

Page 7: ...EN CLOSE BUTTON DVI SELECT BUTTON DVD VCR SELECT BUTTON DVD DECK STANDBY ON BUTTON Rear View of the DVD VCR DVI OUT JACK COAXIAL DIGITAL AUDIO OUT LINE OUT OPTICAL S VIDEO OUT L R AUDIO DVI OUT AERIAL IN CONNECTOR OUT TO TV CONNECTOR AV2 DEC EXT SCART EURO 21 SOCKET AV1 EURO AV IN OUT SCART EURO 21 SOCKET AUDIO L R OUT SOCKETS AUDIO L R OUT SOCKETS DVD ONLY DIGITAL AUDIO OUT SOCKET COAXIAL VIDEO O...

Page 8: ...ED 15 RECORD 16 TIMER 17 ANGLE IPC 18 OPEN CLOSE 19 0 9 20 TV VCR 21 VCR TV SELECT 22 INPUT SEL F ADV STEP 23 PROG TRACKING 24 FAST FORWARD SKIP NEXT 25 PLAY STILL 26 INFO 27 RETURN 28 RIGHT 29 OK 30 EZ VIEW 31 DISC MENU 32 MARK SEARCH 33 MODE REPEAT OPEN CLOSE STANDBY ON OK 1 2 3 4 5 6 7 8 9 10 11 12 13 14 15 16 17 18 19 20 21 22 23 24 25 26 27 28 29 30 31 32 33 ...

Page 9: ...EO CABLE OWNER S INSTRUCTIONS COAXIAL CABLE STEREO 1 2 3 4 5 6 7 8 1 The DVD Deck is active 2 A DVD CD or SVCD is loaded 3 The time counter position time remaining or current deck status is displayed 4 VHS tape is inserted 5 The VCR Deck is active 6 A DVD with a DTS soundtrack is loaded 7 The Hi Fi track of a VHS tape is playing The current TV show or video is broadcast in Stereo 8 A Timer Recordi...

Page 10: ...RT In Satellite receiver Other VCR Audio output Rear Audio RCA Out Audio out VIDEO output Rear RCA Out Video out S VIDEO Rear S JACK Out S Video out DVD only output Digital AUDIO Rear Optical Out Digital Audio out DVD only output Coaxial OUT TO TV Rear 75 Ω Out Television coaxial IN FROM ANT Rear 75 Ω In Aerial coaxial Cable television network Satellite receiver DVI OUTPUT Rear DVI Out DVI video o...

Page 11: ...ision you can also connect your DVD VCR to the television via the SCART cable see section below if your television is equipped with this type of connection TV LINE OUT L R 3 2 CO DI LINE OUT L R AUDIO You can connect your DVD VCR to the television using the SCART cable if the appropriate input is available on the television You thus Obtain better quality sound and pictures Simplify the setting up ...

Page 12: ...lug the SCART Cable with satellite receiver or other equipment into the AV1 EURO AV socket on the rear of the DVD VCR After making this connection select the source by pressing the INPUT SEL button for the AV1 input sources 2 By means of RF Coaxial Cable After making this connection you must preset the station received through the satellite tuner RF output channel of the satellite receiver should ...

Page 13: ...sult A message appears 5 Press OK button 6 Press the or buttons to select your country The VCR searches for the stations according to a preset preference list corresponding to the country that you have selected 7 Press OK to start the auto scanning The number of stations automatically stored by the VCR depends on the number of stations that it has found 8 The current time and date are displayed au...

Page 14: ...ected 3 VCR Button Press the VCR button on remote control when you want to control the VCR deck The VCR indicator will light on the Front Panel Display to show that VHS deck is selected 4 INPUT SEL BUTTON Press the INPUT SEL button repeatedly to cycle through all of your input sources including the Tuner PR AV1 rear AV input AV2 rear AV input It is only available when VCR deck is selected Before u...

Page 15: ...uilt in TV tuner 1 TV VCR Button Press to switch between your TV s tuner and the VCR s internal tuner 2 PROG Button Press to change to the next or previous channel 3 0 9 Buttons Press to select channels directly 4 INFO Press to display the channel you are watching Also works in DVD and VCR mode 1 2 2 3 OK 4 ...

Page 16: ...cally You must set the date and time when You purchase the DVD VCR The time and date are set automatically from the broadcast signal If the signal is weak or ghosting occurs the time and date may not be set automati cally In this case they should be set manually Do not forget to reset the time when you change clocks from winter to summer time and vice versa 1 After pressing the MENU press the OK o...

Page 17: ...e selection arrow next to your desired Language then press the OK button 4 Press the or buttons to select language you want Place the selection arrow next to your desired Language then press the OK button 5 On completion press RETURN to exit the menu Language English User Set Auto Power Off Off Screen Messages On Install Français Deutsch Español Italiano Nederlands Language Set English OK 1 ...

Page 18: ...els already preset on your VCR will be deleted 7 Press OK to start the auto scanning Result The Please Wait indication highlight on the television screen The first frequency band is scanned and the first station found is displayed and stored The DVD VCR then searches for the second station and so on When the automatic scanning procedure has finished the DVD VCR switches automatically to programme ...

Page 19: ...automatically from the broadcast signal 12 To change the programme s name press the button Result The first letter of the name flashes 13 To Then Select a character Press the or button until the in the name required character is displayed letters numbers or character Move to the next or Press the or buttons previous character respectively 14 If you Then Wish to store the Press the or buttons until...

Page 20: ...e Manual Setup option is selected 5 Press the OK or to select a Manual Setup option Result The TV STATION TABLE menu is displayed 6 Press the corresponding or buttons until the required preset TV station PR is selected 7 Press the CLEAR button 8 Repeat the same procedure from Step 6 onwards until all the required stations have been cleared 9 On completion press the RETURN button four times to exit...

Page 21: ... Press the corresponding or buttons until the required preset TV programme is selected Result The selected station is displayed at the same time on the television screen 7 To change the programme number assigned to a station press the OK button on the remote control For example To move a TV station in programme 1 to programme 3 8 Press the or buttons to select required position And then press OK a...

Page 22: ...rd is automatically selected by the DVD VCR B W Black and White 6 On completion press RETURN three time to exit the menu Language English User Set Auto Power Off Off Screen Messages On Install NICAM programmes are divided into 3 types NICAM Stereo NICAM Mono and Bilingual transmission in another language NICAM programmes are always accompanied by a standard mono sound broadcast and you can select ...

Page 23: ... To adjust the sharpness manually press the button to turn the IPC mode Off 8 Press the or buttons until the picture is displayed according to your preferences If you do not press a button within ten seconds the PICTURE menu disappears automatically 9 On completion press the RETURN button again Language English User Set Auto Power Off Off Screen Messages On Install On Off 1 During playback press t...

Page 24: ...ion 3 Press the OK or buttons to select this option Result The User Set menu is displayed 4 Press the corresponding or buttons until the ShowView Extend option is selected 5 Press the OK or buttons to set the ShowView Extend time by increments of 10 minutes 6 To turn off press OKor buttons repeatedly until Off shows Colour System Auto NICAM On IPC On ShowView Extend Off User Set Language English U...

Page 25: ... RETURN twice to exit the menu Language English User Set Auto Power Off Off Install Screen Messages On On Off VCR Auto Power Off VCR The Auto Power Off feature automatically turns off your DVD VCR if no signal is received and you do not press any button for the selected time 1 After pressing the MENU press the OK or Result The Setup menu is displayed 2 Press the corresponding or buttons until the ...

Page 26: ...ape Select E180 Repeat Play Off S VHS Off VCR Setup Off On Selecting the Cassette Type Language English User Set Auto Power Off Off Screen Messages On Install Repeat Play Off S VHS Off VCR Setup Tape Select E180 If you wish to use the tape counter to display the time remaining on a cassette you must indicate the type of cassette inserted 1 After pressing the MENU press the corresponding buttons to...

Page 27: ... or 5 hours OK S VHS Play VCR The DVD VCR allows you to playback high quality S VHS tapes 1 During S VHS play mode after pressing the MENU press the corresponding buttons to select the VCR option 2 Press the OK or buttons to select this option Result The VCR Setup menu is displayed 3 Press the corresponding or buttons until the S VHS option is selected 4 To Press OK or until S VHS play On is displ...

Page 28: ... with the window visible and the safety tab intact or the opening covered with adhesive tape Result The DVD VCR is switched on automatically 4 Select The station to be recorded using the PROG or buttons or The AV1 AV2 source using the INPUT SEL button for a satellite tuner or external video source Result The station number is displayed and the programme can be seen on the television 5 Select the r...

Page 29: ...me can be seen on the television 5 Select the recording speed by pressing the SPEED button as many times as required see page 27 6 Hold the REC button down for a while to start recording Result The record indicator appears on the television screen and DVD VCR display An index is recorded on the tape see page 37 7 Press the REC button several times to increase the recording time in 30 minute interv...

Page 30: ...tion concerning the programme is displayed When using the ShowView function for the first time with stored stations the programme number flashes This one time you must enter the station number manually by pressing the or buttons Refer to the following page if The programme number or times flash You wish to modify the programme 4 If the programme and times are correct press the RETURN button 5 Pres...

Page 31: ...mme every week Press the or buttons until the Day selection mode on the same day and at the same time Press the or buttons until the W Week value is displayed followed by the required day Example W SA Weekly Saturday Extend the recording time Press the or buttons until the Stop selection mode Press the or buttons to increase or decrease the stop time Select the recording speed Press the or buttons...

Page 32: ...he or buttons 11 Press to select the recording stop time 12 Select the required recording stop time by pressing the or buttons following the same procedure as when selecting the recording start time 13 Press to select the recording speed 14 Press the or buttons to select the SP Standard Play LP Long Play Auto Auto Tape Speed Select recording speeds 15 Press the or buttons to toggle between the PDC...

Page 33: ...alues as required For more details refer to the previous page 5 On completion press RETURN twice You can cancel any programmes that are Incorrect No longer required 1 Press TIMER on the remote control Result The timer selection is displayed 2 Press the OK button to select Standard option Result The TIMER PROGRAMMING menu is displayed 3 Select the programme to be cancelled by pressing the or button...

Page 34: ... reached the cassette is rewound automatically NTSC tapes can be played back but cannot be recorded with this DVD VCR 3 To Then press Stop the playback STOP Eject the cassette EJECT Playing a Cassette VI VIDEO 3 2 3 Adjusting Picture Alignment Manually The Picture Adjustment feature allows you to adjust the alignment manually to obtain the best possible picture When noise bars or streaks appear du...

Page 35: ...ches to Hi Fi after five seconds of Mono To select the sound mode simply press the AUDIO button on the remote control until the required option is displayed L R MIX L R MONO You can play a cassette in slow motion No sound is heard when playing back a cassette in slow motion 1 Press ll to start playing the cassette ll button one more time to make still mode to start SLOW mode or button as many time...

Page 36: ...reen Press the TRK buttons to minimize this effect You can vary the playback speed using the Shuttle function up to nine times the normal speed Example You wish to analyze a sportsperson s technique movement by movement The Shuttle function is available on the Remote control No sound is heard when playing a sequence at variable speeds 1 Press ll during playback SHUTTLE to play the cassette backwar...

Page 37: ...he CLEAR button at the point on the tape where you want to set the counter to 0 00 00 The VCR will rewind or fast forward searching for the 0 00 00 counter position and then automatically stop at that position 1 After pressing the SEARCH press the corresponding or buttons until the Go To 0 00 00 option is selected 2 Press the OK or End Search Use this feature when you want to search for a blank po...

Page 38: ...arch This feature will enable you to fast forward rewind to a specific point on a tape E g if you have recorded 3 different programmes on a tape and you have rewound the tape to the beginning by using this feature you can go directly to the start of programme 2 simply by pressing the SEARCH button 1 After pressing the SEARCH press the corresponding or buttons until the Intro Scan option is selecte...

Page 39: ...ress INFO twice to display the counter Press CLEAR when you want to set the tape counter to zero 3 When you are ready Start playback or Recording Press the button To fast froward or rewind to the sequence at which the counter was set to zero press or Some DVD VCR information such as the counter can be displayed on the television screen unless you have deactivated the Screen messages mode refer to ...

Page 40: ... video source such as another VCR or a camcorder It is an infringement of copyright laws to copy prerecorded cassettes or to re record them in any form without the permission of the owners of the corresponding copyright 1 Connect the DVD VCR from which the cassette is to be copied to the appropriate SCART audio and video input connectors on the rear of your DVD VCR as indicated on page 12 2 Insert...

Page 41: ...esult If your television is compatible with the remote control it will switch off It is now programmed to operate with the remote control If several codes are indicated for your television brand try each one in turn until you find one that works When you change the batteries in the remote control you must reprogramme the code following the same procedure You can then control the television using t...

Page 42: ... is only available for DVD The VCR out can not watch by this connection Choosing a Connection DVD OPTICAL COAXIAL COAXIAL DIGITAL AUDIO OUT OPTICAL DVD VCR or Television Connection to an Audio System Connection to an Television Dolby Digital Decoder Digital Audio Input Jack Digital Audio out Jack S Video Jack Digital Video Out ...

Page 43: ...gnal only DVI I connector digital and analog signal Though the player is using DVI I connector the output from a DVI I is only a digital signal If TV does not support HDCP High bandwidth Digital content protect snow noise appears on the screen Be careful that various connectors are similar to DVI connector for example VESA PnD VESA DFD and so on Why we adopt DVI Generally with an analog TV an anal...

Page 44: ...tton 2 Select DVD using buttons then OK or button 3 Select Language Setup using buttons then press the OK or button 4 Select Disc Menu using buttons then press the OK or button 5 Use the buttons to select English Select Others if the language you want is not listed 6 Press the OK button English is selected and the screen returns to DVD menu Using the Disc Menu Language Language Setup Disc Menu Eng...

Page 45: ...ns then OK or button 3 Select Language Setup using buttons then press the OK or button 4 Select Subtitle using buttons then press the OK or button 5 Use the buttons to select English Select Automatic if you want the subtitle language to be the same as the language selected as the audio preference Select Others if the language you want is not listed Some discs may not contain the language you selec...

Page 46: ...e Digital Audio Output DTS 1 Off Doesn t output digital signal 2 On Outputs DTS Bitstream via digital output only Select DTS when connecting to a DTS Decoder Dynamic Compression 1 On To select dynamic compression 2 Off To select the standard range PCM Down Sampling 1 On Select this when the amplifier connected to the player is not 96KHz compatible In this case the 96KHz signals will be down conver...

Page 47: ...to see the central portion of the 16 9 screen Extreme left and right side of movie picture will be cut off 3 16 9 Wide You can view the full 16 9 picture on your widescreen TV Black Level Adjusts the brightness of the screen On Off During DVI video output the Black Level will not work NTSC Disc Output NTSC if the screen only has one NTSC video entrance If this is not the case you can choose to lea...

Page 48: ...rd again The Parental Control screen appears About the Rating Level The Rating Level will work only when Use Password is set to Yes To unlock the player use to select No Use OK or to select Rating Level Press OK Use to select the level e g Level 6 and press OK Discs that contain Level 7 will now not play To cancel the rating level use OK or to select No in Use Password About the Change Password Us...

Page 49: ...n to bypass the DVD VCR s built in Dolby Digital Decoder Use the DIGITAL AUDIO OUT connection below 1 Digital Audio Out Connect EITHER an optical cable OR a digital coaxial cable from the DIGITAL AUDIO OUT jacks on the back panel of the DVD VCR to their corresponding Digital Audio Input jacks on your A V Receiver Optical Coaxial Use whichever connection is available on your A V Receiver COAXIAL DI...

Page 50: ...ump forward and backward through disc chapters tracks Skip Forward will jump to the next chapter track Skip Back will jump to the beginning of the current chapter track Press Skip Back again to jump to the beginning of the previous chapter track Search Forward Back While a disc is in Play mode press and hold the Forward Back buttons on the remote control or front panel to visually search forward b...

Page 51: ...op and bottom of the screen will disappear The picture will look vertically stretched Depending on the type of disc the black bars may not disappear completely Zoom Fit The top bottom left and right of the screen are cut off and the central portion of the screen is enlarged For 4 3 aspect ratio discs Normal Wide Displays the content of the DVD title in 16 9 aspect ratio The picture will look horiz...

Page 52: ...rs The picture will look vertically stretched Zoom Fit When a 4 3 DVD is viewed on a 16 9 TV black bars will appear at the left and right of the screen in order to prevent the picture from looking horizontally stretched For 4 3 aspect ratio discs Normal Screen Displays the content of the DVD title in 4 3 aspect ratio Screen Fit The top and bottom of the screen are cut off and the full screen appea...

Page 53: ...ired time You must ok the starting time as a reference Refers to the language of the film soundtrack In the example the soundtrack is played in English 5 1CH A DVD disc can have up to eight different soundtracks Refers to the subtitle languages available in the disc You will be able to choose the subtitles language or if you prefer turn them off from the screen A DVD disc can have up to 32 differe...

Page 54: ... contain up to 32 subtitle languages How to have the same subtitle language come up wheneveryou play a DVD Refer to Setting Up the Language Features on page 45 ENG On ENG Off OK Using the SUBTITLE button 1 Changing the Camera Angle DVD When a DVD contains multiple angles of a particular scene you can select the Angle function Press the ANGLE button to see if an ANGLE mark is present at the upper l...

Page 55: ...s automatically highlighted Press OK at the point where you want the repeat play to stop B To terminate the function press the CLEAR button A B REPEAT does not allow you to set point B until at least 5 seconds has elapsed after point A has been set 3 Press OK 4 To return to normal play press REPEAT again then press the buttons to select Off and press OK It is available to press CLEAR button on the...

Page 56: ... The audio languages are represented by abbreviations 3 Use the buttons to select Stereo or On CD This function depends on what languages are encoded on the disc and may not work with all DVDs A DVD disc can contain up to 8 audio languages How to have the same audio language come up whenever you play a DVD Refer to Setting Up the Language Features on page 45 DVD DVD CD Using the AUDIO button ...

Page 57: ...he MARK button to turn off the display 1 During play press the MARK button on the remote 2 Use the buttons to select a marked scene 3 Press the PLAY STILL ll buttons to skip to the marked scene 1 During play press the MARK button on the remote 2 Use the buttons to select the mark number you want to delete 3 Press the CLEAR button to delete a mark number Press the MARK button to turn off the displa...

Page 58: ...ll appear on the right side of the screen Up to 8 music folders can be displayed at a time If you have more than 8 folders on a disc press the buttons to bring them up on the screen 2 Use the buttons to select the desired music folder then press OK Use the buttons again to select a song file Press OK to begin playback of the song file 1 Press the MODE button in STOP mode to switch between the RAND...

Page 59: ...t least 64Kbps when recording WMA files Sound quality with WMA files basically depends on the rate of compression decompression you choose Getting audio CD quality sound requires an analog digital sampling rate that is conversion to WMA format of at least 64Kbps and up to 192Kbps Conversely files with decompression rates below 64Kbps or over 192Kbps will not be played properly Do not try recording...

Page 60: ...button 2 Use the buttons to select RANDOM Press the OK button The disc will be played in random order Depending on the disc the Program and Random Play functions may not work To resume normal play press the CLEAR button PROGRAM RANDOM playback cannot be used if the disc contains more than two types of file extensions This unit can support a maximum of 99 programmed order Program Play CD MP3 WMA Ra...

Page 61: ... to the Album Screen Each time the OK button is pressed the picture rotates 90 degrees clockwise Each time the OK button is pressed the picture is enlarged up to 2X Normal 2X Normal The unit enters slide show mode Press the RETURN button to return to the album screen Before the Slide Show can begin the picture interval must be set When this icon is selected and OK is pressed the pictures change au...

Page 62: ...ively written multisession disc can be played If there is a blank segment in the multisession disc the disc can be played only up to the blank segment A maximum of 500 images can be stored on a single CD Only Kodak Picture CDs can be played When playing a Kodak Picture CD only the JPEG files in the pictures folder can be played Picture discs other than Kodak Picture CD may take longer to start pla...

Page 63: ...art socket Output Audio DVD only Digital audio out OPTICAL COAXIAL RCA jack Video DVD VCR RCA jack Euro Scart socket Video DVD only S Video out DVI out Digital visual interface 50Ω load RGB out Euro Scart socket Tape format VHS type video tape S VHS type video tape Playback only Color system PAL SECAM MESECAM NTSC4 43 NTSC PB on PAL TV Tuning system SECAM L B G VCR Video S N Above 43dB standard re...

Page 64: ...ning If poor pictures appear on a variety of cassettes the video heads may need cleaning This is not a common problem and unless it appears the heads should not be cleaned When cleaning the video heads read all instructions provided with the head cleaning cassette Incorrect head cleaning can permanently damage the video heads If when tuning in your TV to the DVD VCR 1 Remove the aerial input plug ...

Page 65: ...operly if the disc is not encoded with the corresponding function The Screen Ratio is fixed on your DVDs Make sure you have selected the correct Digital Output in the Audio Options Menu Press power on from a cold start with no disc in the unit Press the and buttons simultaneously on the front panel for five seconds Switch off and on the DVD VCR by pressing STANDBY ON button The Parental Mode is no...

Page 66: ...v CUSTOMER S ADDRESS Kundeasdress Kundeadresse Dirección de client Direccion del cliente Endereco de cliente Adresse des Kunden Adres van klant adresse du client L indrizzo del cliente Dieuv q unsh tou agopasthv DEALER S NAME Handlendesnavn Forhandler Nombre de negociante Nombre del vendedor Nome de vendedor Name des Händlers Naam van handelaar Nom du marchand il nome del commerciante Onoma tou ka...

Page 67: ...qeiv kai to timolov g io hv h apov d eixh lianikhv ı pwv l hshı pav n w sthn opoiv a o seiriakov ı ariqmov ı tou proiov n toı prev p ei na eiv n ai eukrinhv ı 2 H upocrev w sh thı SAMSUNG aforav mov n o thn episkeuhv tou proiov n toı 3 H episkeuhv tou proiov n toı prev p ei na anativ q etai mov n o se exousiodothmev n a kev n tra service hv exousiodothmev n ouı antiproswv p ouı thı SAMSUNG Kamiv a...

Page 68: ... toı me trov p ouı pou antiv k eintai stiı tecnikev ı prodiagrafev ı asfaleiv a ı pou iscuv o un katav thn crhv s h tou proiov n toı B Episkeuhv pou ev g ine apov mh exousiodothmev n a sunergeiv a service G Atuchv m ata qeomhniv e ı hv opoiadhv p ote aitiv a pev r a tou elev g cou thı SAMSUNG sumperilambanomev n wn allav mh periorismev n wn twn keraunwv n tou nerouv thı fwtiav ı twn dhmosiv w n an...

Page 69: ...THIS APPLIANCE IS DISTRIBUTED BY www samsung com ELECTRONICS ...

Reviews: