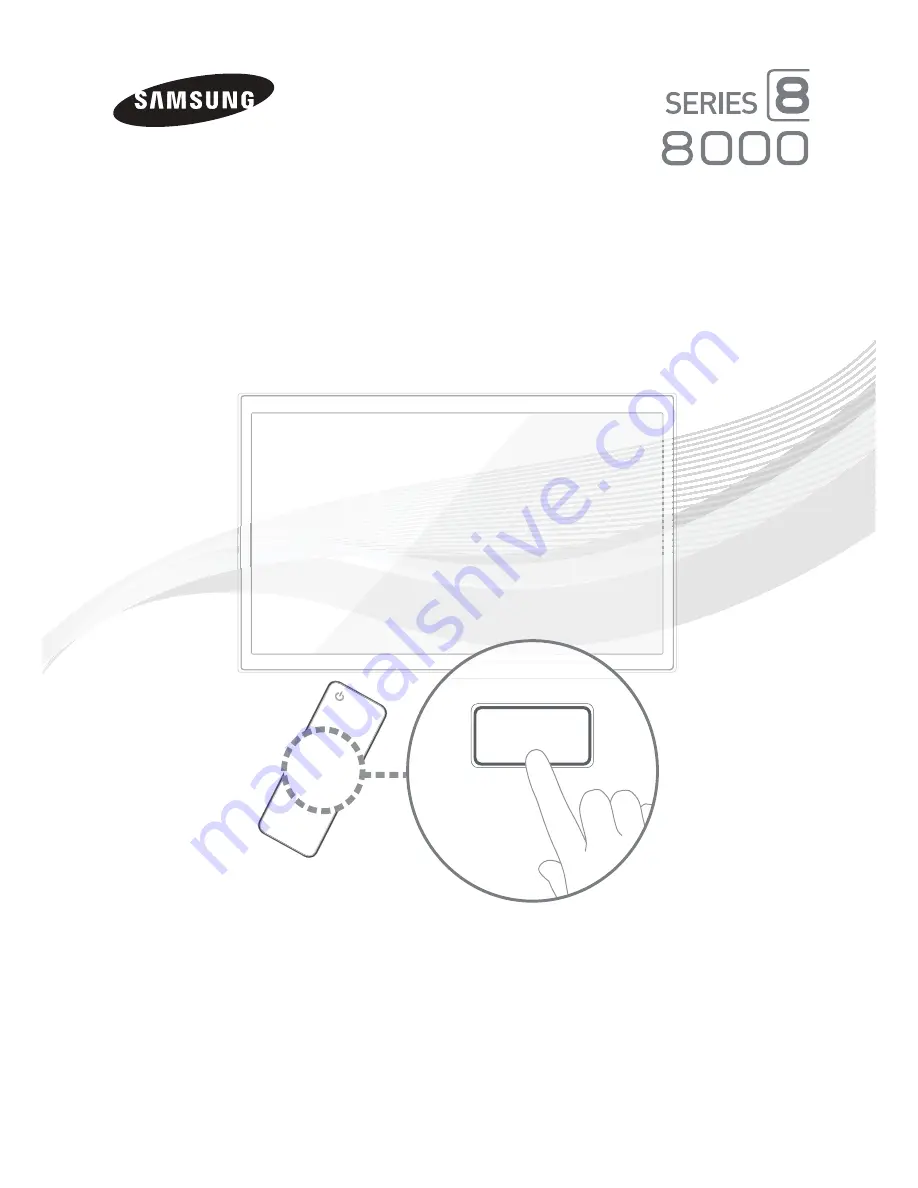
background image

 LED TV

 user manual

SUPPORT

 Thank you for purchasing this Samsung product. 
To receive more complete service, please register 
your product at

 www.samsung.com/register

 Model _____________ Serial No. _____________


 If you have any questions, please call us at 1-800-SAMSUNG (1-800-726-7864) for assistance.

Summary of Contents for LED 8000 series

Page 1: ...asing this Samsung product To receive more complete service please register your product at www samsung com register Model _____________Serial No _____________ If you have any questions please call us at 1 800 SAMSUNG 1 800 726 7864 for assistance ...

Page 2: ...TED WARRANTY STATEMENT Subject to the requirements conditions exclusions and limitations of the original Limited Warranty supplied with Samsung Electronics SAMSUNG products and the requirements conditions exclusions and limitations contained herein SAMSUNG will additionally provide Warranty Repair Service in the United States on SAMSUNG products purchased in Canada and in Canada on SAMSUNG product...

Page 3: ...ers DVD Players etc 20 Ř Connecting to Audio Devices 22 Ř Connecting to a PC 23 Ř The EX Link Cable Connection 23 Ř Changing the Input Source 24 Ř Using Smart Hub 25 Ř SMART Interaction 26 Voice Control 26 Motion Control 29 Face recognition 31 Ř The Evolution Kit Slot Kit Sold Separately 33 Ř Connecting to a Network 34 Ř Configuring Network Connections 36 Ř The Smart Touch Control 38 Ř The IR Blast...

Page 4: ...V by grouping and sorting apps to your taste Ř AllShare Play Lets you access view or play photos videos or music located on USB devices digital cameras cell phones and PCs PCs and cell phones can be accessed wirelessly through your wireless network Ř Anynet HDMI CEC Allows you to control all connected Samsung devices that support Anynet with your Samsung TV s remote Ř e Manual Provides a detailed ...

Page 5: ...ries AA x 4 Ř Remote Control AA59 00637A Batteries AAA x 2 Ř User Manual Ř Cleaning Cloth BN63 01798B Ř Warranty Card Safety Guide Ř 3D Active Glasses Ř Power Cord AV Adapter Holder Wire stand Holder Ring x 4 BN39 01154H BN61 08391A BN96 18153A Assembling the Stand Wire Holder Input Cables Sold Separately You will need one or more of these cables to connect your TV to your antenna or cable outlet ...

Page 6: ...ing it in Illustrations of common plugs and jacks are below Cable Plugs Ports Jacks HDMI USB Optical Warning Do not plug cables in upside down Be sure to check the orientation of the plug before plugging it in Wireless Keyboard Sold Separately Wireless Keyboard ...

Page 7: ...ow to connect the TV to the stand For more detailed instructions see the separate stand installation guide 1 4 3 2 B A C 2 1 2 1 Place a soft cloth over a table to protect the TV and then place the TV on the cloth screen side down x6 M4 X L10 55 and 60 inches only or x6 M4 X L12 46 inches only DO NOT USE CHEMICALS DO NOT USE GREASE DO NOT USE OIL ATTENTION ...

Page 8: ...or injury to yourself or others if you elect to install the wall mount on your own To order the wall mount kit contact Samsung Customer Care at 1 800 SAMSUNG 1 800 726 7864 VESA Wall Mount Kit Notes and Specifications Install your wall mount on a solid wall perpendicular to the floor Before attaching the wall mount to surfaces other than plaster board please contact your nearest dealer for addition...

Page 9: ...V on a wall Product Family TV size in inches VESA screw hole specs A B in millimeters Standard Screw Quantity LED TV 26 100 X 100 M4 4 32 40 200 X 200 M6 46 60 400 X 400 M8 Remove the screws in the mounting holes before you install the wall mount Do not install your Wall Mount Kit while your TV is turned on It may result in personal injury due to electric shock Installing a Wall Mount from Another...

Page 10: ...nstall your TV using a stand or a wall mount we strongly recommend you use parts provided by Samsung Electronics only Ř If you use parts provided by another manufacturer it may cause difficulties with the product or result in injury caused by the product falling Installation with a stand Installation with a wall mount 4 inches 4 inches 4 inches 4 inches 4 inches 4 inches 4 inches Other Warnings The...

Page 11: ... tape attached or not in rear of the TV camera and then you can use a TV camera after adjust a camera angle When you don t want to use a TV camera we recommend to use after a camera lens fixes to upwards In this case Face recognition and Motion Control are not available Power on Turn the TV on by pressing the Controller when the TV is in standby mode Adjusting the volume Adjust the volume by movin...

Page 12: ...n press the Controller To close the Menu Smart Hub or Source press the Controller for more than 1 second Standby mode Your TV enters Standby mode when you turn it off and continues to consume a small amount of electric power To be safe and to decrease power consumption do not leave your TV in standby mode for long periods of time when you are away on vacation for example It is best to unplug the p...

Page 13: ...For details refer to the e Manual Moves the cursor selects the on screen menu items and changes the values seen on the TV s menu Turns the remote control light on or off When on the buttons become illuminated for a moment when pressed Using the remote control with this button set to On will reduce the battery usage time Returns to the previous channel Changes channels Displays a list of recently u...

Page 14: ...out the Smart Touch Control see page 38 NOTE Ř Install the batteries so that the polarity of the batteries matches the illustration in the battery compartment Ř Use the remote control within 23 feet of the TV Ř Bright light may affect the performance of the remote control Avoid using it near fluorescent lights or neon signs Ř The color and shape of the remote may vary depending on the model ...

Page 15: ... TOOLS RETURN HISTORY MENU EXIT 1 2 3 5 4 1 MENUm button Displays the main on screen menu 2 TOOLST button Displays the Tools menus when available 3 E and Direction buttons Use the Direction buttons to move the cursor and highight an item Use the Enter button to select an item or confirm the setting 4 RETURNR button Returns to the previous menu 5 EXITe button Exits the on screen menu How to Operate ...

Page 16: ... Language screen appears Select the menu language you want using your remote and then select Next The TV will display on screen menus using the language you select beginning with the next step in the Setup process 2 Use Mode Select the Home Use Mode On the Use Mode screen select the Home Use using your remote and then select Next The Network Settings screen appears Store Demo is for retail environ...

Page 17: ...F To redisplay letters select F again 3 When done select Next if you have entered a security key or WPS PIN if you have entered a WPS PIN 4 The TV checks the wireless connection If the connection is successful the You are connected to the Internet If you have any problems using online services please contact your Internet Service Provider message appears Select Next and then go to 4 Software Upgra...

Page 18: ...pears Select Agree To use Smart Hub you must select Agree for the Terms of Service Agreement 6 Auto Program 1 Select where your TV signal comes from Select the appropriate option for your TV using your remote and then select Next Ř I use an antenna cable connection to the TV Select if you have an antenna or a cable connection without a set top box If you select this option go to 7 Auto Program 2 S...

Page 19: ...ent You can also turn the DST function on through the TV s on screen menu Menu ĺ System ĺ Time ĺ Clock ĺ DST Manual If you selected Manual you ll go to the Clock screen Select Date or Time You can set the current date and time using your remote When done setting the Date and Time select Next 10 Voice and Motion Control Setting the Voice and Motion Control function You can turn the Voice and Motion...

Page 20: ... uses an older version of HDMI the video and audio may not work If this occurs ask the manufacturer of the device about the HDMI version and if it is out of date request an upgrade Ř Be sure to purchase a certified HDMI cable Otherwise the picture may not display or a connection error may occur Ř We recommend using a basic high speed HDMI cable or an HDMI cable that is Ethernet compatible Note that...

Page 21: ...f you use MHL devices via an HDMI cable The TV will be recognized as the HDMI input In this case the TV may work differently than when you use MHL devices via a MHL cable For the best cable connection to this product use cables no thicker than the cable illustrated below Ř Maximum thickness 0 55 inches 14mm Using a Component Cable up to 1080p HD signals or an Audio Video Cable 480i analog signals ...

Page 22: ...on you can hear sound output from the TV s optical jack When the TV is receiving a DTV signal the TV will send 5 1 CH sound to the home theater receiver When the source is a digital component such as a DVD player Blu ray player cable box STB Set Top Box satellite receiver and you connected it to the TV via HDMI you will only hear 2 CH audio from the home theater receiver If you want to hear 5 1 CH...

Page 23: ...he optimal resolution is 1920 X 1080 60 Hz See the Display Resolution page for all available resolutions page 57 NOTE Ř For an HDMI to DVI cable connection you must use the HDMI IN 1 DVI jack Ř For PCs with DVI video out jacks use an HDMI to DVI cable to connect the DVI out on the PC to the HDMI IN 1 DVI jack on the TV Use the PC s speakers for audio Ř PC D Sub input is not supported The EX Link C...

Page 24: ... Source list is displayed The following selections appear under Edit Name VCR DVD Cable STB Satellite STB PVR STB AV Receiver Game Camcorder PC DVI PC DVI Devices TV IPTV Blu ray HD DVD DMA Select an input jack and then select the name of the device connected to that jack from the list that appears For example if you have your Blu ray player attached to HDMI IN 2 ARC select Blu ray for that input ...

Page 25: ...ou press the z button Ř Web Browser Lets you browse the Internet Ř Schedule Manager Lets you schedule shows and channels for viewing Ř Source Lets you select a connected external video source to view Ř AllShare Play Lets you access view or play photos videos or music located on USB devices digital cameras cell phones and PCs PCs and cell phones can be accessed wirelessly through your wireless netw...

Page 26: ...then you can use a TV camera after adjust a camera angle When you don t want to use a TV camera we recommend to use after a camera lens fixes to upwards In this case Face recognition and Voice and Motion Control are not available Voice Control Menu ĺ System ĺ Voice and Motion Control ĺ Voice Control Enable or disable the voice recognition function Lets you access and control menu options and functi...

Page 27: ... wave it 3 4 time to the left and right Motion Control starts If the Motion Control starts the cursor is displayed at the center of the screen and the Motion Guide Bar Size is at the bottom of the screen Voice Control Turns the Voice Control function on or off The VOICE button on your remote is always activated Language Select the recognition language you want to use Trigger Words You can select t...

Page 28: ...the Voice Control function follow these steps If Voice Control function is set to On the TV may be turned on automatically by effect of the ambient environment 1 Speak the Trigger Words that you selected into the microphone embedded in the TV or press the VOICE button on your remote The TV displays the Voice Command Bar Size When you use the Voice Control the volume is set to 5 automatically 2 Say...

Page 29: ...ough for Motion Control to work properly Select Start using your remote The test will starts and should take only a few seconds Appropriate ambient brightness 50 500 Lux Do not illuminating a sunlight or lights directly into the camera lens Make sure that the camera lens is cloaked by an object Camera Angle Test On the Camera Angle Test screen select Start using your remote A rectangle appears on ...

Page 30: ...moved Return Return to the previous menu Action Spread your hand and rotate it counterclockwise Channel Volume Control Changes the channel or adjust the volume If you use the Motion Control function while watching a channel the channel volume control screen appears Action Use the Pointing Navigation motion to move the cursor to the channel or volume controller and then uses the Run motion to adjus...

Page 31: ... function To create your Samsung Account refer to Creating an Account Advanced Features ĺ Smart Hub in the e Manual 1 On the Smart Hub screen open the Tools menu using your remote and then select Settings 2 Select Account Manager The Account Manager screen appears 3 Select Face recognition The Face recognition screen appears 4 Move your face into the square in the center of the screen and then wai...

Page 32: ...g Account screen select Password mode Log In You can log in using facial recognition Turn your face towards the TV with your face level with the camera Password mode Pause RReturn 3 The TV starts Face recognition Face the front of the TV screen The TV will recognize your face automatically A Green square indicates a registered face A red square indicates an unregistered face If the TV fails to rec...

Page 33: ...ned to accept an extension device called the Evolution Kit The Evolution Kit enables the TV to run a variety of the latest applications for a better user experience The Evolution Kit which may not be available depending on the product will be sold separately in 2013 or later ...

Page 34: ...ss IP Router or Modem that has a DHCP Server This TV supports the IEEE 802 11a b g and n communication protocols Samsung recommends using IEEE 802 11n If you play video using IEEE 802 11a b or g the video may not play smoothly Most wireless network systems incorporate a security system that requires devices that access the network through an access point or AP typically a wireless router or modem ...

Page 35: ...d Modem Cable Not Supplied External Modem ADSL VDSL Cable TV The Modem Port on the Wall External Modem ADSL VDSL Cable TV IP Router that has a DHCP Server TV Rear Panel Modem Cable Not Supplied LAN Cable Not Supplied LAN Cable Not Supplied The LAN Port on the Wall TV Rear Panel LAN Cable Not Supplied The TV does not support network speeds less than or equal to 10Mbps Use Cat 5 or 6 STP Type cable ...

Page 36: ...ollow the directions on the screen 5 Enter your network security key or WPS PIN using your remote Enter numbers and letters using your remote Ř If you are using the standard remote you can enter numbers by pressing the number buttons on your remote Ř To enter a letter move the Highlight to the letter and then select it You can enter numbers in the same fashion if you choose To display capital lett...

Page 37: ...ustrations on page 35 2 Turn on your TV and then go to the Network Settings screen Menu ĺ Network ĺ Network Settings 3 Select Start 4 The Network Connection screen appears and verifies the network connection When the connection has been verified the You are connected to the Internet If you have any problems using online services please contact your Internet Service Provider message appears Network s...

Page 38: ...Smart Touch Control press the Touch Pad Ř If you press and hold the Touch Pad it has the same effect as pressing the MUTEM button on your remote However this action scrolls the page on a Web Browser Ř Tap on the touch pad or press the RETURNR button to return to the normal state Displays color and playing control functions You can select a function using the Touch Pad Displays the shortcut functio...

Page 39: ...ny key on the Smart Touch remote control 2 The connection icon appears at the bottom left of the screen and the Smart Touch remote control is automatically connected to the TV If you want to perform the pairing process again press the reset button in the center of the back cover using a pin or the tip of an unbent paper clip The Smart Touch Control will be initialized Ř Smart Touch Control PAIRING...

Page 40: ...ger on the touch pad and then slide it from one side to the other from top to bottom or bottom to top To move the Highlight continuously flick your finger across the touch pad from right to left left to right top to bottom or bottom to top MENU SOURCE RETURN VOICE NUMBER To Select an item Press the Touch Pad Open the History screen Press the Š button in the left of the Touch Pad Displays a list of...

Page 41: ...h Control To Enter a channel number through Smart Touch Control 1 While watching a broadcast press the NUMBERš button on the Smart Touch Control The TV displays the number button screen 2 Using the touch pad highlight a number and then press the touch pad The TV displays a list of channels that start with the number you selected 3 Using the touch pad highlight the channel in the list you want and ...

Page 42: ...ns of the IR sensor of the external device IR Blaster OPEN ON OFF PAIRING OPEN 1 2 1 Power Switch Device Indicator LED IR Blaster shows the pairing state Pairing Button Installing batteries Battery size AA X OPEN O P E N OPEN O P E N 1 2 1 1 2 1 1 2 1 1 1 2 1 Hold the both sides of the battery holder and pull it out 2 Install four batteries so that the polarity of the batteries matches the illustr...

Page 43: ...ttom left of the screen and the TV connects to IR Blaster automatically If the connection process failed please turn off and on the IR Blaster try again from step 2 OPEN ON OFF PAIRING OPEN Ř IR Blaster PAIRING Reset button Precautions for Using an IR Blaster To use an IR Blaster the IR Blaster must be located nearby with external devices connected to the TV Note that it should be no obstacle betw...

Page 44: ...mart Touch Control and then select Set Up Universal Remote Set Up Universal Remote 3 Select Set up a device to control and then press the Touch Pad What do you want to do Set up a device to control View remote control settings Previous 4 Select an external device from the connected devices and then press the Touch Pad Set top Box Select a device to control The device you select must be connected t...

Page 45: ...ears below the entry field select the model name of your device and then press the Touch Pad If the search for model name does not work properly search with a part of the model name or use the Search for recommended model code For more information on the Search for recommended model code function refer to page 46 Search Model Recommended Check the model number of your Set top Box Then select search...

Page 46: ...sing your Smart Touch Control Previous Download 3 Point the Smart touch remote control forward to the TV s IR sensor and press the touch pad to test if the device works Press the button below until the power is turned on and off on your Set top Box Is it working Yes go to the next step No try the test with a different code set Previous TEST Next 4 If the downloaded recommended model code does not ...

Page 47: ...watching movies in a darkened room Picture modes apply preset adjustments to the picture N When your TV is connected to a PC via the HDMI to DVI cable you can only select Entertain and Standard Picture Picture Mode Backlight Brightness Color Contrast Sharpness Tint G R G50 Changing the Preset Picture Mode Picture Mode Menu ĺ Picture ĺ Picture Mode Ř Dynamic Brightens the screen Suitable for a brig...

Page 48: ...ur remote The Index screen appears 2 To search for a topic select a letter The Index displays a list of topics and keywords that begin with the letter you selected 3 Select a topic or keyword you want 4 The e Manual page with the topic appears To close the Index screen press the RETURNR button To Change the screen position of the e Manual If the e Manual screen is not invisible well because the OS...

Page 49: ...re are no device issues Ř Self Diagnosis User Menu ĺ Support ĺ Self Diagnosis ĺ Picture Test If the problem does not appear in the Picture test make sure Ř Your connections are all consistent For example if you ve used the AV In jack on your TV make sure you have used the AV Out jack on your video source Ř You have connected your devices to the correct jacks For example if you use the Component ja...

Page 50: ... before the TV turns on If you find that you are having trouble powering on your Samsung television there are a number of things to check before making a call to the service department If you re sure your power cord remote control and PC are functioning properly you may be having a cable issue If you have a cable or satellite box your TV may appear to be off because the cable or satellite box is no...

Page 51: ... input source Ř Reboot the connected device by unplugging it and then reconnecting the device s power cable The remote control does not work Ř Replace the remote control batteries Make sure the batteries are installed with their poles in the correct direction Ř Clean the sensor s transmission window on the remote Ř Try pointing the remote directly at the TV from 5 6 feet away The cable set top box...

Page 52: ...oduct can get scratched during cleaning Be sure to wipe the exterior and screen carefully using the cloth provided or a soft cloth to prevent scratches Do not spray water directly onto the product Any liquid that goes into the product may cause a failure fire or electric shock Clean the product with a soft cloth dampened with a small amount of water Do not use a flammable liquid e g benzene thinners...

Page 53: ...e a wood screw screw and molly or other screw appropriate for the wall or cabinet you intend to secure the TV Holder string to We recommend a size M4xL20 wood screw TV Holder BN96 15753A Screw M8 X L19 Installing the TV Holder 1 Remove the screw attached to the back of your TV and then connect the TV Holder to the TV with the screw included in the TV Holder Kit that is designated for your TV Make ...

Page 54: ... for safety purposes Check the cord occasionally to make sure it is secure Before moving the TV separate the connected cord first 4 Verify all connections are properly secured Periodically check the connections for any sign of fatigue or failure If you have any doubt about the security of your connections contact a professional installer To purchase the TV Holder Kit contact Samsung Customer Care ...

Page 55: ...0 7 inches 52 0 x 154 0 x 19 5 mm Weight Without Batteries Including Batteries 0 1 lbs 84 0 g 0 2 lbs 130 0 g Specifications IR Blaster Model Name VG IRB2000 Power Source Battery AA x 4 To extend the battery life use of alkaline battery is recommended Compatibility LED TV Above LED E7500 PDP TV E8000 Dimension W x H x D 3 7 x 2 6 x 3 1 inches 95 0 x 65 0 x 79 0 mm Weight Without Batteries Including...

Page 56: ... 6 kg 36 5 lbs 16 6 kg 42 5 lbs 19 3 kg Model Name UN60ES8000 Screen Size Diagonal 60 Class 60 0 measured diagonally Sound Output 10 W X 2 Dimensions W x H x D Body With stand 53 8 x 31 8 x 1 2 inches 1368 5 x 808 8 x 31 5 mm 53 8 x 33 3 x 8 2 inches 1368 5 x 847 9 x 210 0 mm Weight Without Stand With Stand 45 3 lbs 20 5 kg 51 8 lbs 23 5 kg Design and specifications are subject to change without p...

Page 57: ...40 x 480 800 x 600 800 x 600 800 x 600 1024 x 768 1024 x 768 1024 x 768 1152 x 864 1280 x 720 1280 x 800 1280 x 1024 1280 x 1024 1366 x 768 1440 x 900 1600 x 900RB 1680 x 1050 1920 x 1080 31 469 37 861 37 500 37 879 48 077 46 875 48 363 56 476 60 023 67 500 45 000 49 702 63 981 79 976 47 712 55 935 60 000 65 290 67 500 59 940 72 809 75 000 60 317 72 188 75 000 60 004 70 069 75 029 75 000 60 000 59...

Page 58: ...atible Frame sec listed in the table above If the Index Table is damaged the Seek Jump function is not supported When you play video over a network connection the video may not be played smoothly The menu may take longer to appear if the video s bit rate exceeds 10Mbps Some USB digital camera devices may not be compatible with the player Video decoder Ř Supports up to H 264 Level 4 1 Ř H 264 FMO A...

Page 59: ...N55ES8000 15 7 15 7 33 1 6 2 4 6 7 3 UN60ES8000 15 7 15 7 35 8 8 9 6 0 9 3 NOTE All drawings are not necessarily to scale Some dimensions are subject to change without prior notice Refer to the dimensions prior to performing installation of your TV Not responsible for typographical or printed errors 2012 Samsung Electronics America Inc ...

Page 60: ...Wall Mount Optional 8 IR Blaster Pairing 43 L Language 27 Licenses 52 M Menu Language 16 Motion Control 29 Motion Control Environment Test 29 Motion Guide Bar Size 29 S Securing the TV to the Wall 53 Setting up the Universal Remote Control 44 SMART Interaction 26 Software Upgrade 18 Specifications 56 Store Demo 16 T The Evolution Kit Slot Kit Sold Separately 33 The IR Blaster 42 The Smart Touch Con...

Page 61: ... the equipment and receiver Ř Connect the equipment into an outlet on a circuit different from that to which the receiver is connected Ř Consult the dealer or an experienced radio TV technician for help FCC Caution Any changes or modifications not expressly approved by the party responsible for compliance could void the user s authority to operate this equipment This device complies with Part 15 of...

Page 62: ...brouillage est susceptible d en compromettre le fonctionnement For product available in the USA Canada market only channel 1 11 can be operated Selection of other channels is not possible This device and its antenna s must not be co located or operation in conjunction with any other antenna or transmitter Under Industry Canada regulations this radio transmitter may only operate using an antenna of...

Page 63: ...ease contact the SAMSUNG customer care center Country Customer Care Center Web Site Address CANADA 1 800 SAMSUNG 726 7864 www samsung com Samsung Electronics Canada Inc Customer Service 55 Standish Court Mississauga Ontario L5R 4B2 Canada U S A 1 800 SAMSUNG 726 7864 www samsung com Samsung Electronics America Inc 85 Challenger Road Ridgefield Park NJ 07660 ...

Page 64: ...SMART TV QUICK SETUP GUIDE ...

Page 65: ...digit using the touch pad LED to show the active device You can use MIC to instruct a Voice Control command To activate MIC simply press the VOICE button Š Displays a list of recently used functions T Quickly select frequently used functions Touch Pad Ř Scratch on the Touch Pad to move the focus on the screen Ř Click on the Touch Pad to run the focused item Ř Tap on the Touch Pad and hold to selec...

Page 66: ... select the Trigger Words that start the Voice Control function Alternatively you can turn on your TV using the Trigger Words if Voice Control function is set to On If the Trigger Words is set to Hi TV say Hi TV Power On If the Trigger Words is set to Smart TV say Smart TV Power On Menu ĺ System ĺ Voice and Motion Control ĺ Voice Control 1 Set Voice Control to On 2 If you set Trigger Words to Hi T...

Page 67: ...ow appears select the Create Account button 3 Move to the Samsung account field and then press the E button A window appears with an entry screen and a keypad The ID must be a valid e mail address in the following format sample sample com or sample sample net The same password in the confirm password field in the same fashion If you have a Bluetooth or USB keyboard connected to the TV enter your e...

Page 68: ...E MANUAL Thank you for purchasing this Samsung product To receive more complete service please register your product at www samsung com register Model______________SerialNo ______________ ...

Page 69: ...the TV with Your PC 67 Changing the Preset Sound Mode 70 Adjusting Sound Settings 72 Preference Features Connecting to the Network 82 Setting up the Wired Network 90 Setting up the Wireless Network 100 Managing the Network Connected Devices 120 Setting the Time 126 Blocking Programs 135 Economical Solutions 149 Picture In Picture PIP 152 Using the TV with a Keyboard and a Mouse 156 Other Features ...

Page 70: ...Story 270 Fitness 277 Kids 282 Web Browser 293 Skype 313 SMART Interaction 315 Specification for SMART Interaction 346 AllShare Play 357 Using the AllShare Play 373 My List In AllShare Play 376 Videos In AllShare Play 383 Photos In AllShare Play 397 Music In AllShare Play 410 Using the DLNA Function 421 Using the MHL function 429 Anynet HDMI CEC 434 ...

Page 71: ...hooting 469 Network Connection Troubleshooting 470 Others Troubleshooting 471 3D Troubleshooting 480 Anynet HDMI CEC Troubleshooting 482 AllShare Play Troubleshooting 488 Smart Hub Troubleshooting 489 Web Browser Troubleshooting 491 Using the Smart Touch Control 498 Supported Subtitle and AllShare Play file formats 522 Anti theft Kensington Lock 531 Licenses 535 ...

Page 72: ...this function you can add or delete channels set favorite channels edit the channel name for analog broadcasts N N The American Academy of Pediatrics discourages television viewing for children younger than two years of age All Shows all channels ...

Page 73: ...tton for Standard Remote Control Favorites 1 Favorites 5 Shows all favorite channels in up to five groups Each group has separate channels N N The TV displays Favorites only if you have added favorites using Edit Favorites N N If the Highlight located in the Favorites 1 Favorites 5 category you can change the name of category by selecting b ...

Page 74: ...d Shows the most recently viewed channels Mostly Viewed Shows the most frequently viewed channels Using the colored and function buttons with the Channel When the Highlight located in the category you can use these options a Air Cable ...

Page 75: ...ears only if your TV stored both Air and Cable R Return Return to the previous menu When the Highlight located in the channel list you can use these options a Air Cable Switches the mode and display between Air and Cable N N Appears only if your TV stored both ...

Page 76: ...ble b Delete Delete the selected channel s Information Displays details of the selected channel k Page Scrolls the channel list to the next or previous page E Select Deselect Select or deselect a channel T Tools ...

Page 77: ... to the previous menu Using the Tools menu with Channel Add Delete Delete a channel from or add a channel to the Channel list To delete a channel in Channel follow these steps 1 If you want to delete a channel select a category of the channel ...

Page 78: ...N If you select the selected channel again a c mark disappears 3 Open the Tools menu using your remote 4 Select the Delete The message Deleted the selected channel s appears and then select OK N N You can delete the selected channel immediately by selecting b using your remote N N When you delete a channel in the Recently ...

Page 79: ...ot deleted To add a channel in Channel follow these steps 1 On the Channel screen select the All category 2 Select a grayed out channel in the All category A c mark appears to the left of the channel N N You can select more than one channel N N If you select the selected channel again a c mark disappears ...

Page 80: ...ct the Add The message Added the selected channel s appears and then select OK N N The Add menu option only appears for deleted channel N N All deleted channels will be shown on the All category You add channels back to the Added Ch category on the All category Edit Favorites Sets channels you watch frequently as ...

Page 81: ... these steps 1 Select the All or Added Ch category 2 Select a channel in the category A c mark appears to the left of the channel N N You can select more than one channel N N If you select the selected channel again a c mark disappears 3 Open the Tools menu using your remote 4 Select the Edit Favorites The Edit ...

Page 82: ...u can select a channel in the Edit Favorites screen N N You can add a favorite channel to any one of the groups To change favorites group select using your remote Each time you select a favorites group will be changed 6 When done select OK The channel is made as a favorite and is assigned to the favorite group you selected ...

Page 83: ... favorite Using the colored and function buttons with the Edit Favorites When the Highlight located in the Added Ch you can use these options a Add Add selected channels to the favorites group Change Fav Change the favorites group Each time you select using your remote a ...

Page 84: ...to the Highlight to a channel number immediately by pressing the number button using your remote R Return Return to the previous menu When the Highlight located in the favorites group you can use these options a Delete Delete the selected channel ...

Page 85: ...a selected channel to other favorites groups Change Fav Change the favorites group Each time you select using your remote a favorites group will be changed Ÿ Go To Move to the Highlight to a channel number immediately by pressing the number button using your remote ...

Page 86: ...w these steps 1 Select the favorites group category 2 Select a channel in the selected favorites group A c mark appears to the left of the channel N N You can select more than one channel N N If you select the selected channel again a c mark disappears 3 Open the Tools menu using your remote ...

Page 87: ...cted item s appears N N You can delete the selected channel from the list of favorites group immediately by selecting b using your remote Rename Channel Appears only if you have selected an analog channel Lets you assign a name of up to five characters to an analog channel For example Food Golf etc This makes it easier ...

Page 88: ... and select a channel Select All Deselect All Select all channels in the list Deselect all channels you selected Display Icons Used in the Channel screens An analog channel A favorite channel A locked channel ...

Page 89: ...y a desired channel automatically on a day and at a time of your choice N N You must set the current time first using the Time Clock function in System menu to use this function To use the Schedule Viewing follow these steps 1 On the Schedule Manager screen select a using your remote ...

Page 90: ...rce If your TV has digital broadcasts you can change a source from analog to digital If you want to change an antenna source between Air and Cable select an antenna source you want in Antenna menu Channel Antenna Channel Select the desired channel N N You can only select memorized ...

Page 91: ...i or Everyday If you select Manual you can set the day you want N N The c mark indicates a day you ve selected Date You can set a desired date N N The Date is available only when you select Once in Repeat Start Time You can set the start time you want ...

Page 92: ...k a list of Schedule Viewing To delete an item in a list of scheduled viewing follow these step 1 On the Schedule Manager screen highlight an item you want to delete 2 Open the Tools menu using your remote 3 Select Cancel Schedule The Cancel selected list s message appears 4 Select Yes The selected schedule will be ...

Page 93: ...Info for Smart Touch Control after highlighting an item the Information screen appears On the Information screen you can change or cancel the Schedule Viewing Cancel Schedule Cancel the Schedule Viewing Edit Schedule Change the Schedule Viewing Return Return to the previous screen ...

Page 94: ...channel and manage schedules of timer viewing 1 Press the CH LIST button for Standard Remote Control or select CH List for Smart Touch Control The Channel List screen is displayed immediately 2 Change a channel or channel list mode Added Ch Shows all added channels Favorites 1 Favorites 5 ...

Page 95: ... TV displays favorite groups only if you have added favorites using Edit Favorites Using the colored and function buttons with the Channel List N N If you press the INFO button for Standard Remote Control or select Info for Smart Touch Control the TV displays details of the selected program ...

Page 96: ...r TV stored both Air and Cable Program View Channel View For digital channels switches the display between Program View and Channel View When you select a digital channel in Channel List select once to display a list of programs on that channel select again to re display the Channel View ...

Page 97: ...s list if you have added favorites using Edit Favorites and the Added Ch list On Program View screen change a channel E Watch Information Displays the channel you selected Displays details of the selected channel k Page Scrolls the Channel List to the next or previous page ...

Page 98: ...ed program A locked channel Using the Schedule Viewing in Channel List digital channels only You can use the Schedule Viewing in Channel List to schedule a digital channel program for viewing The TV will turn on and display the digital channel program when the program begins ...

Page 99: ...n appears 2 Select a desired digital channel 3 Select using your remote The TV displays program list of the selected channel 4 Select a desired program in the program list and then select Information using your remote 5 On the Information screen select the Schedule Viewing The selected program is set to Schedule Viewing ...

Page 100: ...N N If you want to cancel the Schedule Viewing follow Steps 1 through 4 and then select the Cancel Schedule ...

Page 101: ...able channels you must select your TV s signal source Air using an antenna or Cable Select Air or Cable After you have selected the signal source go on to the Auto Program function N N Selecting the signal source using the Antenna function also determines the signal source the TV is tuned to For ...

Page 102: ...ou select Cable you will see only snow You must select Air to see a picture Auto Program Menu Channel Auto Program The Auto Program function memorizes all channels that are available over the air or through your cable system and adds them to the Channel list ...

Page 103: ...r both and then select Next A c mark appears in the check box N N If you selected Air or Cable in the Antenna menu your choice will already be selected 3 If you selected the Cable the cable system screen appears Select the Digital Cable System N N If you selected the Air only the Auto Program starts ...

Page 104: ...systems use STD Standard 5 Repeat for Analog Cable System 6 Select Next The Auto Program starts N N After all the available channels are stored the Auto Program removes scrambled channels When done the Auto Program menu then reappears This process can take up to 30 minutes ...

Page 105: ...annel Clear Scrambled Channel This function filters out scrambled channels after the Auto Program is completed This process may take up to 30 minutes N N This function is only available in Cable mode How to Stop the Clear Scrambled Channel function ...

Page 106: ...rching for scrambled channels appears Select Yes 3 The Clear Scrambled Channel function will be stopped Fine Tune Menu Channel Fine Tune analog channels only If the reception is clear you do not have to fine tune the channel as this is done automatically during the search and store ...

Page 107: ...he image is clear N N Select the channel and then select Fine Tune N N Fine tuned channels that have been saved are marked with an asterisk on the right hand side of the channel number in the channel banner N N To reset fine tuning select the channel select Fine Tune and then select Reset on the Fine Tune screen ...

Page 108: ...ction Menu Channel Crosstalk Noise Reduction analog channels only This function reduce diagonal noise in picture caused by the crosstalk of signals If your TV displays with a noise while watching TV turns on this function ...

Page 109: ...de Menu Picture Picture Mode Picture modes apply preset adjustments to the picture N N When your TV is connected to a PC via the HDMI to DVI cable you can only select Entertain and Standard Dynamic Brightens the screen Suitable for a bright room ...

Page 110: ...al for LED TV Relax for PDP TV Suitable for reducing eye strain Movie Darkens the screen making it less glary Suitable for watching movies in a darkened room Entertain Sharpens the picture Suitable for games N N Only available when the TV is connected ...

Page 111: ...to a PC via the HDMI to DVI cable ...

Page 112: ...l Light for PDP TV Menu Picture Backlight Cell Light Adjusts the brightness of the screen by adjusting the brightness of the individual pixels Contrast Menu Picture Contrast Increases or decreases the contrast between dark and light areas of the picture ...

Page 113: ...ightness Adjusts the brightness of the screen Not as effective as Backlight Cell Light Sharpness Menu Picture Sharpness Sharpens or dulls the edges of objects Color Menu Picture Color Adjusts the color saturation The higher the ...

Page 114: ...cture becomes black white and gray Tint G R Menu Picture Tint G R Adjusts the amount of green and red in the picture As you increase the amount of green the amount of red decreases and vice versa To adjust picture quality follow these steps 1 Select an option you want to adjust ...

Page 115: ...u make change to option value the OSD will be adjusted accordingly N N When your TV is connected to a PC via the HDMI to DVI cable Color and Tint G R is not available N N You can adjust and store Settings for each external device connected to the TV N N Lowering picture brightness reduces power consumption ...

Page 116: ...ent Using this function you can make change to various picture size and aspect ratio options Picture Size If you have a cable box or satellite receiver it may have its own set of screen sizes as well However we highly recommend you use your TV s 16 9 mode most of the time ...

Page 117: ...o the 16 9 wide screen format Zoom1 Provides moderate magnification of the picture Sides top and bottom are cut off Zoom2 Provides larger magnification of the picture Sides top and bottom are cut off Wide Fit Enlarges the aspect ratio of the picture so it fits the entire screen N N Available with HD 1080i 720p signals in ...

Page 118: ...layed on the left and right or top and bottom of the screen may cause image retention screen burn which is not covered by the warranty Screen Fit When your TV inputs HDMI 720p 1080i 1080p or Component 1080i 1080p signals displays the full image without any cut off Smart View 1 Reduces the 16 9 picture by 50 for LED TV ...

Page 119: ...mode N N Smart View 2 is enabled only in HDMI or DTV mode N N The picture size can vary depending on the input resolution when you play content from Videos in AllShare Play Position Adjusts the picture position Position is only available if Picture Size is set to Zoom1 Zoom2 Wide Fit or Screen Fit ...

Page 120: ...ction after selecting Zoom1 Zoom2 Wide Fit or Screen Fit follow these steps 1 Select the Position 2 On the Position screen select Position and then move the picture to position you want using your remote 3 When done select Position again and then select Close N N To reset the picture position select Reset ...

Page 121: ...Zoom1 Zoom2 4 3 DTV 720p 16 9 Wide Fit 4 3 Smart View 2 for LED TV DTV 1080i 1080p 16 9 Wide Fit 4 3 Screen Fit Smart View 2 for LED TV Component 720p 16 9 Wide Fit 4 3 Component 1080i 1080p 16 9 Wide Fit 4 3 Screen Fit HDMI 720p 1080i 1080p 16 9 Wide Fit 4 3 Screen Fit Smart View 1 for LED TV ...

Page 122: ... picture size options may vary N N The available items may differ depending on the selected mode N N HD High Definition 16 9 1080i 1080p 1920x1080 720p 1280x720 N N You can adjust and store settings for each external device you have connected to an input on the TV ...

Page 123: ...ings Using this function you can configure advanced picture settings to create your preferred picture N N Advanced Settings is available only when the Picture Mode is set to Standard or Movie mode N N When connecting a PC using the HDMI DVI cable you can only make changes to ...

Page 124: ...st Adjusts the screen contrast Black Tone Darker settings make blacks look darker Flesh Tone Adjusts the amount of red in skin tones RGB Only Mode Displays the Red Green and Blue colors so you can make fine adjustments to hue and saturation ...

Page 125: ...Green Blue and Reset set the Color Space to Custom White Balance Adjusts the color temperature of the picture so that white objects look white instead of for example slightly pink or slightly yellow and the overall color of the picture looks natural R Offset G Offset B Offset Adjusts each color s red green blue darkness ...

Page 126: ...ce to it s default settings 10p White Balance Controls the white balance in 10 point intervals by adjusting the red green and blue brightness N N Available when the Picture Mode is set to Movie and when the external input is set to all input N N Some external devices may not support this function ...

Page 127: ... Green Adjust the green level Blue Adjust the blue level Reset Resets the 10p White Balance to its default settings Gamma Adjusts the primary color intensity Expert Pattern Use the Expert Pattern function to calibrate the picture If the OSD menu disappears or a ...

Page 128: ...unction off Pattern1 This test screen demonstrates the effect of the display settings on shades of grey and black Pattern2 This test screen demonstrates the effect of the display settings on colors N N After selecting Pattern1 or Pattern2 you can adjust any of the advanced settings for desired effect N N While the Expert Pattern is running the ...

Page 129: ...cture detail and enlarges the color space when you are watching movies input from an external device e g BD DVD player connected to the TV s HDMI or Component IN jacks N N Available only when you set the Picture Mode to Movie and the external input to HDMI or Component N N Some external devices may not support ...

Page 130: ...e to the brightness of the room In bright light the screen brightens In dim light the screen dims N N Only available in Standard mode N N This feature is not supported in 3D mode N N When you change the Backlight for LED TV Cell Light for PDP TV Contrast or Brightness the TV sets the Motion Lighting to Off ...

Page 131: ...depth N N Available only when Picture Mode is set to Movie Picture Options Menu Picture Picture Options Using this function you can configure additional picture settings to suit your preference N N When your TV is connected to a PC via the HDMI to DVI cable you can only make ...

Page 132: ...and Warm2 make the picture redder warmer N N Warm1 and Warm2 are deactivated when the Picture Mode is set to Dynamic N N You can adjust and store settings for each external device connected to an input on the TV Digital Noise Filter If the broadcast signal received by your TV ...

Page 133: ...uto Visualization When changing analog channels displays signal strength N N When the signal is weak try all the options until the TV displays the best picture N N Only available for analog channels N N When the bar is green you are receiving the best possible signal MPEG Noise Filter Reduces MPEG noise to provide improved ...

Page 134: ...h by selecting a black level N N Available only in HDMI mode Film Mode Sets the TV so that it senses and then processes film signals from all sources automatically and adjusts the picture for optimum quality N N Available in TV AV Component 480i 1080i and HDMI 1080i ...

Page 135: ...Blur Reduction Adjusts the blur reduction level for signals input from all video sources Judder Reduction Adjusts the Judder reduction level for signals input from a video source through which you are playing a movie Reset Reset the custom settings N N The info screen on your TV displays the resolution and frequency of the incoming ...

Page 136: ...on the screen please set the Auto Motion Plus to Off If the Auto Motion Plus is set to Custom you can control Blur Reduction and Judder Reduction manually and use Reset to reset both to their default settings N N If the Auto Motion Plus is set to Demo you can compare the difference between a picture with Auto Motion Plus On and Auto Motion Plus Off modes ...

Page 137: ...er from scenes with large amounts of rapid movement to provide a clearer picture N N Available only when Picture Mode is set to Dynamic Standard or Movie Reset Picture Menu Picture Reset Picture Resets your current picture mode to its default settings ...

Page 138: ... on Windows 7 For your TV to work properly as a computer display you must enter the correct video settings N N Depending on your version of Windows and your video card the procedure on your PC will probably differ slightly from the procedure presented here N N However the same basic information will ...

Page 139: ...aler 1 Click Control Panel on the Windows start menu 2 Click Appearance and Themes in the Control Panel window A display dialog box appears 3 Click Display Another display dialog box appears 4 Click the Settings tab on the display dialog box On the Settings tab set the correct ...

Page 140: ...tion screen size The optimal resolution for this TV is 1920 x 1080 If a vertical frequency option exists on your display settings dialog box select 60 or 60 Hz Otherwise just click OK and exit the dialog box ...

Page 141: ...Preset Sound Mode Sound Mode Menu Sound Sound Mode Sound modes apply preset adjustments to the sound N N If Speaker Select is set to External Speaker the Sound Mode is disabled Standard Selects the normal sound mode ...

Page 142: ...ic over voices Movie Provides the best sound for movies Clear Voice Emphasizes voices over other sounds Amplify Increase the intensity of high frequency sound to allow a better listening experience for the hearing impaired ...

Page 143: ...aker Select is set to External Speaker the Sound Effect is disabled N N Available only when the Sound Mode is set to Standard Virtual Surround This function provides a virtual 5 1 channel surround sound experience through a pair of speakers using HRTF Head Related Transfer ...

Page 144: ...ound music or sound effects so that dialog can be heard more clearly Equalizer The Equalizer displays a series of sliders Use the arrow buttons to select a slider and change the slider s value To Reset the Equalizer select the Reset A pop up appears asking if you want to reset select Yes To exit select Close ...

Page 145: ...kHz 10kHz Bandwidth Adjustment Adjusts the loudness of specific bandwidth frequencies Reset Resets the equalizer to its default settings 3D Audio Menu Sound 3D Audio 3D audio technology provides the immersive sound corresponding to the pop up effect of 3D video by audio depth control in ...

Page 146: ...s Menu Sound Broadcast Audio Options Preferred Language digital channels only Digital TV broadcasts can simultaneously transmit many audio tracks for example simultaneous translations of the program into foreign languages You can only select a language from among the ones being ...

Page 147: ...n select a sound you want to listen from among the ones being broadcasted N N While watching TV open the Tools menu using your remote you can select the Multi Track Sound in Tools menu immediately N N Multi Track Sound may differ depending on the program being broadcast or broadcast signal ...

Page 148: ...o output to speakers and various digital devices such as A V Receivers and Home Theaters which reduces interference and distortion Audio Format You can select the Digital Audio output SPDIF format The available Digital Audio output SPDIF format may differ depending on the input source Audio Delay ...

Page 149: ... audio output from the TV through an external device such as an AV receiver When you select the Audio Delay a slider screen appears Adjust the option value using your remote 0ms 250ms Speaker Settings Menu Sound Speaker Settings Speaker Select If you are listening to the sound track of a broadcast or movie through an external ...

Page 150: ... N N When the Speaker Select is set to External Speaker the TV s speakers are turned off You will hear sound through the external speakers only When the Speaker Select is set to TV Speaker both the TV s speakers and the external speakers are on You will hear sound through both N N When the Speaker Select is set to External Speaker the volume buttons and mute function will not operate and the sound...

Page 151: ... each station has its own broadcasting conditions the volume may fluctuate each time you change the channel This feature automatically adjusts the volume of a channel by lowering the sound output when the modulation signal is high or by raising the sound output when the modulation signal is low N N To use the volume control of a connected ...

Page 152: ...to Volume to Off A change to the volume control of the connected source device may not be applied if Auto Volume is set to Normal or Night Reset Sound Menu Sound Reset Sound Reset all sound settings to the factory defaults ...

Page 153: ...r LAN using cable N N If you want to view a illustration see your user s manual The network connection illustrated in your user s manual You can attach your TV to your LAN by connecting the LAN port on the back of your TV to an external modem using a LAN cable You can attach your TV to your LAN by ...

Page 154: ...ork is configured you may be able to attach your TV to your LAN by connecting the LAN port on the back of your TV directly to a network wall outlet using a LAN cable Note that the wall outlet is attached to a modem or router elsewhere in your house N N If your network requires a Dynamic IP address you should use an ADSL modem or router that supports the Dynamic ...

Page 155: ...o not have to enter them manually Most home networks use a Dynamic IP address N N Some networks require a Static IP address If your network requires a Static IP address you must enter the IP address subnet mask gateway and DNS values manually when you set up the network connection To get the IP address subnet mask gateway and DNS values contact your Internet Service Provider ISP If you ...

Page 156: ... network requires a Static IP address ADSL modems that support DHCP also let you use Static IP addresses Wireless Network Connection N N If you want to view a illustration see your user s manual The network connection illustrated in your user s manual You can connect your TV to your LAN through a standard wireless router or modem ...

Page 157: ...To use a wireless network your TV must be connected to a wireless IP sharer either a router or a modem If the wireless IP sharer supports DHCP your TV can use a DHCP or static IP address to connect to the wireless network N N Select a channel for the wireless IP sharer that is not currently being used If the channel set for the wireless IP sharer is currently being used by another device ...

Page 158: ...tocols Authentication Mode WEP WPAPSK WPA2PSK Encryption Type WEP TKIP AES N N If you select the Pure High throughput Greenfield 802 11n mode and the Encryption type is set to WEP TKIP or TKIP AES WPS2Mixed on your AP or wireless router Samsung TVs will not support a connection in compliance with new Wi Fi certification specifications ...

Page 159: ...tion or PIN Personal Identification Number WPS will automatically configure the SSID and WPA key in either mode N N If your router modem or device is not certified it may not connect to the TV N N Connection Methods You can set up the wireless network connection in four ways Auto Setup Using the Auto Network Search function ...

Page 160: ... Manual Setup WPS PBC Plug Access ...

Page 161: ... wired or wireless network connection to use various Internet services such as Smart Hub AllShare Play and perform software upgrades Automatic Wired Network Setup You can configure your TV s wired network connection automatically when connecting your TV to a network that supports DHCP ...

Page 162: ... network connection automatically follow these steps 1 Go to the Network Settings screen Network Network Settings 2 Select Start The network test screen appears and verifies the network connection 3 When the connection has been verified the You are connected to the Internet If you have any problems using online ...

Page 163: ...nnection N N If the automatic process cannot find the network connection values or if you want to set the connection manually go to the next section Manual Network Setup Manual Wired Network Setup You can configure your TV s wired network connection manually when connecting your TV to a network that requires a Static IP address ...

Page 164: ...ndows computers follow these steps 1 Right click the Network icon on the bottom right of the screen 2 In the pop up menu that appears click Status 3 On the dialog that appears click the Support tab 4 On the Support Tab click the Details button The Network connection values are displayed ...

Page 165: ...s screen Network Network Settings 2 Select Start The network connection screen appears and the verification process starts 3 Select Stop The verification process stops Select IP Settings on network connection screen The IP Settings screen appears 4 Select the IP Mode and then set the IP Mode to Manual ...

Page 166: ...Address for example 105 into the first entry field using your remote When done go to the next field 7 Enter the next portion of the IP Address When done go to the next field 8 Repeat the entry process for each field in the IP Address N N If you make a mistake when entering a number re enter the number to correct it ...

Page 167: ... When done select OK The network test screen appears and the verification process starts When the connection has been verified the You are connected to the Internet If you have any problems using online services please contact your Internet Service Provider message appears Network Status Menu Network Network Status ...

Page 168: ...ork cable found Check that your network cable is plugged in If it is connected make sure that the router is turned on if it is on try turning if off and on again IP auto setting failed Try the following to set your IP address automatically Or set your IP address manually by selecting IP Settings Ensure ...

Page 169: ...mation Unable to connect to the network Try the following check if your IP address is set correctly in IP Settings Contact your Internet Service Provider for more information Connected to your local network but cannot connect to the Internet Check the DNS settings in IP Settings or contact your Internet Service Provider to ...

Page 170: ...access the Internet Network setup complete but cannot connect to the Internet Contact your Internet Service Provider to access the Internet ...

Page 171: ...ired or wireless network connection to use various Internet services such as Smart Hub AllShare Play and perform software upgrades Automatic Wireless Network Setup Most wireless networks have an optional security system that requires devices that access the network to transmit an encrypted ...

Page 172: ... to enter when you set up wireless security for your wireless network If you use this method of setting up the network connection and have a Security Key for your wireless network you will have to enter the Pass Phrase during the automatic or manual setup process To set up your TV s wireless network connection automatically follow these steps 1 Go to the Network Settings screen ...

Page 173: ... list of the available networks 3 In the list of networks select a network you want to connect and then select Next N N If the wireless router is set to Hidden Invisible you have to select Add Network and enter the correct Network Name SSID and Security Key to establish the connection 4 If the Enter security key screen appears ...

Page 174: ...eless security for the router enter the Security Key Security key or PIN N N You can enter the Security Key Security key or PIN using a keyboard screen Enter the Security Key using your remote N N You should be able to find the Pass Phrase on one of the set up screens you used to set up your router or modem ...

Page 175: ... connected to the Internet If you have any problems using online services please contact your Internet Service Provider message appears N N If the network does not accept the Security Key Security key or PIN select Retry or select IP Settings to enter the settings manually N N If you want to set up the connection manually select IP Settings Then go ...

Page 176: ... your TV s wireless network connection manually when connecting your TV to a network that requires a Static IP address or if the automatic connection process has failed Getting the Network Connection Values To view the Network connection values on most Windows computers follow these steps ...

Page 177: ...ears click Status 3 On the dialog that appears click the Support tab 4 On the Support Tab click the Details button The Network connection values are displayed To set up your TV s wireless network connection manually follow these steps 1 Go to the Network Settings screen Network Network Settings ...

Page 178: ...s select a network you want to connect and then select Next N N If the wireless router is set to Hidden Invisible you have to select Add Network and enter the correct Network Name SSID and Security Key to establish the connection 4 If the Enter security key screen appears go to step 5 If you select a wireless router that does not have wireless security go ...

Page 179: ...You can enter the Security Key Security key or PIN using a keyboard screen Enter the Security Key using your remote N N You should be able to find the Pass Phrase on one of the set up screens you used to set up your router or modem 6 When done select Next The network connection screen appears and the ...

Page 180: ...ection screen The IP Settings screen appears 8 Select IP Mode and then set the IP Mode to Manual 9 Go to the IP Address entry field and then select the IP Address using remote 10 Enter the first portion of the IP Address for example 105 into the first entry field using your remote When done go to the next field ...

Page 181: ...in the IP Address N N If you make a mistake when entering a number re enter the number to correct it 13 When done go to the Subnet Mask fields 14 Repeat the same entry process for Subnet Mask Gateway and DNS Server 15 When done select OK The network connection screen appears and the verification process starts When the ...

Page 182: ...e services please contact your Internet Service Provider message appears WPS PBC Network Setup If your router has a WPS PBC button you can configure your TV s wireless network connection using the WPS PBC button more easily To set up your TV s wireless network connection using WPS PBC follow these steps ...

Page 183: ...wireless networks When done it displays a list of the available networks 3 Select the WPS PBC 4 Press the WPS PBC button on your router within 2 minutes Your TV automatically acquires all the network setting values it needs and connects to your network 5 The network connection screen appears and network setup is done ...

Page 184: ... a USB memory stick to transfer the setup information from the router to the TV If your non Samsung wireless router does not support Plug Access you must connect using one of the other methods N N You can check for equipment that supports Plug Access on www samsung com To set up your TV s wireless network connection using Plug Access follow these ...

Page 185: ... in your Samsung wireless router Check the router s LED s to make sure it is on Blinking on 3 Take the USB memory stick out of the router and then insert it into a USB port on your Samsung TV The memory stick downloads the connection information 4 Wait until the connection is automatically established ...

Page 186: ...u want to try using Plug Access again disconnect the USB memory stick reset the AP and then try again from Step 1 You can also choose one of the other connection setup methods 5 The network connection screen appears and the network setup is done 6 Place the wireless router in a desired location N N If the wireless router s settings change ...

Page 187: ...must perform the Plug Access procedure again beginning from Step 1 Network Status Menu Network Network Status You can check the current network and Internet status When the wireless network connection failed Wireless network connection failed ...

Page 188: ...router is turned on and if it is try turning it off and on again Check if you need to enter a security key to use the router IP auto setting failed Try the following to set your IP address automatically Or set your IP address manually by selecting IP Settings Ensure DHCP server is enabled on router and unplug and re plug in the router Contact ...

Page 189: ...ollowing check if your IP address is set correctly in IP Settings Contact your Internet Service Provider for more information Connected to your local network but cannot connect to the Internet Check the DNS settings in IP Settings or contact your Internet Service Provider to access the Internet ...

Page 190: ... Network setup complete but cannot connect to the Internet Contact your Internet Service Provider to access the Internet ...

Page 191: ...he TV to wireless mobile devices Using this function you can connect wireless mobile devices with your TV directly without a router N N To use this function your mobile device should be supported by the Wi Fi Direct To connect your mobile device with your TV using Wi Fi Direct follow these steps ...

Page 192: ...device Select the desired Wi Fi device PBC Press the WPS PBC button on your Wi Fi device within 2 minutes Your TV automatically acquires all the network setting values it needs and connects to your network PIN Input the displayed PIN on your device N N If you want to disconnect the device select the connected Wi Fi device and ...

Page 193: ... you can connect the TV on your mobile devices if your mobile devices do not support Wi Fi Direct Set the options for connection of Wi Fi device Soft AP Turns on or off the Soft AP When Soft AP is set to On your mobile devices can find the TV name in Wi Fi connection list ...

Page 194: ...es not meet the required digit number Done is not available Input the generated security key into the device you want to connect If network does not operate normally check the security key again An incorrect security key may cause a malfunction AllShare Settings Menu Network AllShare Settings ...

Page 195: ...e AllShare Play section Device Name Menu Network Device Name Enter a name for this TV This name will be shown on network remote controls and devices using AllShare Play N N A keyboard appears on the screen and you can key in a name for your TV manually using your remote control For example if you want to change the name ...

Page 196: ...to Samsung TV select each character using your remote When done select Done ...

Page 197: ...me N N The time you set will appear when you press the INFO button for Standard Remote Control or select Info for Smart Touch Control Clock Set the clock to use the various timer features of the TV N N If you disconnect the power cord you ...

Page 198: ...o Clock screen System Time Clock 2 Select Auto or Manual If you selected Auto The TV will automatically download the correct time from a digital channel Select Time Zone and then select your Time Zone Select DST Daylight Savings Time Select On if you want to turn the DST ...

Page 199: ...N N DST and Time Zone function are only available when the Clock Mode is set to Auto If you selected Manual The Clock Set screen appears Set the Date and Time manually You can set the current date and time using your remote N N Available only when Clock Mode is set to Manual ...

Page 200: ...Select a period of time using your remote To cancel the Sleep Timer select Off On Timer Set On Timer so that your TV turns on automatically at a time and on a day of your choosing You can set up three separate On Timer configurations On Timer 1 On Timer 2 On Timer 3 N N You must set the clock before you can use ...

Page 201: ...an select the days you want to activate the timer N N The c mark indicates days you ve selected Time Set the time that the TV turns on automatically Volume Set the desired loudness Source To select what will be turned on when the timer setting is activated You can set the TV to turn on a specific channel ...

Page 202: ...t be connected to your TV before you can select USB Antenna when the Source is set to TV Select Air or Cable Channel when the Source is set to TV Select the desired channel Music Photo when the Source is set to USB Select a folder in the USB device containing music or photo files you want played when the TV turns on automatically ...

Page 203: ...rectly N N If there is only one photo file in the USB the slide show will not play N N If a folder name is too long the folder cannot be selected N N Each USB you use is assigned its own folder When using more than one of the same type of USB make sure the folders assigned to each USB have different names N N We recommend that you use a USB ...

Page 204: ...3 players or PMPs made by some manufacturers because the TV can take too long to recognize these devices N N If you set the On Timer to play a file saved on a USB HDD it may take up to 40 seconds or more to play the file after the TV is turned on Off Timer Set Off Timer so that your TV turns off automatically at a time and on a day of your ...

Page 205: ... You must set the clock before you can use the Off Timer Setup Select Off Once Everyday Mon Fri Mon Sat Sat Sun or Manual If you select Manual you can choose the days you want Off Timer to turn off your TV N N The c mark indicates days you ve selected Time Set the time that the TV turns off automatically ...

Page 206: ...on you can configure channel related security options Every time you access the Security functions the PIN screen will appear and you must enter that PIN The PIN screen closes and the Security menu appears Program Rating Lock The Program Rating Lock feature lets you ...

Page 207: ...ou must enter a PIN personal identification number To watch a blocked program you must also enter the same PIN N N The Program Rating Lock is not available in HDMI Component mode N N The default PIN number for a new TV set is 0 0 0 0 TV Rating You can block TV programs based on their ratings This function allows you to control what your children can watch ...

Page 208: ...egories are on the left side TV Y Young children TV Y7 Children 7 and over TV G General audience TV PG Parental guidance TV 14 Viewers 14 and over TV MA Mature audience The following categories are on top ALL Lock all TV ratings FV Fantasy violence V Violence ...

Page 209: ...s you click it For example click the lock at the intersection of V and TV MA and you block all programs that are rated violent and for mature adults N N To unblock a category click the lock icon To unblock all the categories in a row click the lock under ALL N N To watch a blocked program you must enter the PIN code when requested ...

Page 210: ...t provides parents or guardians with advanced information on which films are appropriate for children Movie Rating MPAA displays a column with locks and the following ratings categories G General audience no restrictions PG Parental guidance suggested PG 13 Parents strongly cautioned R Restricted Children under 17 should be accompanied by an adult ...

Page 211: ... For example click the X lock and you block all X rated movies N N The rating categories are also grouped so that clicking one category blocks all the categories a parent would block along with it For example if you block the PG 13 category then R NC 17 and X will automatically be blocked also N N To unblock a category click the lock icon ...

Page 212: ...an English Rating displays a column with locks and the following ratings categories C Programming intended for children under age 8 C8 Programming generally considered acceptable for children 8 years and over to watch on their own G General programming suitable for all audiences PG Parental Guidance ...

Page 213: ...ntent select an entry field to lock That is you click it For example click the 18 lock and you block all TV programs rated 18 N N The rating categories are also grouped so that clicking one category blocks all the categories a parent would block along with it For example if you block the G category then PG 14 and 18 will automatically be blocked ...

Page 214: ...n their French Canadian ratings Canadian French Rating displays a column with locks and the following ratings categories G General 8 ans Programming generally considered acceptable for children 8 years and over to watch on their own 13 ans Programming may not be suitable for children under the age of 13 ...

Page 215: ... field to lock That is you click it For example click the 18 ans lock and you block all TV programs rated 18 ans N N The rating categories are also grouped so that clicking one category blocks all the categories a parent would block along with it For example if you block the 8 ans category then 13 ans 16 ans and 18 ans will automatically be blocked also ...

Page 216: ...N If information is not downloaded from the broadcasting station the Downloadable U S Rating menu is deactivated N N Parental restriction information is automatically downloaded while you watch DTV channels It may take several seconds N N The Downloadable U S Rating menu is available for use after information is downloaded from the broadcasting ...

Page 217: ...depending on the broadcasting station The default menu name and the Downloadable U S Rating change depending on the downloaded information N N Even if you set the on screen display to another language the Downloadable U S Rating menu will appear in English only N N Blocking one rating level will automatically block other categories that deal with ...

Page 218: ... H etc may differ depending on the broadcasting station Change PIN The Change PIN screen will appear Choose any 4 digits for your PIN and enter them in Enter New PIN fields Re enter the same 4 digits in Confirm New PIN fields When the Confirm screen disappears select Close The TV has memorized your new PIN ...

Page 219: ...lock it The screen will go blank and a pop up message appears Enter the PIN to unblock the program or movie using your remote N N The Smart Touch Control is not available If you forget the PIN code press the remote control buttons in the following sequence in Standby mode which resets the PIN to 0 0 0 0 MUTEM 8 2 4 P power on ...

Page 220: ... Eco Solution Energy Saving Lets you adjusts the brightness of the TV in order to reduce power consumption If you select Picture Off the screen is turned off but the sound remains on Press any button except the volume button to turn on the screen ...

Page 221: ...l Light for PDP TV in the Picture menu the Eco Sensor will be set to Off automatically Min Backlight for LED TV Min Cell Light for PDP TV When the Eco Sensor is set to On you can manually adjust the minimum screen brightness N N If the Eco Sensor is set to On the display brightness may change become slightly darker or brighter depending on the light ...

Page 222: ...ht function No Signal Power Off To avoid unnecessary energy consumption you can set how long you want the TV to remain on if it s not receiving a signal N N Disabled when an attached PC is in power saving mode Auto Power Off The TV will automatically turned off when no user operation is detected for 4 hours ...

Page 223: ...gnal has passed through the TV s tuner and video from one external video source simultaneously For example if you have a cable box connected to the Cable In jack you can use PIP to watch programs from the cable box and a movie from a Blu ray player attached to the HDMI In jack ...

Page 224: ...gram Rating Lock is on you cannot use the PIP PIP Activate or deactivate the PIP function Air Cable Select either Air or Cable as the input source for the sub picture screen Channel Select the channel for the sub picture screen ...

Page 225: ...e sub picture screen N N In Double à Œ mode you cannot select Position Sound Select You can choose to listen to the sound from the main picture or the sub picture N N If you turn the TV off while watching in the PIP mode the PIP function is reset to Off When you turn your TV on you ...

Page 226: ...tly unnatural when you use the main screen to view a game or karaoke N N The PIP is not supported in 3D function N N PIP Settings The picture from the external video source will be in the main screen and the picture from the TV s tuner will be in the PIP sub picture screen Main picture Component HDMI Sub picture TV ...

Page 227: ...Menu System Device Manager Using this function you can set up input devices to use with the TV You can check your device list and adjust the settings in this menu N N Depending on the model of the USB HID keyboard and mouse may not be compatible with your TV ...

Page 228: ...onnect it on the USB port If you want to use a Bluetooth keyboard connect it using the Bluetooth function N N Available only when the QWERTY keypad screen appears in the Web Browser Select Keyboard Select which keyboard to use from your keyboard list you can only use one keyboard even if several are connected ...

Page 229: ...d Options Sets the default options for the keyboard language and type Keyboard Language Set a language for your keyboard Keyboard Type Set what a type a keyboard you re using to enter text Switch Input Language Select a key sequence to change switching input language ...

Page 230: ...onnect it on the USB port If you want to use a Bluetooth mouse connect it using the Bluetooth function Using your TV to use a mouse you can use the TV s menu in the same way as on a PC Select Mouse Select which mouse to use from your mouse list you can only use one mouse even if several are connected ...

Page 231: ...e Mouse Options Sets the default options for the mouse buttons Primary Button Select the main button you want to use click and select on screen Pointer Size Set the size of the on screen mouse pointer Pointer Speed Select the speed of the mouse pointer ...

Page 232: ...e TV s menu with a mouse 1 Connect a USB or Bluetooth mouse on your TV 2 Click a primary button you selected The Go To screen appears 3 Click a menu you wish and then you can use the menu to same way as on a PC ...

Page 233: ...Other Features Menu Language Menu System Menu Language Set the menu language 1 Select the Menu Language 2 Choose a language you want to use Caption On Screen Text Dialogue Menu System Caption ...

Page 234: ...the screen N N The Caption feature does not work with devices connected to the TV through the Component HDMI jacks Caption Mode You can select the desired caption mode N N The availability of captions depends on the program being broadcast Default CC1 CC4 Text1 Text4 analog channels only The analog caption function ...

Page 235: ... on the broadcasting signal the analog caption function may or may not work with digital channels Default Service1 Service6 CC1 CC4 Text1 Text4 Digital channels only The digital caption function works with digital channels N N Service1 Service6 may not be available in digital caption mode depending on the broadcast ...

Page 236: ...de Default Small Standard and Large The default is Standard Font Style Options include Default and Style0 to Style7 The default is Style0 Foreground Color You can change the color of the letters Options include Default White Black Red Green Blue Yellow Magenta and Cyan The default is White ...

Page 237: ...ault is Black Foreground Opacity This adjusts the opacity of text Options include Default Transparent Translucent Solid and Flashing Background Opacity This adjusts the opacity of the caption background Options include Default Transparent Translucent Solid and Flashing Return to Default This option sets each Size Font Style Foreground Color Background ...

Page 238: ...an select Default and Service1 Service6 in Caption mode N N The availability of captions depends on the program being broadcast N N The Default setting follows the standards set by the broadcaster N N You cannot set both the Foreground Color and the Background Color to the same color N N You cannot set both the Foreground ...

Page 239: ... screen burn this unit is equipped with Pixel Shift screen burn prevention technology Pixel Shift moves the picture slightly on the screen The Pixel Shift Time setting allows you to program the time between movements of the picture in minutes Your TV also has the following additional screen burn protection functions ...

Page 240: ...t Auto Protection Time Scrolling Side Gray Pixel Shift Using this function you can set the TV to move pixels minutely on the PDP screen in a horizontal or vertical direction to minimize after images on the screen ...

Page 241: ...gs and optimum settings Horizontal Available Settings 0 4 pixels Optimum settings for TV AV Component HDMI 4 Vertical Available Settings 0 4 pixels Optimum settings for TV AV Component HDMI 4 Time minute Available Settings 1 4 min ...

Page 242: ...ing on the monitor size inches and mode N N This function is not available in the Screen Fit mode Auto Protection Time If the screen displays a still image for a certain period of time you define the TV activates the screen saver to prevent the formation of burnt in ghost images on the screen ...

Page 243: ...or symbols on the screen especially when you displayed a still image on the screen for a long time N N The after image removal function has to be executed for a long time approximately 1 hour to effectively remove after images on the screen If the after image is not removed after you apply the function repeat the function again N N Press any button to cancel this feature ...

Page 244: ...ur TV displays when you set the screen size to 4 3 Auto Protection Time for LED TV If the screen displays a still image for a certain period of time you define the TV activates the screen saver to prevent the formation of burnt in ghost images on the screen ...

Page 245: ...nsole such as a PlayStation or Xbox to the TV you can enjoy a more realistic gaming experience by turning on the Game Mode function Precautions and limitations for Game Mode Before you disconnect the game console and connecting another external device set Game Mode to Off ...

Page 246: ... source is set to TV N N Set Game Mode to On only after connecting a game console If you turn Game Mode on before you have attached the game console you may notice slightly reduced picture quality N N If the Game Mode is set to On the Picture Mode is set to Standard and the Sound Mode is set to Movie automatically ...

Page 247: ...ater products which support BD Wise When the BD Wise is set to On the picture mode is automatically changed to the optimal resolution N N Available when you connect Samsung products that support BD Wise through an HDMI cable to the TV Menu Transparency Adjust transparency of menu box ...

Page 248: ...Feedback is enabled by default Turn off Sound Feedback or adjust its volume Panel Lock Lock or unlock all the keys on the front panel at once When Panel Lock is on none of the keys on the front panel operate Boot Logo Displays the Samsung logo when the TV is turned on ...

Page 249: ...to save power or if the LED is too bright for you N N Set the Light Effect to Off to reduce the power consumption N N The color of light may vary depending on the model Anynet HDMI CEC Menu System Anynet HDMI CEC Allows you to control all connected Samsung devices that support anynet with your ...

Page 250: ...m DivX Video On Demand Shows the registration code authorized for the TV If you connect to the DivX web site and register with 10 digit registration code you can download the VOD activation file Once you play it using AllShare Play the registration is completed N N For more information on DivX R VOD visit http vod divx com ...

Page 251: ... Support e Manual The e Manual is built into your TV Open the e Manual to learn how to use your TV s many features N N For the detailed information about the e Manual Screen refer to How to view the e Manual in the User s Manual ...

Page 252: ...definition picture that you can examine for flaws or faults Yes Select Yes if the test picture does not appear or there is noise or distortion in the test picture There may be a problem with the TV Contact Samsung s Call Center for assistance No Select No if the test picture displays properly There may be a problem with ...

Page 253: ... built in melody to check for sound problems N N If you hear no sound from the TV s speakers before performing the sound test make sure Speaker Select is set to TV Speaker in the Sound menu and then try the speakers again N N You will hear the melody during the test even if you have set Speaker Select to External Speaker or have muted the ...

Page 254: ... the sound test There may be a problem with the TV Contact Samsung s Call Center for assistance No Select No if you can hear sound from the speakers There may be a problem with your external equipment Please check your connections If the problem persists refer to the external device s user manual ...

Page 255: ...ir HD channels is either perfect or the channels are unavailable Signal Information displays HD channel signal strength so you can adjust your antenna to increase signal strength and receive HD channels Reset Reset all setting to factory defaults except for your network settings ...

Page 256: ...ut screen appears Enter the PIN using your remote 3 When done the PIN screen disappear automatically The message All the settings will return to factory defaults appears 4 Select Yes All settings have been reset The TV will turn off and on again automatically The Setup screen appears For more information about Setup see ...

Page 257: ... a problem access the troubleshooting guide for a solution Software Update Menu Support Software Update The Software Update menu lets you upgrade your TV s software to the latest version Current Version This is the software version already installed in the TV ...

Page 258: ...ftware Standby Mode Upgrade The four methods are explained in the following pages N N Be careful not to turn off the power until the upgrade is complete The TV will turn off and on automatically after completing the software upgrade When you upgrade software all video and audio settings you ...

Page 259: ... you can easily reset them after the upgrade By USB To upgrade the By USB follow these steps 1 Visit www samsung com 2 Download the latest USB software upgrade exe archive to your computer 3 Extracts the exe archive to your computer You should have a single folder with the same name as the exe file ...

Page 260: ...e USB port of the TV 6 In the TV s menu go to Support Software Update 7 Select By USB N N Please be careful not to remove the USB drive until the upgrade is complete Online The Online function lets you download the upgrade software directly from the Internet into your TV and then upgrade the software ...

Page 261: ...the Internet See the Setting up the Wired or Wireless Network instructions To upgrade using the Online follow these steps 1 Select the Online The Connecting to Server message appears 2 If there is a download available the Download pop up appears with a progress bar and the download starts 3 When the download is complete the ...

Page 262: ...ow the TV upgrades the software turns off and then turns on automatically If you do not make a selection in one minute or select the Upgrade Later the TV stores the new upgrade software You can upgrade the software later using the Alternative Software function If you select the Don t Upgrade the TV cancels the upgrade ...

Page 263: ... not to install immediately or a file downloaded by the TV in Standby Mode See Standby Mode Upgrade on the next section To upgrade using Alternative Software follow these steps 1 If upgrade software has been downloaded you will see the software version number to the right of Alternative Software 2 Select Alternative Software ...

Page 264: ...is complete the TV turns off automatically and then turns on Standby Mode Upgrade You can set the Standby Mode Upgrade function so that the TV downloads new upgrade software when it is in Standby mode In Standby mode the TV is off but its Internet connection is active This allows the TV to download upgrade software ...

Page 265: ...omenon may continue for more than 1 hour until the software download is complete To set Standby Mode Upgrade follow these steps 1 Select the Standby Mode Upgrade 2 Select On or Off Off If you select Off the TV will notify you with a pop up message when new upgrade software is available On If you select On the TV will ...

Page 266: ...oads new upgrade software the TV will ask you if you want to install it when you turn the TV on N N To use the Standby Mode Upgrade function your TV must be connected to the Internet Contact Samsung Menu Support Contact Samsung View this information when your TV does not work properly or when you want ...

Page 267: ... call centers and how to download products and software Remote Management Menu Support Remote Management The Call Center will access your Samsung Product remotely to check internal information Remote Management can control user settings and troubleshoot a problem ...

Page 268: ...rt Hub Menu Support Smart Hub Smart Hub lets you connect to the Internet and enjoy variety of Internet and multimedia contents For more information on how to use the Smart Hub see Smart Hub in the e Manual ...

Page 269: ...Using the 3D function 3D Menu Picture 3D This exciting new feature enables you to view 3D content To fully enjoy this feature you must need a pair of Samsung 3D Active Glasses to view 3D video ...

Page 270: ...rning Some viewers may experience discomfort while viewing 3D TV such as dizziness nausea and headaches If you experience any such symptom stop viewing 3D TV remove the 3D Active Glasses and rest Watching 3D images for an extended period of time may cause eye strain If you feel eye strain stop viewing 3D TV remove your 3D Active Glasses and rest ...

Page 271: ...ld stop viewing 3D TV and rest Do not use the 3D Active Glasses for other purposes such as general eyeglasses sunglasses protective goggles etc Do not use the 3D function or 3D Active Glasses while walking or moving around If you use the 3D function or 3D Active Glasses while walking or moving around you can injure yourself by running into objects tripping or falling ...

Page 272: ... 3D Active Glasses on first and then select the 3D Mode from the list below that provides the best 3D viewing experience Off Off Turns the 3D function off Changes a 2D image to 3D Displays two images next to each other Displays one image above another Displays the images for the left and right ...

Page 273: ...lays the images for the left and right eye alternately in pixels for LED TV Displays the images for the left and right eye alternately in frames for LED TV N N The 3D Mode may differ depending on the input signal N N Some file formats may not support the N N The and are available when your PC is connected through an HDMI ...

Page 274: ...st 3D effects like perspective and depth for your preferred 3D viewing experience 3D Effect Adjust the perspective and depth settings If you select Auto adjust the perspective and depth settings automatically in accordance with the 3D input source If you select Manual you can adjust the perspective and depth you want ...

Page 275: ...D perspective of the on screen image Depth Adjust the overall depth 3D Perspective for PDP TV Adjust the overall 3D perspective of the on screen image Depth for PDP TV Adjust the overall depth L R Change Swap the left and right pictures ...

Page 276: ...creen appears when the TV receives a 3D signal Then you can view a 3D image by selecting 3D using your remote N N When you access some application such as Smart Hub etc TV will do not switch to 3D In this case you should to use the 3D after exiting the application 3D Optimize for LED TV Automatically adjusts the picture overall to provide an optimal 3D effect ...

Page 277: ...y HDMI 3D Format Resolution Frequency Hz 1280 x 720p 59 94 60 Hz 1920 x 1080i 59 94 60 Hz 1920 x 1080p 23 98 24 29 97 30 59 94 60 Hz Frame Packing 1280 x 720p 59 94 60 Hz 1920 x 1080i 59 94 60 Hz 1920 x 1080p 23 98 24 29 97 30 Hz ...

Page 278: ...Component Resolution Frequency Hz 1280 x 720p 59 94 60 Hz 1920 x 1080i 59 94 60 Hz 1920 x 1080p 23 98 24 29 97 30 59 94 60 Hz DTV Resolution Frequency Hz 1280 x 720p 59 94 60 Hz 1920 x 1080i 59 94 60 Hz ...

Page 279: ...e formats in the Other Information section Resolution supported for HDMI PC mode for LED 7500 series and above The optimal resolution for the HDMI PC mode is 1920 x 1080 If the input resolution is not 1920 x 1080 the TV may not display images properly in 3D display or full screen mode ...

Page 280: ...nding on the format of the image source To watch in 3D you must wear 3D Active Glasses and turn the glasses on by pressing the power button 1 Go to the 3D screen Picture 3D 2 Select the 3D Mode The 3D Mode screen appears 3 Set the 3D Mode of the image you want to view ...

Page 281: ...The 3D Mode is set to its memorized configuration value automatically when you change the input source Some Picture functions are disabled in 3D mode PIP is not supported in 3D mode 3D Active Glasses from Samsung s previous product IR type or other manufacturers are not be supported When the TV is initially powered on it ...

Page 282: ...or TV If there is a problem keep other electronic devices as far away as possible from the 3D Active Glasses Be sure to stay within the viewing angle and optimum TV viewing distance when watching 3D pictures Otherwise you may not be able to see 3D effects properly The ideal 3D viewing distance is three times or more the height of the screen For example if your screen is two feet ...

Page 283: ...high you should sit at least six feet from the screen We recommend sitting so that your eyes are level with the screen ...

Page 284: ... music from the Internet access various for pay or free of charge applications and view them on your TV Application content includes news sports weather forecasts stock market quotes maps photos and games N N You can also start this function by pressing the button on the remote control ...

Page 285: ...on services may be provided in English only and the contents available may vary depending on your area For more information about a Smart Hub service visit the web site of the applicable service provider The Smart Hub service downloads and processes data via the Internet so that you can enjoy the Internet contents on your TV screen If the Internet connection ...

Page 286: ...et If this occurs check the Internet connection and try again The services provided are subject to change by the Smart Hub service provider without notice The Smart Hub service contents may differ depending on the player s firmware version For pay DivX contents with copy protection can only be played through a composite a component or an HDMI ...

Page 287: ... screen you can use corresponding functions Voice Control System Voice and Motion Control Voice Control Motion Control System Voice and Motion Control Motion Control An USB or Bluetooth Mouse the device must connected to the TV System Device Manager Mouse Settings ...

Page 288: ...en appears In a few cases the Country screen appears immediately after 3 If the Country screen has appeared select your country using your remote N N Some applications are available only in certain countries 4 The General Disclaimer screen appears Select Agree N N Screens can take a few seconds to ...

Page 289: ...ervices and applications When done it closes The applications and services downloaded are displayed on the Smart Hub screen This may take some time N N Smart Hub may close momentarily during the installation process N N A number of screens may appear after installation You can close them or let them close on their own ...

Page 290: ...ng using your remote while you are using the Screen Keypad enables you to change the text fields to lower case capitalized case upper case numbers and icons You can use this Screen Keypad in a several Smart Hub applications Method 1 Using the keypad of ABC type 1 For example suppose that you want to ...

Page 291: ...ower case to numbers 3 Select 1 0 and 5 in numerical order 4 Select 3 times using your remote to change the input mode from numbers to upper case 5 Select 2 3 times using your remote to input C 6 Select 3 times using your remote to change the input mode from upper case to lower case ...

Page 292: ... the Keypad of XT9 type 1 For example suppose that you want to input 105Chang 2 Select 3 times using your remote to change the input mode from lower case to numbers 3 Select 1 0 and 5 in numerical order 4 Select 3 times using your remote to change the input mode from numbers to capitalized case ...

Page 293: ...e selected numbers Select Chang from the list by selecting using your remote N N If Chang cannot be found in the list select to create your own dictionary Add your own word to your dictionary Using the QWERTY Keypad You can use this Screen Keypad in a several Smart Hub applications in same way as a keyboard ...

Page 294: ...ypad a Delete All Delete all inputted character b Numeric QWERTY Toggles the keypad mode between Numeric mode and QWERTY mode N N When the keypad is set to QWERTY mode you can input a character using a USB or Bluetooth keyboard connected on the TV T Settings ...

Page 295: ... select a input language XT9 Text Input Turns on or off the recommended word function E Enter Enter the selected character R Return Return to the previous menu π Prev Page Move to the previous keypad N N Available only when the keypad screen ...

Page 296: ... N Available only when the keypad screen is icon mode Creating an Account To establish your own exclusive configuration of Smart Hub create your own Samsung account N N You must use an e mail address as an ID N N You can register up to 10 User Accounts ...

Page 297: ...Hub screen select a using your remote The Login screen appears 2 Select Create Account using your remote The Create Account screen appears 3 Select Samsung Account An entry screen and keypad appear 4 Use the keypad to enter your e mail address This will serve as your ID 5 When done select OK The Login screen ...

Page 298: ...o enter a password The password can be any combination of letters numbers and symbols N N If you select a using your remote the TV show or hide the password as you enter it 8 When done select OK 9 Select Confirm password The Password screen and a keypad re appear 10 Repeat Steps 7 and 8 ...

Page 299: ...ervice ID window appears 13 Select OK N N If you don t have existing provider accounts or do not want to register existing accounts at this time select Cancel You can also let the window close on its own in about a minute 14 The Register Service Account window appears N N If you have existing accounts with ...

Page 300: ...and the provider account password with your Samsung account Registration makes it easier to access the providers web site For registration instructions go to Step 2 in Account Manager under Settings in the Configuring the Smart Hub with Settings section of this manual ...

Page 301: ...ount follow these steps 1 With the Smart Hub main screen displayed on your TV select a using your remote The Login screen appears 2 Select the next to the Samsung Account N N If you want to input the Samsung Account The keypad screen appears Then you can input your Samsung ...

Page 302: ...tion without input your account For more detailed information about the Face recognition refer to SMART Interaction section in the e Manual 3 Select your ID from the list that appears The Login screen re appears 4 Select Password The Password window and a keypad appears 5 Enter your password using your remote When done select OK ...

Page 303: ... now enter your password automatically when you select or enter your ID N N If you want to log in the Smart Hub automatically when the Smart Hub function starts select Sign me in automatically A c mark appears N N When you forgot password you can reset your Samsung account password Select b using your remote A pop up message appears and the select OK The guide to ...

Page 304: ... home screen Account Manager Lets you register your service provider accounts delete or deactivate your Samsung account and register or reset your face recognition For more information about Account Manager refer to Configuring the Smart Hub with Settings in this section N N Available only when you logged in the ...

Page 305: ...u with Smart Hub Login Logout Log in or log out to your Samsung account WallPaper You can change a background image the Smart Hub home screen Move The Move function lets you change the screen position of an application or a folder ...

Page 306: ...Tools menu using your remote 2 Select Move A position change screen appears 3 Move the icon using your remote When the icon is in the position of your choice select the icon The application moves to its new location Move to Folder The Move to Folder function lets you move an application to a folder ...

Page 307: ...using your remote 2 Select the Move to Folder The Move to Folder window opens 3 Select a folder using your remote A move finished message appears and then closes The application has been moved to the folder N N Also if you select an application in a folder the application can be moved to the Smart Hub screen ...

Page 308: ...he folder opens 2 Select an application you want to execute The application service starts Delete The Delete function lets you delete application from the Smart Hub To use the Delete function follow these steps 1 Select an application and then open the Tools menu using your remote ...

Page 309: ... deleted New Folder The New Folder function lets you create and name new folders Once you have created a folder you can move applications into it To use the New Folder function follow these steps 1 Open the Tools menu using your remote 2 Select New Folder The New Folder window and a keypad screen appears ...

Page 310: ...t OK The New Folder screen closes and the New Folder appears on the Smart Hub screen Rename Folder The Rename Folder function lets you rename folders To use the Rename Folder function follow these steps 1 Select a folder and then open the Tools menu using your remote ...

Page 311: ...ng your remote 4 When done select OK The Rename Folder window closes and the new name appears below the folder Lock The Lock function lets you lock some application in Smart Hub so they cannot be opened without entering the password N N Depending on the application this function may not be supported ...

Page 312: ...n and then open the Tools menu using your remote 2 Select Lock The Security window appears 3 Enter your password using your remote If you do not changed a password enter 0 0 0 0 4 A confirming message screen appears A lock symbol appears left to the application Unlock ...

Page 313: ...nction follow these steps 1 Select an application and then open the Tools menu using your remote 2 Select Unlock The Security window appears 3 Enter your password using your remote If you do not changed a password enter 0 0 0 0 4 A confirming message screen appears A lock symbol disappears ...

Page 314: ...lication you can also lock or unlock the application in the Detailed Information screen Configuring the Smart Hub with Settings The Settings menu gives you access to Account Manager Service Manager Reset and About Smart Hub functions To access the Settings menu and then select a menu item follow these steps ...

Page 315: ...emote Account Manager The Account Manager menu contains functions that let you register your service provider accounts change your Smart Hub password and delete or deactivate your Samsung account Link to other accounts If you have existing accounts with any of the providers listed by the Link to other accounts function ...

Page 316: ...to the account through Smart Hub easily without entering your account name or password N N Before register your site account corresponding application should be installed in the Smart Hub To use the Link to other accounts function follow these steps 1 In the Account Manager menu select the Link to other accounts The Link to other accounts window appears ...

Page 317: ...hen done select OK N N This is the ID and password you normally use to access your account on this application 4 If you have entered the ID and password correctly the Registered successfully message appears 5 If want to add another service application and then repeat Steps 2 through 4 to associate another service application ...

Page 318: ...ed on the Register Service Account screen Deactivate Account Deactivates your Samsung Account and deletes it and all your account settings entirely from the Smart Hub Face recognition Register your face in your Samsung account For more information about Face registration refer to Face recognition in the SMART Interaction ...

Page 319: ...ur Samsung account Service Manager Auto Ticker You can set Auto Ticker to come on when powering on the TV N N The Ticker application provides useful News Weather and Stock Market information The Ticker application on Smart Hub must be downloaded to use this feature ...

Page 320: ...that displays a notification message when an event takes place in an application installed on Smart Hub The TV will display the notification message and allow you to view details of the event even while you are viewing TV Reset The Reset function initializes all downloaded applications erases all user accounts and settings from the TV and resets all Smart ...

Page 321: ... account however remains on the Smart Hub server To log into your account enter your ID and password on the Login screen To use the Reset function follow these steps 1 In the Settings menu select Reset The Reset screen appears 2 Enter the your security password using your remote N N The default password set is 0 0 0 0 ...

Page 322: ...e which resets the PIN to 0 0 0 0 MUTEM 8 2 4 P Power on 3 After a few moments the Smart Hub automatically resets The screen may go black then Smart Hub re appears In a few moments it starts the reinitialization procedure 4 To complete the re initialization go to Step 2 in To start Smart Hub for the first time follow these steps section of this ...

Page 323: ... Hub menu contains functions that display information about Smart Hub Detail Lists information about Smart Hub including version number memory usage and the unique product ID Terms of Service Agreement Display the Terms of Service Agreement ...

Page 324: ...g Apps is a store from which you can download applications to use on Samsung TV AV equipment You can enjoy a variety of contents such as videos music photos games useful information etc using the downloaded applications New applications are added regularly ...

Page 325: ...e Samsung Apps a Login Logout Log in or log out to your Samsung account b Filter by Price To toggle the view between All Paid and Free Sort To sort the applications by Recommended Name Date or Downloaded N N You can sort all categories except Most ...

Page 326: ...ular View Mode Each time you select using your remote the View Mode toggles between basic mode and thumbnail mode π Previous Move to previous page µ Next Move to next page T Tools Displays the option menu ...

Page 327: ...o previous menu Using the Samsung Apps by category The following categories are available What s New User can easily find newly latest registered application Most Popular Displays the most popular applications for users ...

Page 328: ...as movies TV shows and short length videos Games Includes various game apps such as sudoku and chess Sports Includes apps that provide sports content such as game results images and short length video Lifestyle Includes apps that provide lifestyle media ...

Page 329: ...rking such as Facebook and Twitter Information Includes apps that provide information content such as news financial information stock quotes weather etc Education Includes apps that provide education contents such as story book dictionary VOD Video on Demand for kids etc ...

Page 330: ...chased app list or already installed applications on your TV like detailed information download contents etc N N You can purchase App cash that you can use to buy applications through tv samsungapps com Help If you have questions about the Samsung Apps check this section first ...

Page 331: ... Search Samsung Apps The Search window appears 2 Enter a keyword you want to search using your remote 3 When done select an entry field 4 Wait until the search result screen displays Then you can select an application you want in the search result screen N N You can find the keyword in the search ...

Page 332: ...history If you searched a keyword before ...

Page 333: ...ntry Easily search for and access content from diverse sources e g applications Your Video AllShare Play 1 On the Smart Hub screen select Search 2 If you want to input a search term directly select an entry field A keypad screen appears Enter the search term ...

Page 334: ...ategory using your remote Using the Search function by category Your Video Personalize your movie watching with a customized video on demand VOD recommendation service Most Searched You can search by selecting a key word in the key word list The key word list displays ...

Page 335: ...op Application You can search applications and services in the application list The application list displays apps that users download frequently Search History You can find the keyword in the search history if you searched a keyword before ...

Page 336: ...he colored and function buttons with the Search b Refresh Refresh the Search function T Tools You can set a general setting for Search function or delete the search history R Return Return to the previous menu ...

Page 337: ...ion Turns on or off the Keyword Recommendation function Search Scope Sets a search scope The default is allowed all application To customize a search scope you want follow these steps 1 On the Search screen open the Tools menu using your remote 2 Select General Settings ...

Page 338: ...ion in the Search Scope A c mark disappears in the check box 4 When done Press the RETURNR button Search History You can delete the keyword in the search history Also If you select Delete All delete all your search history ...

Page 339: ... depending on your country Using this service from the Smart Hub you can get video recommendation and search for movies from multiple providers Using the Your Video 1 On the Smart Hub screen select Your Video 2 Enjoy your movie watching with a ...

Page 340: ...customized video on demand VOD recommendation service ...

Page 341: ...os messages and events with your family Create Group If you are starting Family Story for the first time among your family members you can create a group and invite members Invite Members After creating a group you can invite your family members who you want to share your ...

Page 342: ...can select Join Group to enjoy Family Story service To create a family group follow these steps 1 On the Smart Hub screen select Family Story The Family Story screen appears 2 Select Create Group The Create Group screen appears 3 Select AGREE It is required to agree with the terms prior to using Family Story ...

Page 343: ...image box An external device containing photos must be connected to your TV via USB N N Fields marked with an asterisk are required 5 When done select Done The group creation is completed N N If you want to invite members to your group select Invite Members If you want to go your Family Story select Go to Family Story ...

Page 344: ... open the Tools menu using your remote and then select Group Members The Group Members screen appears 2 Select Invite Members The Invite Members for your Family Story screen appears 3 Select Select to enter Name The keypad screen appears 4 Enter member s name using your remote When done select Done ...

Page 345: ...mber or Samsung account ID using your remote When done select Done 7 When done select Done N N If you want to add more members select Add member and repeat the Step 3 and 7 8 New member invitation has been completed 9 If invited by phone number 4 digit invite code will be generated and the code need ...

Page 346: ... join a group using the received invite code follow these steps 1 Start Family Story and accept the terms 2 You will see a pop up message asking about invitation type If you were invited by phone number please select Invite Code or if you were invited by Samsung account please select Samsung Account 3 If joining by Samsung Account a list of ...

Page 347: ...firstly enter your phone number using your remote When done select Done Then you will see a list of invitations from your family groups Select Accept to join You can select Deny if you don t want to join the invited group Enter the 4 digit invite code shared by your family member and then select Done to finish 5 Select OK Joining your family group has been completed ...

Page 348: ... Smart Hub Lets you manage Fitness using the exercise related application downloaded in the Samsung Apps N N To use the Fitness you should be logged in Smart Hub Read these note before exercising N N Please do a warm up or stretch before exercising ...

Page 349: ...When you start Fitness for the first time you should create your own profile On Fitness screen select Create Your Profile A pop up message appears Select Create Your Profile N N To go to next step move to right side using your remote 1 Name Select First Name and Last Name to put in a new user name The keypad ...

Page 350: ...date Enter your birthdate using your remote It will be used to personalize some things for you 4 Units Select your preferred units The selected units will be applied all over Fitness 5 Height Enter your height This will be used to calculate your body max index BMI 6 Weight Enter your weight This will be ...

Page 351: ...n of your profile is finished The TV displays the information of your profile and BMI To start the Fitness select Enjoy Fitness Using the Fitness with categories Exercise Provide information on your exercise goal current status and recommended contents Progress ...

Page 352: ...Provide information on your basic body profile exercise progress achievements for your goals etc ...

Page 353: ...uncher and the recommended list to access the kids or education related application or contents easily and quickly Also it helps user parents to manage your kids Using the Kids with categories Playground Displays recommended contents and applications When you select an application ...

Page 354: ...imum number of contents list is 40 N N The contents list can be edited by user parents For more detailed information refer to My Choice in this section Sticker Book Displays the Sticker Books collected stickers which your kids received Also it can be share with your Family Story ...

Page 355: ...ng the Present Sticker function in the Parents menu Automatically Presents a sticker when watching content Creating a Sticker Book 1 If you want to create a new Sticker Book select Create a New Sticker Book The Create a New Sticker Book screen appears 2 Enter the Sticker Book s name using your ...

Page 356: ...ou want to change a name select Edit If you want to change a color select Back 5 When done select Done A new Story Book is created N N You can create a new sticker book Maximum number of books is 10 N N You can check arrived stickers in the Get New Stickers A new sticker will be saved only 10 stickers which recently received ...

Page 357: ...ation or contents if the application or contents were not installed to the TV the TV displays the corresponding download screen in the Samsung Apps screen To use the Browse All follow these steps 1 On the Browse All screen select a character you wish The selected character screen appears 2 Select a contents you want play ...

Page 358: ...Stories Displays the e book contents of the corresponding character 3 The detailed information screen of the selected contents appears You can play the contents share with your Family Story add to Playground and give a rating N N If you were purchased already you can play the contents If you are not purchased you can download the ...

Page 359: ...stickers to your kids check a usage time and set to alarm My Choice You can add or delete the contents in the Playground The Playground displays the added contents only To add or delete the contents in the Playground follow these steps 1 On the Parents screen select My Choice ...

Page 360: ... Select contents you want to add or delete in the list A pop up message appears 3 Select Yes 4 The selected contents will be added or deleted Present Sticker When your kids did a good job today you can present a sticker to your kids ...

Page 361: ...cker The Present Sticker screen appears 2 Select a sticker you want to present A pop up message appears 3 Select Yes 4 Select a sticker book you want to present and then select Present N N If you want to check a sticker book select Check Now You can check the sticker in the selected sticker book ...

Page 362: ... usage time of the application of your kids through a graph Also you can check a usage time of the each contents of your kids Change a date or content title using your remote Set Alarm Lets you can set the watching time of your kids When the time is ended the alarm window appears ...

Page 363: ...To set the watching time follow these steps 1 On the Parents screen select Set Alarm The Set Alarm screen appears 2 Select Timer 3 Select time you wish The alarm will be set ...

Page 364: ...ailable depending on your country Using this function provided by the Smart Hub you can surf the Internet on your TV 1 On the Smart Hub screen select Web Browser The Web Browser screen appears 2 Surf the Internet in the same way as on a PC ...

Page 365: ...r b Control Panel Shows or hides the control panel in the top of the screen Link Browsing Pointer Browsing You can change the cursor to Link Browsing mode or Pointer Browsing mode PIP Turns PIP on or off With PIP on you can watch TV while using the Web Browser ...

Page 366: ...n Link Browsing Pointer Browsing You can change the cursor to Link Browsing mode or Pointer Browsing mode PIP Turns PIP on or off Add to Bookmark Add to current page to the Bookmarks Enable Grabbing Disable Grabbing You can move to the direction you want a current web page To move a web page select a web ...

Page 367: ...on you wish using your remote N N Available only when cursor is set to Pointer Browsing πµ Scroll up down You can scroll the page up or down N N Available only when cursor is set to Link Browsing R Return Close the Web Browser ...

Page 368: ... the screen With these icons you can easily use the Web Browser The icons are described below starting with the icon on the far left of the screen Back Moves to the previous web page N N If there is no saved previous web page this icon will not work Forward Moves to the next web page if there are ...

Page 369: ...saved next web page this icon will not work Refresh Stop Refreshes the current page or stops the current connection from loading Home Page Goes to the URL you specified as your the home page Zoom You can select a zoom level of 50 75 ...

Page 370: ...to visit from the bookmark list You can also sort by Date Name or Times Visited To sort select the Sort When you select Enter URL you can enter in a new URL address directly using your remote When you highlight a page the Option appears on the right In the Option pop up you can edit the selected page or delete the selected page from bookmark list ...

Page 371: ... all bookmark lists Add to Bookmark Sets the current page as a bookmark Import bookmarks You can import a bookmark file saved in the other device like a PC Export bookmarks You can export a bookmark file from your TV to the other device connected your TV ...

Page 372: ...When you select Enter URL you can enter in a new URL address directly using your remote When you highlight a page the Option appears on the right In the Option pop up you can delete the selected page from the history list or add the selected page to bookmark N N If you want to delete all history list open the Tools menu using your remote and then select Delete All ...

Page 373: ...in a new URL directly Windows List Displays list or images of open windows the Windows List You can open a new page to the list using Open new window select and access a page in the list select and close a page in the list or close all pages When you select Enter URL you can enter in a new URL address directly using your remote ...

Page 374: ...w web browser automatically displays the home page Close all windows Close the currently opened all Windows List After closing all Windows List TV opens a new web browser automatically A new web browser automatically displays the home page Search Lets you search the web When you select ...

Page 375: ...d input follow these steps 1 On the Search screen select the search engine Also you can select a different search engine 2 Select Please enter a keyword The keypad screen appears 3 Enter the word you want to search using your remote The TV searches the word by search engine ...

Page 376: ...our Family Story Options You can configure the Web Browser settings Setting up the Web Browser Move the cursor to the top of the screen and then select the Options icon Reading Tools Provides an easy to read page by enlarging the main text ...

Page 377: ... registered web sites N N Every time you access the Approved Sites the PIN screen appears and you should enter the PIN Approved Sites Feature Turns on or off the Approved Sites Reset password for Approved Sites Change the Approved Sites password Add current site Lets you add the currently displayed web site to the Approved Sites list ...

Page 378: ...ny sites to the Clean site list you will not be able to access any Internet sites Private Browsing On Private Browsing off Enable or disable the Privacy mode When the Privacy mode is enabled the browser does not retain the URLs of sites you visit If you want to enable Privacy mode select Yes If the Privacy mode is running the Stop icon appears in front of the URL at the top of ...

Page 379: ...led PIP Settings Lets you configure the PIP function PIP Position Select a position for the PIP sub picture Sound Select the audio source you will hear Main or Sub when PIP is on Web Browser Setting You can configure Web Browser options Set as homepage You can set the home page ...

Page 380: ...page Bookmarks Sets the bookmarks URL as the home page Enter URL Lets you key in the URL of the page you want for your home page The keyboard works like a cell phone texting keyboard Pop up Block settings Turns the Pop up Block on or off Ad Block Settings You can determine whether to block advertisements and select ...

Page 381: ...ent page Adds the current page to the blocked list Manage blocked sites You can add a website for which advertisements should be blocked by directly keying in the URL or you can delete a website from the list General You can delete your personal information Delete history Deletes the website history ...

Page 382: ...rns on or off the control panel auto hide Encoding You can set the Encoding setting for web pages to Automatic or Manual Auto select Turns on or off the Encoding setting for web pages automatically Setting Select the Encoding settings for web pages manually Select an encoding format from the encoding format list Pointer You can set the speed of the cursor ...

Page 383: ...when the cursor is set to Pointer Mode Pointer Speed Select a pointer speed Browser Information You can check the version information about the Web Browser ...

Page 384: ...ting with people around the world easy and fun With Skype you can say hello or share a laugh with anyone anywhere And if both of you are on Skype it s free Communicate with people around the world N N For more information download the Skype user s manual from www samsung com ...

Page 385: ...y not be available on all devices or in all territories Some features on Smart Hub may also require additional peripheral devices or membership fees that are sold separately Please visit http www samsung com for more information on specific device information and content availability The services and availability of content through Smart Hub are subject to change from time to time without prior no...

Page 386: ...ss and control menu options and functions using speech motions or face recognition INFORMATION BOOKLET DISCLAIMER Face recognition Log in In order for Face recognition to function a thumbnail image of your face will be stored in your TV for logging in purposes Logging into the Smart Hub using Face ...

Page 387: ...that under some circumstances and under certain legal conditions your use misuse of the TV Camera can result in legal liability for you By using the TV Camera you agree that you will not use the camera i in locations where cameras are generally prohibited such as bathrooms locker rooms or changing rooms ii in any manner that ...

Page 388: ...en you use a TV camera you should check whether a tape attached or not in rear of the TV camera and then you can use a TV camera after adjust a camera angle When you don t want to use a TV camera we recommend to use after a camera lens fixes to upwards In this case Face recognition and Motion Control are not available ...

Page 389: ...s you access and control menu options and functions using speech N N For accurate voice recognition refer to the Standard Voice Command list at the Samsung web site www samsung com support Manuals Downloads N N Voice Control function can be affected recognition by unclear pronunciation voice level or surrounding noise ...

Page 390: ...ted in Language N N Ambient noise may cause Voice Control to malfunction Appropriate surrounding noise Below 40dB Your TV can hear your voice commands in two ways Using the TV s microphone Distant Recognition N N We are recommended using Voice Control function within about 13 ft with your TV You can check the ...

Page 391: ... remote Close Proximity Recognition N N When you use the TV s microphone the words may not be recognized because of ambient noise If this occurs try using the VOICE button on your remote The TV will be able to recognize a voice command more easily N N The VOICE button on your remote is always activated If you want to use the TV s microphone turn on Voice Control ...

Page 392: ...too small or large voice command may not be recognized N N If a menu option or function is not supported by the Voice Control function we suggest trying the Motion Control function To use the Motion Control raise your hand while opening it toward the screen hold it for a moment and then wave it 3 4 time to the left and right Motion Control starts If the Motion ...

Page 393: ...nter of the screen and the Motion Guide Bar Size is at the bottom of the screen Voice Control Turns the Voice Control function on or off N N The VOICE button on your remote is always activated Language Select the recognition language you want to use ...

Page 394: ...r Words if Voice Control function is set to On If Trigger Words is set to Hi TV say Hi TV Power On If Trigger Words is set to Smart TV say Smart TV Power On Voice Command Bar Size Set the Voice Command Bar Size mode to Minimum or Full Minimum displays the least number of words and phrases you can use Full displays all the words and phrases ...

Page 395: ... responsiveness Select the responsiveness level of Voice recognition Voice Control Environment Test You can test the amount of ambient noise level detected by the TV microphone Noise Test This test checks the amount of ambient noise detected by the TV microphone Too much ambient noise will prevent Voice Command from ...

Page 396: ...es if the sound from the TV speakers picked up by the TV microphone will disrupt Voice Command To run select Start using your remote The test starts and takes a few seconds Please keep as quiet as possible during the test N N Available only when Speaker Select is set to TV Speaker Voice Control Test This test checks the volume level and clarity of your voice for ...

Page 397: ... and clearly as you can N N If the test is not successful select Retest and then say the words loudly and clearly again To use the Voice Control function follow these steps N N If Voice Control function is set to On the TV may be turned on automatically by effect of the ambient environment 1 Say the Trigger Words that you selected ...

Page 398: ...d Bar Size N N When you use Voice Control the TV s volume is set to 5 automatically 2 Say a word or phrase listed in the Voice Command Bar Size N N Pronounce the word or phrase clearly and correctly in the language you selected in Language 3 Wait until recognition is complete and then say the next command in the same fashion ...

Page 399: ...n Using the Voice Text Input Mode 1 Say Search All while in the Voice Control mode N N When you use a QWERTY keypad screen you can use the Voice Text Input Mode Say the Trigger Words that you selected into the microphone embedded in the TV or press the VOICE button on your Smart Touch Control You cannot use it for some ...

Page 400: ...xecutes the spoken function N N Voice Control performance levels will vary based on the language spoken Motion Control Menu System Voice and Motion Control Motion Control Enable or disable the Motion Control function Lets you control your TV by moving the TV cursor using specific motions ...

Page 401: ... may not support Motion Control N N You may experience physical fatigue when you use the Motion Control for a long time N N To use the Motion Control please avoid direct sunlight N N We are recommended using Motion Control function within about 5 13 ft with your TV TV Camera s recognition range may differ depending on the angle ...

Page 402: ...of TV camera by using Motion Control Environment Test System Voice and Motion Control Motion Control Motion Control Environment Test Motion Control Turns the Motion Control function on or off Motion Guide Bar Size Set the Motion Guide Bar Size mode to Minimum or Full ...

Page 403: ...r room is bright enough for Motion Control to work properly Select Start using your remote The test starts and takes a few seconds Appropriate ambient brightness 50 500 Lux N N Do not illuminating a sunlight or lights directly into the camera lens N N Make sure that the camera lens is cloaked by an object Camera Angle Test On the Camera ...

Page 404: ...rself in front of the camera If you are not within the rectangle position the test may not work properly After aligning your body with the TV raise your hand while opening it toward the screen hold it for a moment and then wave it 3 4 times to the left and right To use the Motion Control function follow these steps 1 To use the Motion Control raise your ...

Page 405: ...rts the cursor is displayed at the center of the screen and the Motion Guide Bar Size is at the bottom of the screen 2 Control the TV using your hands For the useable motions see below N N Note that the Motion Control function closes if your hands go out of the camera range N N While using the Motion Control if you use the other devices i e remote control ...

Page 406: ...using motions Access Motion Control Action Spread your hand in the direction of the camera and shake it three or four times from a side to side Pointing Navigation Moves the cursor to the position you want Action Spread your hand and guide the cursor to position you want ...

Page 407: ... Clench your fist N N When you are viewing a page you can use the Run motion to move the page in the direction you want To move a page clench your fist keep it clenched and then move it in the direction you want the page to move Note that not all pages can be moved Return Return to the previous menu ...

Page 408: ...olume N N If you use the Motion Control function while watching a channel the channel volume control screen appears Action Use the Pointing Navigation motion to move the cursor to the channel or volume controller and then uses the Run motion to adjust the channel or volume N N If you use the Run motion once it has ...

Page 409: ...ct as pressing and holding a button on your remote Scroll Scroll the page in the direction you want For example suppose that you want to scroll down N N Some applications may not support this function 1 Move the cursor to the bottom of the screen page scroll zone using the Pointing Navigation motion ...

Page 410: ...tion motion 3 The page will move down Face recognition Tools Settings Account Manager Face recognition Enable or disable the Face recognition function Lets you register your face in your Samsung account Also you can log in to the Samsung account using the Face recognition ...

Page 411: ...face in your Samsung account follow these steps N N To use this function you must log into Smart Hub If you don t have a Samsung account you should create one before using this function To create your Samsung account refer to Creating an Account in Smart Hub 1 On the Smart Hub screen open the Tools menu using your remote and then select ...

Page 412: ...nition screen appears 4 Move your face into the square in the center of the screen and then wait until a square changes from red to green N N If Face recognition fails select Retry and then try again 5 When done your face is now registered in your Samsung account The Continue to Register Service window appears ...

Page 413: ...art Hub menu Tools Settings Account Manager Link to other accounts To log in to your Samsung account using Face recognition follow these steps N N If you use Face recognition to log into Smart Hub it may be less secure than logging in with a password 1 With the Smart Hub screen displayed select a using your remote The Samsung ...

Page 414: ...to the Samsung Account screen select Password mode 3 The TV starts Face recognition Face the front of the TV screen The TV will recognize your face automatically N N A Green square indicates a registered face A red square indicates an unregistered face N N If the TV fails to recognize your face try again ...

Page 415: ...to log in N N If your face is unregistered you can register your face in your Samsung account Follow steps 4 through 5 in the To register your face to your Samsung account follow these steps procedure above N N If you have no account you can create one you can create an account For more detailed information refer to Creating an Account in Smart Hub ...

Page 416: ...section ...

Page 417: ...valuation Criteria Condition Evaluation Item Management Specifications Surrounding Noise 40dB Distance 1M 4M Required Voice Level 60 dB or higher Angle 30 TV Volume dB Step 0 Supported Languages 3 languages Supported languages may differ depending on the model or Voice Control setting ...

Page 418: ...n Evaluation Item Management Specifications Surrounding Noise 40dB Distance 1M 4M Required Voice Level 60 dB or higher Angle 30 TV Volume dB Step 10 Supported Languages 3 languages Supported languages may differ depending on the model or Voice Control setting ...

Page 419: ...se 40dB Distance 1M 4M Required Voice Level 60 dB or higher Angle 30 TV Volume dB Step 5 Supported Languages 3 languages Supported languages may differ depending on the model or Voice Control setting N N To view all commands list of desired language refer to the Guide at the Samsung web site www samsung com Support Manuals Downloads ...

Page 420: ...nvironmental and Evaluation Criteria Condition Evaluation Item Management Specifications Operating Speed Slow Fast Distance 1 5M 4M Environment Illumination 50Lux 500Lux Horizontal Angle 15 Background Recognition White or Grey Vertical Angle 10 ...

Page 421: ...a Condition Evaluation Item Management Specifications Skin Color White Yellow Black Indian Hispanic Distance 1 5M 4M Environment Illumination 50Lux 500Lux Horizontal Angle 15 Background Recognition White or Grey Vertical Angle 10 Response Time 2 sec for 1 person 8 sec for 5 persons ...

Page 422: ...Environmental and Evaluation Criteria Condition Evaluation Item Management Specifications Response Time Within 300 msec Connected State Distance 30cm Within 1 5 sec Disconnected State 4M Vertical Angle 0 20 Horizontal Angle 0 85 ...

Page 423: ...ion Evaluation Item Management Specifications Surrounding Noise 45 50dB Voice Recognition Distance 10cm 30cm Remote Control Operating Distance 30cm 4M Required Voice Level 60 dB or higher TV Volume dB Step 50 Supported Languages 3 languages Response Time 5 sec ...

Page 424: ... Hot Keys Environmental and Evaluation Criteria Condition Evaluation Item Management Specifications Connected State Distance 30cm Disconnected State IR 4M Vertical Angle 0 20 Horizontal Angle 0 85 ...

Page 425: ...g Environmental and Evaluation Criteria Condition Evaluation Item Management Specifications Distance 30cm Distance 30cm Angle 0 4M Environment The operation should not be effected Angle 0 Response Time 1min 45 ...

Page 426: ...ns Temperature Humidity 0 50 50 75 TV Camera Internal Environmental and Evaluation Criteria Condition Evaluation Item Management Specifications Surrounding Noise 40dB Distance AF Operation 1M Environment Illumination 30Lux 500Lux 4M Temperature Humidity 0 50 50 75 Angle AF Operation 45 Horizontal 20 Vertical ...

Page 427: ...uation Criteria Condition Evaluation Item Management Specifications Surrounding Noise 40dB Distance AF Operation 1M Environment Illumination 30Lux 500Lux 4M Temperature Humidity 0 50 50 75 Angle AF Operation 45 Horizontal 20 Vertical ...

Page 428: ... or movie files saved on a USB Mass Storage Class MSC device and or your PC N N To view content on a USB device you should plug the device into a USB port on the TV N N If you want to use a USB HDD we recommend to use a USB HDD that has a power adapter ...

Page 429: ...nd or movie files to the USB port on the TV 3 When a USB device is connected to the TV the New device connected window appears Select a category you want to play among Videos Photos and Music N N The TV may display the files on the USB device automatically if it is the only device connected ...

Page 430: ...r select a Source for Smart Touch Control 2 Select a desired USB device and then press the TOOLST button for Standard Remote Control or T for Smart Touch Control button The Tools menu appears 3 Select Safely Remove USB and then wait until the selected USB device is disconnected You can remove a USB device from the TV ...

Page 431: ...tegory except My List and then press the E button for Standard Remote Control or press the Touch Pad for Smart Touch Control 3 Select a desired USB device and then press the TOOLST button for Standard Remote Control or T for Smart Touch Control button The Tools menu appears 4 Select Safely Remove USB and then ...

Page 432: ...device from the TV N N To remove a USB device from the TV we recommend use Safely Remove USB function Read this information before using AllShare Play with a USB device Restriction and Caution Before connecting your device to the TV please back up your files to prevent them ...

Page 433: ... Do not disconnect the USB device while it is loading If you connect a USB device with a USB extension cable the TV may not recognize the USB device or read the files on the device If a USB device you connect to the TV is not recognized the files on the device are corrupted or a file in the list is not played connect the USB device to a PC format ...

Page 434: ... on the PC to permanently delete the file If the database of the saved file list cannot be constructed because there is no free space on the USB device you may not be able to view a new file even if you have added the file to the USB device Supported Devices Certain types of USB Digital camera and audio devices may not be compatible with this TV ...

Page 435: ... Card Readers and USB HDD USB HUB are not supported Devices should be connected directly to the TV s USB port More than 3TB USB HDD is not supported If more than 2 PTP devices are connected you can only use one at a time If more than two MSC devices are connected some of them may not be recognized A USB device that requires high power more than 500mA or 5V ...

Page 436: ...e the Screensaver will run The power saving mode of some external hard disk drives may be released automatically when you connect them to the TV File system and formats The USB function might not work properly with unlicensed multimedia files MTP Media Transfer Protocol is not supported ...

Page 437: ...he Progressive jpeg format The higher the resolution of the image the longer it takes to display on the screen The maximum supported JPEG resolution is 15360 X 8640 pixels If a file is corrupted or the TV does not support the file type the Not Supported File Format message appears If the files are sorted by Folder view the ...

Page 438: ... and folders may not appear and some folders may not be opened The TV cannot play MP3 files with DRM that have been downloaded from a for pay site Digital Rights Management DRM is a technology that supports the creation distribution and management of digital content in an integrated and comprehensive way including protecting the rights and interests of content ...

Page 439: ...s encoded by a supported format an error message may appear due to a sub container or profile problem Connecting to a PC through a network You can play pictures music and videos saved in your PC through a network connection in the AllShare Play mode N N For more information on how to configure your TV and connect it to ...

Page 440: ...loaded and installed AllShare PC Software on your PC N N We recommend you locate both your TV and PC in the same network subnet IP addresses have four parts separated by periods 111 222 333 444 If your TV and PC are in the same subnet the first 3 parts of the TV IP address and the PC IP address 111 222 333 will be the same and only the last part the host address ...

Page 441: ... connected through a network N N The Background Music and Background Music Setting functions N N Sorting files by preference in the Photos Music and Videos folders The or function while a movie is playing N N DivX DRM are not supported N N Set your PC firewall program so that AllShare PC Software is a permitted ...

Page 442: ... connection The sorting method may vary The Scene Search function may not be supported The Resume function which resumes playing of a video may not be supported The Resume function does not support multiple users It memorizes only the point where the most recent user stopped playing a video ...

Page 443: ... The search function may not work depending on the content information N N You may experience file stuttering while playing a video in AllShare Play through a network connection ...

Page 444: ...our Samsung account to use web storage or social services AllShare Play can play various contents in three ways Using USB Device You can play videos photos or music from a connected USB device Using DLNA or Web storage You can play various contents from devices connected to your home network or web storage ...

Page 445: ...ld be installed in the Smart Hub N N To use SugarSync Facebook or Picasa you should log in to corresponding application Alternatively you can register your application account in to your Samsung account To register your application account refer to Configuring the Smart Hub with Settings in the Smart Hub section N N To use Family Story you should log in ...

Page 446: ... at least one more N N You can transfer a desired content to other device connected to the TV Contents Type Supported transfer device USB DLNA SugarSync Family Story Picasa Facebook Camera DLNA DLNA USB SugarSync USB Family Story USB Picasa USB Facebook USB Mobile device USB ...

Page 447: ...uickly Recently Played Displays the videos photos or music file list of recently played If you have a file you want to play again use this category N N When you play a file from the Recently Played list and the USB device is not connected or the file is not found the Cannot find the file you re looking for ...

Page 448: ... configured on the TV so that the last played file comes first N N When you try to play a file on a mobile phone the file may not be played What s New Displays the newly updated videos photos or music file saved on the USB device or your PC If you have a newly updated file you want to play use this category ...

Page 449: ...ist select the playlist The selected playlist will play immediately N N You can create up to 12 playlists N N You can add up to 100 files to a single playlist N N You can only add one type of content to a single playlist For example you can only add music files to a playlist that includes music files ...

Page 450: ...g your remote and then select Add to Playlist 3 Select a file you want to add The c mark appears in the check box 4 Repeat Step 3 to select additional files N N To select all the files in the list select Select All To cancel a selection select the file again 5 When done select Add The Add to Playlist screen appears ...

Page 451: ...ylist name using your remote 8 When done select Done The newly playlist is created To add files to playlist follow these steps 1 Follow Steps 1 through 4 in the Creating the Playlist procedure 2 Select a playlist to add files The files will be added to playlist you selected ...

Page 452: ...g your remote and then select Edit Playlist The Edit Playlist screen appears 3 Select a file you want to delete The c mark appears in the check box 4 Repeat Step 3 to select additional files N N To select all the files in the list select Select All To cancel a selection select the file again 5 When done select Remove A pop up ...

Page 453: ...message appears 6 Select Yes The selected file s be removed in the Playlist ...

Page 454: ...B device and or your PC N N For more information about the subtitle formats and codec formats refer to Supported Subtitle and AllShare Play file formats in the Other Information section Playing a Video 1 On the AllShare Play screen select Videos 2 Select the device you want to play ...

Page 455: ... play the video later from the point where you stopped it N N The file name appears on the top with its playing time N N If video time information is unknown the playing time and progress bar are not displayed Playback control button with Videos Each time you select or using your ...

Page 456: ... remote control Slide to left or right direction Smart Touch Control Jump to backward or forward from current position Pause the scene In pause mode select Each time you select using your remote the playback speed is reduced to 1 8 1 4 1 2 In pause mode select Each time ...

Page 457: ... To return to normal speed playback select using your remote N N The product does not play sound in stop mode N N Stop motion operates only in the forward direction Using the Tools menu with Videos On the file list screen you can use the following these options ...

Page 458: ...riteria you want Selection Play You can play by selecting the desired music file in the file list Send Lets you send your video files with your Family Story or other devices N N If you want to use this function you should log in the Smart Hub Login Logout ...

Page 459: ...count Add to Playlist Lets you make your own playlist When you use the playlist you can play music you want to listen easily and quickly Go to playlist Moves to Playlist screen Information Displays detailed information about the selected file ...

Page 460: ...file list screen Play from the Beginning You can restart a video file from the beginning Scene Search You can use the Scene Search function during playback to view or start a movie from the scene of your choice N N If the index information is damaged or unsupported you will not be able to ...

Page 461: ... You can move directly to another title Time Search Search the video or input the play time directly using your remote Repeat Mode You can play movie files repeatedly Picture Size You can adjust the picture size to your preference Picture Mode ...

Page 462: ...dio Language You can enjoy video in one of supported languages The function is enabled only when you play stream type files which support multiple audio formats Subtitle You can view a subtitle You can select a specific language if the subtitle file contains multiple languages ...

Page 463: ...tle option Information Displays detailed information about the selected file Viewing the file lists N N When you use the AllShare Play function with Family Story Facebook or Picasa rather than a USB device View is not supported 1 To sort files in the file lists select using ...

Page 464: ...criteria you want Folder view Displays the whole folder You can view the file name and thumbnail by selecting the folder Title Sorts and displays the file title in Symbol Number Alphabet Special order Latest Date Sorts and shows files by the latest date ...

Page 465: ...nd your video files with your Family Story or other devices N N If you want to use this function you should log in the Smart Hub 1 For example suppose that you want to send with your Family Story 2 To send video files in the file list open the Tools menu using your remote and then select Send ...

Page 466: ...l tracks N N To select all the files in the list select Select All To cancel a selection select the file again 5 When done select Send The Send screen appears 6 Choose the destination device to send 7 Choose the family group to share A pop up window appears 8 Enter a message to send to family group you selected ...

Page 467: ...N N In the QWERTY keypad screen you can use the keyboard connected to the TV 9 When done select Send ...

Page 468: ... more information about the subtitle formats and codec formats refer to Supported Subtitle and AllShare Play file formats in the Other Information section 1 On the AllShare Play screen select Photos 2 Select the device you want to play 3 Select the desired photo file in the file list ...

Page 469: ... Standard remote control To change a photo manually slide to left or right direction in the Touch Pad Smart Touch Control N N During the slide show all files in the file list are displayed in order starting from the file you selected N N When watching a photo file or slide show you can add background music if you have music files on same device ...

Page 470: ...ed until the BGM has finished loading Playback control button with Photos The slide show speed change as follow Slow Normal Fast l r Standard remote control Slide to left or right direction Smart Touch Control Change a previous or next photo ...

Page 471: ...list screen Start the slide show Pause the slide show Using the Tools menu with Photos On the file list screen you can use the following these options View You can sort the file list by selecting a sort criteria you want ...

Page 472: ...music file in the file list Send Lets you send your photos with your Family Story or photo related application N N If you want to use this function you should log in the Smart Hub Login Logout You can login or logout your Smart Hub account Add to Playlist ...

Page 473: ...play music you want to listen easily and quickly Go to playlist Moves to Playlist screen Information Displays detailed information about the selected file When playing a photo file you can use the following these options Go to Photos List Moves to the file list screen ...

Page 474: ...y select or using your remote Slide Show Speed You can select the slide show speed during the slide show Alternatively select or using your remote Slide Show Effect You can set various slide show effects Background Music On Background Music Off You can start or stop background music ...

Page 475: ...background music when watching a photo file or slide show Picture Mode You can change the Picture Mode Sound Mode You can change the Sound Mode N N Available only when the background music is set to on Zoom You can zoom into images in full screen mode ...

Page 476: ...rmation about the selected file Viewing the file lists N N When you use the AllShare Play function with Family Story Facebook or Picasa rather than a USB device View is not supported 1 To sort files in the file lists select using your remote The View screen appears ...

Page 477: ...Folder view Displays the whole folder You can view the file name and thumbnail by selecting the folder Title Sorts and displays the file title in Symbol Number Alphabet Special order Latest Date Sorts and shows files by the latest date ...

Page 478: ...nthly Sorts and shows photo files by month Send your photos Lets you send your photos with your Family Story or other devices N N If you want to use this function you should log in the Smart Hub 1 For example suppose that you want to send with your Family Story ...

Page 479: ... want to send The c mark appears in the check box 4 Repeat Step 3 to select additional tracks N N To select all the files in the list select Select All To cancel a selection select the file again 5 When done select Send The Send screen appears 6 Choose the destination device to send 7 Choose the family group to share A pop ...

Page 480: ...up window appears 8 Enter a message to send to family group you selected N N In the QWERTY keypad screen you can use the keyboard connected to the TV 9 When done select Send ...

Page 481: ... the subtitle formats and codec formats refer to Supported Subtitle and AllShare Play file formats in the Other Information section 1 On the AllShare Play screen select Music 2 Select the device you want to play 3 Select the desired music file in the file list or select using your remote ...

Page 482: ...ng you can search the music file by selecting or using your remote N N If the sound is abnormal when you play MP3 files adjust the Equalizer in the Sound menu An over modulated MP3 file may cause a sound problem Playback control button with Music During playback you can use additional functions at the bottom right of the screen ...

Page 483: ...rt or pause a music file Alternatively you can select or using your remote Repeat Mode You can play movie files repeatedly Shuffle Mode You can play the music sequentially or randomly Sound Mode You can change the Sound Mode ...

Page 484: ...ons View You can sort the file list by selecting a sort criteria you want Selection Play You can play by selecting the desired music file in the file list Send Lets you send your music files with your Family Story or other device N N If you want to use this function you ...

Page 485: ...in or logout your Smart Hub account Add to Playlist Lets you make your own playlist When you use the playlist you can play music you want to listen easily and quickly Go to playlist Moves to Playlist screen Encoding You can select an encoding format from ...

Page 486: ...ed file Playing selected music files using Music 1 Select the desired music file in the file list 2 Open the Tools menu using your remote and then select Selection Play 3 Select the tracks you want to add The c mark appears in the check box 4 Repeat Step 3 to select additional tracks ...

Page 487: ...again 5 When done select Play The selected music files will play Viewing the file lists N N When you use the AllShare Play function with Family Story Facebook or Picasa rather than a USB device View is not supported 1 To sort files in the file lists select using your remote The View screen appears ...

Page 488: ... view Displays the whole folder You can view the file name and thumbnail by selecting the folder Title Sorts and displays the file title in Symbol Number Alphabet Special order Artist Sorts the music file by artist in alphabetical order Album ...

Page 489: ...Sorts music files by the genre Send your music files Lets you send your music files with your Family Story or other devices N N If you want to use this function you should log in the Smart Hub 1 For example suppose that you want to send with your Family Story ...

Page 490: ... want to send The c mark appears in the check box 4 Repeat Step 3 to select additional tracks N N To select all the files in the list select Select All To cancel a selection select the file again 5 When done select Send The Send screen appears 6 Choose the destination device to send 7 Choose the family group to share A pop ...

Page 491: ...up window appears 8 Enter a message to send to family group you selected N N In the QWERTY keypad screen you can use the keyboard connected to the TV 9 When done select Send ...

Page 492: ...bile phones or the other devices such as your PC by controlling them on the TV via the network For more information visit www samsung com or contact the Samsung call center Mobile devices may need additional software installation For details refer to each device s user s guide N N If your Samsung TV connects to a non ...

Page 493: ...to a network via AllShare Play you can use Samsung s original functions as follows Playback of various video formats DivX MP4 3GPP AVI ASF MKV etc Video thumbnail feature Bookmark function to resume video playback Auto chaptering scene navigation Digital content management Compatibility with various subtitle ...

Page 494: ...the original DLNA functions of Samsung fully it is recommended that you use the AllShare software provided with your TV AllShare Settings Menu Network AllShare Settings Shows a list of mobile phones or connected devices which have been set up to use AllShare Settings with this TV ...

Page 495: ...e devices from the list N N This function only deletes the name of the device from the list If the deleted device is turned on or tries to connect to the TV it may appear on the list again To play the media contents of the devices connected to DLNA function follow these steps 1 On the AllShare Play screen select desired menu Videos Photos Music ...

Page 496: ...st The selected file will play Playing the media contents saved on the devices 1 Connect the mobile phone or other devices which support AllShare Play function and then play the media contents of each device The popup screen appears on the bottom of your TV 2 Select the Allow to accept the connected devices The media contents of the ...

Page 497: ... you that media contents videos photos music sent from a mobile phone will be displayed on your TV The contents are played automatically 3 seconds after the alarm window appears If you close the alarm window using your remote when the alarm window appears the media contents are not played N N The first time a device accesses your TV ...

Page 498: ...content N N To turn off media contents transmissions from a mobile phone set a device to Denied in the AllShare Settings N N Contents may not play on your TV depending on their resolution and format N N The some buttons may not work depending on the type of media content N N Using the mobile device you can control the media play For details refer to each ...

Page 499: ...mobile s user s guide ...

Page 500: ...vice that supports Mobile High Definition Link MHL function N N To use the MHL function you need an MHL certified mobile device You can check if your mobile device is MHL certified on the device manufacturer s website To find a list of MHL certified devices visit the official MHL website http www mhlconsortium org ...

Page 501: ...the mobile device and the HDMI IN 3 MHL port of the TV N N You can also connect the HDTV adapter 2 Select Source using your remote The Source screen appears 3 Select HDMI3 N N To use the MHL function you must upgrade the software to the latest version N N When you use a MHL cable only the ...

Page 502: ... using the MHL function please contact the manufacturer of the mobile device N N Some mobile devices products may not support the function depending on the performance or the function of the device N N Since the TV screen is wider than the mobile device screen the visual quality may seem degraded N N When you use a MHL cable you can ...

Page 503: ...te N N The TV remote control supports the following buttons for Standard Remote Control u d l r Menu navigation REW FF E select play pause stop e Move to previous menu for Smart Touch Control Menu navigation Slide your finger in the Touch Pad from one direction to the ...

Page 504: ...opposite direction Press the button in the top center of Touch Pad The TV displays these control functions REW FF E select play pause stop e Move to previous menu ...

Page 505: ...ces that support Anynet with your Samsung TV s remote The Anynet system can be used only with Samsung devices that have the Anynet feature To be sure your Samsung device has this feature check if there is an Anynet logo on it N N You can only control Anynet devices using the TV s remote control not the buttons on the TV ...

Page 506: ...t operate with other manufacturers products N N For instructions explaining how to connect Anynet external devices refer to the device s user manual You must connect an Anynet device using an HDMI cable Some HDMI cables may not support Anynet functions N N Anynet works when the AV device supporting Anynet is in the standby or on status ...

Page 507: ...one Anynet Home Theater To connect an Anynet Home Theater connect the Home Theater to the TV using an HDMI cable then To hear sound from the Home Theater s front left and right speakers and the subwoofer only connect a digital optical cable between the DIGITAL AUDIO OUT OPTICAL port on your TV and the Digital Audio Input on the Home Theater ...

Page 508: ...ite box etc Then connect the DIGITAL AUDIO OUT OPTICAL port on your DVD player Satellite Box etc i e Anynet Device 1 or 2 directly to the Home Theater not the TV Anynet HDMI CEC Menu The Anynet menu changes depending on the type and status of the Anynet devices connected to the TV ...

Page 509: ...st mode Device List Shows the Anynet device list device_name Menu Shows the menu of the connected device menus E g if a DVD player is connected the disc menu of the DVD player will appear device_name Tools Shows the tools menu of the connected ...

Page 510: ... N Depending on the device this menu may not be available device_name Title Menu Shows the title menu of the disc in the connected device E g If a DVD player is connected the title menu of the movie in the DVD player will appear N N Depending on the device this menu may not be available ...

Page 511: ...etting up Anynet HDMI CEC Anynet HDMI CEC To use the Anynet Function Anynet HDMI CEC must be set to On N N When the Anynet HDMI CEC function is disabled all the Anynet related operations are deactivated Auto Turn Off Set an Anynet Device to turn off ...

Page 512: ...he Auto Turn Off is set to Yes running external devices will turn off at the same time as the TV powers off N N May not be enabled depending on the device Receiver You can listen to sound through a receiver i e Home Theater instead of the TV Speaker ...

Page 513: ...vice List The Device List screen appears N N If you cannot find a device you want select Refresh to refresh the list 3 Select a device and then wait until switch to the selected device N N The Device List menu appears only when you set Anynet HDMI CEC to On in the System menu N N Switching to the selected device may ...

Page 514: ...sing Source function and then selecting its input source you cannot use the Anynet function Make sure to switch to an Anynet device by using the Device List Listening through a Receiver You can listen to sound through a receiver i e Home Theater instead of the TV Speaker To listen to sound through a receiver go to Receiver screen System ...

Page 515: ...ill work when you have properly connected the optical in jack of the receiver to the DIGITAL AUDIO OUT OPTICAL port of the TV N N When the receiver i e Home Theater is set to On you can hear sound output from the TV s Optical jack When the TV is displaying a DTV air signal the TV will send out 5 1 channel sound to the receiver When the source is a digital ...

Page 516: ...ou can listen to sound through a receiver connected using an HDMI cable without connecting a separate optical cable To listen to sound through a receiver using the ARC function go to Receiver screen System Anynet HDMI CEC Receiver Then select Receiver and set to On N N To use the ARC function a receiver which supports the HDMI CEC and ARC features ...

Page 517: ...t be connected to the HDMI IN 2 ARC port N N To disable the ARC function set the Receiver to Off Even if the TV transmits the ARC signal continuously the receiver will be blocked from receiving the signal ...

Page 518: ...UPPORT button and then search a desired item by selecting a chapter Menu Support Self Diagnosis Troubleshooting If the TV seems to have a problem first review this list of possible problems and solution Also review the Troubleshooting Section in the e Manual If none of the troubleshooting tips apply visit www samsung com support or call Samsung ...

Page 519: ...her the corresponding menu turned on Menu System Voice and Motion Control Voice Control function can be affected recognition by unclear pronunciation voice level or surrounding noise For accurate voice recognition refer to the Standard Voice Command list at the Samsung web site www samsung com support Manuals Downloads ...

Page 520: ...ognized face Alternatively recognition rate of Motion Control may differ depending on the TV camera s angle or the operating speed Therefore we recommend to adjust an ambient brightness and TV camera s angle before using Motion Control If you have other questions visit www samsung com support or call Samsung customer Service at 1 800 SAMSUNG 1 800 726 7864 ...

Page 521: ...ically you may need to disable some of its energy efficient features such as the Eco Sensor or the Energy Saving feature Follow the steps below with your remote to turn these features off or on Energy Saving System Eco Solution Energy Saving Eco Sensor System Eco Solution Eco Sensor ...

Page 522: ...nosis on the TV to make sure there are no device issues Self Diagnosis Support Self Diagnosis Picture Test If the problem does not appear in the Picture test make sure Your connections are all consistent For example if you ve used the AV In jack on your TV make sure you have used the AV Out jack on your video source You have connected to your devices to ...

Page 523: ... video source to the blue Pb jack on the TV the red Pr jack on the source to the red Pr jack on the TV Screen Brightness If you find that the colors on your Samsung TV are correct but just a little too dark or bright try adjusting the following settings in the Picture option in the Main menu Backlight for LED TV Cell Light for PDP TV Contrast Brightness Sharpness Color ...

Page 524: ...adjusting options mentioned above Blur If you find that there is a blur or ghostlike appearance to the images on your television s screen you might be able to correct the blurring using Auto Motion Plus Auto Motion Plus Picture Picture Options Auto Motion Plus ...

Page 525: ...your Eco friendly No Signal Power Off feature First make sure Sleep Timer is not accidentally set The Sleep Timer turns off the TV automatically after a certain period of time has passed Sleep Timer System Time Sleep Timer If the Sleep Timer is not activated you may have engaged the No Signal Power Off or Auto Power Off feature ...

Page 526: ...Powering On Press the power on button on the TV or remote and the light should blink about 5 times before the TV turns on If you find that you are having trouble powering on your Samsung television there are a number of things to check before making a call to the service department If you re sure your power cord remote ...

Page 527: ...e cable or satellite box is not outputting a signal To test the signal output of your cable or satellite box press the guide or info button on the cable or satellite box remote control If the screen displays the guide or info data the problem is caused by the box Stand Assembly If you have any trouble assembling the stand visit www samsung com spsn ...

Page 528: ...Cannot Find a Channel Re run Setup Go to System Setup or run Auto Program Go to Channel Auto Program N N Watch these troubleshooting on video at www samsung com spsn ...

Page 529: ... displaying the test image go to Support Self Diagnosis Picture Test If the test image is properly displayed the poor picture may be caused by the source or signal The TV image does not look as good as it did in the store Store displays are all tuned to digital HD high definition channels ...

Page 530: ...on picture quality N N Many HD channels are up scaled from SD Standard Definition contents Look for a channel that is broadcasting true HD content Cable Satellite subscribers Try HD channels from the channel line up Air Cable Antenna connection Try HD channels after performing an Auto Program Adjust the Cable Sat box video output ...

Page 531: ...ssion of video contents may cause picture distortion especially in fast moving pictures such as sports and action movies A weak or bad quality signal can cause picture distortion This is not a TV issue Mobile phones used close to the TV within 3 3 ft may cause noise in the picture on analog and digital channels ...

Page 532: ... to the correct jacks Incorrect or loose connections may cause color problems or a blank screen The color is poor or the picture is not bright enough Adjust the Picture options in the TV menu go to Picture Mode Color Brightness Sharpness Adjust the Energy Saving option in the TV menu go to System Eco Solution ...

Page 533: ...to Picture Reset Picture There is a dotted line on the edge of the screen If the Picture Size is set to Screen Fit change it to 16 9 Change the cable satellite box resolution The picture is black and white If you are using an AV composite input connect the video cable yellow to the ...

Page 534: ...ture freezes or is distorted or delayed If the TV is connected to a cable box try to reset the box Disconnect and then reconnect the AC cord and wait until the cable box reboots It may take up to 20 minutes Set the output resolution of the cable box to 1080i or 720p ...

Page 535: ...s operating properly Go to Support Self Diagnosis Sound Test If the audio is OK the sound problem may be caused by the source or signal There is no sound or the sound is too low at maximum volume Please check the volume of the device Cable Sat Box DVD Blu ray etc connected to your TV ...

Page 536: ...check the device s audio output option Ex You may need to change your cable box s audio option to HDMI if you have the box connected to your TV using an HDMI cable If you are using a DVI to HDMI cable a separate audio cable is required If your TV has a headphone jack make sure there is nothing plugged into it Reboot the connected device by ...

Page 537: ...g an inappropriate noise Check cable connections Make sure a video cable is not connected to an audio input For antenna or cable connections check the signal information A low signal level may cause sound distortion Perform the Sound Test feature Support Self Diagnosis Sound Test ...

Page 538: ...al cable is connected securely Run Auto Program to add available channels to the channel list Go to Channel Auto Program then select Cable and make sure to select the correct Cable TV signal type There are 3 options STD HRC and IRC Most cable systems use STD Verify the antenna is positioned correctly ...

Page 539: ...channels may not have caption data The picture is distorted macro block error small block dots pixelization The compression of video contents may cause picture distortion especially with fast moving pictures such as sports and action movies A weak signal can cause picture distortion This is not a TV problem ...

Page 540: ...A Mode Not Supported message appears Set your PC s output resolution so it matches a resolution supported by the TV The video is OK but there is no audio If you are using an HDMI connection check the audio output setting on your PC ...

Page 541: ...twork connection failed Make sure the TV is connected to a wireless IP sharer router Software Update over the network fails Run Network Status in Network menu to confirm the connection If you have latest Software SW version SW upgrade will not proceed ...

Page 542: ...ponent cable connection Remove the left and right audio connections from the Set Top box If the buzzing stops this indicates that the Set Top box has a grounding issue Replace the Component video cables with an HDMI connection The picture won t display in full screen HD channels will have black bars on either ...

Page 543: ... watch movies that have aspect ratios different from your TV Adjust the picture size options on your external device or the TV to full screen A Mode Not Supported message appears Check the supported resolution of the TV and adjust the external device s output resolution accordingly Refer to the resolution settings on User manual ...

Page 544: ...ve selected a source connected to the TV via HDMI or Component The external device s Caption function must also be activated There is a plastic smell from the TV This smell is normal and will dissipate over time The TV Signal Information is unavailable in the Self Diagnosis menu ...

Page 545: ...hannels the TV receives from an Antenna RF Coax connection The TV is tilted to the side Remove the base stand from the TV and reassemble it The channel menu is grayed out unavailable The Channel menu is only available when you select the TV source ...

Page 546: ...dio and picture settings every 30 minutes Change the settings from Store Demo mode to Home Use mode using the Setup procedure Select TV in the Source using your remote and go to System Setup You have intermittent loss of audio or video Check the cable connections and reconnect them Loss of audio or video can be caused by using ...

Page 547: ... a wall we recommend using cables with 90 degree connectors You see small particles when you look closely at the edge of the frame of the TV This is part of the product s design and is not a defect The PIP menu is not available PIP functionality is only available when you are using an HDMI or Component source ...

Page 548: ... Feature Plasma TV is making humming noise for PDP TV Plasma TVs typically make a soft humming sound This is normal It s caused by the electrical charges that are used to create the images on the screen If the humming sound is loud you may have set the brightness on the TV too high Try setting the brightness lower ...

Page 549: ... wall mount can also create excessive noise Image Retention Burn In Issue for PDP TV To minimize the possibility of screen burn this unit is equipped with Pixel Shift screen burn reduction technology Pixel Shift lets you set the picture so it moves slightly up and down Vertical Line and side to side Horizontal Dot The regular slight movement of the picture reduces screen ...

Page 550: ...burn in ...

Page 551: ...es are turned on The 3D Active Glasses may not work properly if there is any other 3D product or electronic devices turned on near the glasses or TV If there is a problem keep other electronic devices as far away as possible from the 3D Active Glasses The 3D images don t look quite right ...

Page 552: ...r more the height of the screen We also recommend sitting with viewer s eyes on a level with the screen The batteries in the 3D glasses don t last Turn off 3D glasses while not using them If you leave 3D glasses on battery lifespan is shortened ...

Page 553: ...Check if the device is an Anynet device The Anynet system supports Anynet devices only You can connect only one receiver home theater Check if the Anynet device power cord is properly connected Check the Anynet device s Video Audio HDMI cable connections ...

Page 554: ...ontrol is in TV mode Check whether the remote control is Anynet compatible Anynet doesn t work in certain situations Searching channels operating Smart Hub or Setup etc If you have removed and then reconnected the HDMI cable please make sure to search devices again or turn your TV off and on again ...

Page 555: ...check if the Anynet HDMI CEC is set to On System Anynet HDMI CEC Open the Tools menu using your remote and then select Anynet HDMI CEC Then select a menu you want I want to exit Anynet Select View TV in the Anynet menu Go to Source screen using your remote and select a non Anynet device ...

Page 556: ... the remote control when you are configuring Anynet or switching to a view mode Use the remote control after the TV has completed Anynet configuration or has finished switching to Anynet The Anynet device does not play You cannot use the play function when Setup is in progress ...

Page 557: ...ons Check whether or not the HDMI cable is properly connected Check whether Anynet HDMI CEC is set to On System Anynet HDMI CEC Search Anynet devices again Anynet requires an HDMI connection Make sure the device is connected to your TV with an HDMI cable Some HDMI cables may not support Anynet ...

Page 558: ...ected please repeat the device scan The TV sound is not output through the receiver Connect the optical cable between TV and the receiver The ARC function enables digital output of sound using the HDMI IN 2 ARC port and can only be operated when the TV is connected to an audio receiver that supports the ARC function ...

Page 559: ...AllShare Play Troubleshooting This file may not be playable properly This may appear because of high bit rate of content Content generally will play but could experience some playability issue ...

Page 560: ...English How can I change the language The Application content language may be different from the application user interface language The ability to change the language depends on the service provider Some application services do not work Check with the service provider ...

Page 561: ...ation service provider information When a network error occurs I can only use the setting menu If network connection doesn t work your service might be limited as all functions except the setting menu are needed to connect to the internet ...

Page 562: ... Browser may be displayed differently with PC 2 The Web Browser is not compatible with a Java application 3 When attempted to download a file but the file could not be saved and an error message appeared 4 Access may be blocked to some websites or to web browsers operated by certain businesses ...

Page 563: ...ing a web page that allows only part and not the whole of the page to be scrolled may cause corrupted characters 8 ActiveX is not supported 9 Some options cannot be accessed in Tab mode To access such options switch to Pointer mode 10 Some text may appear corrupted because the number of supported fonts is limited ...

Page 564: ...12 The loading of a web page may delay or stop with some operating systems 13 Copy and Paste are not supported 14 When writing emails or posting messages some functions Such as changing the size or colors may not be supported 15 The number of bookmarks and logs that can be saved is limited 16 The maximum number of windows that ...

Page 565: ...peed depends on the network conditions 18 PIP will automatically be deactivated if a video is played in the browser Videos may not commence playback after PIP interruption and a possible refresh for the page may be required 19 The Web Browser can play MP3 audio files only 20 The function for importing or ...

Page 566: ...e bookmarkfile 1 21 When you import or export the bookmark the folder tree is not included 22 If you import the bookmark file to a Computer from a TV the bookmark file will be saved in Samsung SmartTV Bookmark folder 23 If the time is not set in the menu System Time Clock the history information may not be saved ...

Page 567: ...o content may not play during Flash playback depending on the video audio codec supported 26 A sudden change in the picture brightness inside the video window may affect the brightness of the surrounding stationary picture for PDP TV 27 If you use QWERTY keyboard screen when you use Web Browser with PIP function the PIP function turns off automatically ...

Page 568: ...except inputting a URL address ...

Page 569: ...ser convenience has been provided so that you can switch the channel and adjust the volume with just your fingertips while focusing on the TV screen In addition the built in touch pad removes the need for a mouse when you change the menu settings and search for something on the Internet ...

Page 570: ...Smart Touch Control at a Glance P Turns the TV on and off w v Adjusts the Volume Changes channels ...

Page 571: ...e TV displays the command list You can speak using the microphone embedded in your remote N N For more detailed information about the Voice Control function see SMART Interaction in the e manual NUMBERš Displays the Number button screen You can select a number using the Touch Pad Brings up the Smart Hub applications ...

Page 572: ...ess the button N N If you don t press any button within 30 seconds the Smart Touch Control is set to Sleep mode automatically To wake up the Smart Touch Control press the Touch Pad Initial Pairing After you have run the Initial Setup on your TV you should connect your Smart Touch Control to your TV ...

Page 573: ...t the bottom left of the screen and the Smart Touch Control is automatically connected to the TV N N If you want to perform the pairing process again press the reset button in the center of the back cover using a pin or the tip of an unbent paper clip The Smart Touch Control will be initialized Smart Touch Control PAIRING Reset button ...

Page 574: ...eps 1 Press the NUMBERš button for 3 seconds The calibration starts 2 When done all the LEDs on the top of the Smart Touch Control blink twice simultaneously N N While calibrating don t touch the touch pad N N If the touch pad looses accuracy re calibrate the touch pad by repeating Steps 1 and 2 ...

Page 575: ... screen press the button at the bottom of the touch pad This list includes Menu Source CH List 3D Support and a number of other functions To display the color and playing control functions on the top of the screen press the button on the top of the touch pad To Move the Highlight ...

Page 576: ...d then slide it from one side to the other from top to bottom or bottom to top N N To move the Highlight continuously flick your finger across the touch pad from right to left left to right top to bottom or bottom to top To Select an item ...

Page 577: ...ess the Touch Pad Open the History screen Press the Š button in the left of the Touch Pad Displays a list of recently used functions You can select a function again using the Touch Pad easily and quickly ...

Page 578: ... Open the Tools menu Press the T button in the right of the Touch Pad Quickly select frequently used functions Open the color playing control and exit buttons ...

Page 579: ...color exit and play control buttons at the top of the screen press the button at the top of the touch pad e Close all menus shown on the screen Open the shortcut functions screen Press the button in the bottom center ...

Page 580: ...e Scroll mode If you press and hold the Touch Pad when using Web Browser the Touch Pad switches to the Scroll mode In the Scroll mode slide your finger in the Touch Pad from one side to the other the highlight moves page units N N To return to the general mode of the ...

Page 581: ...mber through Smart Touch Control 1 While watching a broadcast press the NUMBERš button on the Smart Touch Control The TV displays the number button screen 2 Using the touch pad highlight a number and then press the touch pad The TV displays a list of channels that start with the number you selected ...

Page 582: ...pad If you touch the touch pad immediately after the TV displays the list of memorized channels Select a channel by moving or flicking your finger up or down and then pressing the touch pad N N If you change a channel by entering the channel number that channel number is memorized and added to the Added Ch list automatically You can change the channels using a memorized channel list ...

Page 583: ...th your TV you can control connected external devices with your TV using the Smart Touch Control IR Blaster Pairing 1 Turn the IR Blaster on and if the LED blinks connect the IR Blaster to the TV 2 Briefly point the IR Blaster toward the IR sensor of the TV and press the PAIRING button at the bottom ...

Page 584: ...onnection process failed please turn off and on the IR Blaster try again from step 2 Precautions for Using an IR Blaster N N To use an IR Blaster the IR Blaster must be located nearby with external devices connected to the TV N N Note that it should be no obstacle between the external device s IR receiver and an IR Blaster ...

Page 585: ... Setting up Universal Remote Control Lets you control a Set Top Box STB or a BD player or both connected to the TV using your Smart Touch Control After you connect the device to the TV the Smart Touch Control can control the navigation number and other keys needed to operate and control the device To connect the external device to your ...

Page 586: ...ter and Smart Touch Control and then press the touch pad 2 To reset IR Blaster and Smart Touch Control press the button on Smart Touch Control and then select Set Up Universal Remote 3 Select Set up a device to control and then press the touch pad 4 Select an external device from the connected devices and then press the touch pad ...

Page 587: ...on and press Refresh 6 Select Search brands and then press the Touch Pad A keyboard and an entry field appear Enter the first few letters of the brand name of your device using the Smart Touch Control and then select Done at the bottom of the keyboard In the list that appears below the entry field select the brand name of your device and then press the touch pad ...

Page 588: ... the touch pad A keyboard and an entry field appear Enter the first few letters and numbers of the model name of your device using the Smart Touch Control and then select Done at the bottom of the keyboard In the list that appears below the entry field select the model name of your device and then press the touch pad N N If the search for model name does not ...

Page 589: ...ess the touch pad Download the configuration data for the IR Blaster in the same way 9 When all the settings are complete select the Complete button and press the touch pad N N When you use the BD home theater by using Universal Remote some buttons may not be supported In this case we recommend to use Anynet HDMI CEC function ...

Page 590: ...tup select the Recommended and press the touch pad 2 Select Download to download the recommended model code 3 Point the Smart Touch Control forward to the TV s IR sensor and press the touch pad to test if the device works 4 If the downloaded recommended model code does not work repeat the steps from step 3 ...

Page 591: ...TV and Set Top box using universal remote for viewing the Set Top box e g Volume button Adjust the TV volume Channel button Change the STB channels Watch Movie TV BD Player You can control the TV and BD player using universal remote for viewing the BD player ...

Page 592: ... e g Volume button Adjust the TV volume TOOLS button Open the BD players option menu TV You can only control the TV using universal remote ...

Page 593: ...Supported Subtitle and AllShare Play file formats Subtitle External MPEG 4 timed text ttxt SAMI smi SubRip srt SubViewer sub Micro DVD sub or txt ...

Page 594: ... SubStation Alpha ssa Advanced SubStation Alpha ass Powerdivx psb Internal Xsub Container AVI SubStation Alpha Container MKV Advanced SubStation Alpha Container MKV SubRip ...

Page 595: ...Container MKV MPEG 4 timed text Container MP4 Supported image resolutions File Extension Type Resolution jpg JPG 15360 x 8640 png PNG 1920 x 1080 bmp BMP 1920 x 1080 mpo MPO 15360 x 8640 ...

Page 596: ...ts mp3 MP3 MPEG1 Audio Layer 3 m4a mpa aac 3ga MPEG4 AAC flac FLAC FLAC The Seek jump function is not supported Supports up to 2 channel ogg OGG Vorbis Supports up to 2 channel wma WMA WMA WMA 10 Pro supports up to 5 1 channel WMA lossless audio is not supported ...

Page 597: ... vro mpg mpeg ts tp trp m2ts mts divx AVI MKV ASF MP4 3GP VRO VOB PS TS DIVX 3 11 4 x 5 x 6 1 1920 x 1080 6 30 30 AC3 LPCM ADMPCM IMA MS AAC HE AAC WMA DD MPEG MP3 DTS Core DRA MPEG4 SP ASP H 264 BP MP HP Motion JPEG Window Media Video v9 MPEG2 MPEG1 VP6 640 x 480 4 SVAF 1920 x 1080 30 MVC 24 25 30 40 webm WebM VP8 6 30 8 Vorbis ...

Page 598: ...e container N N Sound or video may not work if the contents have a standard bit rate frame rate above the compatible Frame sec listed in the table above N N If the Index Table is in error the Seek Jump function is not supported N N When you play video over a network connection the video may not be played smoothly ...

Page 599: ...N N Some USB digital camera devices may not be compatible with the player Video decoder Supports up to H 264 Level 4 1 H 264 FMO ASO RS VC1 SP MP AP L4 and AVCHD are not supported For all Video codecs except MVC VP8 VP6 Below 1280 x 720 60 frame max Above 1280 x 720 30 frame max ...

Page 600: ...ottom and Side by Side Supports only BD MVC Spec Audio decoder WMA 10 Pro supports up to 5 1 channel WMA lossless audio is not supported RealAudio 10 lossless is not supported QCELP AMR NB WB are not supported If Vorbis is only in Webm container supports ...

Page 601: ...up to 2 channel ...

Page 602: ...n Lock is a device you can use to physically fix your TV in place when using it in a public place You wrap the Kensington Lock s cable around a large immobile object and then attach the lock to the Kensington slot on the 1 TV Rear Optional ...

Page 603: ...nual provided with the Kensington Lock for additional information on proper use The Kensington Lock is not supplied by Samsung N N Please find a K icon on the rear of the TV The Kensington slot is beside the K icon To lock the product follow these steps 1 Wrap the Kensington Lock cable around a large stationary object such as desk or ...

Page 604: ...ock cable 3 Insert the locking device into the Kensington slot on the product 4 Lock the lock N N These are general instructions For exact instructions see the User manual supplied with the locking device N N The locking device has to be purchased separately N N The location of the Kensington slot may ...

Page 605: ...be different depending on the TV model ...

Page 606: ...m for more information and software tools to convert your files into DivX videos ABOUT DIVX VIDEO ON DEMAND This DivX Certified device must be registered in order to play purchased DivX Video on Demand VOD movies To obtain your registration code locate the DivX VOD section in your device setup menu Go to vod divx com for more information on how to complete your registration Covered by one or more ...

Page 607: ...eserved The terms HDMI and HDMI High Definition Multimedia Interface and the HDMI Logo are trademarks or registered trademarks of HDMI Licensing LLC in the United States and other countries Open Source License Notice In the case of using open source software Open Source Licenses are available on the product menu Open Source License Notice is written only English ...

Page 608: ......

Page 609: ......

Reviews: