Samson HXD1, Owner'S Manual
The Samson HXD1 Owner's Manual is essential for getting the most out of your device. Download this comprehensive manual for free from manualshive.com, and gain access to step-by-step instructions, troubleshooting tips, and in-depth product information. Maximize your Samson HXD1's capabilities with this invaluable manual.
Share
Download


Reviews:
No comments
Related manuals for HXD1

MI-PMU16
Brand: Opvimus Pages: 4

MW-50H
Brand: CSI Pages: 1

CVL-1074
Brand: CA Pages: 3

T116A
Brand: Retekess Pages: 4

Audita
Brand: Simeon Pages: 32

XRM 33
Brand: MPMan Pages: 5

T-8000A
Brand: ITC Audio Pages: 11

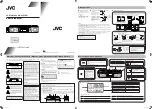
NX-D2
Brand: JVC Pages: 2

PC-XC350
Brand: JVC Pages: 16

RA-P11BK
Brand: JVC Pages: 2

RA-P30WUW
Brand: JVC Pages: 2

RV-DP100BK
Brand: JVC Pages: 31

PC-X250
Brand: JVC Pages: 24

NX-T5
Brand: JVC Pages: 48

NX-F30
Brand: JVC Pages: 70
RA-P31B
Brand: JVC Pages: 2

MXDVA5 - 3 DVD/CD Home Theater Mini System
Brand: JVC Pages: 85

RA-E981B
Brand: JVC Pages: 100


