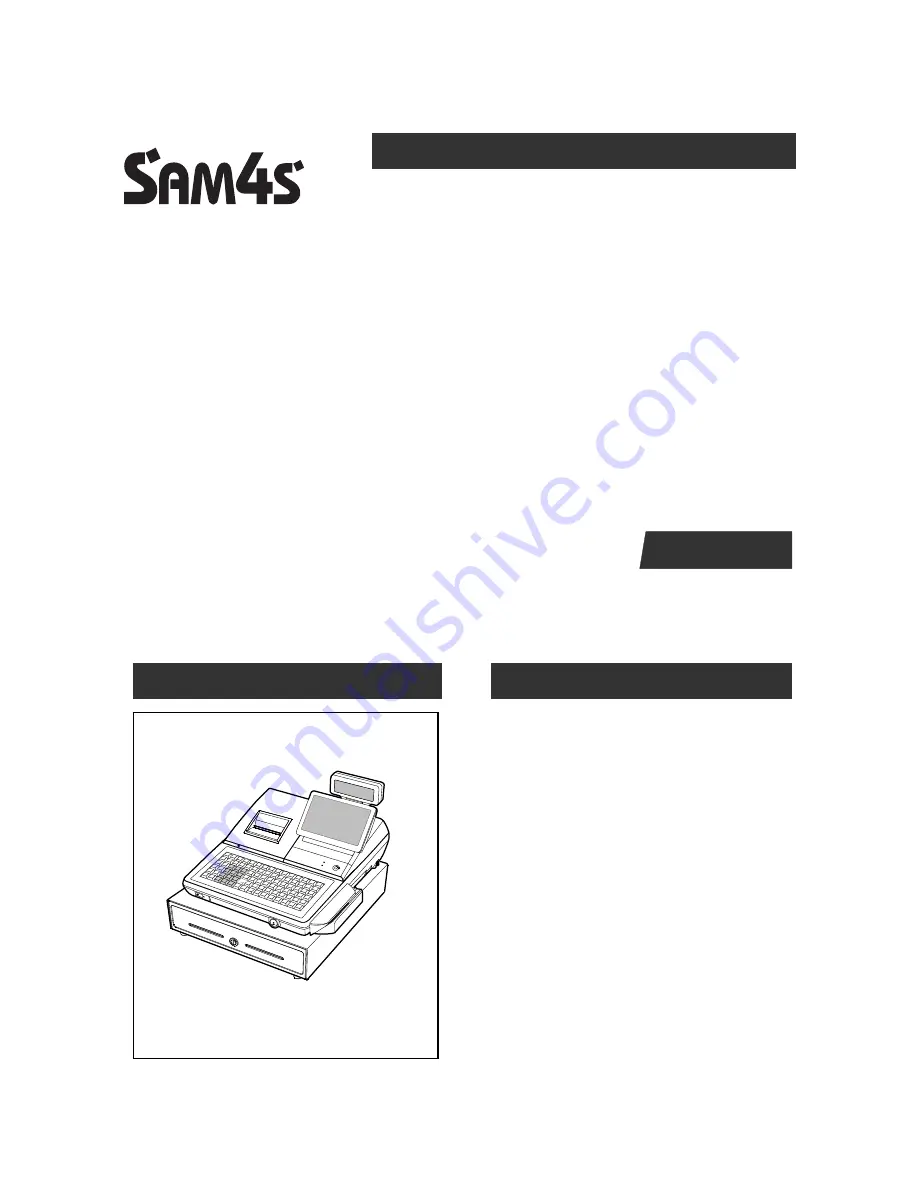
background image


SAP-630 Series 

C O N T E N T S 

SAP-630 SERIES 

POS SYSTEM 

Manual


1.   Precaution Statements 

2.   Product Specifications 

3.   Installation and Operation 

4.   Disassembly and Assembly 

5.   Maintenance and Adjustment 

6.   Troubleshooting 

7.   Exploded Views and Parts List 

8.    PCB Layout and Parts List 

9.    Wiring Diagram 

10.  Bock Diagram 

11.  Schematic Diagrams


SERVICE


Summary of Contents for SAP-630 Series

Page 1: ...caution Statements 2 Product Specifications 3 Installation and Operation 4 Disassembly and Assembly 5 Maintenance and Adjustment 6 Troubleshooting 7 Exploded Views and Parts List 8 PCB Layout and Part...

Page 2: ...Series POS System Notes Notes may appear anywhere in the manual They describe additional information about the item Precaution symbols Indicates a Safety Precaution that applies to this part componen...

Page 3: ...rved This manual may not in whole or in part be copied photocopied reproduced translated or converted to any electronic or machine readable from without prior written permission of Shin Heung Precisio...

Page 4: ...circuits Schematics and specifications provide the needed information for the accurate troubleshooting All information in this manual is subject to change without prior notice Therefore you must chec...

Page 5: ...thermally hot parts 7 Product Safety Notice Some electrical and mechanical parts have special safety related characteristics which might not be obvious from visual inspection These safety features an...

Page 6: ...et forth for an uncontrolled environment This equipment should be installed and operated with a minimum distance of 20 centimeters between the radiator and your body This transmitter must not be co lo...

Page 7: ...ument s ground lead to the instrument chassis ground before connecting the positive lead always remove the instrument s ground lead last 1 3 Precautions for Electrostatically Sensitive Devices ESDs 1...

Page 8: ...base T ETHERNET TCP IP SD CARD 1 Slot 64GB_max SDHC Compatible MSR 1 Slot option 1 2 Track or 2 3 Track i BUTTON Magnetic option DRAWER 3 port Default internal 1 RJ 11 2 3 USB 2 port HOST WIRELESS WiF...

Page 9: ...imensions mm Figure2 1 Dimensions 2 2 2 Location Features Figure2 2 Location Features 400 W With G Drawer 420 W With H Drawer Printer Cover SD Card Key Board USB Drawer Customer LCD Display 16char 2li...

Page 10: ...100 mm Sec Power Supply Volt Power Voltage 24V 24V Recommend Head Motor Circuit Input Voltage 5V Head Control Sensor Printer Head Heat Element Density 8 Dots mm 200dpi Total Head Elements 576 Dots Do...

Page 11: ...fg Co Ltd F380 Kansaki specialty papers Inc USA 2 3 3 Printable Area The Printable area of a paper with width of 79 5mm is 72 0mm 576 dots and the space on the right and left sides are approximately 4...

Page 12: ...XOFF ASC Code 13h Signal Level Logic 1 MARK 3V 15V Logic 0 SPACE 3V 15V Baud Rate 2400 9600 19200 38400 57600 115200 bps Data Word Length 7 Bit 8 Bit Parity None Even Odd Connector DB9P Male COM 1 COM...

Page 13: ...PIN NO Signal Name Direction Function DSUB9 RJ45 1 DCD IN Carrier Detect 2 4 RXD IN Receive Data 3 3 TXD OUT Transmit Data 4 DTR OUT Data Set Ready 5 7 GND 6 DSR IN Data Terminal Ready 7 8 RTS OUT Req...

Page 14: ...Interface Specifications 2 5 3 RS 232C Interface Cable COM1 COM2 SAP 630 SIDE DSUB9 FEMALE 5V PIN CONNECTION USER SIDE DSUB25 MALE SAP 630 SIDE DSUB9 FEMALE 5V PIN CONNECTION USER SIDE DSUB9 MALE CAUT...

Page 15: ...dular 5 RTS 6 CTS 3 TXD 7 S GND 2 DSR 7 RTS 8 CTS 5 S GND 3 TXD 4 DTR 8 DTR 4 RXD 6 DSR 2 RXD PIN CONNECTION USER SIDE DSUB9 MALE SAP 630 SIDE RJ 45 Modular 5 RTS 7 S GND 8 DTR 3 TXD 4 RXD 4 RTS 7 S G...

Page 16: ...8 2 5 V Differential Receive Sensitivity 200 mV Single End Receive Threshold 0 8 2 5 V Speed 480Mbps 12Mbps Power Supply 5V 500mA For HID Cable Connector Cable 5m 2m Connector A type Support Spec USB...

Page 17: ...hernet Receive Data Line 4 N C 5 N C 6 ENET RX IN Ethernet Receive Data Line 7 N C 8 N C 2 5 8 LAN IRC Interface Cable SAP 630 SIDE MAX 100M 5 N C 7 N C 8 N C 4 N C 5 N C 6 ENET RX 7 N C 1 ENET TX 2 E...

Page 18: ...wer Kick Out Driver Signal 3 DRA_COMP IN Drawer Open Close Signal 4 24V Supply DC 24 V 5 DRAWER OUT OUT Drawer Kick Out Driver Signal 6 F G Frame GND CAUTION Make sure that installed 24V Cash Drawer M...

Page 19: ...SAM4S SAP 630 SERIES 3 1 3 Installation and Operation 3 1 Touch Calibration No Setup Method Remark 1 Click the menu 2 Click Touch Screen APP 3 Click Calibration...

Page 20: ...3 Installation and Operation 3 2 SAM4S SAP 630 SERIES 4 Follow below steps...

Page 21: ...3 Installation and Operation SAM4S SAP 630 SERIES 3 3 3 2 Application Management 3 2 1 Application INSTALL No Setup Method Remark 1 Click the APKInstaller...

Page 22: ...3 Installation and Operation 3 4 SAM4S SAP 630 SERIES 2 Click the APK 3 Click Install...

Page 23: ...3 Installation and Operation SAM4S SAP 630 SERIES 3 5 4 You can check what is installed on the menu screen...

Page 24: ...3 Installation and Operation 3 6 SAM4S SAP 630 SERIES 3 2 Application Management 3 2 2 Application UNINSTALL No Setup Method Remark 1 Click Settings 2 Click the APK...

Page 25: ...3 Installation and Operation SAM4S SAP 630 SERIES 3 7 3 Click on the app you want to delete 4 Click UNINSTALL button...

Page 26: ...3 Installation and Operation 3 8 SAM4S SAP 630 SERIES 5 Click OK 6 You can check the success message...

Page 27: ...ction language Input methods Display brightness Sound output and check storage space No Setup Method Remark 1 Click Settings Icon 2 WIFI When opened WIFI Setting would search available wireless router...

Page 28: ...IES 3 Ethernet First check box to turn on Ethernet click Ethernet to choose connection type 4 Display This is for Display setting Brightness Click to setup brightness of backlight Font Size Click to s...

Page 29: ...630 SERIES 3 11 5 Language Input User can set the language for system menus according to their Country or preference About 60 languages supported System default support Chinese and English user need...

Page 30: ...3 Installation and Operation 3 12 SAM4S SAP 630 SERIES 3 4 Hardware Self Test 3 4 1 INSTALL UTILITY No Setup Method Remark 1 After Install Utility Apk Click this APK 2 Check the F W versions OS Micom...

Page 31: ...M4S SAP 630 SERIES 3 13 3 4 Hardware Self Test 3 4 2 DISPLAY TEST Test Method Remar k Display TEST Press DISPLAY TEST from the main menu in the Touch Screen Check the LCD State 9 7inch LCD You must to...

Page 32: ...and Operation 3 14 SAM4S SAP 630 SERIES 3 4 Hardware Self Test 3 4 3 TOUCH TEST Test Method Remar k Touch TEST Press TOUCH TEST from the main menu in the Touch Screen Touch the 4 Circles or Press and...

Page 33: ...tallation and Operation SAM4S SAP 630 SERIES 3 15 3 4 Hardware Self Test 3 4 4 Contrast TEST Test Method Remar k CONTRAST TEST Press CONSTRAST TEST from the main menu in the Touch Screen Adjust Bright...

Page 34: ...nd Operation 3 16 SAM4S SAP 630 SERIES 3 4 Hardware Self Test 3 4 5 DRAWER Port TEST Test Method Remar k DRAWER TEST Press DRAWER TEST from the main menu in the Touch Screen When DRAWER Open DRAWER St...

Page 35: ...and Operation SAM4S SAP 630 SERIES 3 17 3 4 Hardware Self Test 3 4 6 Ethernet TEST Test Method Remark Ethernet TEST Connect The UTP CABLE to Ethernet Port Press ETHERNET TEST from the main menu in th...

Page 36: ...Test Method Remar k SERIAL PORT TEST Connect Loop back Test Connector to SERIAL Port RJ 45 Test Connector 9 RI 8 CTS 6 DSR 3 TXD 1 DCD 2 RXD 5 9 6 1 7 RTS 4 DTR CONNECTOR CIRCUIT COM1 2 MALE 5 S GND...

Page 37: ...3 Installation and Operation SAM4S SAP 630 SERIES 3 19 3 4 Hardware Self Test 3 4 8 Beep TEST Test Method Remar k BEEP TEST Press BEEP TEST from the main menu in the Touch Screen Check the Beep 1 2...

Page 38: ...ration 3 20 SAM4S SAP 630 SERIES 3 4 Hardware Self Test 3 4 9 MSR TEST Test Method MSR TEST Press MSR TEST from the main menu in the Touch Screen When you swipe a magnetic card If you see the value of...

Page 39: ...llation and Operation SAM4S SAP 630 SERIES 3 21 3 4 Hardware Self Test 3 4 10 WIFI TEST Test Method WIFI TEST Press WIFI TEST from the main menu in the Touch Screen Press WIFI ON button and then show...

Page 40: ...Operation 3 22 SAM4S SAP 630 SERIES 3 4 Hardware Self Test 3 4 11 BLUETOOTH TEST Test Method BLUETOOTH TEST Press BLUETOOTH TEST from the main menu in the Touch Screen Press ON button and then show t...

Page 41: ...ERIES 3 23 3 4 Hardware Self Test 3 4 12 KEYBOARD TEST Test Method Remar k KEYBOARD TEST Press KEY BOARD TEST from the main menu in the Touch Screen Press KEY BOARD 160KEY on Keyboard When You press K...

Page 42: ...mark REAR DISPLAY TEST Press REAR DISPLAY TEST from the main menu in the Touch Screen Check the Rear Display 2Line LCD 3 4 Hardware Self Test 3 4 14 MODE TEST Test Method Remar k MODE TEST Press MODE...

Page 43: ...4 Hardware Self Test 3 4 15 Printer TEST Test Method Remark PRINTER TEST Press MODE TEST from the main menu in the Touch Screen Press PRINTER from the main menu in the Touch Screen Click the Print but...

Page 44: ...d Remar k DALLAS TEST Press DALLAS TEST from the main menu in the Touch Screen When You connect Dallas key to Dallas module You can see the numbers on Screen 3 4 Hardware Self Test 3 4 17 SD CARD TEST...

Page 45: ...3 Installation and Operation SAM4S SAP 630 SERIES 3 27...

Page 46: ...3 Installation and Operation 3 28 SAM4S SAP 630 SERIES 3 5 System Configuration 3 5 1 Configuration Figure 3 1 System Configuration...

Page 47: ...tallation 3 6 1 Options No Item Description Remark 1 Dallas Key 5EA 10EA 15EA Selectable 2 Water Proof Default 3 MSR 1Slot Table 3 1 Option 3 6 2 Supplies No Item Description Remark 1 Paper Roll 1EA 2...

Page 48: ...nge Lever will open paper cover in Figure3 2 3 Ensure that the paper is being fed from the bottom of the roll Place the roll into the concave bottom of the printer And put the leading edge of the pape...

Page 49: ...y the angle and the chassis Connect all the cables correctly When connecting or disconnecting the cables be careful not to apply stress to the cables It may cause disconnection Be careful not to bind...

Page 50: ...shown in Figure 3 4 1 a 2 Tidy up the connectors of Ground Wire MSR Harness by inserting them into the MSR Assembly Connectors should be hidden inside the MSR Assembly Figure 3 4 1 b 3 Insert MSR Ass...

Page 51: ...3 Installation and Operation SAM4S SAP 630 Series 3 33 3 7 Installation 3 7 4 Installation of MSR Assembly 1 Figure 3 5 shows the MSR Assembly is in position Figure 3 5 MSR Installation 3...

Page 52: ...e REG REG Used for normal registrations X X Used to read register reports and perform other manager functions Z Z Used to read register reports and reset totals to zero P P Used to program the registe...

Page 53: ...the ASS Y CASE UPPER C Page7 2 4 Remove the four screws A 15 on the LCD HOLDER A 14 and separate the LCD HOLDER A 14 5 Remove the four screws A 13 on the LCD REAR A 12 and separate the LCD REAR A 12 P...

Page 54: ...the ASS Y DALLAS KEY G 5 from the MOTHER BOARD G 37 Page7 11 2 Lift up the ASS Y DALLAS KEY 3 If don t use it only lift up COVER FRONT G 6 from the ASS Y CASE LOWER G Page7 15 Page7 11 Note There are...

Page 55: ...wer switch off 2 Open the Printer Cover 3 Open the cover of paper supplier with pushing the ORANGE CAP LEVER 4 Clean the Printer Head Thermal Element with a cotton swab moistened with alcohol solvent...

Page 56: ...essage will be shown on the display In this case open the COVER PRINTER with power ON If the PRINTER COVER will not open follow the below steps 1 Lift it off COVER Figure 5 3 2 Turn the KNOB Orange co...

Page 57: ...l devices CPU Memory Controller etc are reset The OS application program is copy from eMMC to DDR3 2GB It takes about 10 sec Now Application program is run on DDR3 and TFT LCD is displayed All devices...

Page 58: ...and measure the resistance between power line and ground Measure other voltage Ex VDD3 3V VDD1 8V Vserial If these voltages above mentioned do not go out check the appropriate regulator or component A...

Page 59: ...nal whether it short open 6 3 2 TFT LCD panel problem No display Check the LCD LVDS signals at LVDS Connector on Main B D Measure these signals and check whether it short open or not Check harness Har...

Page 60: ...hort or not Check USB source voltage 5V for HID Ex Mouse Keyboard Scanner etc Check the Cable for front USB Connector 6 4 3 Serial COM 1 COM 4 Communication fail occurs Check communication setting par...

Page 61: ...3V on LCD B D Check the IPEX cable between LCD panel to LCD B D Check related circuit component whether short or not Check the Micom on LCD B D whether it works normally or dead Check the harness betw...

Page 62: ...k the Flat cable between PRINTER and Main B D if it is connected or not Check the TPH voltage 24V Check the Control Signal on micom data clk latch strobe Check the Thermister of printer Check the ADC...

Page 63: ...wer is installed System can be shutdown when open the drawer Check the cable Refer to Chapter 2 for cable connection Check related circuit component whether short or not Compulsory Fail Check the cabl...

Page 64: ...6 Troubleshooting 6 8 SAM4S SAP 630 SERIES MEMO...

Reviews: