Sakar 89379, Owner'S Manual
Looking for an Owner's Manual for Sakar 89379? Look no further! Get your hands on this comprehensive manual, covering everything you need to know about your product. Easily download it for free from manualshive.com, and unlock the full potential of your Sakar 89379.
Share
Download


Reviews:
No comments
Related manuals for 89379

N92
Brand: VEKOOTO Pages: 10

BY704A
Brand: ZEROXCLUB Pages: 25

FI8601W
Brand: Foscam Pages: 16

zBlackBox-500HD
Brand: Zetronix Pages: 2

GoSafe 200
Brand: Papago Pages: 100

DSC-53
Brand: FashionCam Pages: 6

FI9821EP
Brand: Foscam Pages: 2

PDJL007
Brand: JOBO Pages: 11

GoSafe 272
Brand: Papago Pages: 9

ioi HD CF-5212
Brand: FLIR Pages: 2

GoSafe 318
Brand: Papago Pages: 100

StarShoot AllSky Camera II
Brand: Orion Pages: 4
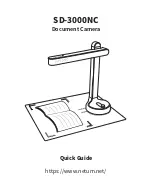
SD-3000NC
Brand: Netum Pages: 6

9002-8808
Brand: BrandMotion Pages: 6

DPF716
Brand: Curtis Pages: 7

Digital signage LDV43-SAI200
Brand: Dahua Technology Pages: 38

DSC13M SMART
Brand: Genius Pages: 17

F312A
Brand: Zavio Pages: 14


