Rosewill RKM-1600RF, User Manual
The Rosewill RKM-1600RF is a cutting-edge wireless keyboard and mouse combo that enhances productivity and convenience. For comprehensive instructions, simply visit our website and download the free user manual, providing step-by-step guidance to maximize your experience with this outstanding product.
Share
Download


Reviews:
No comments
Related manuals for RKM-1600RF
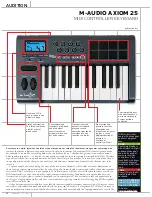
Axiom AIR 25
Brand: M-Audio Pages: 3

Slim Book Pro
Brand: Zagg Pages: 24

RZ03-0188
Brand: Razer Pages: 12

IC-BK10
Brand: iClever Pages: 10

GK1
Brand: Cortek Pages: 2

G84-4400
Brand: Cherry Pages: 2

COOPER GOKEY
Brand: Cooper Cases Pages: 2

5100
Brand: Accuratus Pages: 1

MD-1211
Brand: Radio Shack Pages: 3

8081
Brand: JARLTECH Pages: 33

Orion Spectrum G810
Brand: Logitech G Pages: 6

KB02006
Brand: Inateck Pages: 20

ENHANCE INFILTRATE ENINKNL100BKUS
Brand: Accessory Power Pages: 16

Z1000
Brand: Kawai Pages: 140

SKBWHITEBT
Brand: Sandstrom Pages: 36
Galaxy Note PRO
Brand: Samsung Pages: 38

D100
Brand: Dictopro Pages: 8

Cynosa Chroma Pro
Brand: Razer Pages: 34


