background image

202

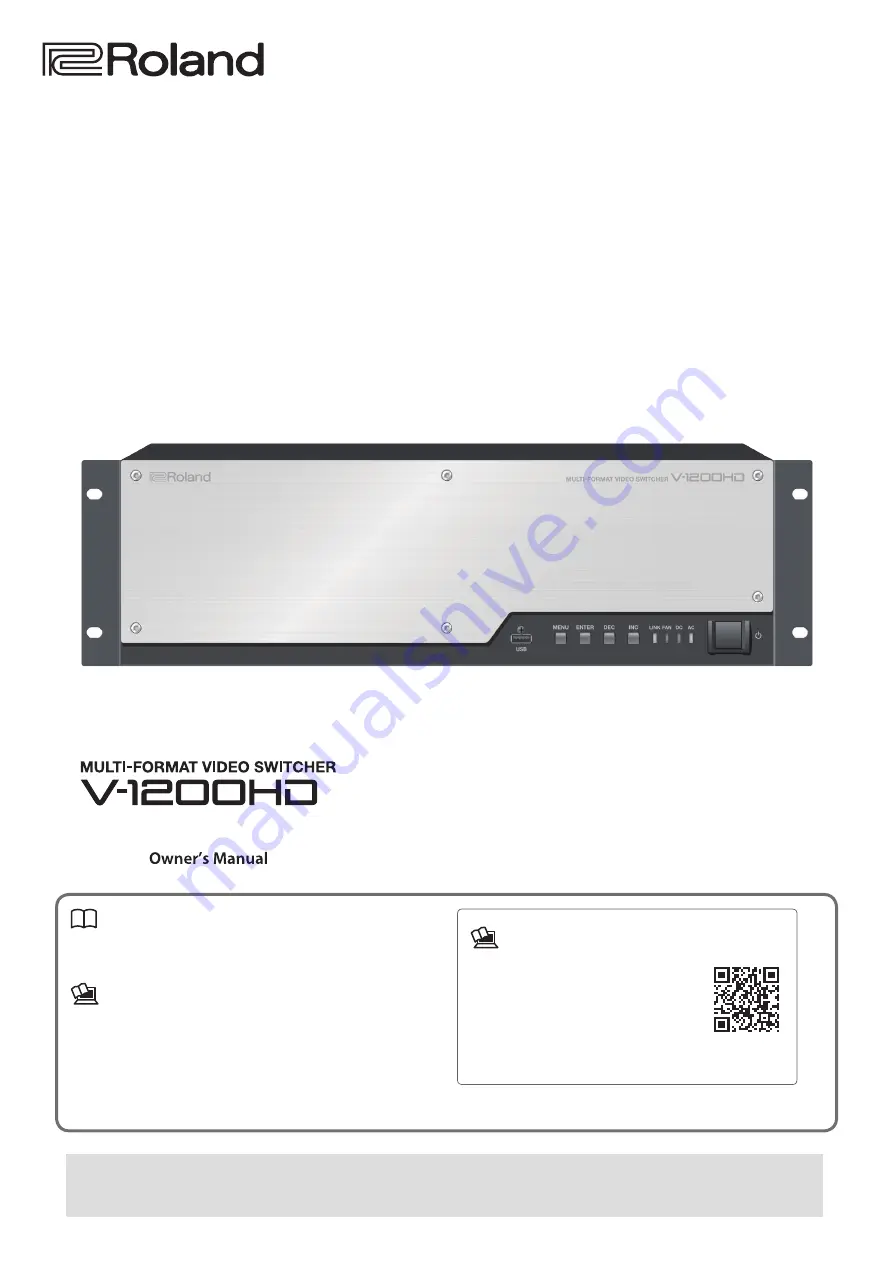
  Owner’s Manual (this document)

Read this first. It explains the basic things you need to know in 
order to use the V-1200HD.

 PDF Manual (download from the Web)


5

V-1200HDR/V-1200HD RCS Remote Control Guide

This explains the procedures and settings when using the 
V-1200HDR or V-1200HD RCS remote-control software to operate 

the unit.

Copyright © 2016 ROLAND CORPORATION

 To obtain the PDF manual

1. 

Enter the following URL in your 

computer.

https://proav.roland.com/manuals/

I

2. 

Choose “V-1200HD” as the product name.

Before using the V-1200HD, ensure that its system program is at the most recent version. For information on available upgrades for the 

system program, see the Roland website (https://proav.roland.com/global/support/).
For information on how to check the system program version, refer to “Checking the Version Information” (p. 30).

Ver. 1.2 and Later

Summary of Contents for V-1200HD RCS

Page 1: ...rate the unit Copyright 2016 ROLAND CORPORATION To obtain the PDF manual 1 Enter the following URL in your computer https proav roland com manuals I 2 Choose V 1200HD as the product name Before using the V 1200HD ensure that its system program is at the most recent version For information on available upgrades for the system program see the Roland website https proav roland com global support For ...

Page 2: ...third grounding prong The wide blade or the third prong are provided for your safety If the provided plug does not fit into your outlet consult an electrician for replacement of the obsolete outlet WARNING IMPORTANT As the colours of the wires in the mains lead of this apparatus may not correspond with the coloured markings identifying the terminals in your plug proceed as follows The wire which i...

Page 3: ...s appareils dont les amplificateurs produisant de la chaleur 9 Ne pas détériorer la sécurité de la fiche polarisée ou de la fiche de terre Une fiche polarisée comporte deux lames dont l une est plus large que l autre Une fiche de terre comporte deux lames et une troisième broche de mise à la terre La lame la plus large ou la troisième broche assure la sécurité de l utilisateur Si la fiche fournie ...

Page 4: ...r as listed on the Information WARNING 004 Do not use or store in the following types of locations Subject to temperature extremes e g direct sunlight in an enclosed vehicle near a heating duct on top of heat generating equipment or are Damp e g baths washrooms on wet floors or are Exposed to steam or smoke or are Subject to salt exposure or are Exposed to rain or are Dusty or sandy or are Subject...

Page 5: ...onnect a power plug if your hands are wet Otherwise you could receive an electric shock 108a Disconnect all cords cables before moving the unit Before moving the unit disconnect the power plug from the outlet and pull out all cords from external devices CAUTION 109a Before cleaning the unit disconnect the power plug from the outlet If the power plug is not removed from the outlet you risk receivin...

Page 6: ...vous trouverez la liste dans les Informations AVERTISSEMENT 004 Ne jamais ranger ou utiliser dans des endroits Soumis à des températures extrêmes ex en plein soleil dans un véhicule fermé à proximité d une conduite de chauffage au dessus de matériel générateur de chaleur ou humides ex salles de bain toilettes sur des sols mouillés ou exposés à de la vapeur ou de la fumée ou exposés au sel ou expos...

Page 7: ...u basculement de l appareil 107a Ne jamais brancher débrancher un cordon d alimentation lorsque vous avez les mains mouillées Sinon vous pourriez subir un choc électrique ATTENTION 108a Débrancher tous les cordons câbles avant de déplacer l appareil Avant de déplacer l appareil débranchez le cordon d alimentation de la prise et retirez tous les cordons des appareils externes 109a Avant de nettoyer...

Page 8: ...mpossible Roland assumes no liability concerning the restoration of any stored content that has been lost Additional Precautions 551 Any data stored within the unit can be lost as the result of equipment failure incorrect operation etc To protect yourself against the irretrievable loss of data try to make a habit of creating regular backups of the data you ve stored in the unit 552 Roland assumes ...

Page 9: ...necting Audio Output Equipment 25 Setup Menu 26 Using the Menus 26 Menu Organization 26 Remote Control from an External Device 27 Using a V 1200HDR Dedicated Controller 27 Using V 1200HD RCS Dedicated Software 27 RS 232 Connector Specifications 28 Using the TALLY GPIO Connector 28 Other Features 29 Operating a VISCA Compatible Video Camera by Remote Control 29 About the TALLY GPIO Connector 29 Sav...

Page 10: ...ch the face panel 2 Clear away any dust buildup from the ventilation ports 3 Use the mounting screws 6 as shown to secure the face panel in place again Important Notes on Rack Mounting When mounting the V 1200HD in a rack enclosure pay attention to the following points to ensure efficient cooling 5 5 Install in a well ventilated location 5 5 Avoid blocking the cooling fan exhaust ports in the top ...

Page 11: ... couvercle frontal 2 Essuyez toute trace de poussière accumulée sur les ports de ventilation 3 Utilisez les vis de montage 6 comme indiqué pour remettre le panneau frontal en place Remarquesimportantessurlemontageenrack Lors du montage du V 1200HD dans un rack faites attention aux points suivants pour assurer un refroidissement efficace 5 5 Installez dans un endroit bien ventilé 5 5 Évitez de bloq...

Page 12: ...ways be sure to turn the volume down Even with the volume turned down you might hear some sound when switching the unit on off However this is normal and does not indicate a malfunction Turning the Power On Once everything is properly connected p 21 be sure to follow the procedure below to turn on their power If you turn on equipment in the wrong order you risk causing malfunction or equipment fai...

Page 13: ...tion externe consultez attentivement le mode d emploi pour la source d alimentation Misesoustensionethorstensiondel appareil Avant d allumer éteindre l appareil veuillez toujours baisser le volume Même avec le volume au minimum un son peut se faire entendre lorsque vous allumez éteignez l appareil Cependant c est tout à fait normal et n indique pas un dysfonctionnement Mise sous tension Une fois q...

Page 14: ...ys turn off the unit and unplug its power cord 5 5 Install only the specified expansion interface Remove only the specified screws 5 5 Do not touch any of the printed circuit pathways or connection terminals 5 5 Never use excessive force when installing an expansion interface If it doesn t fit properly on the first attempt remove the expansion interface and try again 5 5 When the expansion interfa...

Page 15: ...oujours éteindre l appareil et débrancher son cordon d alimentation 5 5 Installez uniquement l interface d extension indiquée Retirez uniquement les vis indiquées 5 5 Ne pas toucher aux circuits imprimés ou aux bornes de connexion 5 5 Ne jamais forcer lors de l installation d une interface d extension Si elle ne s insère pas correctement lors de la première tentative retirez l interface d extensio...

Page 16: ...nd change parametera values on the menu screen Pressing this makes the parametera value smaller p 26 INC button Use this to move between items and change parametera values on the menu screen Pressing this makes the parametera value larger p 26 3 LINK indicator This lights up when a connection is established with the V 1200HDR dedicated controller optional or V 1200HD RCS remote control software FA...

Page 17: ...UT 1 2 output video sent to optional expansion interfaces Connect a monitor that supports 1080 60p HDMI input p 25 10 Power Cord Hook You can use this power cord hook to prevent the power cord from being accidentally disconnected p 12 11 USB port This is a USB connector for future feature expansion This port is not active in the initial release of the V 1200HD 12 LAN port Use this port to connect ...

Page 18: ...allows you to connect to a VISCA compatible camera and operate it remotely from the V 1200HD p 29 22 POWER main power switch This turns the main power on and off After the main power is turned on here use the power button on the front panel to turn the V 1200HD on and off for everyday operation p 12 23 AC IN connector This is for connecting the included power cord p 10 24 DC IN connector This is f...

Page 19: ...4 process section You use the V 1200HDR or V 1200HD RCS remote control software to make the setting for the connection destination For details refer to the V 1200HDR V 1200HD RCS Remote Control Guide PDF available for download at the Roland website About Processing Formats For both the 4 2 2 process and the 4 4 4 process you first select the processing format Choose the desired format from the opt...

Page 20: ... 59 94p 1080 50p 1024x768 60Hz 3 1280x720 60Hz 3 1280x800 60Hz 3 1366x768 60Hz 3 1280x1024 60Hz 3 1400x1050 60Hz 3 1600x1200 60Hz 1920x1080 60Hz 1920x1200 60Hz 3 When the frame rate is set to 50 Hz the output refresh rate is 75 Hz Memo You use the V 1200HDR or remote control software to make the connection destination setting for HDMI 3 and 4 For details refer to the V 1200HDR V 1200HD RCS Remote ...

Page 21: ...plays projectors recording units etc Video camera etc Computer etc SDI output connectors HDMI output connectors HDMI output connectors CD player audio mixer etc Audio output connectors Amplifiers powered speakers recording units etc Audio input connectors SDI input connectors HDMI input connectors Video Input p 23 Audio Input p 24 Audio Output p 25 Video Output p 25 ...

Page 22: ...l charge which is absolutely harmless However if you are concerned about this connect the ground terminal see figure with an external ground When the unit is grounded a slight hum may occur depending on the particulars of your installation If you are unsure of the connection method contact the nearest Roland Service Center or an authorized Roland distributor as listed on the Information page Unsui...

Page 23: ...t HDMI IN 3 4 5 5 Using the built in scalers you can input a large number of video formats For information on the formats you can input refer to About HDMI IN 3 and 4 p 20 5 5 These support HDCP signal input NOTE Settings must be made on the V 1200HD when inputting copyright protected HDCP video For details refer to About Copyright Protection HDCP p 20 Memo When connecting a device equipped with a...

Page 24: ...o selector switch affects both input and output For details refer to About the Audio Selector Switch p 22 Connecting a Reference You can connect a source device for synchronizing You can also output a reference signal via the OUT THRU connector For details refer to the V 1200HDR V 1200HD RCS Remote Control Guide PDF available for download at the Roland website The V 1200HD supports the following e...

Page 25: ...DR V 1200HD RCS Remote Control Guide PDF available for download from the Roland website https proav roland com manuals Making SDI Connections Connect monitors video decks for recording and other devices equipped with SDI inputs to the SDI OUT connectors Video is output in the specified 4 2 2 processing format For information on 4 2 2 formats refer to 4 2 2 Process p 19 Connecting Audio Output Equi...

Page 26: ...he MENU button several times to quit the menu You can display menus on a multi view monitor connected to the V 1200HD and use them to make various settings Menu Organization The V 1200HD s menus are organized as shown below Menu item Description Section to see System Displays the program version information Checking the Version Information p 30 Backup This saves a settings file on a USB flash driv...

Page 27: ...y Memo For more information on how to use the V 1200HD RCS refer to the V 1200HD Owner s Manual and V 1200HDR V 1200HD RCS Reference Manual PDF available for download at the Roland website 1 Start the computer on which the V 1200HD RCS is installed 2 Make the network settings on the computer For information on how to make the network settings refer to the V 1200HDR V 1200HD RCS Remote Control Guid...

Page 28: ...e Data length 8 bit Stop bit length 1 bit Code set ASCII Flow control XON XOFF CableWiring Diagram Wire the three lines of RxD TxD and GND as shown in the figure below V 1200HD end Controller end N C 1 1 RxD 2 2 RxD TxD 3 3 TxD DTR 4 4 GND 5 5 GND DSR 6 6 RTS 7 7 CTS 8 8 N C 9 9 The connections between 4 and 6 and between 7 and 8 are inside the V 1200HD When connecting to a controlling device such...

Page 29: ...ns Maximum input 12 V 200 mA Open collector type 5 5 Control input connector specifications Trigger method No voltage contact make contact triggeringContact capacity DC 24 V 0 1 A or higher Input method Photocoupler D Sub 25 pin female 1 13 14 25 By default the following functions are assigned to the V 1200HD s TALLY GPIO connector Pin number Connector name Function Default 1 OUTPUT 1 GPO 1 Tally ...

Page 30: ...elf MAIN and for expansion interfaces EXP A and EXP B connected at expansion slots A and B 1 Press the MENU button and select System then press the ENTER button The program version information is displayed When no expansion interfaces are inserted into expansion slots A and B no version information is displayed at EXP A and EXP B Formatting a USB Flash Drive To use a USB flash drive with the V 120...

Page 31: ...match the color space for the processing being done by the unit Use an optional V 1200HDR unit or remote control software to change the settings for the color space 1 Depending on the device the color space might be interlinked with the selection of DVI or HDMI or the selected format In such cases changing the color space on the input or output device might bring about improvement for the problem ...

Page 32: ...nu HDCP Required Audio Processing Sampling Rate 24 bits 48 kHz Input Connectors 3G HD SDI BNC type x 4 Ch7 10 HDMI type A x 4 AUDIO IN XLR L 1 2 R 3 4 Analog Audio or AES EBU Output Connectors 3G HD SDI BNC type x 4 Ch1 4 HDMI type A x 4 AUDIO OUT XLR L 1 2 R 3 4 Analog Audio or AES EBU Input Level and Impedance AUDIO IN 4 dBu Maximum 22 dBu 15 k ohms Output Level and Impedance AUDIO OUT 4 dBu Max...

Page 33: ...33 Appendix Dimensions Unit mm 357 430 328 344 482 133 ...

Page 34: ...DI 2 SDI 3 SDI 4 SDI 5 SDI 6 SDI 7 SDI 8 SDI 9 SDI 10 EXPANSION SLOT B EXPANSION SLOT A USB MEMORY from CAPTURE to MULTI VIEW 1 to MULTI VIEW 2 HDMI 1 HDMI 2 REF IN HDMI 3 HDMI 4 SCALER RE RE ENTRY STILL 2 STILL 1 SIGNAL GENERATOR SYNC GENERATOR INPUT EXPANSION 4 IN x 2 OUT INPUT PATCHBAY 16 8 from VIDEO STRUCTURE SDI 7 16ch 92ch 16ch 16ch 16ch SDI 8 16ch 16ch 16ch 16ch SDI 9 16ch SDI 10 16ch HDMI...

Page 35: ...RING 1 FTB FTB FTB FTB FTB FTB MULTI VIEW 1 MULTI VIEW 2 EXPANSION OUTPUT PATCHBAY 6 IN x 2 OUT 2 IN 4 OUT 444 PROCESS XPT SCALER FS MIX CUT LUMINANCE KEY CROPPING MULTI FORMAT PROCESSOR FTB FTB SIGNAL GENERATOR SDI 1 SDI 2 SDI 3 SDI 4 SDI 5 SDI 6 EXPANSION SLOT A EXPANSION SLOT B PGM PVW XPT1 1 XPT2 4 from INPUT from INPUT HDMI 1 HDMI 2 REF OUT REF THRU POST PROCESS B1 RE S1 S2 B2 B3 B4 B5 B6 B1 ...

Page 36: ...36 Memo ...

Page 37: ...37 Memo ...

Page 38: ...C Rules Operation is subject to the following two conditions 1 this device may not cause harmful interference and 2 this device must accept any interference received including interference that may cause undesired operation To assure continued FCC emission limit compliance use only shielded interface cables when connecting to other device Any unauthorized changes or modifications not expressly app...

Page 39: ...企业可在此处 根据实际情况对上表中打 的技术原因进行进一步说明 此标志适用于在中国国内销售的电子信息产品 表示环保使用期限的年数 所谓环保使用 期限是指在自制造日起的规定期限内 产品中所含的有害物质不致引起环境污染 不会对 人身 财产造成严重的不良影响 环保使用期限仅在遵照产品使用说明书 正确使用产品的条件下才有效 不当的使用 将会导致有害物质泄漏的危险 部件名称 有害物质 外壳 壳体 电子部件 印刷电路板等 附件 电源线 交流适配器等 铅 Pb 汞 Hg 镉 Cd 六价铬 Cr VI 多溴联苯 PBB 多溴二苯醚 PBDE 有关产品中所含有害物质的说明 本资料就本公司产品中所含的特定有害物质及其安全性予以说明 本资料适用于 年 月 日以后本公司所制造的产品 ...

Page 40: ...d Roland distributor in your country https roland cm proav_service Roland Service Centers and Distributors Roland Service Centers and Distributors When you need repair service access this URL and find your nearest Roland Service Center or Roland Service Centers and Distributors Roland Service Centers and Distributors ...

Reviews: