

FT6012 - MITER TRIM CUTTER
APPLICATIONS
This product has been designed only for the purposes
listed below:
Cutting vinyl and pine, not intended for cutting
hardwoods.
Cutting up to 3/4 in. quarter round flooring trim or shoe
molding.
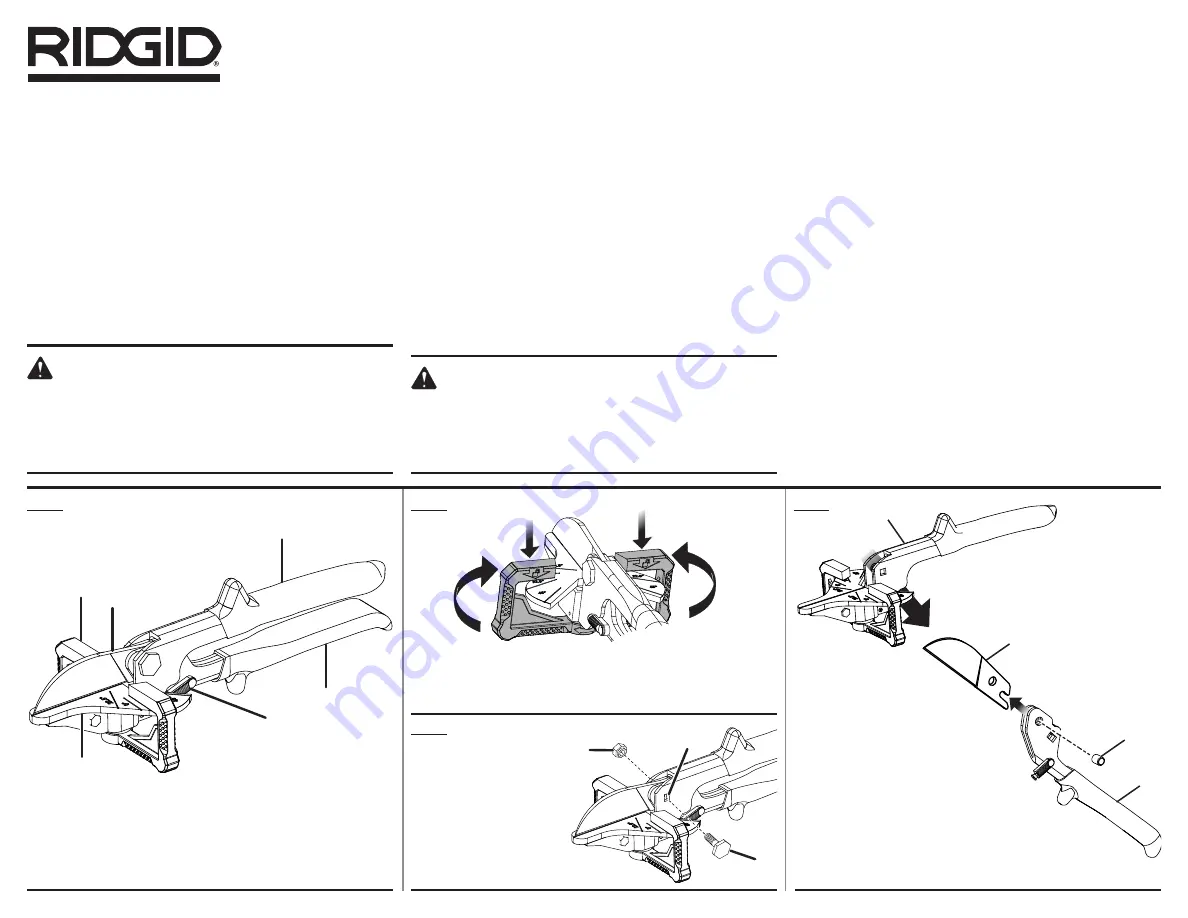
USING THE MITER TRIM CUTTER
See Figures 1 and 2.
Rotate the locking lever to unlock the cutter.
NOTE:
When the cutter is unlocked, the blade will move
away from the cutting table.
WARNING:
The blade is extremely sharp. Do not touch the
cutting edge of the blade and do not let your hand
or fingers come between the blade and cutting
table. Failure to heed this warning can result in
serious personal injury.
Using the scale on the cutting table, push fence down
and rotate it to your desired angle. When the fence is
released, it will return to the locked position.
NOTE:
You can quickly locate 0°, 22.5°, and 45° left or
right by rotating the fence until it seats itself in one of
the positive stop notches on the cutting table.
Place the flat side of the material to be cut against the
fence.
NOTE:
Do not attempt to cut material larger than 3/4 in.
x 3/4 in. or material obviously too large to fit between
the cutting blade and the table.
Squeeze the upper and lower handles together to cut
the material.
When the cutting operation is complete, hold the handles
together and rotate the locking lever to lock the cutter.
REPLACING THE BLADE
See Figures 3 and 4.
WARNING:
Blades are sharp. Use extreme caution and wear
heavy-duty gloves when replacing the blade.
Failure to heed this warning can result in serious
personal injury.
If the blade becomes dull, replace it. Do not use with dull
blades. Do not attempt to sharpen blade.
When replacing the blade, use only RIDGID model number
FT6013.
Hold the handles together and rotate the locking lever
to lock the cutter.
Remove the bolt and nut securing the lower handle to
the upper handle.
Rotate the locking lever to unlock the cutter.
Slide the lower handle away from the upper handle.
Remove the bushing and old blade from the lower
handle.
Slide the new blade into the lower handle until the tab in
the handle engages the notch in the blade. Make sure
that the holes are aligned, then secure with bushing.
Insert lower handle into upper handle with the cutting
edge of the blade facing the cutting table.
Align the holes in the handles and blade.
Insert bolt through holes and secure using nut. Tighten
securely.
NOTE:
The bolt has a square shoulder. Ensure it is fully
seated in the square hole before tightening nut.
A
B
C
A
A
B
A
B
B
C
D
E
F
Fig. 1
Fig. 2
Fig. 4
Fig. 3
A - Upper handle (poignée supérieure, mango superior)
B - Lower handle (poignée inférieure, mango inferior)
C - Fence (guide, guía)
D - Cutting table (table de coupe, mesa de corte)
E - Blade (lame, hoja)
F - Locking lever (levier de verrouillage, palanca de fijación)
A - Upper handle (poignée supérieure, mango superior)
B - Blade (lame, hoja)
C - Bushing (douille, buje)
D - Lower handle (poignée inférieure, mango inferior)
A - Nut (écrou, tuerca)
B - Bolt (boulon, perno)
C - Square hole (trou carré,
agujero cuadrada)
A - Push down to unlock (pousser pour déverrouiller, empuje para
desbloquear)
B - Rotate to desired position (tourner vers l’angle désiré, gire la cerca
al ángulo deseado)
D
C
A
B


