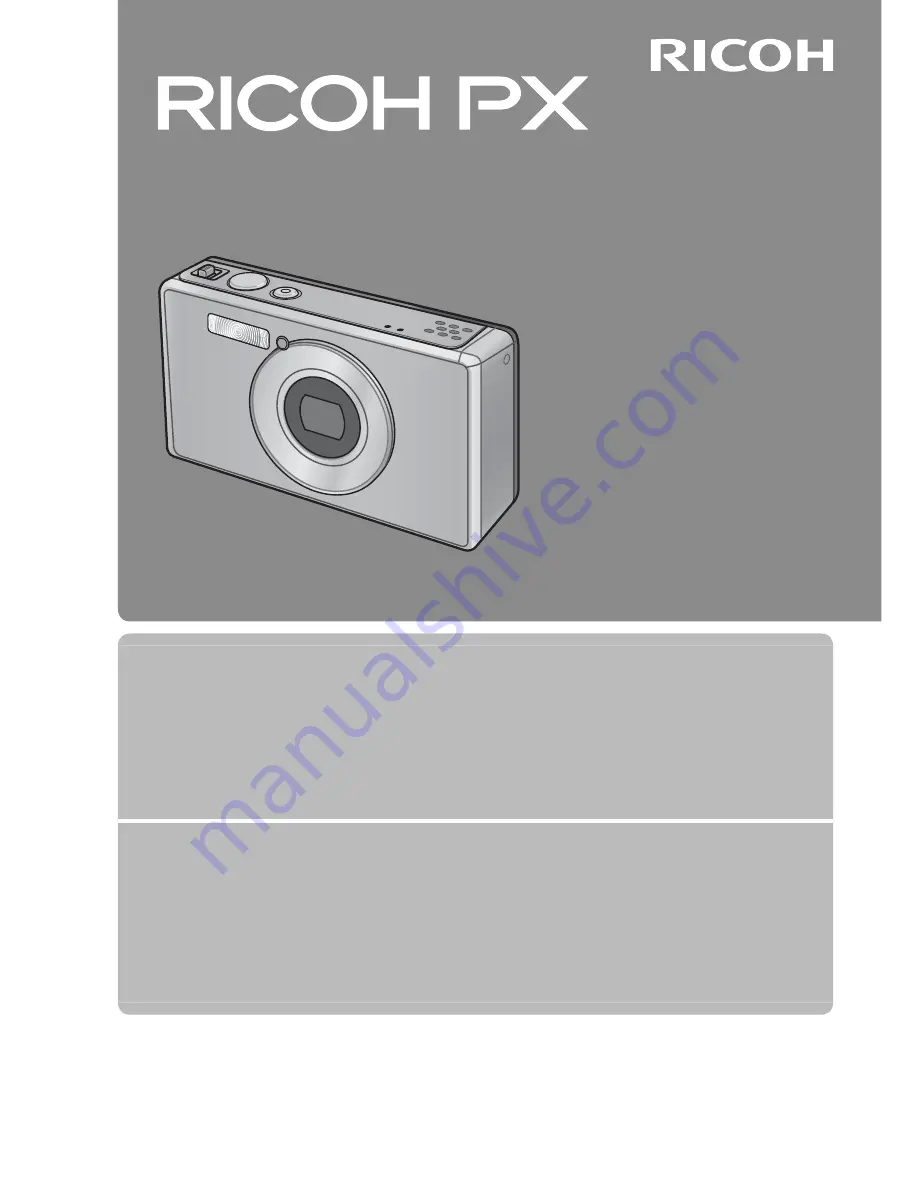
background image

Camera User Guide

The serial number of this product 
is given on the bottom face of the 
camera.

Basic Operations

If you are using the camera for the first time, read this section.

This section provides a basic overview of how to turn on the camera, take 
pictures and play back pictures.

Advanced Operations

Read this section when you want to learn more about the different camera 
functions.

This section provides more detailed information about the functions used to 
take pictures and play back pictures, as well as information on how to customize 
the camera settings, print pictures, and use the camera with a computer.

The rechargeable battery needs to be charged before use.  The battery is not 
charged at the time of purchase.

Summary of Contents for PX

Page 1: ... and play back pictures Advanced Operations Read this section when you want to learn more about the different camera functions This section provides more detailed information about the functions used to take pictures and play back pictures as well as information on how to customize the camera settings print pictures and use the camera with a computer The rechargeable battery needs to be charged be...

Page 2: ...ng the camera close to a radio or television may lead to interference If interference occurs follow the procedures below Move the camera as far away as possible from the TV radio or other device Reorient the TV or radio antenna Plug the devices into separate electrical outlets 2011 RICOH CO LTD All rights reserved This publication may not be reproduced in whole or in part without Ricoh s express w...

Page 3: ...mbol may be combined with other symbols to indicate that a specific action is prohibited Examples Do not touch Do not disassemble Observe the following precautions to ensure safe use of this equipment Danger Do not attempt to disassemble repair or alter the equipment yourself The high voltage circuitry in the equipment poses significant electrical hazard Do not attempt to disassemble alter or dire...

Page 4: ...ectrical outlet be sure to unplug the USB power adapter from the outlet to avoid fire or electrical hazards Discontinue use of the equipment immediately if it is malfunctioning Contact the nearest service center at your earliest convenience Avoid any contact with the liquid crystal inside the picture display should the monitor be damaged Follow the appropriate emergency measures below SKIN If any ...

Page 5: ... When using the camera in kitchens or other areas where it may be exposed to steam or damp air be sure that moisture does not penetrate the interior of the camera Failure to observe this precaution could result in fire or electric shock Do not use the equipment near flammable gases gasoline benzene thinner or similar substances to avoid the risk of explosion fire or burns Do not use the equipment ...

Page 6: ...the device is malfunctioning or damaged Do not disassemble The device contains high voltage circuits that could cause electric shock Do not handle the plug during thunderstorms Failure to observe this precaution could result in electric shock Keep batteries out of reach of children Cease charging if the battery fails to charge in the specified time Do not place in microwave ovens or pressure cooke...

Page 7: ...se cords pose a fire hazard Do not fire the flash at drivers of vehicles as this may cause the driver to lose control and result in a traffic accident For your safety unplug the device during cleaning Unplug the device when it is not in use Do not cover equipment while charging Failure to observe this precaution could result in fire Do not short the metal parts of the camera terminals or USB cable...

Page 8: ...mera Each language has its own Software User Guide To copy the User Guide onto your computer connect the camera to the computer using the supplied USB cable See P 89 for more information MediaBrowser image viewing and editing software for Windows only is stored in the camera s internal memory For information on use see the MediaBrowser online help or contact one of the following customer support c...

Page 9: ... Rechargeable Battery 22 Turning the Power On Off 24 Basic Setup 25 Basic Shooting 26 Focusing and Taking Pictures Normal Mode 26 Using the Zoom Function 28 Using the Flash 29 Using the Self timer 30 Exposure Compensation 30 Playing Back Images 31 Viewing Your Images 31 Thumbnail View 31 Rating Pictures 32 Enlarging Images 33 Deleting Files 34 Deleting Multiple Files 35 Using the Menus 36 The Quic...

Page 10: ...ooting and Viewing Movies 45 Shooting Movies 45 Viewing Movies 46 3 More on Photography 47 Focus 47 Focus Lock 47 Focus Options 49 Subject Tracking 49 Preventing Blur 50 Blur Reduction 50 Using the Flash 50 Raising ISO 50 Modifying Color 51 White Balance 51 Manual 52 Image Settings 52 Taking a Series of Photos 53 Creating a Date Stamp 55 ISO Sensitivity 56 Digital Zoom 57 Auto Resize 57 ...

Page 11: ...tures on TV 69 5 The Shooting Menu 71 Using the Menu 71 Shooting Menu Options 72 Picture Quality Size 72 Continuous 72 Focus 72 Exposure Metering 72 Image Settings 72 Super Resolution 72 White Balance 73 ISO Setting 73 Maximum for ISO Auto 73 Exposure Compensation 73 Movie Size 73 Red eye reduction 73 Pre AF 73 Shake Correction 73 Date Imprint 73 Plus Normal Shooting 73 Soft Focus Options 73 Hue 7...

Page 12: ...nu Options 79 Quick menu display 79 Choose shooting info 79 Grid Guide Display 80 Playback info 80 Auto Rotate 80 Auto protect faves 80 LCD Brightness 80 AF Auxiliary Light 80 Operation Sounds 81 Volume Settings 81 LCD Confirmation Time 81 Auto Power Off 81 Sleep Mode 81 LCD Auto Dim 81 Digital Zoom Image 82 Card Sequence No 82 Date Settings 82 Language N 82 Video Out Mode 82 HDMI Output 83 Format...

Page 13: ... Software 90 Copying Pictures to Your Computer 94 For Macintosh 96 Copying Pictures to Your Computer 96 10 Appendices 98 Troubleshooting 98 Error Messages 98 Camera Troubleshooting 99 Available Settings 104 Specifications 106 Number of Images That Can Be Stored 109 Defaults Settings Functions Whose Defaults Are Restored When the Camera Is Turned Off 111 Optional Accessories 113 Battery Charger BJ ...

Page 14: ...ns If you are using the camera for the first time read this section Packing List 14 Names of Parts 15 Picture Display 17 Getting Ready 20 Basic Shooting 26 Playing Back Images 31 Deleting Files 34 Using the Menus 36 ...

Page 15: ...trap Warranty Camera User Guide Note Attaching the Plug Before using the USB power adapter for the first time connect the plug by sliding it into the USB power adapter until it clicks into place The shape of the plug depends on the country of sale Optional Accessories Rechargeable Battery DB 100 Battery Charger BJ 10 HDMI Cable HC 1 Used to connect your camera to a television compatible with HDMI ...

Page 16: ...utton Indicator Lamp P 24 23 4 Microphone P 45 5 Speaker P 46 6 Flash P 29 7 AF Auxiliary Light Self timer Lamp P 80 30 8 Lens Note Attaching the Handstrap Neck Strap to the Camera Thread the small end of the strap through the strap eyelet on the camera and loop the ends Remove the end of the neck strap from the buckle and attach it as shown in the illustration For the latest information on option...

Page 17: ...DMI Micro Output Terminal Type D P 69 6 Common Terminal for USB Port AV Output P 20 69 84 90 94 96 7 Flash Dial P 29 8 3 Movie F Favorites Button P 45 32 43 44 9 PREMIUM Button P 40 10 Button 11 Button 12 D Exposure Compensation Button P 30 39 13 MENU OK Button P 36 71 75 78 14 t Self timer D Delete Button P 30 34 15 6 Playback Button P 31 The and symbols in this manual indicate the up PREMIUM dow...

Page 18: ...e Mode Item Name Refer to Item Name Refer to 1 Premium Shot Mode P 38 14 AF Frame P 48 2 Fireworks Exposure Time P 38 15 Shake Correction P 50 3 Self timer P 30 16 Date Imprint P 55 4 Flash Mode P 29 17 Battery Symbol P 19 5 Remaining Number of Still Images P 109 18 Eye Fi Connection P 19 6 Recording Destination P 21 19 ISO Setting P 56 7 Exposure Warning Indicator P 101 20 Exposure Compensation P...

Page 19: ...9 9999 0000 9999 0000 9999 000 000 0000 0000 000 0000 000 0000 Rate Rate Rate Rate 6 6 7 7 8 8 1 1 3 3 4 4 5 5 2 2 11 11 11 9 9 10 10 10 12 12 12 13 13 13 Still Image Mode 2011 2011 01 01 01 00 01 00 00 00 2011 01 01 00 00 2011 01 01 00 00 12 12 15 15 12 15 12 15 0000 0000 9999 9999 0000 9999 0000 9999 RMOV RMOV0001 0001 RMOV0001 RMOV0001 640 640 640 640 Start Start Start Start 15 15 15 14 14 14 M...

Page 20: ...may be a problem with the card Additional photo information can be displayed by selecting Detailed for Select info displayed in the quick playback menu GP 36 2011 2011 01 01 01 00 01 00 00 00 2011 01 01 00 00 2011 01 01 00 00 F2 8 1 1000 1000 EV EV 0 3 ISO 1600 ISO 1600 1140 1140mm mm F2 8 1 1000 EV 0 3 ISO 1600 1140mm F2 8 1 1000 EV 0 3 ISO 1600 1140mm 4 3 4 3 4 3 0000 0000 9999 9999 0000 9999 00...

Page 21: ...icks into place and insert the battery The battery is fully inserted when the latch pops into place as shown The camera will not turn on if the battery is not in the correct orientation Logo side 3 Close the cover Close and latch the cover as shown Removing the Rechargeable Battery After unlatching and opening the battery card cover release the battery latch to eject the battery The battery can th...

Page 22: ...camera off and leave it to cool down sufficiently before removing the battery Please remove the battery if you are not going to use the camera for a long period of time Batteries should be disposed of under rules appointed by the government or the local authorities About SD Memory Cards available in stores The camera can be used with SD SDHC and Eye Fi memory cards hereafter referred to as SD memo...

Page 23: ...Fi cards can only be used in the country in which the cards were purchased If it is unclear whether the card has been approved for use in the area please check with the card manufacturer Write protecting your images Move the write protection switch on the SD memory card to LOCK to prevent your still images from being accidentally erased or the card from being formatted Note that you cannot shoot i...

Page 24: ...er Charge Charge Charge Note The camera indicator lamp shows charging status as follows Indicator lamp Description Blinks about once a second USB charging in progress Off Charging complete Blinks rapidly about twice a second for 5s and then turns off Charging error or no battery inserted Charging takes about 160 minutes when the camera is connected to a power outlet and about 240 minutes when it i...

Page 25: ...hen using a computer connect the USB cable directly to the computer Data can not be written to the camera memory card during charging Accessing the camera during charging may increase the time needed for the battery to charge Pressing the POWER button ends charging and turns the camera off Turning the Power On Off Press the POWER button to turn the camera on in shooting mode A start up sound will ...

Page 26: ...own at right will be displayed press or to highlight the year month hour minute second or date format and press or to change Press the MENU OK button when settings are complete A confirmation dialog will be displayed press the MENU OK button again to set the camera clock Note To stamp pictures with the time and or date of recording select Date or Date Time for Date Imprint GP 73 in the shooting me...

Page 27: ...onditions The shutter release button has two positions the camera adjusts focus automatically when the button is pressed halfway and takes a picture when the button is pressed the rest of the way down to take pictures without using autofocus adjust focus settings as described on P 48 1 Hold the camera with both hands and lightly press both elbows against your body Be sure your fingers or hair or t...

Page 28: ...tions that are in focus 3 Gently press the shutter release button all the way The still image you have taken appears momentarily on the picture display and is recorded to the internal memory or the SD memory card Note If the camera is turned off in premium mode GP 38 the last selected premium shot mode will be restored the next time the camera is turned on To return to normal shooting press in the...

Page 29: ... super resolution zoom the C symbol appears on the picture display and the zoom ratio is displayed in green The super resolution zoom allows you to enlarge the subject with less image deterioration Note The super resolution zoom is enabled when the Normal option is selected for Digital Zoom Image GP 82 in the setup menu GP 78 Using the Digital Zoom Depending on the shooting mode and the options se...

Page 30: ...e flash may not fire depending on the shooting mode or the options selected in the shooting menu GP 104 Caution The flash mode icon will blink for about five seconds while the flash charges no photographs can be taken until charging is complete and the icon stops blinking The camera may take longer to turn on when the flash is used Note The auxiliary flash fires to increase the AE accuracy To redu...

Page 31: ...hot To cancel the self timer press the t button and change the self timer setting to Self Timer Off When the ten second timer is active the self timer lamp will light for eight seconds while the timer counts down and blink for the final two seconds before the picture is taken When the self timer is set to 2 seconds the self timer lamp does not light or blink The options available depend on the sho...

Page 32: ...011 01 01 00 00 4 3 4 3 4 3 0000 0000 9999 9999 0000 9999 0000 9999 000 000 0000 0000 000 0000 000 0000 Rate Rate Rate Rate 2011 2011 01 01 01 00 01 00 00 00 2011 01 01 00 00 2011 01 01 00 00 4 3 4 3 4 3 0000 0000 9999 9999 0000 9999 0000 9999 000 000 0000 0000 000 0000 000 0000 2011 01 31 Monday 25pics 2011 01 31 Monday 25pics 2011 01 31 Monday 25pics 2011 01 2011 01 2011 01 S S M M M T T W W T T...

Page 33: ...01 00 00 4 3 4 3 4 3 0000 0000 9999 9999 0000 9999 0000 9999 000 000 0000 0000 000 0000 000 0000 Rate Rate Rate Rate Viewing Favorites To view pictures with a selected rating press the F button during playback and choose the desired rating Select All ratings to view all pictures with a rating of at least one star or press F again to return to normal playback 0000 0000 9999 9999 0000 9999 0000 9999...

Page 34: ... in on photographs displayed in single frame view select 8 with the zoom lever Maximum magnification varies with image size Image Size Enlarged View maximum magnification z 4 3 3 4 a 4 3 6 7 Image sizes other than those above 16 Use the and buttons to view other areas of the image or select 9 with the zoom lever to view the image full frame 0000 0000 9999 9999 0000 9999 0000 9999 000 000 0000 0000...

Page 35: ...le Settings Description Delete One Delete the current image Delete Multi Display images in 20 frame view and choose from Sel Indiv and Sel Range see below Delete All A confirmation dialog will be displayed highlight Yes and press the MENU OK button to delete all images in internal memory or on the memory card Thumbnail View Available Settings Description Sel Indiv Delete selected images Sel Range ...

Page 36: ... the MENU OK button again 2 Press D A confirmation dialog will be displayed 3 Highlight Yes and press the MENU OK button Sel Range Deleting All Files in Selected Ranges 1 Highlight the first picture in the range and press the MENU OK button An icon will appear on the picture to deselect highlight and press the t button 2 Highlight the last picture in the range and press the MENU OK button to mark ...

Page 37: ...ty size Adjust image size GP 72 Adv shooting options View the full shooting menu GP 71 including the setup menu tab The Quick Playback Menu By default pressing the MENU OK button during playback displays the quick playback menu to jump directly to the full playback menu when the MENU OK button is pressed select Off for Quick menu display GP 79 in the setup menu GP 78 Available Settings Description...

Page 38: ... Read this section when you want to learn more about the different camera functions 1 Matching Settings to the Scene 38 2 Shooting and Viewing Movies 45 3 More on Photography 47 4 More on Playback 59 5 The Shooting Menu 71 6 The Playback Menu 75 7 The Setup Menu 78 8 Direct Printing 84 9 Downloading Images to Your Computer 89 10 Appendices 98 ...

Page 39: ... when you want to adjust settings manually GP 104 Portrait Use for portraits The camera automatically detects faces up to eight and adjust focus brightness and color Night Portrait Use when taking portrait pictures against a nightscape The shutter speed slows down so be careful of camera shake Loupe Optimize zoom for tighter than normal close ups Optical zoom cannot be used Landscape Use when taki...

Page 40: ...cameras High Contrast B W Use for grainy high contrast black and white shots Soft Focus Choose for soft focus effects similar to those created by soft focus lenses Cross Process Take photographs with colors that differ markedly from those of the actual subject The colors can be selected using the Hue option GP 74 in the shooting menu Black White Take photos in black and white Sepia Take photos in ...

Page 41: ...u last selected the dialog will show either your favorite premium shot modes or a complete list Press or to toggle between the two displays if desired you can change the order in which the options are listed in the favorites display GP 43 2 Highlight a premium shot mode Press or to highlight a premium shot mode Sample image Note The sample image can be selected using the Save premium shot option G...

Page 42: ... to normal shooting mode press or in the premium shot shooting display Auction Mode Take one or more shots to create a picture using the selected layout Each time the shutter is released the camera will display a confirmation dialog press the MENU OK button to add the picture to the next frame in the layout When all the frames are full press the MENU OK button to complete the picture Note Image si...

Page 43: ...d a copy that has been processed to reduce the effects of perspective Note You can also correct the skew of a previously shot still image GP 64 Caution When Skew Correct Mode is selected note the following To shoot the subject as large as possible position it so that the entire portion of the subject is visible on the picture display The camera may fail to recognize the subject in the following ca...

Page 44: ...e When the camera is held vertically the area that will be in focus is shown in horizontal orientation Caution The focus of the final image differs slightly from that in the image displayed immediately after shooting Favorite Premium Shot Modes To add a premium shot mode to your list of favorites highlight the mode in the complete list and press F You will be prompted to choose a mode to remove fr...

Page 45: ...et Cooking Cooking Cooking Cooking Playback Mode Display a photo taken in premium shot mode in full frame playback and select Save My Settings Premium Shots GP 76 in the playback menu GP 75 to create a new premium mode using the adjustments in effect when the photo was taken Note The sample image taken when settings are saved in shooting mode can not be viewed during playback New modes are saved i...

Page 46: ...on Movie button End End Movie button End Movie button End Caution While shooting movies operation sounds may be recorded Movies may be up to 4GB in size or 29 minutes in length Depending on the type of memory card used shooting may end before this length is reached The maximum total length of all movie files that can be stored depends on the capacity of the memory card GP 109 Flicker may be visibl...

Page 47: ...Movies displayed in full frame playback can be viewed by selecting 8 with the zoom lever Progress is shown by an indicator in the display 2011 2011 01 01 01 00 01 00 00 00 2011 01 01 00 00 2011 01 01 00 00 12 12 15 15 12 15 12 15 0000 0000 9999 9999 0000 9999 0000 9999 Start Start Start Start RMOV RMOV0001 0001 RMOV0001 RMOV0001 640 640 640 640 Fast Forward Select z with the zoom lever while playb...

Page 48: ... which the subject is not in the center of the frame 1 Position your subject in the center of the frame and press the shutter release button halfway to set focus exposure and white balance 4 4 3 4 3 4 3 9999 9999 9999 9999 The focal distance is measured at a maximum of nine points Green frames appear to indicate the positions that are in focus 2 Keeping the shutter release button pressed halfway t...

Page 49: ... Green Subject not in focus Red Flashing It may be impossible to bring the following subjects into focus or they may not be in focus even when the frame color is green Objects that lack contrast such as the sky a wall that is only one color or the hood of a car Flat two dimensional objects with only horizontal lines and no significant protrusions Quickly moving objects Things in poorly lit places ...

Page 50: ...t until a picture is taken or you remove your finger from the shutter release button Choose for subjects that are in motion Spot AF Selects one AF area at the center of the picture display to allow the camera to focus on this area automatically Subject Tracking In this mode the camera focuses on the subject in the center of the picture display when the shutter release button is pressed halfway The...

Page 51: ...con The following are recommended to prevent blur Blur Reduction Blur can be reduced by selecting On for Shake Correction in the shooting menu GP 71 Note that this option may not be available in some modes GP 104 Caution Blur reduction has no effect on blur caused by subject movement motion blur Blur reduction is on by default Using the Flash The flash can be activated by choosing a flash mode of ...

Page 52: ...ilable in some modes GP 104 AUTO Auto Adjusts the white balance automatically Multi P AUTO The camera automatically selects the optimal white balance according to the conditions of sun and shade or the flash illumination range Outdoors Select this when shooting outdoors sunny and white balance fails to adjust properly Cloudy Select this when shooting in cloudy weather or shade and the white balanc...

Page 53: ...e white balance is set 3 Press the MENU OK button The symbol appears on the screen The effect of the selected white balance setting can be previewed in the picture display Repeat the above steps until the desired effect is achieved Note To cancel Manual select a setting other than Manual Image Settings The Image Settings option in the shooting menu GP 71 can be used to adjust contrast sharpness an...

Page 54: ...n full frame playback GP 31 the other pictures in the sequence can be viewed by pressing or S Cont stream continuous While the shutter release button is pressed the camera shoots up to 16 frames at about 7 5 frames per second and joins them to form a single image 4 608 3 456 pixels in size About 2s are required to shoot the entire sequence M Cont memory reversal continuous The camera shoots while ...

Page 55: ...ng continuous shooting and On is selected for Card Sequence No GP 82 the remaining photos in the sequence will be saved to a separate folder Viewing S Cont and M Cont Images with Enlarged View Zoom can be used to view the individual frames of S Cont and M Cont images during playback Selecting 8 with the zoom lever while an image taken with either of these options is displayed in single frame playb...

Page 56: ...d Setting the Camera Clock Use the Date Settings option in the setup menu GP 78 to set the camera clock 1 Highlight Date Settings in the setup menu and press to display the date settings menu 2 Press or to highlight the year month day hour minute or date format and press or to change You can cancel the setting by pressing the t button 3 Check the information on the screen and then press the MENU O...

Page 57: ...y size Choose settings other than Auto to fix ISO sensitivity at the selected value The upper limit for auto ISO sensitivity can be selected using the Maximum for ISO Auto GP 73 in the shooting menu Note that this option may not be available in some shooting modes GP 104 Note When Auto is selected for ISO sensitivity the camera will select an ISO sensitivity between 100 and the value selected for ...

Page 58: ...size Digital zoom normally enlarges image data from the center of the frame creating a slightly grainy image To record pictures at actual size select Auto Resize for Digital Zoom Image in the setup menu GP 78 The size at which the image will be recorded varies with the zoom ratio Auto resize can be activated by briefly releasing the zoom lever when the zoom bar display reaches the maximum optical ...

Page 59: ...y Size Zoom Magnification Focal Length o 4 3 1 0 140mm j 4 3 1 3 170mm e 4 3 1 8 240mm a 4 3 3 6 500mm z 4 3 7 2 1000mm Equivalent to that on a 35mm camera Caution Auto Resize has no effect in skew correction or toy camera mode or when S Cont or M Cont is selected for Continuous Mode ...

Page 60: ...electing Individual Files 1 Highlight images and press the MENU OK button to select Selected pictures are marked with icons To deselect a photo highlight it and press the MENU OK button again 2 Press F to complete the operation Sel Range Selecting Ranges 1 Highlight the first picture in the range and press the MENU OK button An icon will appear on the picture to deselect highlight and press the t ...

Page 61: ...rivacy Settings menu Note When On is selected for Privacy Settings pictures can not be deleted using the D button GP 34 and the Adv PB options option is not available in the quick playback menu Viewing Hidden Images Select Off for Privacy Settings to reveal hidden images and return to normal playback ...

Page 62: ...ancel Execute Aspect Ratio Frame Size Cancel Execute Press the MENU OK button to save the cropped image to a separate file Caution You can only trim still images shot using this camera You cannot trim movies While you can trim an image repeatedly the image is recompressed each time and there will be some decline in image quality Note To choose the aspect ratio press the F button in the crop displa...

Page 63: ...648 2736 4 to 6 2592 1944 7 to 10 1280 960 11 to 14 640 480 n 3 2 4608 3072 1 to 3 3648 2736 4 to 6 2592 1944 7 to 10 1280 960 11 to 14 640 480 l 1 1 3456 3456 1 to 3 2592 1944 4 to 7 1280 960 8 to 11 640 480 l 16 9 4608 2592 1 to 3 2592 1944 4 to 7 1280 960 8 to 11 640 480 j 4 3 3648 2736 1 3648 2736 2 to 5 2592 1944 6 to 9 1280 960 10 to 13 640 480 e 4 3 2592 1944 1 to 3 2592 1944 4 to 7 1280 96...

Page 64: ...1 to 14 480 480 l 1 1 3456 3456 1 to 4 2736 2736 5 6 1536 1536 7 to 10 960 960 11 to 14 480 480 l 16 9 4608 2592 1 to 3 1536 1536 4 to 7 960 960 8 to 11 480 480 j 4 3 3648 2736 1 to 3 2304 2304 4 to 6 1536 1536 7 to 9 960 960 10 to 13 480 480 e 4 3 2592 1944 1 to 3 1536 1536 4 to 7 960 960 8 to 11 480 480 d 4 3 2304 1728 1 2 1536 1536 3 to 6 960 960 7 to 11 480 480 a 4 3 1280 960 1 to 3 960 960 4 ...

Page 65: ...ect another correction area move the orange frame to the target area by pressing the button To cancel skew correction press the t button Even if you cancel skew correction the original image remains unchanged The image size does not change for skew corrected images The time for skew correction increases with image size To reduce the time required perform skew correction on small copies created wit...

Page 66: ...ndividual Files 1 Highlight images and press the MENU OK button to select Selected pictures are marked with icons To deselect a photo highlight it and press the MENU OK button again 2 Press F to complete the operation Sel Range Selecting Ranges 1 Highlight the first picture in the range and press the MENU OK button An icon will appear on the picture to deselect highlight and press the t button 2 H...

Page 67: ... select 1 File Choose Select All to add all photos to the print order or Cancel All to remove all files from the print order Selecting Multiple Files To change the print status of multiple selected images choose Sel Multiple Images are displayed in a 20 frame view highlight pictures and press or to choose the number of prints press to increase to decrease Press the MENU OK button to exit when the ...

Page 68: ...ected for Quick menu display GP 79 in the setup menu GP 78 the full playback menu will be displayed proceed to Step 3 2 Select Adv PB options Highlight Adv PB options and press the MENU OK button to display the full playback menu 3 Select Reorder favorites Highlight Reorder favorites and press the MENU OK button to display your favorites in a 20 frame view Select 1 at a time or Multiple Reorder fa...

Page 69: ...ected files will be moved to the cursor position Repeat Steps 4 6 to move additional images or press t to exit Select images to be moved Select images to be moved Select images to be moved Select images to be moved Finish Select Finish Select Finish Select Finish Select Note The repositioned files are assigned the same rating as the image immediately after the cursor or if the cursor is positioned...

Page 70: ...of the camera 3 Set the television to Video mode Set the input to Video For details see the documentation that came with the television 4 Press the POWER button or press and hold the 6 Playback button to turn the camera on Caution The USB AV OUT terminal should be used only with cables specifically designated for this purpose Connecting a cable to a terminal for which it is not intended could resu...

Page 71: ...y See the television manual for details but note the following The camera HDMI micro connector should be used only with HDMI cables specifically designated for use with this camera Product malfunction could result if the connector is used with other cables Do not use force when connecting the HDMI cable Do not tug the cable or move the camera while the cable is connected If the cable is connected ...

Page 72: ...p menu GP 78 the full shooting menu will be displayed proceed to Step 3 2 Highlight Adv shooting options and press the MENU OK button to display the full shooting menu 3 Press or to highlight the desired item 4 Press to view options for the highlighted item 5 Press or to highlight the desired option 6 Press the MENU OK button to select the highlighted option and exit to shooting mode To select the...

Page 73: ...nge is divided into 256 partitions and each is metered to determine the overall exposure value Center The entire image is metered with emphasis on the center to determine the exposure value Spot Only the center of the image is metered to determine the exposure value Image Settings GP 52 You can change the picture quality of an image including the contrast sharpness color and vividness Super Resolu...

Page 74: ... halfway This may decrease the time needed to focus when a picture is taken potentially improving shutter response Shake Correction GP 50 Select On to reduce blur caused by camera shake Date Imprint GP 55 You can insert the date YY MM DD or the date and time YY MM DD hh mm at the lower right of a still image Select Off to turn date imprint off Plus Normal Shooting Select On to save unprocessed cop...

Page 75: ...esired results Vignetting Choose the amount of vignetting in toy camera premium shot mode Select from Weak Strong and Off Toy Color Select On to increase saturation in photographs taken in toy camera premium shot mode Reset premium shot settings Highlight Yes and press the MENU OK button to reset premium shot settings to their default values Restore Defaults Select Yes and press the MENU OK button...

Page 76: ...quired with Privacy Settings GP 76 Slide Show GP 77 or Copy to Card from Int Memory GP 77 2 Press the MENU OK button The quick playback menu will be displayed if Off is selected for Quick menu display GP 79 in the setup menu GP 78 the full playback menu will be displayed proceed to Step 4 3 Highlight Adv PB options and press the MENU OK button to display the full playback menu 4 Press or to highli...

Page 77: ...photo as a sample image for the premium shot mode menu Note Settings for custom premium shot modes are reset when Reset premium shot settings GP 74 is selected in the shooting menu GP 71 Resize Create resized copies of photos or other still images produced with the camera Original Resized o 4 3 n 3 2 l 1 1 l 16 9 j 4 3 e 4 3 d 4 3 a 4 3 z 4 3 a 4 3 z 4 3 Caution Movies cannot be resized Trim GP 61...

Page 78: ...ta from internal memory to a memory card in a single operation Note If there is not enough space available on the destination memory card a warning will be displayed Select Yes to copy only those files for which there is sufficient space It is not possible to copy the contents of an SD memory card to the internal memory DPOF GP 66 Select pictures for printing Reorder favorites GP 67 Change the ord...

Page 79: ...yback menu will be displayed if Off is selected for Quick menu display GP 79 in the setup menu the full menu will be displayed proceed to Step 3 2 Highlight Adv shooting options or Adv PB options and press the MENU OK button to display the full menu 3 Press to highlight the tab for the current menu 4 Press to highlight the setup menu tab 5 Press to position the cursor in the setup menu 6 Press or ...

Page 80: ...etting selection method may differ from what is explained here For detailed operation see the explanation of each function Setup Menu Options Quick menu display If Off is selected the full shooting or playback menu will be displayed in place of the quick menus Choose shooting info Choose the information displayed during shooting Available Settings Display Description Show info 4 4 3 4 3 4 3 9999 9...

Page 81: ...e left clear to make it easier to view the subject Use if your subject is in motion Playback info Choose the information displayed during playback Available Settings Description Simplified Display basic photo info GP 18 Detailed Display detailed photo info GP 19 Off Hide photo info Auto Rotate Select On to automatically display pictures in the correct orientation during playback Auto protect faves...

Page 82: ...an the selected time if noise reduction is required Choose Hold to display photos until the shutter release button is pressed halfway Photos displayed after shooting can be deleted GP 34 Auto Power Off Choose how long the camera remains on when no operations are performed The camera will not turn off automatically if Off is selected when connected to a computer or printer or while images are being...

Page 83: ... the file name reaches RIMG9999 no more data can be recorded to that card Note This option applies only to memory cards When images are transferred to a computer using DL 10 GP 94 the file being transferred is renamed and saved Caution When the file name reaches RIMG9999 or R9999999 no more files can be saved In this case move image data from the SD memory card to the memory of the computer or a s...

Page 84: ...ete copy the images to the SD memory card before formatting the internal memory GP 77 Check Firmware Ver Display the firmware version of the camera When the SD memory card contains the file for updating the firmware the camera rewrites the program Eye Fi settings 2 When using the SD memory card with wireless LAN function built in i e Eye Fi card the On option turns wireless LAN function on the Off...

Page 85: ... using the USB cable provided 1 Make sure that the camera power is off 2 Connect the common terminal for USB port AV output of your camera to a printer using the USB cable provided Turn on the printer if it is not already on Your camera turns on automatically 3 Use the camera and buttons to highlight Printer and press the MENU OK button Do not select Computer or Charge when the camera is connected...

Page 86: ...Caution After making sure that the printing completes and the camera turns off disconnect the USB cable to end the connection between the camera and the printer Note If a Printer error message appears during image transfer check the printer status and take the appropriate action Printing One or All Still Images 1 Select an image for printing and press the MENU OK button 2 Select 1 File or All File...

Page 87: ...whether to print the date shooting date The date format can be set using the date time option in the setup menu If the picture was taken using Date Imprint GP 55 only the imprinted date will be printed File Name Print Selects whether to print the file name Optimize Image Selects whether to optimize the image data still image prior to printing on the printer Print Size Sets the print image size Pri...

Page 88: ...ed to the printer select No 4 Select an option and press the MENU OK button The display returns to the Direct Print menu Repeat Steps 3 and 4 to change other settings as required 5 Press the MENU OK button The selected still images are sent to the printer and the Sending screen appears Pressing the t button cancels the operation When the images have been sent to the printer the display returns to ...

Page 89: ...he MENU OK button The Direct Print menu appears 5 Highlight items and press to view additional options See Steps 3 and following on P 86 Note Only images with a printer symbol p are printed If you cancel printing and then try to print again make sure that the printer symbol is on the images you want to print The same still image can also be printed several times on a single sheet The available ite...

Page 90: ...atible Use as a stand alone application System Requirements for Using the Supplied Software The software is stored in the camera s internal memory Before using the supplied software check that your computer meets the following requirements See the documentation provided with your computer for details Operating Systems Supported Windows XP Home Edition Service Pack 3 Professional Service Pack 3 Win...

Page 91: ...ther USB devices the software may not work properly When dealing with movies and other large files a larger memory environment is recommended Installing Software Install the supplied software to your computer Caution If you install the DC Software 2 with the DC Software having been already installed DL 10 for the DC Software 2 is added to the Start up folder 1 Turn the camera power off and pull th...

Page 92: ... and then click the OK button Digital camera software installer screen appears Windows 7 Click Open folder to view files and double click AUTORUN EXE from the displayed files Use this button to install software required for batch downloading and editing of images Click this to display the Website for user registration 6 Click Installing the software Windows XP After a while the Choose Setup Langua...

Page 93: ...into the terminal or apply excessive force with the USB cable connected Also when using the USB cable do not move the camera with the USB cable Do not disconnect the USB cable with the camera power on Do not connect other cable other than the USB cable provided Uninstalling the Software DC Software 2 and MediaBrowser can be uninstalled from Control Panel Programs and Features Windows 7 and Windows...

Page 94: ... camera appears as the drive 2 Open MANUAL folder Each language has its own Software User Guide PDF file 3 Copy the PDF file for your language directly to your hard disk Note Adobe Reader is required to display the operation manual PDF file Acrobat Reader or Adobe Reader need to be installed from the Adobe website if not installed on your computer When the DL 10 Software has already been installed...

Page 95: ...in if no operations are performed for over 30 seconds During charging the camera controls can not be used and the camera will not function as a Mass Storage device disconnect the USB cable and start over from Step 1 3 Copy photos to the computer If DL 10 is installed DL 10 starts and image transfer begins automatically Pictures are copied to the Digital Camera folder in My Documents where they are...

Page 96: ... can then disconnect the USB cable If the remove hardware icon is not displayed in Windows 7 click the button in the taskbar Caution Do not turn off the camera or disconnect the USB cable during image transfer Note MediaBrowser image viewing and editing software for Windows only is also included in the internal memory of the camera You can download the information on how to use MediaBrowser from t...

Page 97: ...on To copy pictures stored in the SD memory card insert the card first and then connect the camera to the computer 1 Connect the common terminal for USB port AV output of the camera to the computer using the supplied USB cable Turn the camera off before connecting the USB cable The camera turns on automatically when a connection is established 2 Use the camera and buttons to highlight Computer and...

Page 98: ...n Do not turn off the camera or disconnect the USB cable during image transfer You can also click Eject on the File menu to cancel the connection If the USB cable is disconnected without disabling the connection the Unsafe Removal of Device screen may be displayed Be sure to stop the connection before removing the USB cable When you connect your camera to a Macintosh computer a file called FINDER ...

Page 99: ...lected for printing Insufficient Memory Files cannot be stored Make sure there is sufficient memory or delete unwanted files P 34 P 83 The image print number limit has been exceeded Select an image and set the number to 0 P 88 Format internal memory The internal memory requires formatting P 83 Format card The card is not formatted Format the card with this camera P 83 Card Error SDXC cards can not...

Page 100: ...ra was left unattended and unused so auto power off turned it off Turn the camera back on P 24 Battery is exhausted Charge the rechargeable battery P 22 An unacceptable battery is used Use the dedicated rechargeable battery Never use any other battery P 21 The camera does not turn off Camera malfunction Remove the battery and load it again P 20 The battery has been fully charged but The battery sy...

Page 101: ...t Lengthen the image confirmation time P 81 Images do not appear on the picture display The camera is not on or the picture display is dark Turn the camera on or adjust the brightness of the picture display P 24 P 80 TheVIDEO AV cable is connected Disconnect theVIDEO AV cable Camera is unable to focus The lens is dirty Wipe clean with a soft dry cloth The subject is not in the center of the shooti...

Page 102: ...isplay P 80 The image is too dark The flash is off and the subject is poorly lit Select ON or AUTO P 29 The subject is underexposed The Q symbol appears Correct the exposure P 30 The brightness of the picture display is not appropriate Adjust the brightness of the picture display P 80 The image lacks natural color The picture was shot in conditions that made it difficult for auto white balance to ...

Page 103: ...h a soft dry cloth There is something wrong with the SD memory card Play back images from another card and if there is nothing wrong with the card the camera is okay There may be something wrong with the card so do not use it The picture display turned off Battery is exhausted Charge the rechargeable battery P 22 Having been left unused the camera has entered sleep mode or turned itself off to sav...

Page 104: ... P 55 The set date disappeared The battery was removed If the battery is removed for more than one week the date setting will be lost Make the settings again P 55 Auto power off does not work Auto power off is set to Off Set the time for auto power off P 81 The operation sound cannot be heard Pets is selected in premium shot mode Choose another mode P 40 The operation sound volume is turned off Us...

Page 105: ...gs Restore Defaults 1 Red eye reduction is automatically enabled when ON or AUTO is selected 2 Group portrait is not available 3 Fixed at d4 3 4 n3 2 and l16 9 are not available 5 Fixed at a4 3 6 Only a4 3 or z4 3 is available 7 When an option other than Off is selected the flash turns off and Multi P Auto white balance functions as Auto 8 If S Cont or M Cont is selected ISO sensitivity is adjuste...

Page 106: ...105 10 Appendices Available Not available PREMIUMd 2 2 2 2 2 2 2 5 6 ...

Page 107: ...e Movie 1 30 to 1 2000 seconds Exposure Control Exposure Metering Mode Multi Light Metering 256 segments Center weighted Light Metering Spot Metering Exposure Mode Program AE Exposure Compensation Manual exposure compensation 2 0 to 2 0EV in 1 3EV steps Exposure Range auto mode center weighted metering Wide angle 3 2 17 7EV Telephoto 4 1 19 4EV Exposure range for auto ISO calculated using values f...

Page 108: ...x 817KB screen 640 480 Approx 202KB screen Recording File Format Still Image JPEG ExifVer 2 3 3 Movie AVI Open DML Motion JPEG Format Compliant Compression Format JPEG Baseline Format Compliant Still image movie OtherMajorShootingFunctions Continuous mode Self timer operation time approx 10 seconds approx 2 seconds Group portrait Grid guide display Other Major Playback Functions Thumbnail view Fav...

Page 109: ...that on a 35mm camera 2 The following are the minimum focal lengths and shooting ranges for Loupe mode the minimum shooting distance in Loupe mode is 3cm Focal Length Shooting Range 28mm Approx 46mm 35mm 56mm Approx 23 2mm 17 4mm when 2 0 super resolution zoom digital zoom is not used 269mm Approx 4 8mm 3 6mm when 2 0 super resolution zoom 4 8 digital zoom is used Equivalent to that on a 35mm came...

Page 110: ...173 351 689 1409 2823 5664 l1 1 8 204 415 815 1666 3339 6698 l16 9 8 204 415 815 1666 3339 6698 j4 3 10 242 491 965 1973 3953 7930 e4 3 15 373 758 1490 3045 6101 12238 a4 3 43 1059 2118 4160 8505 17039 34181 z4 3 169 4028 7681 15082 30828 61759 123888 Movie x1280 7 s 3 min 3 s 6 min 14 s 12 min 14 s 25 min 1 s 50 min 7 s 100 min 33 s z640 22 s 8 min 55 s 18 min 8 s 35 min 38 s 72 min 50 s 145 min ...

Page 111: ...ture display may differ from the actual number of shots depending on the subject Movie recording time and the maximum number of still pictures may vary depending on the capacity of the recording destination internal memory or SD memory card shooting conditions and the type and manufacturer of the SD memory card Choose image size according to how the picture will be used Image Size Description o4 3...

Page 112: ...rect Mode a4 3 Continuous Mode Off Focus Multi AF Exposure Metering Multi Image Settings Standard Super Resolution Off White Balance Multi P AUTO ISO Setting Auto Maximum for ISO Auto AUTO 1600 Exposure Compensation 0 0 Movie Size x1280 Red eye reduction Off Pre AF On Shake Correction On Date Imprint Off Plus Normal Shooting Off Soft Focus Options Strong Hue Basic Vignetting Weak Toy Color On Prem...

Page 113: ...fied Auto Rotate On Auto protect faves Off LCD Brightness AF Auxiliary Light On Operation Sounds All Volume Settings Medium LCD Confirmation Time 0 5 seconds Auto Power Off 5 minutes Sleep Mode Off LCD Auto Dim On Digital Zoom Image Normal Card Sequence No Off Date Settings Language N Video Out Mode HDMI Output AUTO Eye Fi settings On The default setting varies depending on where you purchased the...

Page 114: ...osion if battery is replaced by an incorrect type Dispose of used batteries according to the instructions Use only the lithium ion batteries of the series DB 100 which our company supplies Do not use the specialized electrical power cord with other products Do not subject the appliance to strong shock Do not use in a place which is extremely hot or cold or a place subject to strong vibrations Do n...

Page 115: ...e in the country in which it was purchased The warranty is only valid in the country in which the camera was purchased Should the product fail or malfunction while you are abroad the manufacturer assumes no responsibility for servicing the product locally or bearing the expenditure incurred therefore Playback on Television in Other Regions Playback is possible on televisions or monitors equipped w...

Page 116: ... adhere to the inside of the covers while they are open Dry the inside of the covers before use Do not leave the camera in places where there are extremes of temperature or humidity such as in a closed car at the seashore or in a bathroom If any foreign object metal water liquid gets inside the camera stop using the camera immediately Turn the power off remove the battery and memory card and consu...

Page 117: ...denly condensation may occur in the camera resulting in troubles such as fogging of the glass surface or malfunctions of the camera If this occurs place the camera in a bag to slow the temperature change as much as possible Take it out of the bag after the temperature difference from the atmosphere has decreased to a fairly small amount If condensation occurs remove the battery and memory card and...

Page 118: ...n no longer be used Note that the camera clock will be reset after the battery has been removed for about a week Reset the clock before use When storing for an extended period of time charge for 30 minutes at least once a year draining it complete before storing it again Store the battery in a cool dry place A temperature range of 15 C to 25 C is optimal Avoid extremely hot or cold locations Do no...

Page 119: ...mage the seal impairing water resistance If the foreign matter can not be removed or the seal is damaged request replacement from a Ricoh repair center To ensure continued water resistance it is recommended that the rubber seal be replaced once every two years whether it is damaged or not Replace the seal once a year if you regularly use the camera underwater or in locations exposed to sand or dus...

Page 120: ...ls including mothballs or other insect repellent for long periods of time Places with strong magnetic fields near a monitor transformer magnet etc Store your camera in a dust free camera bag etc to prevent dust or dirt from getting on the camera Also avoid carrying the camera without a case in your pocket etc to help to keep free from dust or fiber particles Remove the battery if you are not going...

Page 121: ...e customer whether or not they are incurred during the warranty period 6 This warranty only applies to the camera and not to the accessories such as the case and strap nor does it apply to the battery and other consumables provided 7 Any consequential damages arising from failure of the camera such as expenses incurred in taking pictures or loss of expected profit will not be reimbursed whether th...

Page 122: ...dealer or an experienced radio TV technician for help FCC 15 105B Changes or modifications not expressly approved by the party responsible for compliance could void the user s authority to operate the equipment FCC 15 21 Properly shielded and grounded cables and connectors must be used for connections to host computer in order to comply with FCC emission limits FCC 15 27 An AC adapter with a ferri...

Page 123: ...nt 73 Date Settings 25 82 Delete 34 Delete Button 16 34 Digital Zoom 28 57 Digital Zoom Image 57 82 Direct Print 84 DL 10 89 DPOF 66 77 E Enlarged View 33 Error Messages 98 Exposure Compensation 73 Exposure Compensation Button 16 30 Exposure Metering 72 Eye Fi Card 19 22 Eye Fi Host ID 83 Eye Fi Settings 83 F Favorites 32 Favorites Button 16 32 43 44 Fireworks 38 Flash 15 29 50 Flash Dial 16 29 Fo...

Page 124: ...k Playback Menu 36 75 Quick Shooting Menu 36 71 R Rate 32 Rechargeable Battery 20 22 Red eye Reduction 73 Reorder Favorites 67 77 Reset Premium Shot Settings 74 Resize 76 Restore Defaults 74 S S Cont 53 Save My Settings Premium Shots 44 76 Save Premium Shot 76 SD Memory Card 20 21 109 Select info displayed 36 Self timer 30 Self timer Button 16 30 Self timer Lamp 15 Sepia 39 Setup Menu 78 Shake Cor...

Page 125: ...124 V Video Out Mode 82 Vignetting 74 Volume Settings 36 81 W White Balance 51 73 Z Zoom 28 Zoom Lever 15 28 31 33 ...

Page 126: ...d innerhalb Deutschlands 06331 268 438 außerhalb Deutschlands 49 6331 268 438 France à partir de la France 0800 88 18 70 en dehors de la France 33 1 60 60 19 94 Italia dall Italia 02 4004 7319 dall estero 39 02 4004 7319 España desde España 900984912 desde fuera de España 49 6331 268 440 http www service ricohpmmc com ...

Page 127: ...icoh Offices RICOH COMPANY LTD 3 2 3 Shin Yokohama Kouhoku ku Yokohama City Kanagawa 222 8530 JAPAN http www ricoh com r_dc RICOH AMERICAS CORPORATION 5 Dedrick Place West Caldwell New Jersey 07006 U S A 1 800 22RICOH http www ricoh usa com RICOH INTERNATIONAL B V EPMMC Oberrather Straße 6 D 40472 Düsseldorf GERMANY innerhalb Deutschlands 06331 268 438 außerhalb Deutschlands 49 6331 268 438 http w...

Reviews: