RCA Scenium HD52W140, User Manual
The RCA Scenium HD52W140 television offers a stunning high-definition viewing experience. To help users navigate its features effortlessly, a comprehensive User Manual is available for download, absolutely free, from manualshive.com. Enhance your TV enjoyment by accessing the manual to fully understand all its functionalities.
Share
Download


Reviews:
No comments
Related manuals for Scenium HD52W140

EX-93211
Brand: TOPSCCC Technology Pages: 74

PINT-090T-APL Series
Brand: ICOP Technology Pages: 46

ELI70-IPHW-M
Brand: FDI Pages: 11

LZ-612IR
Brand: Kenwood Pages: 11

RLED4778A
Brand: RCA Pages: 73

VIPA HMI TP 62I-JIDR
Brand: YASKAWA Pages: 49

62M-JID0
Brand: YASKAWA Pages: 53

AFOKAR-08A-RK39
Brand: IEI Technology Pages: 60
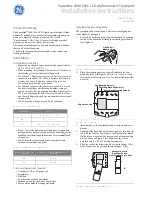
17453- - Motion Sensing Utility Light 1 LED
Brand: GE Pages: 4
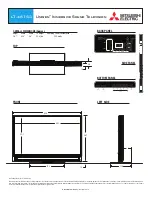
Unisen LT-46153
Brand: Mitsubishi Electric Pages: 2

UN55F7050AF
Brand: Samsung Pages: 34

UN75F6400AF
Brand: Samsung Pages: 2

JPC70
Brand: janitza Pages: 8

i3TOUCH Premium
Brand: i3 Pages: 18

67S-RSL0
Brand: YASKAWA Pages: 69

67S-RRJ0
Brand: YASKAWA Pages: 69

67S-RTP0
Brand: YASKAWA Pages: 73

67P-RTP0
Brand: YASKAWA Pages: 73


