background image

www.rca.com/television

User’s Guide

Changing Entertainment. Again.

Find Inside:


Connecting

 ..............  

page 4


Remote Control

 ......... page 9

• Favorite Channel

 ...... page 14


Sleep Timer

 ................... page 22


Troubleshooting

 .....  

page 31

Summary of Contents for 20F420T

Page 1: ...www rca com television User s Guide Changing Entertainment Again Find Inside Connecting page 4 Remote Control page 9 Favorite Channel page 14 Sleep Timer page 22 Troubleshooting page 31 ...

Page 2: ...e grounding system of the building as close to the point of cable entry as practical Important Stand and Base Safety Information Choose the location for your TV carefully Place the TV on a stand or base that is of adequate size and strength to prevent the TV from being accidentally tipped over pushed off or pulled off This could cause personal injury and or damage the TV Refer to the Important Saf...

Page 3: ...mended international global safety standards for tilt and stability proper ties of its cabinet design Do not compromise these design standards by applying excessive pull force to the front or top of the cabinet which could ultimately overturn the product Also do not endanger yourself or children by placing electronic equipment toys on the top of the cabinet Such items could unsuspectingly fall fro...

Page 4: ... Channel Programming Quick and easy selection of available stations Child Lock FPA Lock Locks the buttons on the front of the TV so it cannot be operated accidentally by young children Closed Captioning Allows you to read TV program dialog or voice conversations as on screen text Off Timer Turns off the TV at a preset time On Timer Turns on the TV at a preset time to a designated TV channel or vid...

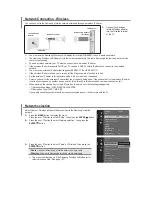
Page 5: ...75 ohm or may include a Cable Box In either case the connection to the TV is easy If your Cable TV signal comes directly via a 75 ohm coaxial cable using the following steps Connect the Cable TV signal to the 75 ohm ANTENNA INPUT jack on the rear of the TV Screw it down tight Plug the TV s power cord into a power outlet and turn on the TV Set TV CATV to CATV as detailed on page 11 Refer to AUTO SE...

Page 6: ...r could lose the authority to operate this equipment if an unauthorized change or modification is made CABLE TV ANTENNA CONNECTIONS Before plugging the UHF VHF Rod Antenna into the ANTENNA INPUT jack check that the pin is not bent If it is bent straighten the pin as illustrated then plug the pin into the jack Straight pin Plug Cable Bent pin Needs to be straightened Some cable TV systems use scram...

Page 7: ...f the VCR or other device Match the cable color to the jack color Turn on the TV and the VCR or other component Press the INPUT button on the remote control until the correct video input channel appears in the upper right corner of the TV screen When you play material on the VCR DVD player etc that is connected to the AUDIO and VIDEO jacks it will appear on the TV on the video input channel The bo...

Page 8: ...fer slightly 1 MENU BUTTON Press to display main menu 2 VOLUME BUTTONS Press to increase decrease the volume 3 CHANNEL BUTTONS Selects channel numbers Selects items in the submenus 4 SENSOR Receives infra red signals from the remote 5 STANDBY LED INDICATOR Lights to show AC power is available 6 POWER BUTTON Turns the TV on and off ...

Page 9: ...ly as marked inside the battery compartment Reattach the battery compartment lid Effectively Using the Remote Control Point the remote control toward the remote sensor on the front of the TV when operating the TV with the remote control Note If you need to replace your remote call 1 800 338 0376 A shipping and handling fee will be charged upon ordering and the appropriate sales tax Have your Visa ...

Page 10: ...screen menu Press to go back to the previous menu or to remove a menu from the screen MUTE Press to mute or restore the TV sound Pressing the volume buttons VOLUME also will cancel mute and restore the sound NOTEPAD Press to display or close the NOTEBOOK window NUMBER Buttons When the TV Cable menu option is in the TV position all channels can be selected by using two buttons For example to select...

Page 11: ...ences Time Setup Language You can set the TV s on screen menu to English French or Spanish Press MENU to see the main menu Press CH or CH to highlight Preferences Press OK to enter the Preferences submenu Language is highlighted Press VOL or VOL to select English Francais French or Espanol Spanish Press MENU repeatedly to exit the menu or the menu will automatically disappear within a few seconds ...

Page 12: ... TV Cable TV CATV It is important for the TV to know what type of signal Cable TV CATV or a normal antenna you are using Choose your signal Antenna or Cable Press MENU to see the main menu Press CH or CH to highlight Setup Press OK to enter the Setup submenu TV CATV is highlighted Press VOL or VOL to select TV or CATV Choose CATV if you have Cable TV service See page 4 for connection details If yo...

Page 13: ...Setting TV Channels You can set your TV to receive local TV channels from an antenna or Cable TV channels when you have Cable TV service Then use Auto Search to set up channels that are available for you This makes it easy for you to select only the available TV stations when you press CH or CH Before you start Auto Search make the Antenna or Cable TV connection described on pages 4 and 5 In the m...

Page 14: ...ress CH or CH to highlight Setup Press OK to enter the Setup submenu TV CATV is highlighted Press VOL or VOL to select TV or CATV whichever you have Details are on page 11 Press CH or CH repeatedly to highlight Channel Press VOL or VOL to enter the channel number at which you want to begin the search Press CH or CH repeatedly to select Manual Press VOL to start searching upward for example startin...

Page 15: ...all these channels easily by pressing the FAV button on the remote control Press MENU to see the main menu Press CH or CH to highlight Setup Press OK to enter the Setup submenu Press CH or CH repeatedly to highlight Favorite List Press OK to display the features of Favorite List TV CATV is highlighted Press VOL or VOL to select TV or CATV whichever you have Press CH or CH to select CH1 the first c...

Page 16: ...o highlight Setup Press OK to enter the Setup submenu TV CATV is highlighted Press VOL or VOL to select TV or CATV whichever you have Details are on page 11 Press CH or CH repeatedly to highlight Channel Press VOL or VOL to enter the channel number you want to add or erase Press CH or CH repeatedly to highlight Add Erase Press VOL or VOL to choose Add or Erase If you select Add the channel will be...

Page 17: ... 00 Blue Back On C Warmth Cool Picture Color 45 Brightness 50 Contrast 50 Sharpness 50 Tint 00 Blue Back On C Warmth Cool Picture Color 45 Brightness 50 Contrast 50 Sharpness 50 Tint 00 Blue Back On C Warmth Cool Picture Color 45 Brightness 50 Contrast 50 Sharpness 50 Tint 00 Blue Back On C Warmth Cool Picture Color 45 Brightness 50 Contrast 50 Sharpness 50 Tint 00 Blue Back On C Warmth Cool Pictu...

Page 18: ...o automatically adjust the TV s Brightness Color Contrast and Sharpness Press PRESETS on the remote control The current preset picture setting will appear on the screen Press PRESETS repeatedly to select Personal Normal Bright or Theater The Personal setting is what you specify with the picture adjustments as described on page 16 Personal is the only picture setting you can change All others are s...

Page 19: ... the Time submenu Press CH or CH repeatedly to highlight Clock Press VOL or VOL to change the time in minutes Press and hold VOL or VOL to change the time quickly in 10 minute increments press OK The highlight moves to the hour position Use VOL or VOL to set the hour Press MENU repeatedly to exit the menu or the menu will automatically disappear within a few seconds if no buttons are pressed on th...

Page 20: ...etails are on page 11 Press CH or CH repeatedly to highlight Channel Press VOL or VOL to enter the channel number This will be the channel to which the TV turns on at the specified time Press CH or CH repeatedly to highlight On Time Press VOL or VOL to select Once Daily or Off If you select Once the timer will turn on the TV one time within the next 24 hours only If you select Daily the timer will...

Page 21: ...VOL or VOL to select Once Daily or Off If you select Once the timer will turn off the TV once If you select Daily the timer will turn off the TV at the same time every day Choose Off to cancel the Off timer Press CH or CH repeatedly to highlight 0 00 under the line of Off Time Press VOL or VOL to enter Off Time Hold down VOL or VOL to change the time quickly in 10 minute increments press OK The hi...

Page 22: ...Setup Closed captioning CC lets you read the voice content of TV programs on the TV screen Designed to help the hearing impaired on screen text boxes will show dialog conversation and activity during TV programming Press MENU to see the main menu Press CH or CH to highlight Preferences Press OK to enter the Preferences submenu Press CH or CH repeatedly to highlight CC Press VOL or VOL to select th...

Page 23: ...current time Press SLEEP repeatedly to set the sleep timer from 120 to 10 minutes in 10 minute decrements After setting the sleep timer press SLEEP once to display the remaining time To cancel the sleep timer press SLEEP until Off appears Within 1 minute of the time set a clock icon will flash to remind you that the TV will turn itself off soon Sleep Timer ...

Page 24: ... view this programming with an accompanying parent or adult guardian It contains one or more of the following intense violence intense sexual situations strong coarse language or intensely suggestive dialog NC17 No children under the age of 17 will be admitted This type of programming should be viewed by adults only It contains graphic violence explicit sex or crude indecent language X Adult only ...

Page 25: ... Password will appear on the screen If you want to set a new code go to steps 6 8 directly You can press the number buttons to enter a four digit code The code 0000 is the default password of the TV If you have not set up a code previously then 0000 is the code Resetting Your Password Press VOL on the remote and the CHANNEL on the front of the TV at the same time Enter New Pwd will appear on the s...

Page 26: ...tal Lock Press MENU to see the main menu Press CH or CH to highlight Preferences Press OK to enter the Preferences submenu Press CH or CH repeatedly to highlight Par Parental Control Press OK to display the password screen Press the number buttons to enter your four digit code The Parental Lock setup menu appears on the screen and the MPAA rating is highlighted Press OK to display MPAA ratings G P...

Page 27: ... your four digit code The Parental Lock setup menu appears on the screen Press CH or CH to highlight TV parental guidelines Press OK to display the parental guidelines TV Y TV Y7 TV G TV PG TV 14 or TV MA Press CH or CH to select a rating Press OK to turn the rating on or off A checkmark appears when the rating is blocked TV Y and TV G can be turned on to block viewing or off to allow viewing only...

Page 28: ... Parental Lock setup menu appears on the screen Press CH or CH to select Master Enable Block Unrated or Block No Rating MASTER ENABLE this is the master switch for Parental Lock When ON all blocking censoring you have set is enabled When OFF all blocking is disabled BLOCK UNRATED All unrated programs based on Movie Ratings or TV Ratings will be blocked if this feature is ON and MASTER ENABLE is ON...

Page 29: ...r off FPA Lock Choose On to disable all the buttons on the front of the TV FPA Lock On will appear on the TV screen each time you press the buttons on the front of the TV You can still operate the TV with the remote control You can still use the POWER button on the front of the TV but only to turn off the TV not on Set FPA Lock to Off to cancel this feature so you can use the buttons on the front ...

Page 30: ...age will be displayed on the screen first when the TV is turned on If you select this icon the notebook window with the stored message will not be displayed on the screen when the TV is turned on If you want to display the message at a specified time select the icon and proceed with these steps Press CH CH and VOL VOL to select OFF Press OK to turn OFF into AM 12 00 Press CH or CH to change the ti...

Page 31: ...the calendar Press VOL or VOL to display a previous or future month e g MAY Press CH or CH to to display a previous or future year e g 2004 Press MENU repeatedly to exit the menu or the menu will automatically disappear within a few seconds if no buttons are pressed on the remote control ...

Page 32: ...CR No picture no sound butTV is on Maybe the signal type is set wrong Go to page 11 for more instructions You may have the wrong video input channel selected Go to the INPUT button description on page 9 Sound okay picture poor Check antenna connections Make sure all of the cables are firmly connected to the jacks Try adjusting sharpness to improve weak signals Go to page 16 for more instructions B...

Page 33: ...nothing has fixed your problem try rebooting your TV Note that after a reboot you may need to run your TV through the setup process again To do a reboot unplug the power cord from the wall outlet power strip etc Keep your TV unplugged for about 5 minutes Then plug the TV back in turn on the TV and see if the problem is fixed If the problem remains then please visit www rca com television for updat...

Page 34: ...arranty Limited Warranty What your warranty covers Defects in materials or workmanship For how long after your purchase 90 days from date of purchase for labor charges One year from date of purchase for parts Two years from date of purchase for the picture tube What we will do Pay any Authorized RCA Television Service Center the labor charges to repair your television Pay any Authorized RCA Televi...

Page 35: ...ranty coverage Limitation of Warranty THE WARRANTY STATED ABOVE IS THE ONLY WARRANTY APPLICABLE TO THIS PRODUCT NO VERBAL OR WRITTEN INFORMATION GIVEN BY TTE TECHNOLOGY INC ITS AGENTS OR EMPLOYEES SHALL CREATE A GUARANTY OR IN ANY WAY INCREASE OR MODIFY THE SCOPE OF THIS WARRANTY REPAIR OR REPLACEMENT AS PROVIDED UNDER THIS WARRANTY IS THE EXCLUSIVE REMEDY OF THE CONSUMER TTE TECHNOLOGY INC SHALL ...

Page 36: ...erference in a residential installation This equipment generates uses and can radiate radio frequency energy and if not installed and used in accordance with the instructions may cause harmful interference to radio communications However there is no guarantee that interference will not occur in a particular installation If this equipment does cause harmful interference to radio or television recep...

Reviews: