background image


RHB-B41/B/P/V


4-In-1 USB Handheld Blender 4合1無線手提攪拌機


僅適用於家庭使用


  For household use only


使用說明書 

OPERATION MANUAL 

•  在使用本產品前,請仔細閱讀本說明書。閱讀後小心收藏,以備日後查閱。   

Please read the operation manual carefully before using. Keep it in a safe place for future reference. 

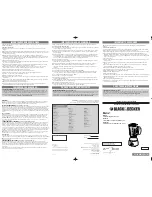
•  本說明書中的圖示可能與實物有不同的地方,僅供參考。   

Some figures in this manual may not match with the real object, just for reference only. 


Summary of Contents for RHB-B41/B

Page 1: ...use only 使用說明書 OPERATION MANUAL 在使用本產品前 請仔細閱讀本說明書 閱讀後小心收藏 以備日後查閱 Please read the operation manual carefully before using Keep it in a safe place for future reference 本說明書中的圖示可能與實物有不同的地方 僅供參考 Some figures in this manual may not match with the real object just for reference only ...

Page 2: ...1 非常感謝您選購樂信牌4合1無線手提攪拌機 為了使我們的產品能全心全意的 為您服務 在使用前請先詳細閱讀本說明書 並保存以備日後參考 目錄 1 安全注意事項 2 保養 清潔及儲存 3 產品規格 4 產品結構 5 使用方法 6 故障排除 7 特別聲明 8 售後服務 ...

Page 3: ...的獨立電源單元將本產品連接到電源 4 請將隨附的 USB 充電線插入直流 5 伏特 1 安培的 USB 充電器 本產品並不包括此配件 及插 座 為產品充電 1 2 使用時 1 必須在穩固 平坦和水平的表面上放置或使用本產品 切勿在以下環境使用 潮濕或靠近水源的地方 高溫或受陽光直接照射的地方 靠近熱源 如焗爐或電磁爐等 或火源的地方 不平穩的表面 易燃物料或非耐熱物品附近 如地毯 紙品 檯布 窗簾及毛巾等 2 各配件的每次最長運作時間請參考章節5 使用方法 3 加入食物前 檢查刀片座是否安裝到位及能否自由運轉 如發現刀片座不能轉動 轉動緩慢 須檢查攪拌容器內是否有障礙物或食材超出 MAX 指示線 如發現以上情況 先將障礙物或 過多的食材取出 ...

Page 4: ...攪拌機容器時 小心產品有可能會噴出蒸氣或有液體濺出 引致損 傷 8 使用過程中 切勿用重物壓住按鍵令產品在無人看管情況下或空載時工作 否則 產品過熱可 能會導致火災或自燃等危險 9 如果刀片被卡住 應立即停止使用 切勿試圖將手指伸進攪拌機容器中 使用橡皮刮刀取出阻 礙刀片轉動的食材 否則 可能會導致受傷 10 本產品不適用於處理較硬的食材 例如 有骨的肉類 尚未解凍的食物 咖啡豆 胡椒 冰塊 或黏性食物 如要處理有果核的水果 請先去除果核 1 3 使用後 1 刀片座的刀相當鋒利 取出刀片座或清空攪拌容器時應特別小心 以免造成損傷 2 當不使用本產品 拆除或裝設配件及清洗前 必須先關機 3 注意 確保機件已關掉才提起主機 4 使用一段時間後 產品或配件可能會出現染色問題 此乃食材本身的色素所致 屬正常現象 無 損健康 並不影響使用 ...

Page 5: ... 切勿將攪拌容器放入微波爐加熱 或放入洗碗碟機清洗 或用乾碗機烘乾本產品及其配件 否 則可能導致產品燃燒 變質或故障 4 移動產品時 必須用雙手握緊容器及主機 使用單手移動有可能造成產品掉落 引致配件損毀 或身體受傷 如攪拌容器載有熱的液體 移動時須份外小心 5 保持產品清潔及不沾油污 以免引起火災 6 切勿讓嬰兒靠近 若有孩童在旁 須加倍小心使用及看管小孩 以確保他們不會把此產品當作 玩具 切勿讓小孩單獨使用或進行保養 亦切勿將本產品及其充電線放於小孩能觸及的地方 7 本產品只供家庭使用或類似環境使用 如商戶內部 辦事處和其他類似工作環境的員工廚房區 域 切勿在室外使用或用作說明書建議以外的其他用途 否則 有可能發生故障或產生危 險 如不當使用本產品 或作為 半 商業用途 維修保養將告無效 本公司將不會承擔任 何損壞的維修責任及賠償 ...

Page 6: ...及令保修服務無效 10 USB充電線上不可放置重物 切勿改裝 用力拉扯或扭曲USB充電線 插入或拔出USB充電器 時 應用手握穩USB充電器 不可抓住USB充電線 USB充電器要牢固地插入插座内 否則 或會因USB充電器異常而導致觸電或火災 11 切勿在USB充電線纏結的情況下使用本產品 或將USB充電線懸挂在桌子 櫥櫃邊緣或讓其接 觸發熱表面 否則會損壞產品及其USB充電線 12 如無人看管且在組裝 拆卸或清潔之前 請務必拔出USB充電線以斷開電源 2 保養 清潔及儲存 2 1保養及儲存 1 每次使用本產品後 請及時清洗以備下次使用 2 切勿使用鋼絲刷 研磨性清潔劑或腐蝕性的液體 如汽油或丙酮 清潔本產品 3 切勿將主機座浸入水中或其他液體中 亦不可在水龍頭下或放入洗碗機內沖洗 4 清潔前請關閉本產品及供應本產品的 電源開關 掣 5 待主機停止轉動後 才取下可拆卸的配件 ...

Page 7: ... 請放置於通風的環境中 以免產生異味 8 如長期不使用本產品 請拔掉USB充電線 並於清潔後套上塑膠袋 藏於乾爽及避免紫外光直接 照射的環境 9 若長時間不使用產品 請每三個月進行一次充電 防止電池老化 10 不要用天拿水 汽油 去污粉 硬質刷及不銹鋼絲球等來清潔配件 以免刮花或腐蝕部件表 面 致產生異味或滋生細菌 11 請勿使用尖銳的物品來清潔本器具 例如牙籤或針 2 2 產品配件清潔注意事項 配件 擦拭 沖洗 浸洗 洗碗機 備註 攪拌棒組件 不可浸水 打蛋器 打蛋器配接器 不可浸水 切碎容器蓋 不可浸水 切碎刀座 切碎容器 攪拌杯蓋 攪拌杯 ...

Page 8: ... 直流 7 4 伏特 額定功率 150 瓦 充電電池種類 鋰離子電池 額定充電池容量 2000 毫安時 輸入電壓 電流 直流 5 伏特 1 安培 轉速 15000 至 20000 轉 分鐘 充電時間 約 2 3 小時 使用時間 約 不同配件的使用時間請查看章節 5 使用方法 攪拌杯容量 約 400 毫升 產品尺寸 闊 x 深 x 高 約 主機 打蛋器組件 53 x 43 x 406 毫米 主機 切碎容器組件 106 x 106 x 320 毫米 主機 攪拌棒 59 x 59 x 372 毫米 淨重 約 1 14 公斤 ...

Page 9: ...8 4 產品結構 1 USB充電口 USB膠塞 7 攪拌杯 2 啓動開關 8 打蛋器配接器 3 電源開關 9 打蛋器 4 主機 10 切碎容器蓋 5 攪拌棒配件 11 切碎容器 6 攪拌杯蓋 12 切碎刀座 13 USB充電線 ...

Page 10: ...9 5 使用方法 5 1 攪拌器的組裝 此配件適合製作加工醬汁 濃湯 蛋黃醬 以及混合飲料 果汁 奶昔等 將攪拌棒配件插入主機 逆時針旋轉扣緊到位 攪拌器組裝完成 5 2 攪拌器的使用 將食物切成不大於1 5 x 1 5 x 1 5立方厘米塊狀放入攪拌杯中 再加入清水 以果汁杯的刻度為準 最大容量400毫升 水溫不超過50 ...

Page 11: ...10 一手握住攪拌杯 另一隻手握緊攪拌器放入攪拌杯中 長按 電源開關 約 2 秒 藍色指示燈亮起藍燈後 鬆開 電源開關 然後長 按 啟動開關 攪拌器將開始運作 為了更好的攪拌效果 可將攪拌器慢慢 上下移動 讓食物得到均勻分的混合 鬆開 啓動開關 攪拌器將停止運 作 ...

Page 12: ...11 注意 1 連續運作時間不能超過 1 分鐘 連續運作 1 分鐘後 必須停機 2 分鐘 然後 再使用 2 以運作1分鐘及停機2分鐘為一個循環 連續運作5個循環後必須停機30分 鐘 待主機充分冷卻後再運作 5 3 打蛋器的組裝 將打蛋器插入打蛋器配接器中 然後插入主機 逆時針旋轉扣緊到位 打蛋 器組裝完成 ...

Page 13: ...12 5 4 打蛋器的使用 將雞蛋清倒入攪拌杯內 或含雞蛋黃 雞蛋都放入攪拌杯內 將一隻手握緊攪拌器放入攪拌杯中 另一隻手握住攪拌杯 ...

Page 14: ...13 長按 電源開關 約 2 秒 藍色指示亮起 然後長按 啓動開關 打蛋器將 開始運作 鬆開 啓動開關 打蛋器將停止運作 注意 1 攪打蛋清時 攪打至起泡無液體狀為最佳 攪打蛋清與蛋黃的混合液時 以 攪拌混合均勻即可 2 連續運作時間不能超過 3 分鐘 3 分鐘後必須停止主機運作 30 分鐘 待主 機充分冷卻後再運作 ...

Page 15: ...14 5 5 切碎器的組裝及使用 此配件特別適合用於切碎肉類 薑蒜粒 洋蔥 胡蘿蔔 辣椒 香草等 將切碎刀座放入切碎容器內的刀軸上 將食物切成不大於 2 x 2 x 2 立方厘米塊狀 最大分量不超過切碎容器的 MAX 的刻度 蓋上切碎容器蓋組件 並順時針旋轉扣緊到位 ...

Page 16: ...示燈亮 起 鬆開 電源開關 長按 啓動開關 切碎器將開始運作 停止運作後 切勿立即提起主機 確保刀片已經停止轉動及關上電源後 才 可提起主機 當食物切碎至預期效果後 鬆開 啓動開關 待刀片停止轉動後 打開容器 蓋 倒出食材 注意 1 處理食材時 最大份量不能超過 MAX 刻度 2 本配件每次連續工作時間不能超過 30 秒 每次加工 30 秒後需要休息 2 分鐘 3 以工作 30 秒間隔 2 分鐘為一個週期 連續工作 3 個週期必須間隔 30 分鐘 待主機 冷卻後再工作 ...

Page 17: ...機最大使用量 攪拌杯 最大使用量 加工時間 秒 胡蘿蔔 不大於 1 5 x 1 5 x 1 5 立方厘米 段 160 克 食材 160 克 水 240 克 切碎 15 30 攪拌 40 60 蘋果 切成 10 14 瓣 160 克 食材 160 克 水 240 克 切碎 20 30 攪拌 40 60 雞蛋清 4 隻雞蛋 60 瘦肉 2 x 2 x 2 立方厘米 塊 150 克 60 洋蔥 切成 12 16 瓣 100 克 10 15 大蒜 剝瓣 100 克 15 30 辣椒 50 克 10 15 使用提示 1 切碎肉類時 建議一次分量不多於 100 150 克 使用時間為 15 30 秒效果更 佳 ...

Page 18: ... 加工芹菜 包菜類等食材 請儘量切小段 加工量一次不多於 50g 使用時 間為 10 20 秒效果最佳 4 切碎器對此類食物切碎效果較佳 不帶筋的精牛肉 不帶皮且肥肉少的豬瘦 肉 5 若沒有長按 電源開關 直接按下 啓動開關 主機顯示燈將會出現紅色閃 燈 表示 並沒有開啓 電源開關 5 7 產品充電説明 注意 產品必須拆除配件後再進行充電 請使用直流電 5 伏特 1 安培或 1 安培以下的充電插頭 本產品沒有配備 USB 充電器插頭 給本產品充電 充電過程中紅色指示燈常亮 充滿電後 變為藍色指示燈常亮 產品充電時 不能啓動工作 ...

Page 19: ... 主機與配件沒有安裝好 參考章節 5 使用方法 正確安裝配件 攪拌杯 切碎容器中的食物 過多 減少攪拌 切碎的食物量 詳情可參考 章節 5 使用方法 食物尺寸太大 調整食物的尺寸 刀片上黏有食物 使用抹刀輕輕刮除黏在刀片上的食物 產品工作時間過長 摩打 開啓溫度控制保護 停止運作約 20 至 30 分鐘後重新啟動 本產品 異常振動或者噪音過大 主機與配件沒裝配到位 將配件取出 重新安裝 食材過量 暫停主機 取出多餘食材 切碎機停止操作 切碎容器蓋未正確鎖上 確保切碎容器蓋及切碎容器已正確組 裝 攪拌棒或打蛋器停止操作 攪拌棒或打蛋器組件未正 確安裝 確保將攪拌棒或打蛋器鎖定到位 ...

Page 20: ...以製造商資料為準 3 如本資料之中英文版本有差異時 應以中文版為準 4 使用說明書的電子副本可以通過電子郵件發送致客戶 如有需要 可致電信 興電工工程有限公司 28612767 8 售後服務 1 由購買收據日期起之一年保修期內 經信興電器服務中心有限公司之服務人 員證實產品故障屬於正常使用之情況下發生者 本公司將提供免費維修或更 換零件服務 經更換之任何損壞零件 將歸屬本公司所有 保修範圍不包括修 理或更換產品之損耗性零件等 2 用戶必須於維修時出示購買收據 換購收據及蓋有銷售點 換購中心印章的產 品保修記錄卡 如有任何疑問 請致電信興電器服務中心有限公司熱線 2406 5666查詢 ...

Page 21: ...20 ...

Page 22: ...ion manual carefully before using and keep this manual for your future reference Table of Contents 1 Important Safeguards 2 Maintenance Cleaning and Storage 3 Product Specifications 4 Product Descriptions 5 Operation Instructions 6 Troubleshooting 7 Special Avowal 8 After Sales Service ...

Page 23: ...fic separated power supply unit is required to connect this appliance to power supply 4 Please insert the provided USB charging cable to DC5V 1A adapter not supplied with the appliance and power socket to charge the appliance 1 2 When using the appliance 1 Always place or use the appliance on a stable flat and horizontal surface Never operate the appliance in following places Humid environment or ...

Page 24: ...and accessories with hot water over 50 C 5 Do not operate the appliance without the container lid otherwise it may cause injury 6 Do not put your finger or utensils such as spoon fork etc into the container during operation Otherwise it may cause injury electric shock or fire 7 CAUTION Be careful when pouring hot liquid into the container as small amount of liquid or steam may be spilled out causi...

Page 25: ...The appliance and accessories may get stained after using periods of time It is because ingredients contain pigment itself This is a normal phenomenon causing no harm to human body 5 Never immerse the main body USB charging cable into water or let them wet as it will affect its safety performance or cause electric shock 6 Do not process the amount of ingredient which exceeds MAX level of the conta...

Page 26: ...ach for infants Great care is necessary in using the appliance especially near children Make sure that they do not play with the appliance Also children without adult supervision should not operate the appliance or do maintenance and keep them away from the appliance and its cord 7 The appliance is intended to be used in household or similar applications such as staff kitchen areas in shops office...

Page 27: ...any unauthorized parts other than the supplier otherwise it can cause hazards and the warranty will become invalid 10 Do not put heavy objects on the USB charging cable Never clip modify stretch or twist the USB charging cable Make sure to grasp the USB adapter itself when plug in or unplug the appliance rather than grasping the USB charging cable Inset the USB adapter firmly to the socket otherwi...

Page 28: ...e cleaning 5 After the main body stops rotating remove the detachable accessories 6 Do not put any accessories of this appliance into the dishwasher for cleaning If necessary wash with a diluted neutral kitchen cleaner The main body can be wiped with a twisted dry soft damp cloth 7 After the main body is cleaned place it in a ventilated environment to avoid peculiar smells 8 If you do not use this...

Page 29: ...f the parts resulting in odor or breeding of bacteria 11 Do not use sharp objects such as toothpick or needles to clean this appliance 2 2 Appliance accessories cleaning CAUTION Accessories Wipe Rinse Dipping Dishwasher Remarks Blender Not submersible Egg whisk Whisk adapter Not submersible Chopper lid Not submersible Blade assembly Container Mixing cup lid Mixing cup ...

Page 30: ...put Voltage Current DC5V 1A Rotation Speed Approx 15000 20000 rpm Charging Time Approx 2 3 hrs Operation Time Approx For the operation time of different accessories please refer to Chapter 5 Operation Instructions Capacity Approx 400 ml Product Size W x D x H Approx Egg whisk Main body 53 x 43 x 406mm Chopper Main body 106 x 106 x 320 mm Blender Main body 59 x 59 x 372 mm Net Weight Approx 1 14 kg...

Page 31: ...ptions 1 USB charging port USB rubber plug 7 Mixing cup 2 ON OFF button 8 Whisk adapter 3 Power button 9 Egg whisk 4 Main body 10 Chopper lid 5 Blender 11 Container 6 Mixing cup lid 12 Blade assembly 13 USB charging cable ...

Page 32: ...1 Blender assembly This accessory is suitable for making processed sauces soups mayonnaise as well as mixed drinks juices shakes etc Insert the blender into the main body and turn the blender counterclockwise to assemble into place ...

Page 33: ... than 1 5 cm3 and put it in the mixing cup then add water the scale of the juice cup shall prevail maximum capacity 400 mL and the water temperature shall not exceed 50 Hold the mixing cup and main body firmly with hands and place the blender into the mixing cup ...

Page 34: ...slowly to make the food more fully mixed release the ON OFF button and the blender will stop operating CAUTION 1 The continuous operating time cannot exceed 1 minute After 1 minute of continuous operation it must be stopped for 2 minutes before use 2 1 minute of work and 2 minutes idle as a cycle After 5 cycles of consecutive work it must be stopped for 30 minutes and the main body must be cooled ...

Page 35: ...e egg whisk into the whisk adapter and then insert the egg whisk into the main body and turn it counterclockwise to lock it in place 5 4 Egg whisk instruction Pour the egg into the mixing cup or with egg yolk egg white all in mixing cup ...

Page 36: ...and place the blender into the mixing cup Long press the Power button about 2 seconds After the blue light is on release the Power button Long press the ON OFF button the whisk will start operating Release the ON OFF button and the whisk will stop operating ...

Page 37: ...nuously over 3 minutes Let the appliance rest and cool down for 30 minutes after a 3 minute operation Otherwise the appliance might be damaged due to overheat 5 5 Chopper assembly This accessory is especially suitable for mincing meat diced ginger and garlic onion carrot chili spice and more Place the blade assembly into the container ...

Page 38: ...iner Close the chopper lid and turn it clockwise to fasten it in place Insert the main body into the chopper lid and installed in place Long press the Power button about 2 seconds After the blue light is on release the Power button Long press the ON OFF button the chopper will start operating ...

Page 39: ...AX line 2 Do not run the chopper continuously over 30 seconds Let the appliance rest and cool down for 2 minutes after a 30 seconds operation otherwise the appliance might be damaged due to overheat 3 Every 30 seconds of work and 2 minutes as a cycle 3 consecutive cycles of operated must be separated by 30 minutes and then operate after the main body cools down 4 Do not place the blade assembly an...

Page 40: ...r 240 g Chopping 20 30 Blending 40 60 Egg white 4 eggs 60 Lean meat 2 x 2 x 2 cm3 150g 60 Onion 12 16 slices 100g 10 15 Garlic remove the peel 100g 15 30 Chili 50g 10 15 Kind tips 1 When mincing meat it is recommended to cut 100 150 grams of meat at a time and it takes 15 30 seconds for better results 2 When cutting hard and tough foods such as carrots apple potatoes peppers etc the processing amo...

Page 41: ...nd lean pork without skin and less fat 5 If you do not press and hold the power button press the ON OFF button directly the indicate light will flash in red Indicates The power button is not pressed on 5 7 Charging Detach all accessories before charging Please connect this appliance to power supplier DC5V 1A or below 1A this appliance is not equipped with an USB adapter to charge this appliance Du...

Page 42: ...ry drained Use it after charging After long pressing the power switch the red light flashes continuously The main body operate normally but the blades cannot rotate The main body and accessories is not correctly installed Refer to Chapter 5 Operation Instructions to install accessories properly Excessive ingredients in blender chopper Refer to operation guidelines put suitable food amount ...

Page 43: ...will turn on the temperature control protection Restart the appliance after about 20 to 30 minutes of inactivity Abnormal vibration or excessive noise The main body and accessories are not properly assembled Remove accessories and reinstall Excessive food Pause the appliance and remove excess ingredients Chopper stops operating Chopper container lid is not properly locked Make sure the chopper con...

Page 44: ...nding on the content 2 If there are technical improvements on the appliance the operation manual will be updated in new version without prior notice The product appearance and specification are subject to the manufacturer information 3 In case there is any inconsistency or conflict between the English versions and Chinese versions of the terms the Chinese versions shall prevail 4 The e copy of use...

Page 45: ...in one year guarantee period commencing from the date of purchase Any defect part which has been replaced shall become our property Guarantee service does not cover the repair or replacement of consumable parts etc 2 User must present the official invoice redemption voucher and the product warranty card with the chop from sales point redemption center for maintenance For enquiries please call Shun...

Page 46: ... shesc com zh 11 F Shun Hing Centre 2 Shing Yiu Street Kwai Chung N T H K Tel 2406 5666 Fax 2408 0316 Website http www shesc com en 客戶服務中心 香港新界葵涌勝耀街2號信興中心1樓 九龍尖沙咀東部麼地道67號半島中心B座9樓 香港天后琉璃街7號柏景中心22樓 澳門慕拉士大馬路193 199號南嶺工業大廈5樓I座 Customer Service Centre 1 F Shun Hing Centre 2 Shing Yiu Street Kwai Chung N T 9 F Block B Peninsula Centre 67 Mody Road Tsim Sha Tsui East Kowloon 22 F Parkview Centre 7 Lau Li...

Reviews: