


TMCAT QSG
1
QSG-TMCAT-0D-v1.0-E
255-37-0122-00 RoHS
TMCAT17®
Quick Setup Guide
Thank you for your purchase of the TMCAT17
™
, a 1U 17" LCD KVM switch, which enables you to control multiple
computers through a set of keyboard, touchpad (or mouse), and monitor.
This Quick Setup Guide explains how to install and configure the TMCAT17. For additional information on any aspect of
TMCAT17, see the TMCAT17 User Guide, which can be downloaded from the Firmware and Documentation section
(http://www.raritan.com/support/firmware-and-documentation/) of Raritan's website. Or you can access the product's
online help in the Product Online Help section (http://www.raritan.com/support/online-help/).
Package Contents
TMCAT17 switch x 1
Power cord x 1
Rackmount kit x 1 (including brackets and associated
screws)
* Mounting depth adjustable from 560 to 900 mm
Quick Setup Guide x 1
Warranty card x 1
If anything is missing or damaged, contact the local dealer or
Raritan Technical Support for help.
QS Rule
Structure Diagrams
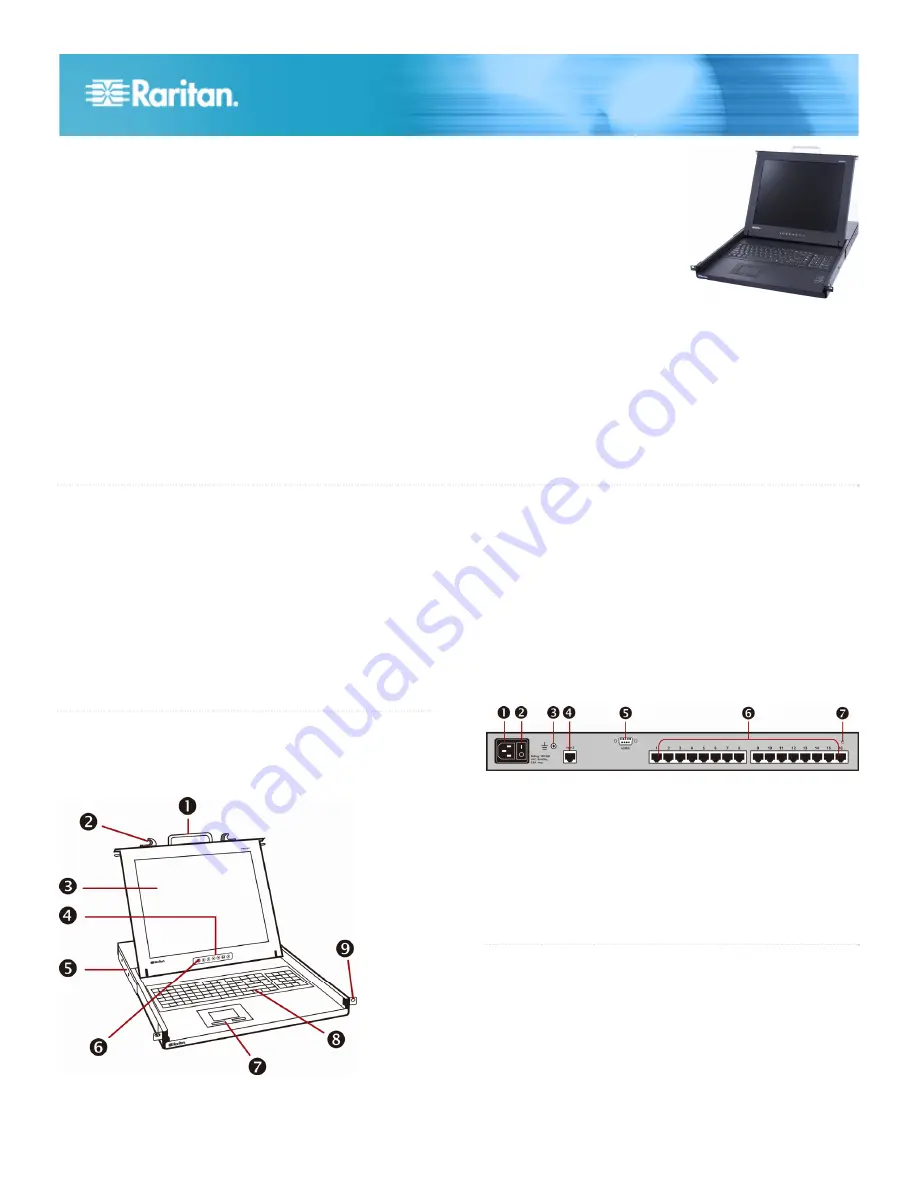
Front View
1. Handle
2. Latches
3. LCD display
4. LCD controls
5. Support brackets
6. LCD power switch and LED
7. Touchpad mouse and buttons
8. Keyboard
9. Mounting ears
Rear View
1. Power socket
2. Power switch
3. Ground screw
4. User 2 port
5. Admin port
6. Channel ports (8 or 16 ports, depending on the model you
purchased)
7. Reset button
QS Rule
Before Installation
It is very important to locate the TMCAT17 in a suitable
environment.
The surface for placing and fixing the TMCAT17 should be
stable and level or mounted into a suitable cabinet.
Make sure the place has good ventilation, is out of direct
sunlight, away from sources of excessive dust, dirt, heat,
water, moisture, and vibration.


