Ranger Wheelchair, Owner'S Manual
The Ranger Wheelchair's comprehensive Owner's Manual is essential for understanding the product's features and functionality. Available to download for free, it provides users with detailed assembly instructions, maintenance tips, and troubleshooting guidance. Visit our website today to access the manual and unlock the full potential of your Ranger Wheelchair.
Share
Download


Reviews:
No comments
Related manuals for Wheelchair
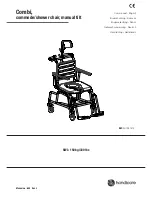
Combi
Brand: Handicare Pages: 32

15204003
Brand: Vela Pages: 2

e-fix
Brand: Alber Pages: 50

Ibis 24
Brand: Handicare Pages: 52

11101W-2
Brand: Drive Medical Pages: 2

Boss
Brand: PaceSaver Pages: 44

CH1044
Brand: EZee Life Pages: 6

MR4588
Brand: WARDRAY PREMISE Pages: 15

MPDC-250
Brand: marsden Pages: 12

KM 7520
Brand: Karma Pages: 16

Pluton 1
Brand: Zippie Pages: 172

ANI-RC440
Brand: Days Pages: 18

MURANO 10
Brand: HJH office Pages: 2

S13966
Brand: HERO Pages: 3
Varilite Icon Mid Back
Brand: ALLIED MEDICAL Pages: 5

SE09
Brand: Vermeiren Pages: 12

V300 DL
Brand: Vermeiren Pages: 176

Custom Cushion 2
Brand: Ride Pages: 7


