Ranger design C4-PA18-8, Installation Manual
The Ranger design C4-PA18-8 is a versatile and durable product designed for easy installation. For step-by-step instructions on how to properly assemble and install this product, make sure to download the free Installation Manual from manualshive.com. This manual provides detailed guidance to ensure a seamless setup process.
Share
Download


Reviews:
No comments
Related manuals for C4-PA18-8
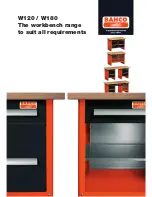
W120
Brand: Bahco Pages: 4

4065
Brand: X-METAL Pages: 36

PowerStor L200
Brand: Quantum Pages: 9

F2000
Brand: Quantum Pages: 2

DX3000
Brand: Quantum Pages: 11

Scalar 10K
Brand: Quantum Pages: 7

ATL M1500
Brand: Quantum Pages: 10

Scalar i500
Brand: Quantum Pages: 8

DAT 160
Brand: Tandberg Data Pages: 58

ValueLoader DLT VS80
Brand: Quantum Pages: 50

DV-HD60
Brand: Edirol Pages: 1

HAWK 2 ST11900W
Brand: Seagate Pages: 40

ST3250621NS
Brand: Seagate Pages: 54

120008
Brand: Far Tools Pages: 11

TrueNAS R Series
Brand: iXsystems Pages: 24

StoreJet 35T
Brand: Transcend Pages: 24

Deskstar 34GXP
Brand: IBM Pages: 2

H-1229
Brand: U-Line Pages: 5


