1
16
© 2004
Standard Features:
Two 4- Button Remote Transmitters
Status indicator (LED)
Valet / override switch
Multi-tone siren (120dB)
Dual stage impact detector
Remote panic
Remote chirp mute
Remote sensor bypass
Passive or active arming
Optional Features:
Starter disable
Flashing parking lights
Keyless entry
Remote trunk or hatch release
Illuminated entry
Hood and trunk protection
Remote auto start
Power window roll up
Back-up battery w/charging circuit
Glass Sensor
Microwave sensor
Note:
Some features may require additional parts
and labor, and may not be appropriate for certain
vehicles. Consult your authorized dealer.
System Operation
ARMING OPERATION
To arm the system press transmitter button 1:
• The siren will chirp once.
• The parking lights will flash once.*
• The doors will lock.*
• The LED will turn solid for 10 seconds
then start flashing slowly. After 10
seconds the system is armed.
After Arming, if the system detects a bad sensor
or an open zone, the siren will chirp and the
parking lights will flash 4 times to indicate a
zone is open. The system will ignore that input,
but keep all other areas protected.
While Armed, the system will trigger if:
• The doors are opened.
• The shock sensor detects an impact to
the vehicle.
• The hood or trunk is opened.
When triggered, the siren will sound, the horn
will honk*, and the parking lights will flash* for
30 seconds.
If the same input triggers the system 3 times
during a single arming cycle,the system will bypass
that input, keeping the other zones protected,
until the next time the system is armed.
If the shock sensor detects a light impact to the
vehicle, the siren will chirp and the parking
lights will flash 5 times to warn away the
potential intruder.
*
Optional Feature
2R / 4-BUTTON SERIES
VEHICLE SECURITY SYSTEM
Button
1
Button
2
Button
3
Button
4
WHITE -
BLANCO
(+/-)
BROWN -
CAFE
ORANGE -
NARANJA
BLACK -
NEGRO
(-)
YELLOW -
AMARILLO
(+)
GREEN -
VERDE
(-)
VIOLET-
VIOLETA
(+)
GRAY -
GRIS
(-)
BLUE -
AZUL
(-)
BLACK/WHITE -
NEGRO/BLANCO
(-)
BROWN/WHITE -
CAFE/BLANCO
(-)
RED -
ROJO
(+)
HORN -
CLAXON
SIREN -
SIRENA
LIGHTS -
LUCES
DOME LIGHT -
LUZ DE CABINA
DOOR -
PUERTA
(-)
DOOR -
PUERTA
(+)
IGNITION -
IGNICION
(+)
TO BATTERY -
A
BATERIA
(+)
TRUNK/HOOD -
MALETA/CAPOT
(-)
GROUND -
TIERRA (-)
BLUE -
AZUL
(-)
GREEN -
VERDE
(-)
LED
VALET -
INTERRUPTOR DE VALET
SHOCK SENSOR -
SENSOR DE IMPACTO
+12V
TO STARTER -
PARA MARCHA
IGNITION -
IGNICION
CUT -
CORTE
X
AUXILIARY -
SALIDA AUXILIER
ARMED OUTPUT -
SALIDA ARMADO
= RELAY -
RELEVO
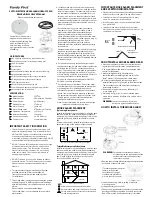
WIRING DIAGRAM -
DIAGRAMA DE INSTALACION
64-21.50 10/03 Rev. 2
PARKING LIGHT JUMPER -
INTERRUPTOR DE LUCES
jump
POSITIVE -
POSITIVO
jump
NEGATIVE -
NEGATIVO
BW2150 art dept.qxd 1/27/2004 3:47 PM Page 1


