background image

OWNER’S MANUAL

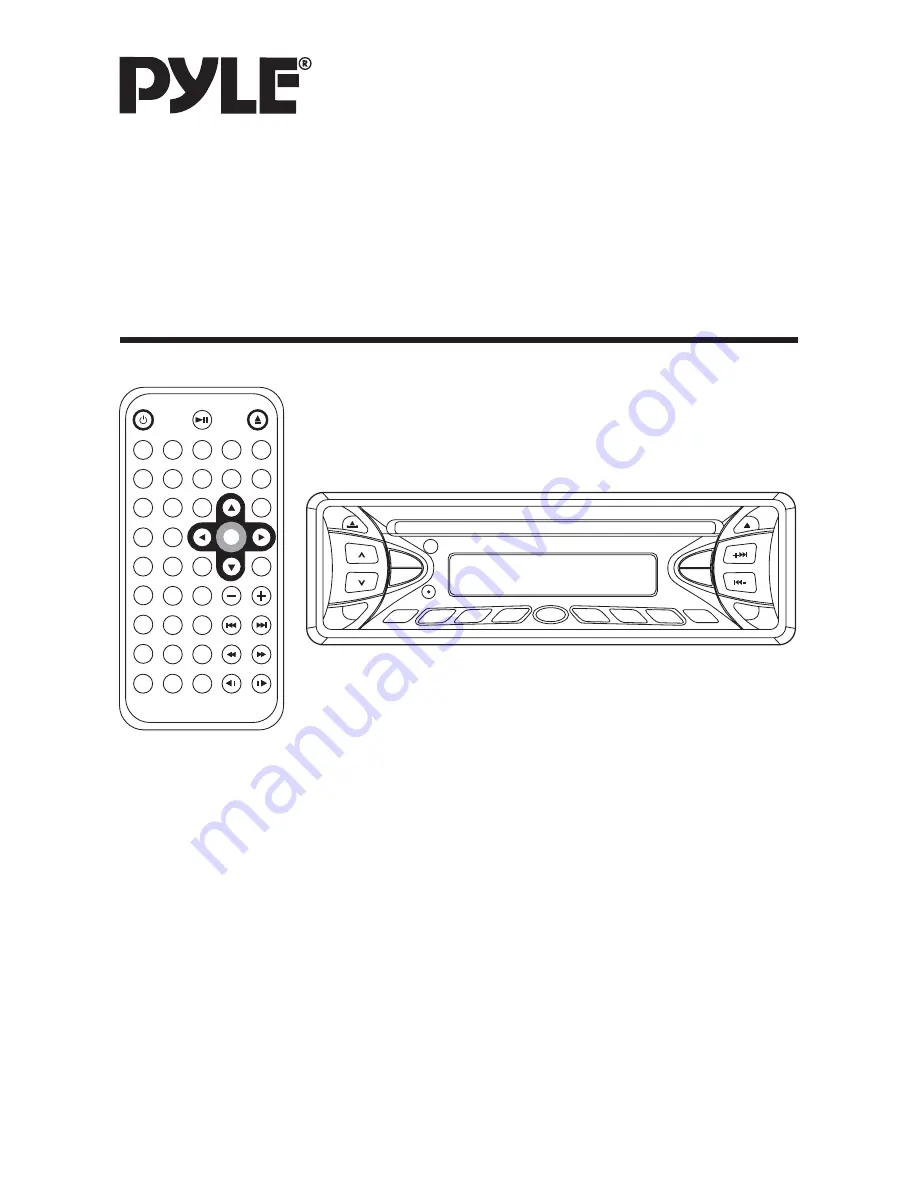
Mobile Audio/Video System

  •

Digital Audio Out-Coaxial

  •

PLL Synthesizer Stereo Radio

  •

DVD Player

 •

Automatic Memory Storing

  •

Full Detachable Panel

  •

Preset Equalization

  •

Multi-subtitle Languages Function

  •

Multi-audio Languages Function

  •

Multi-angle Function

  •

Parental Control

  •

Remote Control

  •

XM Function

www.pyleaudio.com

PLDVD199XM

Summary of Contents for PLDVD199XM

Page 1: ...l PLL Synthesizer Stereo Radio DVD Player Automatic Memory Storing Full Detachable Panel Preset Equalization Multi subtitle Languages Function Multi audio Languages Function Multi angle Function Parental Control Remote Control XM Function www pyleaudio com PLDVD199XM ...

Page 2: ...moisture This could cause electrical shorts fire or other damage When Parked Parking in direct sunlight can produce very high temperatures inside your vehicle Give the interior a chance to cool down before starting playback Use the Proper Power Supply This product is designed to operate with a 12 volt DC negative ground battery system the regular system in a North American car Protect the Disc Mec...

Page 3: ...emote Control 14 Preparing the Remote Control 14 Loading Ejecting a disc 14 Loading a disc 14 Ejecting a disc 14 Operation 15 Basic Operation 15 Radio Operation 16 XM Operation 16 Disc DVD VCD CD MP3 Operation 17 AV IN Operation 22 Setup 23 Initial Setup 23 General Setup 23 Speaker Setup 25 Audio Setup 25 Preferences Setup 26 Defaults Table 29 Trouble Shooting 30 Specifications 31 ...

Page 4: ...IS DEVICE IS INTENDED FOR CONTINUOUS OPERATION This product incorporates copyright protection technology that is protected by method claims of certain U S patents and other intellectual property rights owned by Macrovision Corporation and other rights owners Use of this copyright protection technology must be authorized by Macrovision Corporation and is intended for home and other limited viewing ...

Page 5: ...s benzine thinner or conventional record cleaners as they may mar the surface of the disc Note A disc may become somewhat scratched although not enough to make it unusable depending on your handle it and conditions in the usage environment Note these scratches are not an indication of any problem with the player Preparing New Discs with Rough Spots A new disc may have rough edges on its inside and...

Page 6: ...NT REAR MOUNT This unit can be properly installed either from Front conventional DIN Front mount or Rear DIN Rear mount installation utilizing threaded screw holes at the sides of the unit chassis For details refer to the following illustrated installation methods 30 DIN FRONT MOUNT Method A Installation Opening This unit can be installed in any dashboard having an opening as shown below Installin...

Page 7: ...the other end of metal strap to a solid metal part of the vehicle under the dashboard This strap also helps ensure proper electrical grounding of the unit Note to install the short threading terminal of the mounting bolt to the back of the unit and the other long threading terminal to the dashboard Sleeve Dashboard Screwdriver Tabs INSTALLATION 10 Reconnect the cable to the vehicle battery s negat...

Page 8: ...the unit to the factory radio mounting brackets 1 Use a screwdriver to loose the hook s screws on the front left and right sides of the unit and remove the hooks 2 Align the screw holes on the bracket with the screw holes on the unit and then tighten the screws 5x5mm on each side Note the outer trim ring sleeve and the metal strap are not used for method B installation 8 Dashboard or Console Facto...

Page 9: ...Front Panel Precautions when handing 1 Do not drop the front panel 2 Do not put pressure on the display or control buttons when removing or installing the front panel 3 Do not touch the contacts on the front panel or on the main unit body It may result in poor electrical contact 4 If any dirt or foreign substances adhered on the contacts they can be removed with a clean and dry cloth 5 Do not expo...

Page 10: ... CABLE GRAY SUBWOOFER CABLE GREEN IGNITION SWITCH ACC MEMORY BACK UP B CHOKE BOX FOR DVD SIGNAL OUTPUT ONLY YELLOW VIDEO OUT WHITE AUDIO L OUT RED AUDIO R OUT FUSE FRONT RCA CABLE BROWN REAR RCA CABLE GREY WHITE RED WHITE Lch Rch Lch RED Rch FRONT Lch SPEAKER REAR Lch SPEAKER GREEN BLACK WHITE BLACK GREEN WHITE VIOLET BLACK GREY BLACK VIOLET GREY FRONT Rch SPEAKER REAR Rch SPEAKER BLUE BLACK YELLO...

Page 11: ... VOLUME 12 VOLUME 13 BND MEN 14 1 6 preset buttons 15 SMART M 16 MANU SKIP 17 MANU SKIP 18 AMS 19 ST XM MOD 20 21 SCN 22 RPT 23 SHF 24 RX LOCATION AND FUNCTION OF KEYS THE PLAYER 11 When remove the front panel 25 LED 26 RESET button 25 26 14 5 22 21 20 23 19 1 3 16 10 7 12 4 17 13 6 8 11 15 18 2 9 24 ...

Page 12: ...12 REMOTE CONTROL LOCATION AND FUNCTION OF KEYS 9 4 8 6 10 7 3 5 27 12 11 23 16 17 14 13 32 24 1 2 25 28 31 30 26 29 20 15 18 22 21 19 ...

Page 13: ...he next track press to skip back one track In radio mode press to increase frequency or press to decrease frequency by one step of channel spacing When the clock flashing use to adjust the minutes or hours 18 AUDIO Press and hold the button for several seconds to change the AUDIO soundtrack on multi audio soundtrack DVD disc Press the button shortly to change the sound mode of the VCD discs 19 EQ ...

Page 14: ...nel or EJECT button on remote control to eject the disc LOADING EJECTING A DISC Preparing the Remote Control Inserting the Batteries 1 Open the battery compartment cover 2 Insert the new battery Make sure that the positive and negative terminals of the battery are oriented as indicated 3 Close the cover Battery a button cell lithium battery CR2025 3V Using the Remote Control Point the remote contr...

Page 15: ...mote control to change minutes press CH TUN TRK on the front panel or button on the remote control to change hours MUTE Press and hold ENT MUT button on the front panel for several secounds or press MUTE button on the remote control to mute down the sound instantly Press it again to resume sound output EQUALIZATION Press EQ button on the front panel or on the remote control shortly to turn on equa...

Page 16: ... several seconds the radio searches from the FM1 the initial frequency and checks the signal strength until one cycle search is finished And then 6 16 OPERATION strongest stations are stored into the corresponding preset number button Program scanning Press AMS button shortly to scan preset station STATION STORING Press any one of the preset buttons 1 to 6 on the front panel to select a station wh...

Page 17: ...ds After that it will search for another available channel STORING PRESET CHANNELS The preset buttons can be used to store 6 channels for convenient access to your favorite channels Programming channels 1 Select the desired channel you want to store in memory 2 Press and hold one of the preset buttons for more than 2 seconds until the corresponding preset button number appears Repeat steps 1 and 2...

Page 18: ...PLAYING A PASSAGE A B repeat allows a passage to be repeated continuously Press A B button on the remote control at the start of the required passage then press A B button again at the end of the passage To revert to normal playing press A B button again Each time the button is pressed the screen will display as follows A TO B SET A A TO B SET B A TO B CANCELLED TIME SEARCH GOTO FOR DVD Press GOTO...

Page 19: ...in to stop intro and listen to track PLAYING IN PROGRAMMED ORDER For CD VCD WITH PBC OFF Press the stop button twice to ensure that the player is in STOP mode Then press PROGRAM button the screen will display PROGRAM P00 00 For example press numeric button 4 PROGRAM P01 04 appears it means track 4 will be played first then press numeric button 6 and PROGRAM P02 06 appears Press the different numer...

Page 20: ...guage soundtrack are recorded will be displayed at screen left top corner For VCD Press AUDIO button on the remote control for several seconds during playback It is possible to switch the sound between mono and stereo sound OPERATION 20 2 Press DISPLAY for the second time 3 Press DISPLAY for the third time 4 Press DISPLAY for the fourth time 5 Press DISPLAY for the fifth time The message on the sc...

Page 21: ...es When no different angle are recorded will be displayed at screen left top corner MONO LEFT MONO RIGHT STEREO OPERATION SMART MODE FUNCTION In DVD mode press SMART M button on the DVD unit or SMART button on the remote control shortly during disc playback to activate SMART MODE function and SMART MODE appears on the display of the DVD unit When press MOD or MODE button to switch to radio or AV I...

Page 22: ... is selected press to change between the following mode Pressing SHF on the front panel or SHUFFLE button on the remote control to play tracks in random order Press SHF button or SHUFFLE button again to release the mode During playback use or to skip an item ahead or back Rapid reverse Rapid advance Note The FOLDER cannot be selected during playing It can be selected after Stop button pressed SING...

Page 23: ...lease refer to AUDIO SETUP MENU d PREFERENCES SETUP This setup page includes all the configuration of support feature For details please refer to PREFERENCES SETUP MENU 23 SETUP Video Material Normal TV Screen Pan Scan Letter box 4 3 Wide 16 9 4 3 16 9 GENERAL SETUP SPEAKER SETUP AUDIO SETUP PREFERENCES EXIT SETUP GENERAL SETUP GENERAL PAGE TV display setup This is to select the appropriate TV asp...

Page 24: ...R MAIN PAGE AUTO HI RES N FLICKER TV DISPLAY PIC MODE ANGLE MARK OSD LANG CAPTIONS SCR SAVER MAIN PAGE ON OFF SETUP GENERAL PAGE OSD LANG type setup Select the preferred OSD On Screen Display language by using the buttons GENERAL PAGE CAPTIONS setup When play DVD disc activte the CAPTIONS feature by selecting ON and the captions such as the actor dialogue appear on the screen deactivate this featu...

Page 25: ...activate simple stereo mode AUDIO SETUP AUDIO SETUP SPDIF This is to activate the digital audio output on or off AUDIO SETUP OP MODE LINE OUT Line out mode with digital dialog normalization RF REMOD RF remodulation mode with heavy compression and digital dialog normalization It is recommended to select LINE OUT mode TV DISPLAY PIC MODE ANGLE MARK OSD LANG CAPTIONS SCR SAVER MAIN PAGE ON OFF DOWNMI...

Page 26: ...en LPCM 48K and LPCM 96K The higher the sampling frequency is the better the output audio quality is It is recommended to select LPCM 96K AUDIO SETUP DYNAMIC RANGE CONTROL Select DYNAMIC and adjust the dynamic range of a Dobly Digital encoded program There are 8 steps between full compression and off compression SPDIF OP MODE LPCM OUTPUT DYNAMIC MAIN PAGE FULL 6 8 4 8 2 8 OFF SPDIF OP MODE LPCM OU...

Page 27: ... The initial factory code is 3308 and key in 4 characters password now you want to use and retype again to confirm key in correctly 27 SETUP TV TYPE AUDIO SUBTITLE DISC MENU PARENTAL PASSWORD DEFAULTS SMART NAV LOGO MAIN PAGE 1 G 2 3 PG 4 PG 13 5 6 PG R 7 NC 17 8 ADULT NO PARENTAL CHANGE TV TYPE AUDIO SUBTITLE DISC MENU PARENTAL PASSWORD DEFAULTS SMART NAV LOGO MAIN PAGE TV TYPE AUDIO SUBTITLE DIS...

Page 28: ...TITLE DISC MENU PARENTAL PASSWORD DEFAULTS SMART NAV LOGO MAIN PAGE NO MENU WITH MENU TV TYPE AUDIO SUBTITLE DISC MENU PARENTAL PASSWORD DEFAULTS SMART NAV LOGO MAIN PAGE ORIG LOGO CUST LOGO TV TYPE AUDIO SUBTITLE DISC MENU PARENTAL PASSWORD DEFAULTS SMART NAV LOGO MAIN PAGE PREFERENCES PAGE LOGO Select ORIG LOGO original picture when the unit turns on or CUSTLOGO customer set picture when the uni...

Page 29: ...ge English Captions ON SCR Saver ON Speaker Setup Downmix Stereo Audio Setup SPDIF OFF OP Mode Line Out Dynamic FULL LPCM Output LPCM 96K Preferences TV Type AUTO Audio English Subtitle English DISC Menu English Parental NO Parental Password 3308 Smart NAV With Menu Logo ORIG Logo 29 SETUP ...

Page 30: ...he disc format is not according to the TV set used PAL NTSC DISC DOES NOT PLAY Ensure the disc label is upwards Clean the disc Check if the disc is defective by trying another disc NO SOUND Check audio connections If using a HIFI amplifier try another sound source DISTORTED SOUND FROM HIFI AMPLIFIER Check to make sure that no audio connections are made to the amplifier phono input THE PLAYER DOES ...

Page 31: ...z 10 dB Maximum Output Power 4 x 40 watts Current Drain 15 Ampere max DVD PLAYER Signal to Noise Ratio More than 55 dB Channel Separation More than 45 dB Frequency Response 20 Hz 20 kHz RADIO FM Frequency Coverage 87 5 to 107 9 MHz IF 10 7 MHz Sensitivity S N 30 dB 4 µV Stereo Separation 25 dB AM Frequency Coverage 530 to 1710 KHz IF 450 KHz Sensitivity S N 20 dB 36 dBu ...

Page 32: ...s curtains etc No naked flame sources such as lighted candles should be placed on the apparatus The use of apparatus in tropical and or moderate climates Before scrapping the appliance remove the batteries and place them in the appropriate battery collection container This product incorporates copyright protection technology that is protected by method claims of certain U S patents and other intel...

Reviews: