PURE Pop Midi with Bluetooth, Руководство пользователя
Получите бесплатное руководство пользователя для PURE Pop Midi с Bluetooth на нашем сайте. Загрузите руководство прямо сейчас, чтобы быстро начать использовать этот удивительный продукт. Компактный и стильный, этот радиоприемник обеспечивает отличное качество звука и удобство благодаря поддержке Bluetooth.
Поделиться
Скачать


Отзывы:
Нет отзывов
Похожие инструкции для Pop Midi with Bluetooth

MPD820 - DVD Player - 8
Бренд: Magnavox Страницы: 42

ESL 2805
Бренд: QUAD Страницы: 20

BCG4.0KW
Бренд: Westerbeke Страницы: 95

DL150HP
Бренд: Palstar Страницы: 2

EDDINGTON EDD-DAB-BLK
Бренд: MAJORITY Страницы: 26

22-4 HD PVMV-N
Бренд: Fischer Panda Страницы: 154

L55DAB10
Бренд: Logik Страницы: 24

CR 105K
Бренд: Seg Страницы: 111

R4400
Бренд: Rainier Страницы: 2

SureCross
Бренд: Banner Страницы: 2

TTR1C
Бренд: Sirius Satellite Radio Страницы: 88
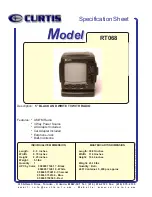
RT068
Бренд: Curtis Страницы: 1

DA-300E
Бренд: Arion Страницы: 31

PANTHER 300M
Бренд: COMNET ERICSSON Страницы: 32

103108
Бренд: Silvercrest Страницы: 126

274010
Бренд: Silvercrest Страницы: 156

900 Series
Бренд: Barrett Страницы: 164

Sync E
Бренд: Tentacle Страницы: 14


