PSA LIFESAVER LIFWMB2, Quick Start Manual
Introducing the PSA Lifesaver LIFWMB2, a must-have safety device! Get started quickly with our comprehensive Quick Start Manual. Download the full user manual for free from manualshive.com to unlock the full potential of this life-saving product. Ensure your loved ones' safety with ease, thanks to this essential manual.
Share
Download


Reviews:
No comments
Related manuals for LIFESAVER LIFWMB2

Allen-Bradley CrossBoard 141C-G Series
Brand: Rockwell Automation Pages: 4
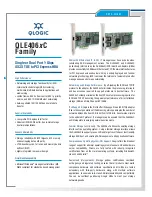
QLE4060C
Brand: Qlogic Pages: 2

ZyXEL ZyAIR 100
Brand: ZyXEL Communications Pages: 10

VC500MAC
Brand: Diamond Multimedia Pages: 14

Notebook Computer Universal 30W Power...
Brand: Radio Shack Pages: 36

TruGlow
Brand: ProTek R/C Pages: 2

PTP 820 Series
Brand: Cambium Networks Pages: 1149

NetPassage WLM54AGP23
Brand: Compex Pages: 6

iWavePort WLU11A
Brand: Compex Pages: 65

iWavePort Series
Brand: Compex Pages: 94

CBX500
Brand: Datalogic Pages: 16

CB3700
Brand: Creative Pages: 48

JU-VG0311-S1
Brand: SIIG Pages: 16

6930050
Brand: Novy Pages: 12

HP01
Brand: HomePlug Pages: 19

USB to HDMI/DP 4K
Brand: Elecable Pages: 21

GN-WI01GS-RH
Brand: Gigabyte Pages: 20

GN-WB31N-RH
Brand: Gigabyte Pages: 32


