background image

Your Proxima Lightbook Projector    

i-1

Introduction

Your Proxima Lightbook Projector

The Proxima® Lightbook™ projector makes sharing data and presenting
information as easy as connecting your computer to your monitor.

800

600

400
200

0

APR

MAY

JUN JUL

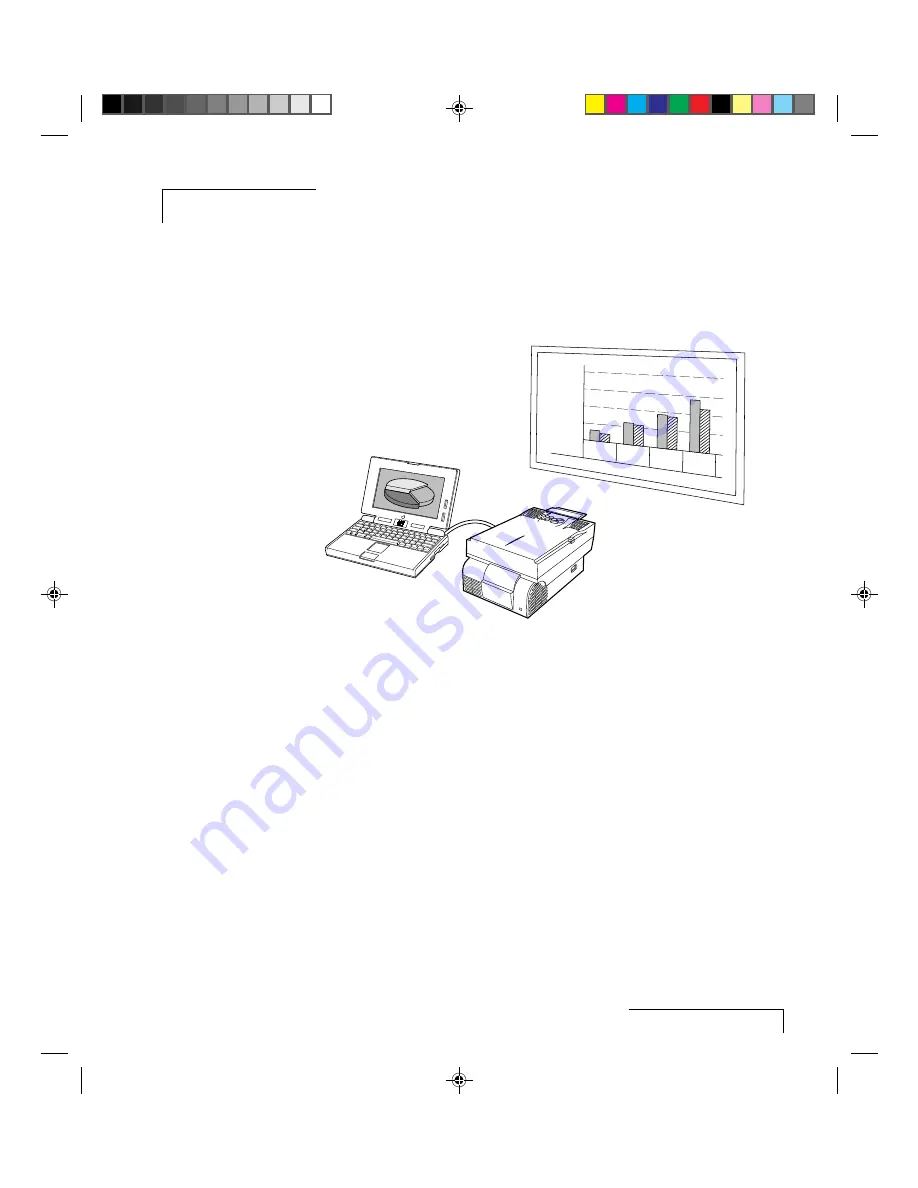
Figure i-1    The Proxima Lightbook projector in use

This manual covers the Proxima Lightbook family of light, portable
projectors which provide images of unrivaled clarity and color accuracy.

Summary of Contents for Lightbook

Page 1: ...akes sharing data and presenting information as easy as connecting your computer to your monitor 800 600 400 200 0 APR MAY JUN JUL Figure i 1 The Proxima Lightbook projector in use This manual covers the Proxima Lightbook family of light portable projectors which provide images of unrivaled clarity and color accuracy ...

Page 2: ...VGA Video Cable C951 6 Mac VGA Adapter C922 Also included but not shown Cyclops F X Diskettes 2 AAA Alkaline Batteries Product Registration Card Composite Video Audio Cable C497 6 S Video Cable C466 6 Computer Audio Cable C498 6 VGA Mac Monitor Adapter C924 Serial Cable C936 6 ADB Cable C4070 6 Mini Jack to RCA Cable Adapter C5105 PROG 1 PROG 2 SOURCE SETUP MUTE VOLUME MENU O MAC MAC VGA preview s...

Page 3: ...ns on both sides of the projector and pull the top assembly up It will click into place Figure i 3 Opening the projector NOTE The and indicators will both flash if the projector is not completely open 2 Lift the gold front door latch to pop the lens open Figure i 4 Opening the lens ...

Page 4: ...ETUP MUTE VOLUME MENU O 9 10 12 11 1 1 3 8 2 3 4 5 6 7 4 3 preview select source 13 Figure i 5 The Lightbook projector and Cyclops Remote Control 1 Internal Speakers 8 Cyclops Remote Control 2 Control Panel 9 Circuit Breaker 3 Cooling Fans 10 Power Cord Receptacle 4 Release Button 11 Main AC Power Switch 5 Keystone Adjustment 12 Connector Panel 6 Focus Ring 13 Cyclops Quick Remote 7 Remote Control...

Page 5: ...se Cyclops F X software 2 COMPUTER IN Connects computer video to the projector 3 MONITOR OUT Provides computer video output to a separate monitor 4 S VIDEO Allows S Video video input 5 VIDEO IN Allows video input from an NTSC PAL or SECAM source 6 L AUDIO R Allows stereo mono audio input from an NTSC PAL or SECAM source 7 AUDIO IN Allows stereo mono audio input 8 AUDIO OUT Provides audio output to...

Page 6: ...The and indicators provide status information about your projector Source Setup Menu Over Temperature Replace Lamp 3 4 5 6 7 1 2 Figure i 7 The Control Panel KEY FUNCTION 1 Controls the menu and adjusts screen position 2 Source Switches the video inputs 3 Setup Activates the Setup menu 4 Menu Displays or hides the menu 5 Turns the lamp on or off 6 Adjusts the volume 7 ...

Page 7: ...ector Connecting a Notebook NOTE If you are connecting to an Apple PowerBook attach the Mac VGA cable adapter to the computer s Video Out port or video adapter cable 1 Plug the COMPUTER end of the supplied VGA Video cable into the notebook s VGA Out port or into the Mac VGA cable adapter Macintosh only Serial Computer In Monitor Out S Video Video In L R In Audio Out VIDEO VGA SERIAL AUDIO VIDEO VG...

Page 8: ... 2 Plug the end of the supplied VGA cable with the large round collar into the COMPUTER IN port on the projector Plug the other end into the computer s Monitor Out port 3 Connect your audio source to the AUDIO IN port on the projector 4 You can project without using the PC monitor If you want to also use the monitor plug the monitor cable into the MONITOR OUT port on the projector 5 Turn the proje...

Page 9: ... 3 Plug the Mac end of the Mac VGA cable adapter into your computer s video port 4 Connect your audio source to the AUDIO IN port on the projector 5 To project and view the monitor at the same time plug the monitor cable into the Mac end of the VGA Mac monitor adapter NOTE The Lightbook projector only supports Multi sync monitors for Macintosh computers 6 Plug the VGA end of the VGA Mac monitor ad...

Page 10: ...o Cable Optional Figure i 11 Connecting video Special Configurations If your computer has an internal monitor but no external video capability such as the Macintosh Performa 575 PowerMac 5200 and certain PowerBooks you need a video adapter card to attach the Lightbook projector Setup for a third party adapter is identical to the procedures outlined in the Quick Start section above Contact your dea...

Page 11: ...NG THE PROJECTOR 1 Close the lens door latch Figure i 12 Closing the lens 2 Press both gold buttons to release the top assembly Figure i 13 Releasing the projector top 3 Gently press down and pull back on the assembly until it clicks into place ...

Page 12: ...r on a solid flat surface at a right angle perpendicular to the projection screen and parallel to the floor If you are using a media cart make sure the wheels are locked to prevent it from moving Perpendicular to the projection screen Parallel to the floor Top View Side View Projection Screen Figure 1 1 Positioning the projector ...

Page 13: ...eight of the unit Figure 1 2 Moving the projector Projector Cooling and Airflow Locate the air intake grills under the front of the projector and in the left rear corner and the air exhaust grill in the right rear corner CAUTION Never operate the projector if these grills are clogged or obstructed or if the electric fans are not running Comp ute r In Serial S VHS Vid eo In L A M P 10 R In Audio Ou...

Page 14: ... a serial connector for a PC ADB connector for a Macintosh 2 COMPUTER IN Connects computer video to the projector 3 MONITOR OUT Provides computer video output to a separate monitor 4 S VIDEO Allows S Video video input 5 VIDEO IN Allows video input from an NTSC PAL or SECAM source 6 L AUDIO R Allows stereo mono audio input from an NTSC PAL or SECAM source 7 AUDIO IN Allows stereo mono audio input 8...

Page 15: ...Computer In Serial S Video Video In L A M P 10 R In Audio Out Monitor Out O I Circuit Breaker AC Power Switch Power Receptacle Figure 1 5 Power receptacle AC Power switch and circuit breaker reset switch 1 Plug the appropriate power cord into the power receptacle on the side of the projector 2 Connect the other end of the power cord to a properly grounded wall outlet ...

Page 16: ...r to the computer s Video Output port or video adapter cable 1 Plug the end of the supplied VGA cable with the large round collar into the computer s VGA or Video Out port or into the Mac VGA cable adapter Macintosh only 2 Plug the other end of the VGA cable into the COMPUTER IN port on the projector 3 If you want audio connect your audio source to the AUDIO IN port on the projector 4 Turn the pro...

Page 17: ...er In Serial S Video Video In L R In Audio Out Monitor Out Figure 1 8 Connecting a PC 1 Unplug the monitor cable from the computer 2 Plug the end of the supplied VGA cable with the large round collar into the projector COMPUTER IN port Plug the other end of the VGA cable into the computer s Video Out VGA port 3 If you want audio connect your audio source to the AUDIO IN port on the projector 4 If ...

Page 18: ...o VGA Cable To Mac Monitor Cable From Projector MONITOR OUT MAC MAC Figure 1 9 The Macintosh adapters Use the cable adapters and supplied VGA video cable to connect the projector to your Macintosh computer Computer In Serial S Video Video In L R In Audio Out Monitor Out MAC II CPU VGA Mac Monitor Adapter Mac VGA Cable Adapter VGA Cable to Computer 1 In Port Macintosh Monitor Cable To Monitor Out P...

Page 19: ...the same time 5 To project and view the monitor at the same time plug the monitor cable into the Mac end of the VGA Mac monitor adapter 6 Plug the VGA end of the Mac VGA monitor adapter into the MONITOR OUT port on the projector 7 Turn the projector on NOTE An external monitor is not required to use the Lightbook projector Special Configurations If your computer has an internal monitor but no exte...

Page 20: ... can be active If computer video is selected AUDIO IN is active If NTSC PAL SECAM or S Video is being viewed AUDIO is active CONNECTING COMPOSITE VIDEO You can display composite video NTSC PAL or SECAM on the projector Video In L R Figure 1 12 Video In port Use the supplied composite Video Audio cable see page i 2 to connect an NTSC PAL or SECAM source to your projector 1 Find the RCA connector on...

Page 21: ...io signal Use the red and white connectors on the AV cable see Connecting L Audio R Ports below to connect Audio Out from your video source to the L AUDIO R ports on the projector CONNECTING AUDIO FROM A COMPOSITE VIDEO SOURCE Use the supplied AV cable to connect stereo or monaural audio inputs from an NTSC PAL SECAM or S Video source Video In L R Figure 1 14 L Audio R ports 1 Insert one of the wh...

Page 22: ...ough this system provides high quality stereo output a multimedia presentation may require independently powered speakers or an external sound system NOTE The projector s internal speakers can be turned on or off using the Audio menu see page 2 21 R In Audio Out Figure 1 15 The Audio Out port To connect your projector to an external stereo system or powered speakers 1 Insert one end of the Compute...

Page 23: ...r to use the optional Cyclops F X software Computer In Serial Figure 1 16 The Serial port 1 Connect one end of the serial cable to the projector s SERIAL port 2 Connect the other end of the cable to the computer On a PC connect the computer end to a serial port On a Macintosh connect the computer end to an ADB connector ...

Page 24: ...tons on the projector s sides Figure 2 1 Opening the projector 2 Pull the top assembly up and forward It will click into place NOTE The and indicators will both flash if the projector is not completely open 3 Lift the gold lens door latch The lens door will pop open and the lens will extend Figure 2 2 Opening the lens ...

Page 25: ...puter If you turn the projector off while the rest of your computer system is running your external monitor will go blank This is normal Just turn the projector on again and your monitor display will return CAUTION Never operate the projector if the air intake or exhaust grills are clogged or obstructed or if the electric fan is not running FOCUSING THE IMAGE You can use the title screen that appe...

Page 26: ... Figure 2 5 Keystoned and square images 1 Move the keystone correction lever forward or back to adjust the shape of the image Figure 2 6 Correcting the keystoned image TURNING OFF THE PROJECTOR 1 Press the key to turn the lamp off 2 Let the projector cool until the fans turn off and then turn the AC POWER switch off CAUTION Do not close the projector without allowing it to cool until the fans turn...

Page 27: ...JECTOR 1 Close the lens door latch Figure 2 7 Closing the lens 2 Press both gold buttons to release the top assembly Figure 2 8 Releasing the projector top 3 Gently press down and pull back on the assembly until it clicks into place ...

Page 28: ...age and to display and hide the menu Source Setup Menu 3 4 5 6 7 1 2 Figure 2 9 Control Panel keys KEY S FUNCTION 1 Controls the menu and adjusts screen position 2 Source Switches through the video inputs 3 Setup Activates the Setup menu 4 Menu Displays or hides the menu 5 Turns the lamp on or off 6 Adjusts the volume up or down 7 ...

Page 29: ... image Press the arrow keys to shift the image in the direction indicated by the arrow or Modify settings in the Menus Menu Menu Press the Menu key to display the menus in the upper portion of the projected image Press the Menu key again to turn off the menus Menu settings are automatically stored when you exit the menus or turn off the projector Source Source The Source key allows you to switch b...

Page 30: ...s or to adjust the selected item Press Setup again to accept the new setting The display disappears after five seconds if no actions are taken NOTE The Setup options will be different for each type of input source SETTING PURPOSE AVAILABLE ON Sync Fine tune the clarity of the image Computer only Contrast Sharpen the image All sources Brightness Increase decrease brightness Video Image Position Mov...

Page 31: ...eats A thermostat automatically turns off the power to the lamp until the projector cools If an over temperature condition occurs perform the following checks while you allow the projector to cool Verify that the room temperature is below 86 F 30 C Check the intake and exhaust vents Clear any obstruction to the air flow Make sure that the fans are working If the projector has reached an over tempe...

Page 32: ...ash quickly if the projector is not completely open Make sure that the projector locks into the open position Replace Lamp The indicator will glow red if the primary bulb burns out The indicator will flash if the spare projection lamp burns out If both lamps have burned out you cannot continue your presentation until you replace the lamp See page 4 2 to replace the lamp NOTE When the lamp nears th...

Page 33: ...k Remote allows you to control several of the projector s most popular features For best results aim the remote control at the projection screen or at the projector s front panel Do not obstruct the red infrared eye located on the front of the projector SETUP MENU MUTE VOLUME SOURCE PROG 2 PROG 1 O Infrared Eye preview select source Figure 2 12 Cyclops Remote Control Infrared Eye and Cyclops Quick...

Page 34: ...he cursor to the new location and press the center button again to release it Cyclops Quick Remote The Cyclops Quick Remote allows you to control the most often used projector functions NOTE Several of the remote control functions require the installation of Proxima s Cyclops F X software see Chapter 3 KEY FUNCTION Moves a presentation PowerPoint Persuasion etc forward or back one frame This funct...

Page 35: ...mputer Cyclops F X can be used with both the Cyclops Remote and Cyclops Quick Remote USING THE MENUS Your Lightbook projector features a graphical user interface that makes it easy to control all of the projector s functions Menu selections can be made with the projector control panel or remote control Menus will change based on the type of video source you have connected 1 Press MENU to display t...

Page 36: ...lists the Main menu options MENU ACTIONS Tools Selects a projector tool Input Source Selects a video source and adjusts the settings of an incoming signal Image Sets the display characteristics Audio Controls the audio volume Fine Audio Selects mono or stereo Adjusts balance treble and bass Preferences Programs a custom key on the remote control or increases the fan speed for high altitude use Adv...

Page 37: ...he Draw tools allow you to highlight text or other objects on the screen or to draw on a white or black background with the remote control 1 From the Tool Select menu select one of the drawing tools LightBoard Uses the Pencil tool to highlight or annotate the projected image WhiteBoard Clears the screen and provides a white background for the Draw tool BlackBoard Clears the screen and provides a d...

Page 38: ... to select a new color This button also shows the currently selected color Choosing a Color 1 Click New Color or the down arrow in the upper right corner of the Draw tool bar to display the color palette Figure 2 16 Toolbox Color palette 2 Click the color you want to use The Color box takes on the selected color and the color palette remains on the screen 3 Click the Color box or the down arrow in...

Page 39: ... the center of the MouseDisk with the cursor on the top of the tool bar Drag the bar to the new location and release the center button Setting the Timer Use the Timer menu to start and reset the on screen digital timer You can set the Timer to count down for breaks class activities and other presentation requirements Start Reset 99 00 Figure 2 17 Timer menu 1 From Tool Select choose Timer and pres...

Page 40: ...o source has been detected by the projector Menus Source Select Source Mode Sync Status Input Source V Freq 59 Hz Advanced Image Video Tools Computer H Freq31 4 KHz H Pol NEG Audio Preferences Select Cancel Help Fine Audio Automatic VGA Think Pad VGA 640 x 400 VGA 640 x 350 V Pol NEG Custom 2 Custom 1 Figure 2 19 Input Source menu MENUS SETTING Source Select Selects computer and video input source...

Page 41: ...tting into one of the available custom modes see page 2 19 The Source Mode box displays a next to all of the input source settings that match or are close to the type of source you have connected 2 To change the Source Mode setting use the and keys to move to the Source Mode box and use the and keys to select a different input source 3 Use the and keys to either Cancel or Select the new source ent...

Page 42: ...E The menus vary according to the current input source Computer Source Contrast Sync Menus Input Source Advanced Image Tools Audio Preferences Help Fine Audio Pixel Skip Save To Select Cancel None Selected Custom 3 Custom 2 Custom 1 More Video Source Contrast Tint Saturation Brightness Menus Input Source Advanced Image Tools Audio Preferences Help Fine Audio Fit To View On Off Figure 2 20 Image me...

Page 43: ...or darker Video Tint Changes the color tones Video Saturation Increases or decreases the saturation of Video the image colors Save To Saves the current settings Computer Fit to View Compresses the image to fit on PAL SECAM the display video only Saving Custom Settings A set of customized values for every video mode can be stored for up to twenty custom modes If you want to store custom settings 1 ...

Page 44: ...Off Speaker Enable Ext Only Both Volume Menus Input Source Advanced Image Tools Audio Preferences Help Fine Audio Figure 2 21 Audio menu MENU ITEM SETTING Volume Raises or lowers the speaker volume for the selected source Mute Mutes the speaker sound Speaker Enable Selects internal and external Both or external speakers only Ext Only ...

Page 45: ...sts the bass Stereo Select stereo when playing a stereo source from both left and right audio inputs Select Mono when using a monaural source for simulated stereo output Using the Audio Menus You can include audio in your presentation in a variety of ways Selecting Stereo Audio 1 Open the Fine Audio menu and select Stereo Adjust the balance treble and bass 2 Press MENU to exit Muting Audio with th...

Page 46: ... Prog Key 1 and 2 Assigns a specific projector function to one of the PROG keys on the Cyclops Remote Control or to the Select key on the Cyclops Quick Remote LightBoard Opens or closes the Draw tools WhiteBoard Draw on a white background BlackBoard Draw on a black background Timer Start or reset the Timer Reveal Gradually reveals the video image Freeze Freezes the image on the screen Host Enables...

Page 47: ...g Menus Input Source Advanced Image Tools Audio Preferences Help Fine Audio Factory Reset All Custom Computer Mode All Standard Computer Mode Current Computer Video Mode None Selected Figure 2 24 Advanced menu MENU ITEM FUNCTION Language Display the menus in any of five languages Projection Flips the image for rear and ceiling projection Reset Mode Select Reset to return the settings for the curre...

Page 48: ...for your PC Macintosh or video source Help Topics PC Mac Video Figure 2 25 Help menu 1 Press or to select the item you want Help on Press to display that item or to cancel Serial Computer In Monitor Out S Video Video In L R In Audio Out VIDEO VGA SERIAL AUDIO VIDEO VGA SERIAL AUDIO Figure 2 26 PC Help screen ...

Page 49: ...You cannot use Cyclops F X with the MediaExpress system To use Cyclops F X follow these steps details are covered throughout this chapter 1 Use the serial cable appropriate for your system PCs C936 6 or Macs C470 6 to connect the serial port on your computer to the CYCLOPS port on the projector C Cyclops Figure 3 1 Cyclops port on the projector 2 Install the Cyclops F X software 3 Start Cyclops F ...

Page 50: ...le click the Cyclops F X Installer icon in the disk window Drag the Cyclops F X icon onto the hard disk icon 3 Follow the instructions that appear on your screen STARTING CYCLOPS F X Once you re finished with the installation do one of the following In Windows 3 x or Windows 95 double click the Cyclops F X icon to start the program For Macintosh users the software will automatically load each time...

Page 51: ...provides options that allow you to customize your remote and software NOTE If you open a menu or if you re using the LightBoard tool Cyclops F X will be suspended ASSIGNMENTS AREA The Assignments area displays the custom remote keys and their current assignments To modify the custom remote keys 1 Highlight the effect you want to assign 2 Double click the box next to the custom remote key in the As...

Page 52: ...edback CUSTOMIZING EFFECTS Most effects have options that you can tailor to both the presentation and your own presentation style For example you can customize the Spotlight effect to specify the shape and size of the spotlight You can also change the name of each effect for example you can change the name from Spotlight to Headlight You can assign each effect to a key on the keyboard or a button ...

Page 53: ...Cyclops interactive pointer system with Cyclops F X To set up the software click Setup Remote in the Assignments area of the mains screen Choose Cyclops Wand or Laser Pointer The following screen appears Figure 3 3 Cyclops interactive pointer screen Click the Show Navigation Bar checkbox to enable the navigation bar This will provide you with a quick way to scroll through your slide show with the ...

Page 54: ...creen Use this screen to assign different options to the navigation bar To assign a new function to the navigation bar click the Next or Previous areas and assign a function using the list boxes to the right You can also use this screen to define where the navigation bar will appear on your display The default is Lower Left ...

Page 55: ...e preparing for the message on the next slide To use See it Show it 1 Click Edit Navigation Keys in the Assignments area of the Cyclops F X main screen The following screen appears Figure 3 5 Edit Navigation Keys screen 2 Select a countdown time for the Forward or Reverse keys or both When you select a countdown time See it Show it is automatically enabled 3 To disable See it Show it select None f...

Page 56: ...t Freeze Key screen To use Freeze 1 Press PAUSE on your Cyclops remote 2 Use any of the remote keys to control your computer 3 Press PAUSE again when you re ready to return to your presentation Once you freeze your screen all of the other keys on your remote are available to control your computer This means you can edit your current presentation display slides from another presentation or even ope...

Page 57: ... expires To set a transparent background uncheck Color and Picture To display a picture check Picture click File then select the desired BMP file Center Cursor centers the mouse pointer on the screen This helps prevent losing the cursor Custom Cursor changes the appearance of the mouse pointer to one of 30 images Only the standard arrow pointer changes The other standard icons such as the hourglas...

Page 58: ...u can play the sound repeatedly or just once NOTE You must have a sound card to use this effect Spotlight dims all of the image except for the area around the mouse pointer You specify the shape and size of the spotlight circular square or bar Once you ve started Spotlight press the MouseDisk to change its size Another setting makes the Spotlight visible against a black background Stamp allows you...

Page 59: ...r During Zoom checkbox left click to change the zoom factor NOTE Most effects have an option that lets you rename the command itself MENU COMMANDS File menu The File menu offers the following commands for working with profiles of effects MENU ITEM FUNCTION Reset to defaults Resets the F X options to the factory defaults Open Opens a previously saved profile of settings Save Saves recent changes to...

Page 60: ...OM port settings MENU ITEM FUNCTION Setup Remote Allows you to display the assignments area for the Cyclops remote control or the optional Cyclops wand or laser pointer Cursor Options Changes the look and feel of the cursor Also includes an option that allows you to apply one of the Cyclops F X custom cursor options to Windows Connect Allows you to edit the COM port settings for your computer ...

Page 61: ...back 3 Lift the tab and pull the lamp assembly up and out Rotate the assembly and place it back in the projector Figure 4 1 Changing the lamp NOTE Some lamps may fail without turning on the indicator If the lamp fails and the indicator glows allow the fans to cool the projector until they stop If the lamp fails but the indicator does not go on press the key to turn the lamp circuit off Then allow ...

Page 62: ...ng a bulb 3 Replace the lamp assembly as shown in Figure 4 1 CLEANING THE LENS From time to time you ll need to clean the lens 1 Take a piece of lens tissue and form it into a loose swab Wet it with lens cleaning fluid or denatured alcohol and gently move it over the lens surface 2 Take a part of the lens tissue that you haven t touched and repeat the process going over the lens in another directi...

Page 63: ...htbook front filter CHANGING BATTERIES CYCLOPS REMOTE To install or change the two AAA alkaline batteries in the remote control unit 1 Locate the battery compartment at the lower rear of the case Slide the cover off the battery compartment 2 Remove the old batteries and replace them with new ones Make sure to align the batteries in the proper orientation see Figure 4 4 3 Replace the cover on the b...

Page 64: ...ries 1 Locate the battery compartment at the lower rear of the case Press the corner down and slide it off 2 Remove the old batteries and replace them with new ones Make sure to align the batteries in the proper orientation 3 Replace the battery cover Figure 4 5 Installing batteries in the Cyclops Quick Remote ...

Page 65: ... breaker reset button Over temperature indication Allow projector to cool turn projector OFF and then ON No computer image Loose cable Check and secure cable projected connections No power to computer Turn on computer Incompatible video system If possible check computer with another monitor Laptop video port not Make sure laptop external video activated port is activated No video image Video sourc...

Page 66: ...splay Turn on projector and light the lamp Cable not connected Connect cable Faint screen Low CONTRAST or Adjust CONTRAST and or BRIGHTNESS settings BRIGHTNESS Jittery fuzzy text Out of sync Adjust SYNC Image off center Position controls arrow keys Adjust position controls Compatibility problem Make sure the projector is compatible with one of the standards listed in Appendix A Misalignment or dam...

Page 67: ...ecure cabling between audio source s and projector Over Temperature Air vent s clogged Allow projector to cool clear indication obstructions from vents Fan malfunction Allow projector to cool Check for fan operation If the fans are not working call Proxima Customer Service Room is warm or you are Use the Preferences menu to at high altitude switch to the High Altitude setting Remote Control Batter...

Page 68: ... or any of its accessories are determined to be defective 1 Contact Proxima Customer Service to request a Return Material Authorization RMA number 2 Send the defective unit including any accessories cables and the remote control with the RMA number clearly marked on the outside of the shipping box freight prepaid to USA and Canada Europe Proxima Corporation Proxima Corporation RMA RMA 9440 Carroll...

Page 69: ...sory parts through your local reseller or call Proxima at USA and Canada Europe 800 447 7694 or 31 43 358 5200 619 457 5500 Fax 31 43 358 5201 Press 1 for Customer Service Fax 619 457 8542 Outside USA and Canada 619 457 5500 Press 1 for Customer Service Fax 619 622 0173 ...

Page 70: ...with variable focus Keystone Correction 17 29 degrees adjustable Audio System Digital stereo sound two built in 2 Watt speakers Inputs 1 Computer Video 1 Composite Video NTSC PAL SECAM S Video 1 Computer Stereo Audio 1 Composite Video Stereo Audio 1 Serial ADB Outputs Stereo Audio 1 Monitor Power Source 90 260 VAC 47 63 Hertz Dimensions 5 H x 9 1 8 W x 13 1 2 L closed 12 7 cm H x 23 2 cm W x 34 3 ...

Page 71: ...1002 10 Power Cord Europe C1001 10 Power Cord United Kingdom C1004 10 Power Cord Italy C1003 10 VGA Video Cable C951 6 VGA Mac Adapter C922 Mac VGA Monitor Adapter C924 S Video Cable C466 6 Computer Audio Cable C498 6 Serial Cable C936 6 Mini jack to RCA Cable Adapter C5105 Macintosh ADB Cable C4070 6 Composite Video Audio Cable C497 6 Cyclops F X Disks A50 F X Soft Carrying Case A260 ...

Page 72: ...B 2 Appendix B OPTIONAL ACCESSORIES OPTION PART NUMBER Deluxe Soft Carrying Case A261 Deluxe Soft Case for Laptop A262 Rolling Hard Case A263 MicroSaver Security Cable K100 ...

Page 73: ... Indicator Over Temperature 2 8 Projector Not Open 2 9 Replace Lamp 2 9 Control Panel Indicators 2 8 Control Panel Keys 2 5 Control Panel Lights i 7 Cooling Fans i 4 Custom Settings Recalling 2 18 Custom Settings Saving 2 20 Cyclops Quick Remote i 4 2 10 Cyclops Remote Control i 4 2 10 D Desktop PC Connecting i 8 Draw Tool Bar Clear All 2 15 Eraser 2 15 New Color 2 15 Pencil 2 15 Drawing Tools 2 1...

Page 74: ... i 11 2 4 Connecting Power 1 4 Cooling and Airflow 1 2 Main Parts i 4 Moving 1 2 Opening i 3 2 1 Positioning 1 1 Setting up 1 1 Transporting 1 2 Turning Off 2 3 Turning On 2 2 Q Quick Remote 2 10 Quick Remote Batteries 4 4 Quick Remote Keys 2 11 Quick Start Desktop PC i 8 Macintosh Computer i 9 Notebook i 7 R Recalling Custom Settings 2 18 Release Button i 4 Remote Control 2 10 Remote Control Batt...

Page 75: ...reble Fine Audio Menu 2 22 Troubleshooting 5 1 Help 5 4 Returning for Repair 5 4 Turning off the Projector 2 3 V VGA Video Cable 1 6 Video Connection Macintosh 1 7 Notebook 1 5 PC 1 6 Special Configurations 1 8 Video In Port i 5 1 3 Composite Video Connections 1 9 Volume Audio Menu 2 21 Volume Key 2 6 Remote Control 2 11 Volume Keys i 6 2 5 W WhiteBoard 2 14 ...

Reviews: