background image


  PRONAR Sp. z o.o. 

17-210 NAREW, UL. MICKIEWICZA 101A, WOJ. PODLASKIE 


tel.: 

+48 085 681 63 29 

+48 085 681 64 29 


+48 085 681 63 81 

+48 085 681 63 82 


fax: 

+48 085 681 63 83 

+48 085 682 71 10 

www.pronar.pl 

OPERATOR'S MANUAL 

AGRICULTURAL TRAILER 

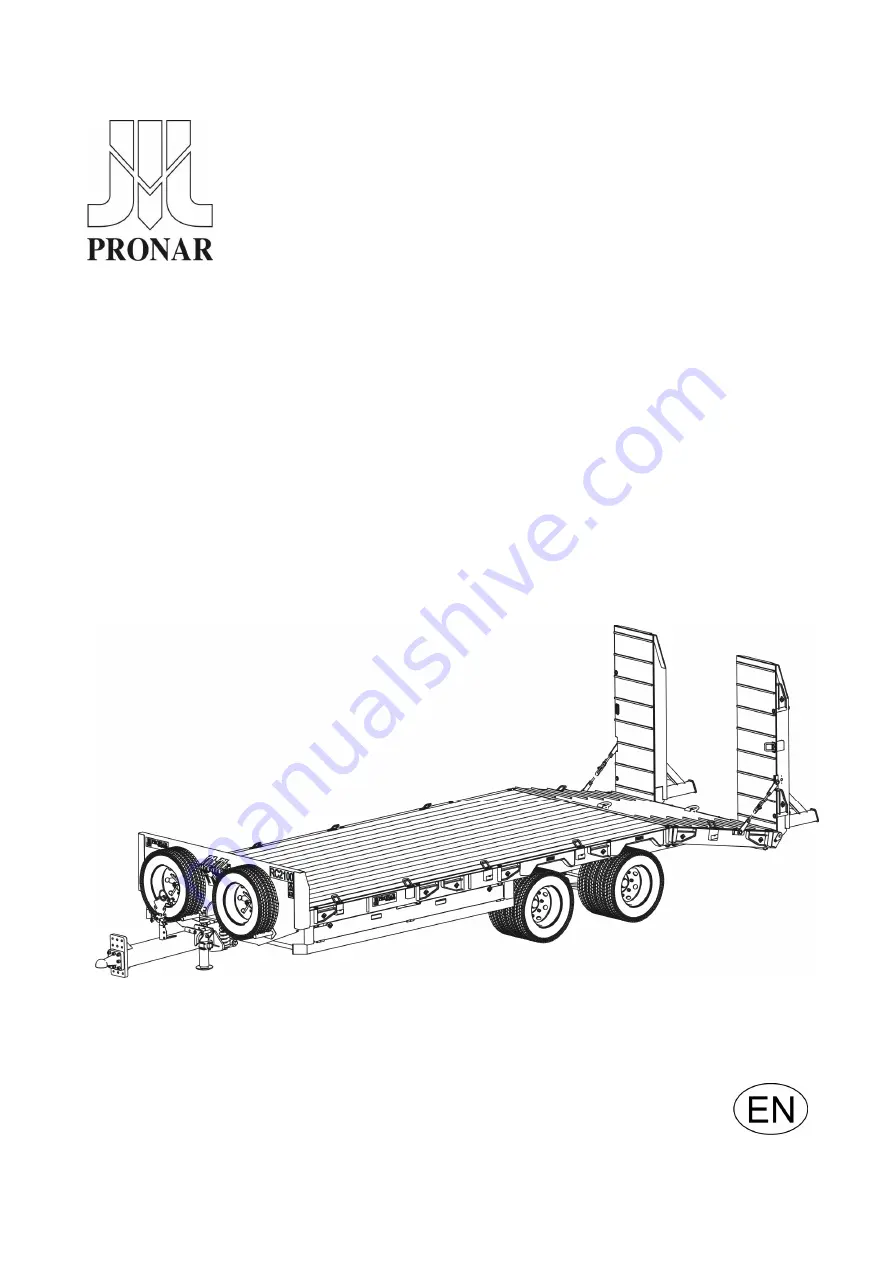
PRONAR RC2100 


TRANSLATION OF THE ORIGINAL COPY OF THE MANUAL 


ISSUE 2A-09-2010 

PUBLICATION NO 208N-00000000-UM


Summary of Contents for RC2100

Page 1: ...48 085 681 63 29 48 085 681 64 29 48 085 681 63 81 48 085 681 63 82 fax 48 085 681 63 83 48 085 682 71 10 www pronar pl OPERATOR S MANUAL AGRICULTURAL TRAILER PRONAR RC2100 TRANSLATION OF THE ORIGINAL COPY OF THE MANUAL ISSUE 2A 09 2010 PUBLICATION NO 208N 00000000 UM ...

Page 2: ......

Page 3: ...n Before using the machine the user must carefully read this Operator s Manual and observe all recommendations This guarantees safe operation and ensures malfunction free work of the machine The machine is designed to meet obligatory standards documents and legal regulations currently in force The manual describes the basic safety rules and operation of agricultural trailer Pronar RC2100 If the in...

Page 4: ...articularly important information and instructions the observance of which is essential are distinguished in the text by the sign and also preceded by the word ATTENTION Failure to observe the instructions may lead to damage to the machine as a result of improper operation adjustment or use In order to focus the user s attention on the need to perform maintenance the relevant section of the Operat...

Page 5: ...ction of machine s forward travel Right side side to the right hand of the operator facing in the direction of machine s forward travel REQUIRED SERVICE ACTIONS Service actions described in the manual are marked Result of service adjustment actions or comments concerning the performance of actions are marked ...

Page 6: ......

Page 7: ...ON VEHICLE 1 10 1 5 2 INDEPENDENT TRANSPORT BY THE USER 1 12 1 6 ENVIRONMENTAL HAZARDS 1 12 1 7 WITHDRAWAL FROM USE 1 13 2 SAFETY ADVICE 2 1 2 1 BASIC SAFETY RULES 2 2 2 1 1 USE OF TRAILER 2 2 2 1 2 HITCHING AND DISCONNECTING FROM TRACTOR 2 3 2 1 3 HYDRAULIC AND PNEUMATIC SYSTEMS 2 4 2 1 4 LOADING AND UNLOADING 2 4 2 1 5 TRANSPORTING THE MACHINE 2 6 2 1 6 TYRES 2 9 2 1 7 MAINTENANCE 2 10 2 2 DESCR...

Page 8: ...1 PREPARING FOR WORK BEFORE FIRST USE 4 2 4 1 1 CHECKING THE TRAILER AFTER DELIVERY 4 2 4 1 2 PREPARE A TRAILER FOR FIRST HITCHING TO TRACTOR 4 3 4 2 HITCHING AND DISCONNECTING FROM TRACTOR 4 4 4 3 TRAILER SUPPORT OPERATION 4 7 4 4 LOADING AND UNLOADING THE TRAILER 4 10 4 4 1 STANDARD SIZE LOADS 4 10 4 4 2 OVERSIZE LOADS 4 11 4 4 3 UNLOADING THE TRAILER 4 15 4 5 RAMPS PROTECTIONS 4 15 4 5 1 RAMPS ...

Page 9: ...E EVALUATE TECHNICAL CONDITION OF WHEELS AND TYRES 5 10 5 2 7 ADJUSTMENT OF MECHANICAL BRAKES 5 11 5 2 8 CHANGE OF PARKING BRAKE CABLE AND ADJUSTMENT OF CABLE TENSION 5 13 5 3 PNEUMATIC SYSTEM MAINTENANCE 5 16 5 3 1 PRELIMINARY INFORMATION 5 16 5 3 2 INSPECTING AND CHECKING AIR TIGHTNESS OF PNEUMATIC SYSTEM 5 17 5 3 3 CLEANING THE AIR FILTERS 5 18 5 3 4 DRAINING WATER FROM AIR TANK 5 19 5 3 5 CLEA...

Page 10: ...ON 5 25 5 6 OPERATION OF ELECTRICAL SYSTEM AND WARNING ELEMENTS 5 27 5 6 1 PRELIMINARY INFORMATION 5 27 5 6 2 CHANGE BULBS 5 28 5 7 TRAILER LUBRICATION 5 29 5 8 CONSUMABLES 5 33 5 8 1 HYDRAULIC OIL 5 33 5 8 2 LUBRICANTS 5 34 5 9 CLEANING TRAILER 5 35 5 10 STORAGE 5 37 5 11 TIGHTENING TORQUE FOR NUT AND BOLT CONNECTIONS 5 37 5 12 TROUBLESHOOTING 5 39 ...

Page 11: ...SECTION 1 BASIC INFORMATION ...

Page 12: ...of lower frame The trailer is marked with data plate 1 located on the trailer s front wall and with serial number 2 located on a gold painted rectangle The serial number is stamped on the right longitudinal member of the frame When buying the trailer check that the serial numbers on the machine agree with the number written in the WARRANTY BOOK in the sales documents and in the OPERATOR S MANUAL ...

Page 13: ...ertificate number F Tare weight G Maximum gross weight H Carrying capacity I Permissible hitching system loading J Permissible front axle load K Permissible rear axle load 1 1 2 AXLE IDENTIFICATION FIG 1 2 Location of the axle data plate 1 data plate 2 wheel axle The factory number of the axle shaft and its type are stamped onto the data plate 2 secured to the axle shaft beam 1 figure 1 2 ...

Page 14: ...ials is forbidden and regarded as contrary to the intended purpose of the trailer During the use of the machine comply with all road traffic regulations and transport regulations in force in the given country and any breach of these regulations is regarded by the Manufacturer as use contrary to its intended purpose The trailer is constructed according to current safety requirements and engineering...

Page 15: ... during travel transport loads which have uneven load distribution and or overload axles and suspension elements Using it as intended also involves all actions connected with the safe and proper operation and maintenance of the machine In connection with this the user is obliged to carefully read the OPERATOR S MANUAL of the trailer WARRANTY BOOK and comply with the recommendations contained in th...

Page 16: ...essure of the system Hydraulic brake system Hydraulic system Nominal pressure of the system bar bar sockets compliant with PN ISO 1728 2007 8 sockets compliant with ISO 7421 1 150 Hydraulic system Hydraulic oil Pressure rating of the system Oil demand MPa l L HL 32 Lotos 16 14 Electrical system Electrical system voltage Attachment socket V 12 7 polar compliant with ISO 1724 Tractor hitches Minimum...

Page 17: ...ne pneumatic system with ALB Knorr Bremse regulator Hydraulic system Drawbar set with ball joint towing attachment 80 Drawbar set with fixed eye 50 Drawbar set with fixed eye 40 Drawbar set with rotating drawbar eye 50 Ramp folding mechanism Hydraulic system for ramp folding Wheel chocks Slow moving vehicle warning sign Warning reflective triangle Mudguards Water tank Side Barriers Fixing lugs Too...

Page 18: ...AR Sp z o o Narew guarantees the reliable operation of the machine when it is used according to its intended purpose as described in the OPERATOR S MANUAL The repair period is specified in the WARRANTY BOOK The guarantee does not apply to those parts and sub assemblies of the machine which are subject to wear in normal usage conditions regardless of the warranty period Consumables include the foll...

Page 19: ...t stamp may make the user ineligible for any warranty repair or refund The user is obliged to report immediately on noticing any wear in the paint coating or traces of corrosion and to have the faults rectified whether they are covered by the guarantee or not Detailed guarantee regulations are contained in the WARRANTY BOOK attached to each machine Modification of the trailer without the written c...

Page 20: ... use of the given element from use Carefully read the information contained in the Operator s Manual for the given securing measure Chocks wooden blocks or other objects without sharp edges should be placed under the wheels of the trailer to prevent it from rolling Trailer wheel blocks must be nailed to the low platform planks of the vehicle or secured in another manner preventing their movement T...

Page 21: ...ccordance with the transport safety requirements and the regulations Driver of the vehicle should be particularly careful during travel This is due to the vehicle s centre of gravity shifting upwards when loaded with the machine Use only certified and technically reliable securing measures Carefully read the manufacturer s instructions for the securing measures FIG 1 3 Positioning of transport lug...

Page 22: ...he formation of a film of oil on the water may be the direct cause of physical action on organism perhaps causing change of oxygen values in the water because of lack of direct contact of air with the water An oil leak into water reservoirs may however lead to a reduction of the oxygen content While carrying out maintenance and repair work which involves the risk of an oil leak this work should ta...

Page 23: ... tanks 1 7 WITHDRAWAL FROM USE In the event of decision by the user to withdraw the trailer from use comply with the regulations in force in the given country concerning withdrawal from use and recycling of machines withdrawn from use Before commencing dismantling totally remove the oil from the hydraulic system and reduce air pressure completely in the pneumatic brake system e g using air tank dr...

Page 24: ...Pronar RC2100 SECTION 1 1 14 ...

Page 25: ...SECTION 2 SAFETY ADVICE ...

Page 26: ... and non compliance with the recommendations given in this operator s manual is dangerous to your health Be aware of the existence of a minimal risk and for this reason the fundamental basis for using this trailer should be the application of safety rules and sensible behaviour The machine must never be used by persons who are not authorised to drive agricultural tractors including children and pe...

Page 27: ...ailer Before hitching trailer to tractor check that both machines are in good technical condition While connecting the trailer to the tractor use the appropriate hitch After completing the coupling of the machine check the safety of the hitch Carefully read the tractor Operator s Manual If the tractor is equipped with an automatic hitch make certain that the coupling operation is completed Be espe...

Page 28: ...il with eye rinse with large quantity of water and in the event of the occurrence of irritation consult a doctor In the event of contact of oil with skin wash the area of contact with water and soap Do NOT apply organic solvents petrol kerosene Use the hydraulic oil recommended by the Manufacturer After changing the hydraulic oil the used oil should be properly disposed of Used oil or oil which ha...

Page 29: ... is properly secured against relocation Oversize load may be transported on public roads only if a travel permit is obtained from a competent office Loading equipment may work on the load platform only if the total weight of the loading equipment and the load does not exceed the maximum carrying capacity of the trailer Be especially careful when opening or closing the ramps because there is a risk...

Page 30: ...mits The machine must NOT be left unsecured When not connected to the tractor the trailer must be immobilised with parking brake and protected against rolling with chocks or other objects without sharp edges placed under the front and back trailer wheels Before driving off check that the parking brake is released The trailer s ramps must be folded and properly secured using ramps interlocks Travel...

Page 31: ...s of the hydraulic pneumatic and electrical systems FIG 2 1 Method of placing chocks 1 wheel chock The trailer is designed to operate on slopes up to 8 Driving trailer across ground with steeper slopes may cause the trailer to tip over as a result of loss of stability Prolonged driving across steep ground may lead to loss of braking efficiency While driving on public roads the trailer must be fitt...

Page 32: ...ruding beyond the edge of the trailer should be indicated according to the road traffic regulations Do NOT transport loads forbidden by the Manufacturer Do NOT exceed the trailer s maximum carrying capacity Exceeding the carrying capacity may lead to damage to the machine loss of stability and danger while driving The brake system is adjusted to the gross weight of the trailer exceeding the weight...

Page 33: ... against rolling by placing chocks under wheel Wheels can be taken off the trailer axle only when the trailer is not loaded Repair work on the wheels or tyres should be carried out by persons trained and entitled to do so This work should be carried out using appropriate tools Inspect tightness of nuts after first use of trailer after first travel under load and then every 6 months of use or every...

Page 34: ...s should be placed beneath trailer wheel Ensure that unauthorised persons do not have access to the tractor cab Service inspections of the trailer should be carried out according to the frequency specified in this Operator s Manual Regularly check the condition of nut and bolt connections in particular connections of drawbar eye with drawbar and wheel nuts Before beginning repair works on hydrauli...

Page 35: ...mmable material before commencing welding work Before beginning work prepare a CO2 or foam extinguisher In the event of work requiring the trailer to be raised use properly certified hydraulic or mechanical lifts for this purpose After lifting the machine stable and durable supports must also be used Work must not be carried out under a trailer which has only been raised with a lift or jack The tr...

Page 36: ...ler while the engine is working and when the machine is being attached or hitched to second trailer being on the machine while the engine is working not maintaining safe distance during loading or unloading of trailer operation of the trailer by persons under the influence of alcohol making modifications to the machine without the consent of the Manufacturer cleaning maintenance and technical chec...

Page 37: ... figure 2 3 Throughout the time it is in use the user of the machine is obliged to take care that notices and warning and information symbols located on the trailer are clear and legible In the event of their destruction they must be replaced with new ones Safety decals are available from your PRONAR dealer or directly from PRONAR customer service New assemblies changed during repair must be label...

Page 38: ... ignition 3 Danger of crushing or severing Do not place hands between the ramps and the trailer frame 4 Grease the trailer according to the recommendations in the Operator s Manual 5 Regularly check if the nuts and bolts fixing the wheels and other components are properly tightened 6 Air pressure in the tyres standard tyres 7 Permissible hitching system loading ...

Page 39: ...arking of mounting points for belts ropes chains or other devices for securing load on the platform 10 Manufacturer s decal 11 Trailer version 12 Information decal identifying the hydraulic support connection 13 Information decal identifying the hydraulic brake connection 14 Carrying capacity decal ...

Page 40: ...NING OF SYMBOL 15 Information decal identifying the supply connection of the ramp hydraulic system 16 Information decal identifying the return connection of the ramp hydraulic system Numbers in the item column correspond to labels in figure 2 3 ...

Page 41: ...SECTION 2 Pronar RC2100 2 17 FIG 2 3 Locations of information and warning decals ...

Page 42: ...Pronar RC2100 SECTION 2 2 18 ...

Page 43: ...SECTION 3 DESIGN AND OPERATION ...

Page 44: ...550 2 460 2 540 1 900 7 000 1 865 1 325 Weights Maximum gross weight Carrying capacity Tare weight kg kg kg 19 000 14 650 4 350 Tyres Tyre dimensions Air pressure in the tyres kPa 215 75R17 5 850 Technical specification of the winch Maximum pull force Oil pressure Rope diameter Rope length kg bar mm m 6 800 160 12 30 Other parameters Lift of load surface Axle load Hitch load Maximum design speed N...

Page 45: ...mp interlock 3 warning sign 4 rear lamp assembly Low chassis trailer is a welded structure made from steel profiles The main support elements are two longitudinal members connected with crossbars Two ramps are installed in the rear part of the frame 1 Figure 3 1 As standard the ramps are lowered manually by trailer operator Optionally the ramps can be controlled by means of hydraulic system The ra...

Page 46: ...igure 3 2 with a thickness of 45 mm Load placed on the platform is secured with belts ropes or chains which are attached to fixing lugs 2 located along the whole platform on both sides of the trailer The fixing lugs are marked with information decals 9 table 2 1 On the front side the load platform is limited by wall 3 to which spare wheels 4 optional equipment and chocks 5 are attached Optional wi...

Page 47: ...e of the frame in front of the front wheel there is a toolbox optional equipment and parking brake mechanism 3 2 2 DRAWBAR OF TRAILER FIG 3 3 Drawbar 1 rotary drawbar 2 drawbar faceplate 3 drawbar hitching eye 4 parking stand 5 spring 6 line bracket In the front part of the trailer Figure 3 3 there is a rotary drawbar 1 with shock absorbing springs 5 Drawbar hitching eye 3 is bolted to the drawbar...

Page 48: ...arm 3 parabolic leaf spring 4 rocker arm pin 5 lubricated leaf spring pin 6 smooth leaf spring pin 7 twin wheels Axles 1 Figure 3 4 in a tandem arrangement are attached to parabolic leaf springs 3 using an absorber plate and U bolts The parabolic leaf springs are connected together by means of rocker arms 2 The complete axle system is connected with the frame by means of fixing brackets welded to ...

Page 49: ...perated by pneumatic cylinders bolted to axle brackets 3 2 4 MAIN BRAKE FIG 3 5 Double line pneumatic brake construction and system diagram 1 air tank 2 control valve 3 automatic brake force regulator 4 transmission valve 5 pneumatic cylinder 6 7 lead connectors 8 air filter 9 drain valve 10 air tank control connectors ...

Page 50: ...when tractor s brakes are applied Furthermore in case of an inadvertent disconnection of the line between the trailer and the tractor the control valve will automatically activate trailer s brakes Valve used in the system is equipped with a circuit causing the brakes to be applied when trailer is disconnected from the tractor When compressed air line is connected to the tractor the device automati...

Page 51: ...smission to cylinders during braking Automatic brake force regulator 3 adapts braking pressure to the trailer load During normal work it does not require service Connections of pneumatic conduits are marked with coloured safety covers which enable identification of individual conduits red supply connection yellow control connection Each pneumatic connection is equipped with a cut off valve which a...

Page 52: ...ted to the front axle expander arms through equalising bar 2 Tightening the cable causes tilting of the expander arms which part the brake shoes immobilising the trailer while standing motionless 3 2 6 HYDRAULIC SYSTEM OF THE RAMPS FIG 3 8 Design of the ramps hydraulic system 1 hydraulic selective control valve 2 flow divider 3 cylinder 4 hydraulic coupler 5 hydraulic pipes 6 information decal 7 i...

Page 53: ...on the right side of the trailer The system is supplied from the external hydraulic system of the tractor Oil supply conduit and return conduit are marked with information decals 6 and 7 which define proper flow of working medium in the system IMPORTANT Before unfolding the ramps first loosen and then remove ramps interlocks Towing the trailer without installed and properly tightened interlocks is...

Page 54: ...00 SECTION 3 3 12 3 2 7 SUPPORT HYDRAULIC SYSTEM FIG 3 10 Design and diagram of the support hydraulic system 1 straight hydraulic support 2 cut off valve 3 hydraulic coupler 4 information decal 5 information decal ...

Page 55: ...ion open When towing the trailer the support must be folded to transport position and secured with a cotter pin The cut off valve must be set to Z position closed 3 2 8 LIGHTING SYSTEM The trailer s electrical lighting system is designed to be supplied from direct current source of 12 V The trailer s electrical system should be connected to the tractor using an appropriate connection lead that is ...

Page 56: ...sign is shown in Figure 3 12 The subassembly is mounted on the load platform planks behind the chassis front wall The winch facilitates loading of damaged machines and machines without driving system Hydraulic motor 1 connected with the winch drum 2 is supplied from the external hydraulic system of the tractor Steel rope ended with a hook is wound around the drum The steel rope is routed between v...

Page 57: ...ic motor operation is controlled by electrical controller 3 or wirelessly using a remote control On the right side of the drum there is lever 5 whose task is to disconnect drive from the drum in order to unwind the rope without the use of the motor ...

Page 58: ...Pronar RC2100 SECTION 3 3 16 ...

Page 59: ...SECTION 4 CORRECT USE ...

Page 60: ...s Operator s Manual and observe all recommendations understand the design and the principle of machine operation IMPORTANT Before proceeding to hitching to tractor the user must carefully read this Operator s Manual and additional publications attached to machine and observe all recommendations External inspection Check completeness of machine standard and optional equipment Check condition of pro...

Page 61: ...re is no doubt as to the trailer s good technical condition it can be connected to tractor Start the tractor check all systems and conduct test run of trailer without load no load in load box It is recommended that the inspection is conducted by two people one of which should always remain in the tractor cab Test start should be conducted according to the sequence shown below Connect trailer to ap...

Page 62: ...ty rules of this Operator s Manual can be dangerous to the health and life of the operator and others After completion of test drive check tightness of wheel nuts TIP Service operation hitching to unhitching from tractor adjustment of drawbar position use of ramps and use of winch etc are described in detail further in the Operator s Manual in sections 4 and 5 4 2 HITCHING AND DISCONNECTING FROM T...

Page 63: ...ne marked yellow with yellow socket in tractor Connect pneumatic line marked red with red socket in tractor Connect hydraulic brake system lines optional equipment interchangeable with pneumatic system Connect main line supplying electric lighting system Connect hydraulic ramp control system lines optional equipment Ramp control system lines are marked with decals which indicate correct direction ...

Page 64: ...azard zone Be especially careful when hitching the machine to tractor When connecting the hydraulic lines to the tractor make sure that the tractor hydraulic system and trailer are not under pressure IMPORTANT When hitching is completed secure the electrical leads and hydraulic and braking system lines in such a way that they do not become entangled in tractor s moving parts and are not at the ris...

Page 65: ... caution when disconnecting trailer from the tractor Ensure good visibility Unless it is necessary do not go between tractor and trailer Before disconnecting conduits and drawbar eye close tractor cab and secure it against access by unauthorised persons 4 3 TRAILER SUPPORT OPERATION Setting the support to driving position Immobilise tractor and trailer with parking brake Open valve 5 Shift valve l...

Page 66: ...rt foot to position 2 Insert safety pin 3 to socket B and secure it with R clip 4 Prior to moving off release trailer s parking brake FIG 4 1 Trailer support operation 1 support in parking position 2 support in driving position 3 safety pin 4 R clip of safety pin 5 cut off valve 6 information decal O Z 7 information decal A B safety pin sockets ...

Page 67: ...y pin 3 and R clip 4 Setting the support to rest position Immobilise tractor and trailer with parking brake Remove R clip 4 from safety pin 3 Figure 4 1 Turn the support to position 1 parking position Insert safety pin 3 to socket A and secure it with R clip 4 Set cut off valve 5 to O position Operate selective control valve in the tractor in order to lower the support foot Drawbar hitching eye sh...

Page 68: ...Do NOT exceed the trailer s maximum carrying capacity People or animals and loads not permitted by the Manufacturer must not be carried on the trailer Loading the trailer Tractor and trailer must be placed to drive forwards Immobilise tractor and trailer with parking brake Switch off tractor engine secure cab to prevent unauthorised access Loosen tensioning bolts of the ramps interlocks and remove...

Page 69: ...d visibility DANGER Do NOT stand within the danger zone i e keep a distance of approximately 5 meters from each side of the trailer If loading takes place on soft or muddy ground place thick planks strong plates or other materials under the ramps to prevent them from sinking into the ground IMPORTANT Unfolded ramps must be at the same height Do not place the ramps in such a manner that one of the ...

Page 70: ...curing cotter pin 3 cover of holder for spare planks 4 pin of extension lock Tractor and trailer must be placed to drive forwards Immobilise tractor and trailer with parking brake Switch off tractor engine secure the cab to prevent unauthorised access Loosen tensioning bolts of the ramps interlocks and remove interlocks Take out locking pins and lower the ramps to the ground manually or using hydr...

Page 71: ...il they fully rest on the ground Otherwise when a machine is driven onto the load platform the trailer will have a tendency to raise the drawbar which may cause damage to the tractor hitch or drawbar Oversize load may not fully load the floor extension elements Wheels brackets supports or other load elements item 1 Figure 4 3 which carry the machine load must be arranged in such a manner as to ens...

Page 72: ...is trailer 3 symmetry axis of the transported trailer s wheel 4 extension plank 5 load platform A forbidden position B C allowed position DANGER Do NOT stand within the danger zone i e keep a distance of approximately 5 meters from each side of the trailer IMPORTANT During transport of oversize load all brackets and additional planks must be unfolded ...

Page 73: ...ground Otherwise when a machine is driven off the load platform the trailer will have a tendency to raise the drawbar which may cause damage to the tractor hitch or drawbar If unloading takes place on soft ground place planks plates or other materials under the ramps to prevent them from sinking into the ground 4 5 RAMPS PROTECTIONS 4 5 1 RAMPS INTERLOCK IMPORTANT If ramps interlocks are installed...

Page 74: ...frame and ramp pins If ramps are not fully folded correct their position by means of selective control valve Ramps interlocks must be positioned in such a manner as to ensure that locks 3 are located over the nut Otherwise the lock will slide off during travel Tighten the ramps interlocks by turning nut with lever 2 Fold the lever and secure it by means of lock 3 ...

Page 75: ... catches 1 Figure 4 5 are mounted near the ramp rotation pin Pull out the lever to position 2 in order to release the catch In this position the catch lever can not be automatically closed After releasing the interlock the ramps can be lowered to working position IMPORTANT After finishing ramps folding make sure that spring catches are in locking position ...

Page 76: ...e preliminarily by means of hydraulic controller by winding the rope around the drum Check if the hook is correctly attached Pull the load onto the trailer platform 4 6 2 GENERAL PRINCIPLES OF SAFE OPERATION OF THE WINCH Before operating the winch immobilise tractor and trailer with parking brake It is additionally recommended that chocks should be placed under the trailer wheel Do NOT use additio...

Page 77: ...ss of the type of load carried the user is obliged to secure it in such a manner that the load is unable to move freely on the load platform and pose a threat to other road users during transport Securing the load involves its correct attaching to load platform by means of belts ropes chains or other devices equipped with a tensioning mechanism Information provided in this section do not describe ...

Page 78: ...g lugs Figure 4 5 whose maximum load must not exceed 2 000 kg The optimum angle for attaching securing measures is 300 see Figure 4 6 Increased load applied to fixing lug or wrong attaching angle may cause damage to fixing lug and lead to relocation of load DANGER Do NOT exceed the maximum load of external fixing lugs 3 additional fixing lugs are installed on the symmetry plane of the load platfor...

Page 79: ...udence Listed below are the key guidelines for driving the tractor and trailer combination Before moving off make sure that there are no bystanders especially children near the trailer or the tractor Take care that the driver has sufficient visibility Make sure that the ramps are correctly secured with interlocks and the support is set to transport position Make sure that the trailer is correctly ...

Page 80: ...road users and position reflective warning triangle according to traffic regulations While driving on public roads the trailer must be fitted with a certified or authorised reflective warning triangle When driving comply with all road traffic regulations indicate an intention to turn using indicator lamps keep all road lights and indicator lights clean at all times and ensure they are in good cond...

Page 81: ...ry 6 months In the event of intensive work check the nut tightening at least every 100 km During wheel dismounting memorize the sequence of wheel and spacer ring dismounting The smaller ring is mounted on the wheel axle drum side The larger ring is mounted on the external side Regularly check and maintain correct pressure in tyres according to Operator s Manual especially if trailer is not used fo...

Page 82: ...Pronar RC2100 SECTION 4 4 24 ...

Page 83: ...SECTION 5 MAINTENANCE ...

Page 84: ...ctions which are not regarded as possible for the trailer operator to perform the user shall invalidate the guarantee 5 2 SERVICING BRAKES AND AXLES 5 2 1 PRELIMINARY INFORMATION Work connected with the repair change or regeneration of axle and brakes elements should be entrusted to specialist establishments having the appropriate technology and qualifications for this type of work The responsibil...

Page 85: ...ler to tractor and place chocks under trailer wheel Engage and release in turn the main brake and then the trailer parking brake Main brake and parking brake should be engaged and released without great resistance and severity Check means of securing cylinder and return springs Check cylinder movement and correct return of piston to start position The help of a second person is required who shall ...

Page 86: ...rd level ground Place securing chocks under one trailer wheel Ensure that trailer shall not move during inspection Raise front wheel opposite to the side where chocks are placed The lifting jack should be placed under the axle between U bolts 1 Figure 5 1 securing axle to shock absorber leaf springs or as near as possible to axle mounting Recommended fulcrum is marked with an arrow Lifting jack mu...

Page 87: ... such an event the bearing together with sealing ring should be replaced with new parts or cleaned and greased again During inspection of bearings ensure that possibly detected looseness comes from the bearing and not from the suspension system TIP Damaged hub cover or lack of hub cover causes penetration of contamination and dampness to hub which causes significantly faster wear of bearing and hu...

Page 88: ...ring looseness of axles 5 2 4 ADJUSTMENT OF WHEEL AXLE BEARINGS LOOSENESS PREPARATION PROCEDURES Prepare tractor and trailer for adjustment procedures according with description provided in section 5 2 3 FIG 5 2 Adjustment of road wheel axle bearings 1 hub cover 2 castellated nut 3 securing split cotter pin ADJUSTMENT OF ROAD WHEEL AXLE BEARINGS Take off hub cover 1 figure 5 2 Take out split cotte...

Page 89: ...ctable resistance not originating from abrasion of brake shoes in brake drum Adjustment of bearing slackness may only be conducted when the trailer is hitched to tractor and it is not loaded TIP If the wheels are dismounted bearing slackness is easy to check and adjust 5 2 5 MOUNTING AND DISMOUNTING WHEELS INSPECTION OF WHEEL NUT TIGHTENING WHEEL DISMOUNTING Immobilise trailer with parking brake P...

Page 90: ...ernal wheel 2 internal wheel 3 tyre valve extension 4 nut 5 washer 6 spacer ring WHEEL MOUNTING Clean axle pins and nuts of dirt contamination Do not grease thread of nuts and pins Check condition of pins and nuts if necessary replace Mount internal wheel on hub Check condition of tyre valve extension Mount spacer rings on pins ...

Page 91: ...m nuts M20x1 5 TIGHTENING NUTS Nuts should be tightened gradually diagonally in several stages until obtaining the required tightening torque using a torque spanner If a torque spanner is not available one may use an ordinary spanner The arm of the spanner L Figure 5 4 should be selected according to the weight of the person F tightening the nut Remember that this method of tightening is not as ac...

Page 92: ...act wrench because of danger of exceeding permissible tightening torque the consequence of which may be breaking the thread connection or breaking off the hub pins The greatest precision is achieved by use of a torque spanner Before commencing work ensure that correct tightening torque value is set 5 2 6 CHECK AIR PRESSURE EVALUATE TECHNICAL CONDITION OF WHEELS AND TYRES Tyre pressure should be ch...

Page 93: ...yre valve extension facilitates checking air pressure in internal wheel tyre Wheels should be inspected with regard to distortion breaking of material breaking of welds corrosion especially in the area of welds and contact with tyre Technical condition and appropriate maintenance significantly extends the life of these components and ensures appropriate level of safety to trailer users Checking ty...

Page 94: ...g braking repairs are made to braking system Trailer wheels must brake simultaneously Brakes adjustment involves changing the position of the expander arm 1 Figure 5 5 in relation to expander shaft 2 REQUIRED SERVICE ACTIONS FIG 5 5 Adjustment of axle mechanical brakes 1 expander arm 2 expander shaft 3 cylinder fork Dismount cylinder fork mounted on expander arm 1 ...

Page 95: ...hdrawal of a piston ram may cause abrasion of brake shoes in drum and result in overheating trailer brakes Expander arms must be positioned in parallel with regard to each other at full braking If this is not so adjust the position of the lever which has the longer stroke The cylinder fork mounting position is selected by the Manufacturer and may not be changed For all the braking systems on this ...

Page 96: ...ubricate parking brake mechanism 1 and pins of cable guide rollers 4 Install new cable adjust cable tension FIG 5 6 Installation of steel cable 1 steel cable 2 clamp jaw 3 thimble 4 nut 5 heat shrink tubing INSTALLATION OF STEEL CABLE Secure cable ends by means of heat shrink tubing 5 Mount thimble 3 Mount the first clamp jaw as close as possible to thimble and tighten nuts 4 Mount other clamp jaw...

Page 97: ...ace Place securing chocks under trailer wheel Unscrew the brake mechanism bolt maximally 1 Figure 5 7 anti clockwise Loosen nuts of handbrake cable clamps located near expander lever Tighten cable and tighten clamps Length of parking brake cable should be so selected that at total release of working and parking brake the cable would be loose and hanging by 1 2 cm FIG 5 7 Adjustment of parking brak...

Page 98: ...ent every 12 months if needed 5 3 PNEUMATIC SYSTEM MAINTENANCE 5 3 1 PRELIMINARY INFORMATION Work connected with the repair change or regeneration of system components brake cylinders conduits control valve braking force regulator etc should be entrusted to specialist establishments having the appropriate technology and qualifications for this type of work DANGER Do NOT use the trailer when brake ...

Page 99: ...ppearance of leaks compressed air will reach places of damage on the exterior with a characteristic hiss Lack of system tightness may be exposed by covering checked elements with washing fluid or other foaming preparations which will not react aggressively with system components It is recommended to supply preparations commercially available designed to facilitate discovering air leaks Damaged com...

Page 100: ...or worn should be replaced Visual assessment of system Conduct inspection of system at the same time as when checking tightness IMPORTANT Repair exchange or regeneration of pneumatic system components may only be performed in a specialised workshop 5 3 3 CLEANING THE AIR FILTERS FIG 5 8 Air filter 1 securing slide lock 2 air filter cover ...

Page 101: ...tion to resistance point Remove securing slide 1 figure 5 8 Hold the filter cover 2 with the other hand After removing slide lock the cover is pushed off by the spring in the filter housing The insert and the filter body should be carefully washed out and blown through with compressed air Assembly should be done in reverse order Cleaning the air filter filters every 3 months of use 5 3 4 DRAINING ...

Page 102: ...5 20 FIG 5 9 Draining water from air tank 1 air tank 2 drain valve 3 control connector Draining water from air tank after each week of use 5 3 5 CLEANING DRAIN VALVE DANGER Before dismantling drain valve release air from tank ...

Page 103: ...of braking system Damaged connection body or connection socket to second trailer should be replaced In event of damage to cover or seal change these elements for new reliable elements Contact of pneumatic connector seals with oils grease petrol etc may cause damage and accelerate ageing process If the trailer is unhitched from the tractor connections should be protected by covers or placed in thei...

Page 104: ... tank i e by pressing and holding the drain valve in that position until the tank is completely empty Remove the pneumatic line by loosening the nut 2 Cut off pneumatic line of required length 1 Use damaged line as standard for measuring proper length of new line The ends of the pneumatic line 1 must be cut exactly at right angles Install nut 2 clamping ring 3 and reinforcing sleeve 4 Install pneu...

Page 105: ...IMINARY INFORMATION Work connected with the repair change or regeneration of hydraulic system components cylinders valves etc should be entrusted to specialist establishments having the appropriate technology and qualifications for this type of work The duties of the operator connected with the hydraulic system include inspecting and checking air tightness of system ...

Page 106: ...lic system inspect cylinders and hydraulic lines In the event of confirmation of oil on hydraulic ram cylinder bodies ascertain origin of leak Inspect hydraulic seals when ram cylinder is completely extended Minimum leaks are permissible with symptoms of sweating however in the event of noticing leaks in the form of droplets stop using the trailer until faults are remedied If unreliability is evid...

Page 107: ...ston surfaces etc Inspection of hydraulic connections and sockets each time before hitching trailer to tractor 5 4 4 CHANGE OF HYDRAULIC LINES Hydraulic lines must be changed every 4 years regardless of their technical condition This should be entrusted to specialised workshops Change of hydraulic lines every 4 years 5 5 ADJUSTMENT OF DRAWBAR EYE POSITION FIG 5 11 Adjustment of drawbar position 1 ...

Page 108: ... in its new position and tighten with bolts 3 using appropriate torque The faceplate design 2 allows 4 possible drawbar eye positions Figure 5 11 Drawbar eye tightness should be checked according to the schedule defined by the Manufacturer Drawbar eye tightness should be checked simultaneously with wheel nut tightness checking Tightening torque should amount to 240 Nm Nuts should be tightened grad...

Page 109: ...amaged reflective lights must be replaced The responsibilities of the user are limited to technical inspection of electrical system and reflectors Changing bulbs REQUIRED SERVICE ACTIONS Hitch trailer to tractor with appropriate connection lead Check if the connection lead is reliable Check connection sockets in tractor and trailer Check completeness and technical condition of trailer lights Check...

Page 110: ...rews and it is not necessary to dismantle whole lamp or trailer subassemblies TAB 5 2 List of bulbs LAMP BULB TYPE BULB 12V 21W BA15S 12V 21W BAU15s orange 12V 21 5W BAY15d Right rear lamp assembly 24 7200 007 Left rear lamp assembly 24 7000 007 12V 5W SV8 5 8 Left end clearance lamp 31 3409 05 Right end clearance lamp 31 3409 04 12V 4W BA9s Licence plate illumination light 36 3209 01 12V 5W SV8 5...

Page 111: ...eve in drum casing 4 A 3M 3 Expander shaft bracket sleeve 4 A 3M 4 Drawbar hitching eye 1 B 14D 5 Absorber spring 4 C 6M 6 Spring sliding surface 4 B 3M 7 Rocker arm pin 2 B 3M 8 Leaf spring absorber pin 4 B 3M 9 Hydraulic cylinder bearing fixing eye of spring absorbers 1 4 A 3M 10 Parking brake mechanism 1 A 6M 11 Pin of parking brake cable guide roller 4 A 6M 12 Drawbar side surface 2 B 1M 13 Ro...

Page 112: ...ay lubrication periods TAB 5 4 Recommended lubricants LISTED ON TAB 5 3 DESCRIPTION A machine general purpose grease lithium alkaline B permanent grease for heavily loaded elements with addition of MOS2 or graphite C ordinary machine oil silicon grease in aerosol Trailer lubrication should be performed with the aid of a manually or foot operated grease gun filled recommended grease Before commenci...

Page 113: ...SECTION 5 Pronar RC2100 5 31 FIG 5 12 Lubrication points part 1 ...

Page 114: ...Pronar RC2100 SECTION 5 5 32 FIG 5 13 Lubrication points part 2 ...

Page 115: ...rer During trailer use the user is obliged to observe lubrication instructions according to attached lubrication schedule 5 8 CONSUMABLES 5 8 1 HYDRAULIC OIL Always adhere to the principle that the oil in the trailer hydraulic system and in the tractor hydraulic system are of the same type In the event of application of different types of oil make certain that both hydraulic substances may be mixe...

Page 116: ... tract A hazard only occurs when oil is strongly atomised oil vapour or in the case of fire during which toxic compounds may be released Oil fires should be quenched with the use of carbon dioxide foam or extinguisher steam Do not use water to quench oil fires 5 8 2 LUBRICANTS For parts under great load it is recommended to apply lithium grease with molybdenum disulphide MOS2 or graphite additive ...

Page 117: ...tiveness but particular care must be taken during work During washing washer nozzle may not be closer than 50 cm from the surface being cleaned Water temperature shall not exceed 55 C Do not direct water stream directly at system and equipment elements of trailer i e control valve braking force regulator brake cylinders hydraulic cylinders pneumatic electric and hydraulic plugs lights electrical c...

Page 118: ...plastic from which these elements are made may be susceptible to organic substances and some detergents As a result of long term reaction of some substances the ageing process may be accelerated and risk of damage increased Rubber elements should be maintained with the aid of special preparations after previous thorough washing After finishing washing wait until trailer is dry and then grease all ...

Page 119: ...be carefully washed and dried During longer storage of unused trailer it is recommended that every 2 to 3 weeks the machine may be moved a bit so that the place of contact of tyres with ground is changed The tyres will not be deformed and maintain proper geometry Also tyre pressure should be inspected from time to time and if necessary pressure should be increased to appropriate value 5 11 TIGHTEN...

Page 120: ...200 M16 160 210 310 M20 300 425 610 M24 530 730 1 050 M27 820 1 150 1 650 M30 1 050 1 450 2 100 1 resistance class according to DIN ISO 898 standard TIP Hydraulic lines should be tightened with torque of 50 70 Nm FIG 5 14 Bolt with metric thread 1 resistance class d thread diameter ...

Page 121: ...eded Damaged bearing Replace bearing Noise in axle hubs Damaged hub parts Replace Insufficient pressure in system Check pressure on tractor pressure gauge wait till compressor fills tank to required pressure Damaged air compressor in tractor Repair or replace Damaged brake valve in tractor Repair or replace Leaking system lines or connections Check system for tightness Incorrect main or parking br...

Page 122: ...g corrosion check ram cylinder for tightness piston seal in case of need repair or replace ram cylinder Excessive cylinder ram loading Check and reduce cylinder loading if necessary Damaged hydraulic lines Check and ascertain that hydraulic lines are tight not fractured and properly tightened If necessary replace or tighten Damaged hydraulic selective control valve Check if selective control valve...

Page 123: ...NOTES ...

Page 124: ... ...

Page 125: ...ANNEX A Tyre dimensions LP AXLE FRONT REAR WHEEL BRAKE 1 215 75 R17 5 135 133 J 17 5x6 75 ...

Reviews: