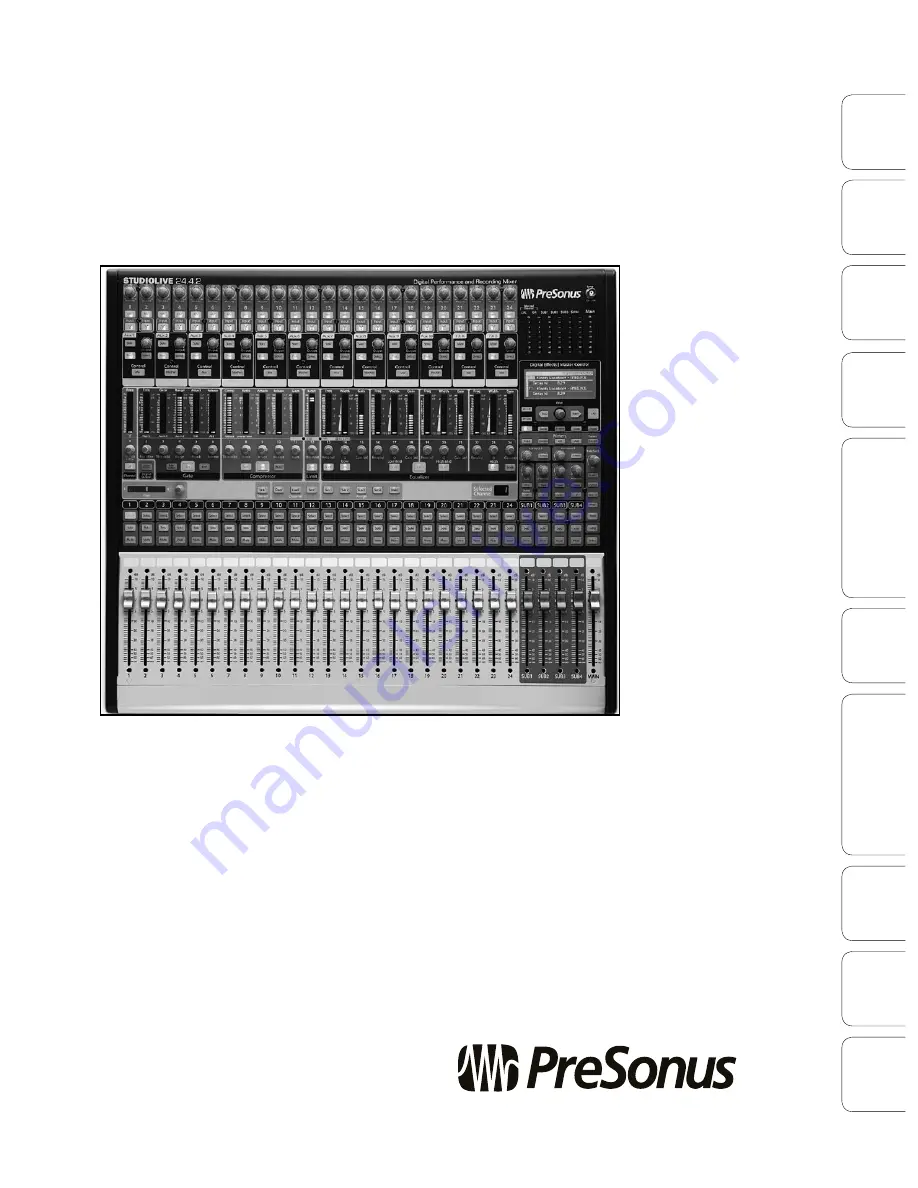
background image

StudioLive

 24.4.2

Owner’s Manual

www.presonus.com

Quick S

tar

t:

Lev

el

Setting

Ov

er

view

Hook

up

Con

trols

Connec

ting

to

 a

Comput

er

Tut

orials

Technic

al

Inf

orma

tion

Trouble

-

shooting  W

arr

an

ty

Sc

enes

, P

resets

, S

yst

em Menu

,

and MIDI C

on

trol

Sof

tw

ar

e Univ

ersal C

on

trol

SL Remot

e, C

aptur

e, 

and S

tudio O

ne A

rtist

Summary of Contents for STUDIOLIVE 24.4.2

Page 1: ...com Quick Start Level Setting Overview Hookup Controls Connecting to a Computer Tutorials Technical Information Trouble shooting Warranty Scenes Presets System Menu and MIDI Control Software Universal Control SL Remote Capture and Studio One Artist ...

Page 2: ... electrical and electronic equipment CE This product complies with the European Union Council Directives and Standards relating to electromagnetic compatibility EMC Directive 2006 95 EC and the LowVoltage Directive 2004 108 EC 0 1 Important Safety Instructions The exclamation point within an equilateral triangle is intended to alert the user to the presence of important operating and maintenance s...

Page 3: ... 4 1 2 What You Can Process with the Fat Channel and FireWire Sends 23 4 1 3 Fat Channel Dynamics Processing and EQ 24 4 1 4 Fat Channel Panning and Stereo Link 33 4 1 5 Fat Channel Output Assignments 34 4 1 6 Copying Loading and Storing Fat Channel Settings 34 4 2 Metering 35 4 2 1 StudioLive Metering Controls 35 4 3 Input Channel Strip 36 4 3 1 Input Channel Controls 36 4 4 Aux and FX Buses 38 4...

Page 4: ...3 Using StudioLive Remote for iPad 87 7 3 1 Networking your iPad and Computer 87 7 3 2 Connecting to Virtual StudioLive and the StudioLive Mixer 90 7 3 2 SL Remote Overview Page 91 7 3 3 Aux Mix Page 95 7 3 4 The GEQ Page 98 7 3 5 Channel Zoom Page 101 7 4 Capture 102 7 4 1 What is Capture 102 7 4 2 Start Page 103 7 4 3 The Session Page 104 7 4 4 The Edit Window 106 7 4 5 Getting Started in Captur...

Page 5: ...Mixing 163 8 5 2 Using an External Effects Processor 163 8 6 Digital Effects 166 8 6 1 Reverb 166 8 6 2 Delay 167 8 7 Level Setting Procedure in Detail 168 8 8 The Solo Bus 169 8 8 1 Using the Solo Bus for Monitoring 169 8 8 2 Destructive Soloing 170 8 8 3 Using Solo in Place SIP to Set Up a Mix 170 8 9 Cascading Two StudioLive 24 4 2s 171 8 9 1 Configuring Multiple Units 171 8 9 2 Aux Mixing with...

Page 6: ...4 4 2 Overview Hookup Controls Connecting to a Computer Tutorials Technical Information Trouble shooting and Warranty Scenes Presets System Menu and MIDI Control Software Universal Control SL Remote Capture and Studio One Artist ...

Page 7: ...tudioLive to adjust the level up or down until you have achieved the optimal volume Do not allow your inputs to clip Watch the level meters when the LEDs near the Clip mark the top LED will illuminate indicating that the analog to digital converters are in danger of being overdriven Overdriving the converters will cause digital distortion which sounds terrible The XMAX preamps in your StudioLive p...

Page 8: ...power amplifier or powered monitors 3 If you re using passive speakers connect them to your power amplifier using speaker cable 4 Bring down all the faders on your StudioLive to the setting Make sure that the Trim knob on Channel 1 is all the way counter clockwise 5 Plug your StudioLive into a power outlet and turn it on 6 If your microphone requires phantom power engage the 48V button on Channel ...

Page 9: ...from the bottom up To begin bring all your faders down and raise your main fader to unity gain Press and hold the SIP button in the Solo section until it illuminates red Press the Solo button and then the Solo button on your kick drum mic channel Notice that all the other channels on your StudioLive have been muted Bring up the fader on the kick drum channel and press the channel s Select button T...

Page 10: ...front of a live audience We encourage you to contact us at 1 225 216 7887 in the U S Central Time Zone with any questions or comments you may have regarding the PreSonus StudioLive PreSonus Audio Electronics is committed to constant product improvement and we value your suggestions highly We believe the best way to achieve our goal of constant product improvement is by listening to the real expert...

Page 11: ...ware by PreSonus allowing you to record every performance and rehearsal with a few clicks of your mouse Intuitive flexible and powerful StudioLive revolutionizes music production opening endless creative possibilities 2 2 Summary of StudioLive 24 4 2 Hardware Features 24 bit 48 kHz sampling rate 24 Class A XMAX microphone preamplifiers 24 line level inputs 10 auxiliary buses 4 subgroups High defin...

Page 12: ...on Record with two mouse clicks Essential editing suite copy cut paste splice resize Peak LED style meter bridge with clip indicators Marker placement and recall Export between marker Record stereo mix from StudioLive mixer Import export wav aiff or OpenTL files 2 4 Summary of StudioOne Artist Software Features All PreSonus audio interfaces include PreSonus Studio One Artist recording software whi...

Page 13: ...c EQ and effects Quickly drop entire Scenes to the mixer for instant recall of all channel effects and graphic EQ settings Load effects quickly by simply dragging presets into the GUI Makes StudioLive as easy to use as Studio One Remote controllable with an Apple iPad running PreSonus SL Remote Use the mouse to quickly assign channels to multiple buses mute solo etc Timestamped backups of the enti...

Page 14: ...nd Windows which in turn controls any StudioLive series digital mixer As long as you have a wireless connection between your iPad and computer you are in control of the console Provides wireless control over Virtual StudioLive and hence over any StudioLive series digital mixer Overview displays levels mutes panning EQ curves and Fat Channel processing for multiple channels at once Aux view shows t...

Page 15: ...s in the Box In addition to this manual your StudioLive package contains the following PreSonus StudioLive 24 4 2 digital recording and performance mixer 6 1 8 m 6 pin to 6 pin FireWire 400 cable 6 1 8 m 6 pin to 9 pin FireWire 400 to 800 cable IEC power cord StudioLive Software Library containing PreSonus StudioLive Artist program DVD plus gigabytes of third party content PreSonus Capture CD with...

Page 16: ...ure can be individually enabled for each channel using buttons on the top panel WARNING Phantom power is only required for condenser micro phones and can severely damage dynamic mics especially ribbon mics Therefore switch phantom power off for all channels where it is not required XLR connector wiring for phantom power Pin 1 GND Pin 2 48V Pin 3 48V Line level Input Each channel of the StudioLive ...

Page 17: ...uxiliary inputs which are generally used as effects returns In Section 8 5 2 we discuss using an aux bus to send several channels to an external effects processor the aux inputs can be used to return the processed signal to the mixer Each input is balanced stereo The left input is normalled to the right input so if you are returning a mono signal to the mix connect it to the left input and the sig...

Page 18: ...ts are parallel to each other and to the mono output Main Output Level This knob controls the maximum output level of the XLR and TRS main outputs The signal can be attenuated to 40 dB and boosted up to 0 dB Power User Tip All the main outputs XLR Stereo TRS Stereo and XLR Mono of the StudioLive are active all the time Because of this you can send your main mix to five speakers at the same time Th...

Page 19: ...reamps and line level inputs are available through the direct outputs The FireWire returns cannot be patched to the direct outputs See Section 6 4 2 for more information DB25 pin outs H Hot C Cold G Ground FireWire Ports There are two standard 6 pin FireWire 400 ports on the back of the StudioLive Either port can be used to connect your StudioLive to a FireWire port on your computer If your comput...

Page 20: ...F output either through the System menu in the Digital Effects Master Control section or in the StudioLive Control Panel See Sections 5 4 and 7 2 5 for more information Because the StudioLive cannot be synced externally you will need to use it as the master clock and set your S PDIF equipped device to receive word clock externally via S PDIF Please consult the documentation for your external digit...

Page 21: ...hooting and Warranty Scenes Presets System Menu and MIDI Control Software Universal Control SL Remote Capture and Studio One Artist Hookup 3 Hookup Basic Hookup Diagram 3 2 3 2 Basic Hookup Diagram Vocal Mic Vocal Monitor Bass Bass Monitor Bass D I Drum Monitor Drum kit Keyboards Monitor Keyboard Guitar Amp Guitar Monitor Main P A ...

Page 22: ...ion Trouble shooting and Warranty Scenes Presets System Menu and MIDI Control Software Universal Control SL Remote Capture and Studio One Artist 3 Hookup Hookup 3 3 Typical Band Hookup 3 3 Typical Band Hookup Mac or PC running Universal Control with VSL Capture or Studio One Artist Drum Monitor Drum kit Keyboards Monitor Main P A ...

Page 23: ...nty Scenes Presets System Menu and MIDI Control Software Universal Control SL Remote Capture and Studio One Artist Hookup 3 Hookup Typical Band Hookup 3 3 Vocal Mic Vocal Monitor Vocal Mic Vocal Monitor Vocal Mic Vocal Monitor Horn Horn Monitor Bass Bass Monitor Bass D I Guitar Amp Guitar Monitor Guitar Amp Guitar Monitor Guitar Mic Guitar Monitor ...

Page 24: ...anty Scenes Presets System Menu and MIDI Control Software Universal Control SL Remote Capture and Studio One Artist 3 Hookup Hookup 3 4 Typical Church Hookup 3 4 Typical Church Hookup Mac or PC running Universal Control with VSL Capture or Studio One Artist Crying Room Foyer or Overflow Room Drum Monitor Electronic Drum kit Keyboard Monitor Keyboard Main P A ...

Page 25: ...cenes Presets System Menu and MIDI Control Software Universal Control SL Remote Capture and Studio One Artist Hookup 3 Hookup Typical Church Hookup 3 4 Vocal Mic Vocal Monitor Vocal Mic Vocal Monitor Vocal Mic Vocal Monitor Vocal Mic Vocal Monitor Horn Horn Monitor Bass Bass Monitor Bass D I Guitar Monitor Guitar Amp Guitar Monitor Guitar Monitor Guitar ...

Page 26: ...n Trouble shooting and Warranty Scenes Presets System Menu and MIDI Control Software Universal Control SL Remote Capture and Studio One Artist 3 Hookup Hookup 3 5 Typical Recording Hookup 3 5 Typical Recording Hookup Mac or PC running Universal Control with VSL Capture or Studio One Artist Drum Headphones Drum kit Reference Monitors ...

Page 27: ...ystem Menu and MIDI Control Software Universal Control SL Remote Capture and Studio One Artist Hookup 3 Hookup Typical Recording Hookup 3 5 PreSonus HP60 Headphone Distribution PreSonus HP60 Headphone Distribution PreSonus HP60 Headphone Distribution Condensor Mic Vocal Headphones Bass Bass Headphones Bass D I Guitar Amp Guitar Headphones Guitar Headphones Guitar Amp ...

Page 28: ...internal effects buses Assign subgroup and main routing Meter inputs post dynamics processing outputs and gain reduction for all 24 channels Meter aux send outputs Copy save and load mix scenes Recall your fader position for stored mixes 4 1 1 Select Buttons Meters and the Fat Channel Select Buttons All around the StudioLive you will see Select buttons There is a Select button on each of the 24 in...

Page 29: ...o mention that these meters are only active when one of the 24 input channels or an aux bus is selected It should be noted that while the noise gate compressor EQ and limiter are available on every input and bus the high pass filter is only available on the inputs 10 auxes and 2 internal FX buses and the phase reverse is only available on the 24 inputs In addition other inputs and buses without Se...

Page 30: ...f an encoder and a meter You will notice that the there is a frequency range to the left of the meter The high pass filter s threshold can be set from 24 Hz to 1 kHz When the meter is set to its lowest point the filter is off Remember that all frequencies below a high pass filter s threshold are attenuated See Section 8 3 1 for more details The slope of the High Pass Filter is 6dB octave The high ...

Page 31: ...efault the Expander button will be enabled Power User Tip In practice expanders and noise gates are used almost identically The main difference is that an expander is smoother and more gradual so that it is easier to set the attack and release times correctly Gate Key Filter Sets and Displays the Frequency atWhich the GateWill Open This encoder sets and the meter displays the frequency at which th...

Page 32: ...the attack time from 0 2 to 150 ms Power User Tip A fast attack rate is crucial for percussive instruments Slow rising signals such as vocals and bass guitar require a slower attack with these signals a faster attack can cause an audible click All gates have the ability to click when opening but a properly set gate will never click Gate Release Sets and Displays the Rate atWhich the Gate Closes on...

Page 33: ...ve and a preprogrammed attack and release curve is used In this mode the attack is set to 10 ms and the release is set to 150 ms All other compressor parameters can still be adjusted manually Compressor Threshold Sets and Displays theThreshold of the Compressor for the Selected Channel or Output Bus This encoder sets and the meter displays the compressor threshold for the selected channel or outpu...

Page 34: ...tput Bus This encoder sets and the meter displays the release setting of the compressor for the selected channel or output bus Release sets the length of time the compressor takes to return the gain reduction back to zero no gain reduction after crossing below the compression threshold Release can be set from 40 to 1 000 milliseconds Power User Tip Very short release times can produce a choppy or ...

Page 35: ...ctive The Low EQ band is available for all input and output buses Low EQ Frequency Control Sets and Displays the Center Frequency of the Low EQ Band This encoder sets and the meter displays the center frequency of the equalizer s Low band The center frequency is the middle of the passband the mean between the lower and upper cutoff frequencies that define the limits of the band You can adjust the ...

Page 36: ...Q is available for all input and output buses Low Mid EQ Frequency Control Sets and Displays the Center Frequency of the Low Mid EQ This encoder sets and the meter displays the center frequency for the Low Mid band You can adjust the center frequency from 75 Hz to 1 2 kHz Low Mid EQ Q Control Sets and Displays the Q of the Low Mid Frequency Band This encoder sets and the meter displays the Q for t...

Page 37: ...y to the bandwidth When the center frequency is constant the bandwidth is inversely proportional to the Q so as you raise the Q you narrow the bandwidth High Mid EQ Gain Control Sets and Displays the Gain Attenuation or Boost at the Center Frequency This encoder sets and the meter displays the gain cut or boost at the center frequency of the High Mid band The level of the center frequency can be s...

Page 38: ...e bandwidth High EQ Gain Control Sets and Displays the Gain Attenuation or Boost at the Center Frequency of the High Frequency Band This encoder sets and the meter displays the gain cut or boost at the center frequency of the High EQ band The level of the center frequency can be set between 15 and 15 dB High Shelving EQ Button Turns on the High Shelving EQ for the Selected Input or Output Bus When...

Page 39: ...stereo pan Stereo linking is done within the Fat Channel Input channels aux buses and subgroups can be linked to create a stereo pair The stereo pairs are predefined and cannot be changed They are as follows Channels 1 and 2 Channels 3 and 4 Channels 5 and 6 Channels 7 and 8 Channels 9 and 10 Channels 11 and 12 Channels 13 and 14 Channels 15 and 16 Channels 17 and 18 Channels 19 and 20 Channels 21...

Page 40: ...ted The subgroups main output aux bus aux inputs and internal effects returns automatically send their signals post Fat Channel dynamics and EQ All FireWire sends are pre fader except for the subgroups and the main outputs For more information on using your StudioLive as an audio interface please consult Section 6 4 1 6 Copying Loading and Storing Fat Channel Settings Every setting in the Fat Chan...

Page 41: ...ioLive or a Mix or Mix Pan button in the Aux section Power User Tip It is important to mention that the meters simply overlay the selected Fat Channel state For instance if you have Channel 16 selected and then press the Output button in the Meter section the knobs and buttons in the Fat Channel section will still be active and any changes made will be applied but the changes will not be displayed...

Page 42: ...dio program 4 3 1 Input Channel Controls Trim Control Adjusts the Input Gain Level The Trim control adjusts the gain of the channel s analog input Power User Tip It is very important to properly adjust this control in order to minimize noise and avoid overload distortion Follow the Quick Start level setting instructions on page 5 before operating a channel Phantom Power Button Turns Phantom Power ...

Page 43: ... depending on whether PFL or SIP is selected in the Solo bus section Please review Section 8 8 for details When a Solo button is enable that channel or bus will automatically be selected and its Select button will illuminate Mute Button Turns Muting On and Off This button mutes its channel It will illuminate red when the channel is muted When a mute button is engaged its channel will be muted in a...

Page 44: ...l automatically be selected and its Select button will illuminate Post Fader Send Button Enables and Disables the Post Fader Send When this button is enabled the send levels to that aux bus will be post Fat Channel and post fader and therefore are affected by fader settings If the button is disabled by default the aux buses use the Pre 1 setting so that all channels on your StudioLive are sent to ...

Page 45: ...ich the sends are post EQ and post dynamics but pre fader However in the System Menu you can switch the EFX sends to the Pre 1 setting in which the sends are pre fader and pre Fat Channel dynamics processing and EQ Please review Section 5 4 for details Output Level Control Adjusts the Master Level of the Effects Send This knob controls the overall output level of the internal effects mix Internal ...

Page 46: ... the send amount for each of the input channels Aux Flip Mode Enables Aux Send Levels for Main FireWire Return Tape In Aux Ins A and B FXA FXB andTalkback Pressing the Mix button a second time will switch the first seven meters and encoders to become the aux send level controls for the Main FireWire Return Analog Tape In Aux Input A Aux Input B the output of FXA and FXB and the Talkback mic While ...

Page 47: ...wing you to add dynamics processing EQ panning etc or to patch a Subgroup to the Main Bus Solo Button Turns Soloing On or Off for the Subgroup Bus This button will solo it subgroup either to the monitor outputs post fader PFL and SIP are not available for the Subgroups When a Solo button is enabled that channel or bus will automatically be selected and its Select button will illuminate Mute Button...

Page 48: ...tton Enables Fat ChannelViewing As previously described in Section 4 1 1 the Select button routes its channel through the Fat Channel allowing you to add dynamics processing EQ panning etc Main Fader Controls the Level of the Main Output The fader controls the overall level of the main stereo and mono outputs The white area above the fader can be used as a scribble strip Use only oil pencils Other...

Page 49: ...the same time You also can patch processed return signals from an external effects processor using Aux Inputs A and B Section 8 5 goes into the connections and procedures in greater detail Power User Tip Aux Ins A and B can also be used as stereo line input channels for line level devices like keyboards synths and amp modelers In effect this makes your StudioLive 24 4 2 a 26 channel mixer Aux Inpu...

Page 50: ... do have independent level control over this input in each of the 10 Aux Mixes by using Aux Flip Mode Because of this you can adjust the Talkback signal up or down or even off on a per Aux basis For more information about Aux Flip Mode please see Section 4 4 3 Talkback Mic Level Controls the Overall Level of theTalkback Mic This knob controls the overall volume of the external talkback mic input T...

Page 51: ...e engaged at the same time 2 Track In Volume Control Adjusts the Level for theTape Input This knob adjusts the level for both the tape input and the main FireWire return Tape Input On Off Button Patches theTape Input to the Main Outputs This button patches the Tape input to the main outputs It will illuminate to indicate that the Tape input is being sent to the mains To disable the routing simply ...

Page 52: ... Solo bus and has no effect on the main or subgroup mixes PFL soloing is not available for the Subgroups The Aux bus soloing is always PFL regardless of whether this mode is engaged SIP Solo In Place On Off Button Enables Solo In Place Mode SIP Solo In Place or destructive soloing mutes every unsoloed channel on the StudioLive If one of the muted channels is routed to the mains or a subgroup it wi...

Page 53: ...Monitor button routes the same signal that is being sent from the main outputs to the Monitor bus This signal is always pre fader FireWire Monitor Button Assigns the Main Left Right FireWire Return to the Monitor Bus The FireWire Monitor button patches the main left right FireWire return that is the signal from your audio software s master outputs to the Monitor bus The level for this input is con...

Page 54: ... the FX Menu press the FX button twice 4 8 1 The Digital FX Effects Menu The StudioLive features two internal effects processors Each processor can access the StudioLive s selection of high quality reverbs and delays As described in Section 8 4 each of these effects can be routed to any of the subgroups the aux bus or the main outputs To access the effects library and make adjustments to effect pa...

Page 55: ... X to 1 00 If they are eighth notes you would set Time X to 0 50 half notes would be 2 00 and so on In this way you can precisely synchronize or syncopate the delay echoes to the music in real time Power User Tip While you have to select the Time parameter in order to use the Tap button you only have to do this the first time you use the Tap button for that effect Once the Tap button has been used...

Page 56: ...rt F22 GateVerb Med F23 GateVerb Long F24 GateVerb Extreme TYPE NAME F25 LARGE HALL Church F26 Cathedral F27 Gymnasium F28 Arena F29 PLATE PlateVerb Shimmer F30 PlateVerbThick F31 PlateVerb Drums F32 PlateVerbVox F33 MONO DELAY M ShortTail F34 M Short Slap F35 M Long Slap F36 M Triplet F37 M Triplet F38 FILTER DELAY Analog Slap F39 AnalogTrip F40 Analog 8th F41 STEREO DELAY Slap Quick F42 Long Sla...

Page 57: ... Scene allows you to move to another song or project and come back to the current mix later For live shows with multiple bands you can set up custom mixes for each band at sound check and recall the mix when that band goes onstage You also can save custom mixes for each venue that a band plays repeatedly To save a Scene press the Scene button and either page down to the second screen or press Stor...

Page 58: ...amics processors and the four bands of the EQ will be turned off Their parameters will be set as follows FAT CHANNEL PARAMETERS HIPASS NOISE GATE LIMIT COMPRESSOR EQ LOW L MID H MID HIGH OFF KEY N A OFF THR 0 dB P S PEAK n a n a PEAK THR 0 05 s THR 0 dB RAT 2 1 Q 0 6 0 6 0 6 0 6 RNG N Aj ATK 20 ms FREQ 130 Hz 320 Hz 1 4 kHz 5 kHz ATK 5 ms REL 150 ms GAIN 0 dB 0 dB 0 dB 0 dB REL 0 7 ms GAIN 0 dB MO...

Page 59: ...luminate and the meter section of the Fat Channel will display the recalled fader position Move the faders up or down until only the center LED is illuminated in each meter to recall the stored position The subgroup and main meters at the top right of the StudioLive will display the recalled positions for their respective faders As long as you remain in Fader Locate mode the faders on your StudioL...

Page 60: ...to create your own library of presets To load a preset to any channel on the StudioLive first press the Select button for the desired channel From the Fat Channel press the Load button You will notice that LCD now displays the Channel Preset Load menu The Channel Preset Load menu always displays the selected channel onto which the preset will be loaded Use the Value encoder to locate the preset yo...

Page 61: ...c Fingerstyle 29 KEY Piano Bright 30 KEY Piano Warm 31 KEY Piano Jazz 32 KEY Piano Electric 33 KEY Piano Electric 2 34 KEY Vibes 35 HRN Trumpet 36 HRN Trombone 37 HRN Sax 38 HRN Sax Solo 39 PRC Congas 40 PRC Bongos 41 PRC Cowbell 42 PRC Tambourine 43 VOX Male 1 44 VOX Male 2 45 VOX Male 3 46 VOX Female 1 47 VOX Female 2 48 VOX Female 3 49 VOX Speech 1 50 VOX Speech 2 51 EMPTY LOCATION 52 EMPTY LOC...

Page 62: ... Traditionally a 31 band graphic EQ uses 31 second order shelving filters with fixed frequencies in order to simulate a curve set by the user via 31 front panel sliders A well designed graphic EQ creates an output frequency responses that corresponds as closely as possible to the curve displayed graphically by the sliders In an analog EQ this is achieved by carefully choosing the bandwidth of the ...

Page 63: ...rolled individually or odd even pairs can be controlled as a stereo unit To copy the left side odd GEQ settings to the right side even simply page down to the right side and press the Recall button Pressing the Recall button while using an odd numbered GEQ will flatten it Power User Tip In VSL or SL Remote if you assign a Graphic EQ to a bus that has been Stereo Linked it will always function as a...

Page 64: ...nd FX Menus your StudioLive remembers on which page of the System Menu you were when you navigated way To quickly jump to Page 1 simply press the System button LCD Contrast and LCD Backlight Press the System button to access the System menu The first page allows you to adjust the LCD Contrast and LCD Backlight for optimal viewing in your working environment These settings are retained when the uni...

Page 65: ... it the StudioLive will mute all post converter outputs for two seconds when the sample rate is changed and while it is connecting to a computer This includes the main and the control room outputs as well as the aux and subgroup outputs While this offers a good measure of protection to your sound system it could put the brakes on a live show Because of this it very important that the sample rate b...

Page 66: ...groups as the source for your mains you can factor in that 2 to 4 ms delay the left speaker needs so that unbalanced speaker placement is no longer an issue Lockout Mode Your StudioLive features a Lockout mode that allows you to create a password and lock the controls This is especially useful in situations where several people will be running sound but only one or two are knowledgeable enough to ...

Page 67: ...www PreSonus com and check for the latest driver build before installing your product 6 1 System Requirements Below are the minimum computer system requirements for your StudioLive and Capture software Macintosh Operating Systems Mac OS X10 6 2 recommended Hardware Minimum Intel Core Solo 1 5 GHz processor 1 GB RAM Recommended Intel Core Duo or Intel Xeon processor 2 GB or more RAM Windows Operati...

Page 68: ...ollow as possible Please read each message carefully to ensure the StudioLive driver is properly installed Before beginning the StudioLive installation setup please close all applications including antivirus software and disconnect the StudioLive from your computer After the installation is successfully completed don t forget to re enable your antivirus protection If you see any Windows Security a...

Page 69: ...ecially careful that you do not connect your StudioLive too soon 1 You will be directed to the Welcome screen Click Continue and follow the onscreen instructions 2 You will be directed to choose the hard drive onto which you want to install the drivers and Universal Control Panel You must choose your system drive Storage drives and partitions cannot be used as hosts for the driver Once the install...

Page 70: ...Live with Popular Audio Applications Complete setup instructions for PreSonus Studio One Artist and a brief tutorial on its features are located in Section 7 4 of this manual Below are basic driver setup instructions for four popular audio applications Apple Logic Pro Express 7 1 Launch Logic Pro Express 2 Go to Logic Preferences Audio 3 Click on the Devices Tab 4 On the Core Audio tab check Enabl...

Page 71: ... now select the StudioLive s inputs and outputs for each track created in Live 6 4 2 FireWire Sends and Returns When using the StudioLive as an audio interface it is important to understand the terms FireWire send and FireWire return Because the audio interface in the StudioLive is completely integrated with the other functions of the mixer the FireWire I O is designed to work as an independent bu...

Page 72: ...l record the backing vocal group and the track whose input is assigned to Subgroup 2 will record your guitar group If however you have a stereo drum group assigned to Subgroups 3 4 you can create a stereo track in your recording application and assign its input to Subgroups 3 and 4 For more information on subgroup mixing please see Section 8 4 The obvious exception to this principle is the Talkbac...

Page 73: ...you can monitor the main output from your recording application without using two channels on your StudioLive leaving the other 24 outputs available to be routed to the Fat Channel or for inserting a plug in on a live instrument see the next section for more details 6 4 3 Using Plug In Effects as Inserts FireWire streaming on your StudioLive is continuously bidirectional This means that the Studio...

Page 74: ...he signal source for that channel press the channel s Select button and assign the channel to a subgroup bus ensuring that only that channel is routed to the subgroup You can then process the playback stream through the Fat Channel for both the individual channel and for the subgroup In your recording software assign the subgroup as an input source for a new track and record it The unprocessed tra...

Page 75: ...ormation on Universal Control please consult the next section Mac users Please skip to the next section for important information about using your StudioLive as your main Core Audio device 1 In the Launch window go to Settings WDM setup 2 The WDM Channel Mapper window will open By default WDM Outputs 1 and 2 are routed to StudioLive Channels 1 and 2 As previously mentioned we recommend that they b...

Page 76: ...ous limitation of this is that you will use up two input channels on your StudioLive just for Core Audio playback Channels 25 and 26 are available through the FireWire Return buttons inside the 2 Track In and Monitor sections of the StudioLive and we recommend that you use these channels for Core Audio playback The following instructions will help you configure your StudioLive to be used as the ma...

Page 77: ...aces Universal Control includes two windows the Launcher window and the Device window For the StudioLive the Device window is the Virtual StudioLive VSL application VSL provides bidirectional control of channel subgroup and main bus levels Fat Channel parameters aux mixes effects and the Graphic EQs It also provides a visual overview of your StudioLive settings so that you can see adjust and organ...

Page 78: ...e Rate Selector Changes StudioLive Sample Rate Set the sample rate to 44 1 or 48 kHz from the Launcher window when your StudioLive is connected to a computer A higher sample rate will increase the fidelity of the recording It will also increase the file size and the amount of system resources necessary to process the audio To ensure the safety of the audio equipment connected to it the StudioLive ...

Page 79: ...nce but the less playable virtual instruments and the like become In general 512 samples 11 to 12 milliseconds will provide you with a large enough buffer for optimum system performance but low enough to be unobtrusive You should set your buffer size and sample rate prior to launching your host application On the Mac the buffer size is set from inside your host application DeviceWindow Button Open...

Page 80: ...e for the Universal Control or add a new FireStudio family product to your system you should use this feature to ensure that the firmware is up to date If the firmware needs to be updated the update application will launch automatically If you have presets and scenes saved in your StudioLive updating the firmware will not overwrite them Settings Factory Reset ResetsYour StudioLive to its Factory D...

Page 81: ...rol SL Remote Capture and Studio One Artist Universal Control 7 1 Settings Always onTop Allows the Launch Window to Stay in View When Other Applications Are in Use When this is enabled the Launch window will remain in the foreground when other applications are active rather than being in the background behind the current application s window Settings WDM Setup Opens the WDM Channel Mapper Windows ...

Page 82: ... will dynamically change the channel faders to knobs 7 2 1 VSL Browser When you first launch VSL notice the Browser window along the right side of the screen The Browser in VSL functions similarly to the Browser in Studio One From the Browser you can see all of the Scenes Fat Channel presets FX presets and graphic EQ settings that are saved on your StudioLive and on your computer You can also crea...

Page 83: ... your Scenes and presets are contained in dedicated folders in VSL To view a specific set of presets simply click on its tab SCENE Displays stored Scenes FAT CH Displays stored Fat Channel presets FX Displays stored effects presets GEQ Displays graphic EQ presets BACKUP Displays any backup logs that have been created in VSL Send Button Transfers Designated Scenes Fat Channel FX and Graphic EQ Pres...

Page 84: ... any time Remove Button Deletes a Stored Scene or Preset In the On the Disk section of the Browser notice the Remove button Clicking this button will delete the currently selected stored Scenes or presets BackupTab Creates and Restores Backups ofYour StudioLive The Backup tab allows you to create complete time stamped snapshots of your StudioLive This can be especially useful when completing a pro...

Page 85: ... VSL overview is also updated If you use your mouse to adjust a parameter in VSL the StudioLive will be updated remotely It is important to remember that every button knob slider and fader on the VSL corresponds directly to a button knob slider or fader on your StudioLive The graphic above identifies each controller labeled with its corresponding control on the StudioLive and can be used as a map ...

Page 86: ... Masters view also displays the send levels for the Aux Flip Mode Channels Main FireWire Return Tape Input Aux In A and B FXA FXB and Talkback From within the Masters View you can also Select each Aux and FX bus to edit its Fat Channel insert GEQ in Focus In general most Graphic EQ settings are created prior to any live show and are not adjusted after that However sometimes minor adjustments must ...

Page 87: ...sters view 7 2 4 Loading Scenes and Presets from VSL As stated in the previous section the Browser window in VSL functions in much the same way as the Browser in Studio One This means that to load a Scene or preset from the Browser window you simply select it and drag it over the mixer or channel on which you wish to load it Scenes and presets can be dragged from either the On The Disk or the Devi...

Page 88: ...ing an FX Preset To load an FX preset select it from the Browser window and drag it over any part of the desired FX bus in the Master section of the Overview tab Once it is loaded you can use the FX Type menu to change the effect and create new presets Note At this time VSL does not transfer the name of the preset to the StudioLive All FX presets loaded from within VSL will be labeled Natural in t...

Page 89: ...true stereo Graphic EQ if the pair is inserted onto a stereo bus allowing you to control both sides at once e g if you insert GEQ 1 2 onto Subgroups 3 and 4 and stereo link the Subgroups GEQ 1 2 will function as a stereo Graphic EQ rather than a dual mono Graphic EQ Note The GEQ menu on your StudioLive does not have to be active to make changes to a Graphic EQ from VSL If you wish to use the Fat C...

Page 90: ...Live allows you to route to a computer the mixer s 24 input channels and any 8 of 23 buses and other inputs This is done via the Auxiliary Inputs Router on the Setup tab To route FireWire Sends 25 through 32 first decide which buses and inputs you would like to record in addition to your input channels Once you ve determined your input pairs simply patch them to a stereo pair of auxiliary inputs o...

Page 91: ... the Scene Recalling Menu on your StudioLive 7 2 7 Enabling Lockout Mode Your StudioLive features a Lockout mode that allows you to temporarily disable nearly every feature on the StudioLive although analog features e g input trim knobs faders and cue tape input and monitor levels can still be adjusted Because of this after unlocking your StudioLive and before resuming mixing you should take a qui...

Page 92: ...buttons for Channels 1 2 3 4 and 5 in that order The Panel Status will switch to Locked indicating that Lockout mode is now active To unlock your StudioLive navigate back to Page 4 Lockout in the System menu if this page is not currently active Press the same sequence of Select buttons The Panel Status will change to Unlocked and you will be able to resume your mix 7 2 8 Remotely Controlling Studi...

Page 93: ...tall Universal Control on and sync your StudioLive to a Windows or Apple computer that has both a FireWire connection and a wireless card Once you have connected and synced your StudioLive to VSL on your computer the next step is to create an ad hoc wireless network between your iPad and your computer An ad hoc or peer to peer network is a very simple network involving at least two systems in this...

Page 94: ...to computer network 6 Click on Next twice 7 Enter the network name such as StudioLive 8 Select the Security WAP or WEP 9 Enter the Security key or password For the best security include letters numbers and punctuation Then click OK 10 Check Save this network 11 Click Turn on Internet connection sharing Mac OS X 10 6 1 On the Menu bar click on the Wireless Status Icon 2 From the pull down menu sele...

Page 95: ...ck on Wi Fi 3 Make sure a check mark is visible before your ad hoc network name 4 Click on the arrow next to your ad hoc network name 5 The IP address should begin with 169 254 xxx xxx 6 If there is no IP the field is blank that s why StudioLive Remote can t connect 7 Wait about 60 seconds on that screen and a new IP like 169 254 xxx xxx will be assigned automatically 8 If no IP appears click choo...

Page 96: ...ill be holding your iPad in Landscape view This will allow you to use the Start Overview Aux Mix and GEQ pages Portrait view provides you with a zoomed in look at the currently selected channel and allows you to scroll quickly through every channel and bus on your StudioLive To launch StudioLive Remote tap on the SL Remote icon on your iPad When you launch StudioLive Remote for the first time on a...

Page 97: ... with most of the controls on the Overview Page in VSL The following parameters can be controlled and or viewed from this page Channel and Main Volume Channel and Main Select Channel Mute Channel and Master Metering Channel Panning Channel FireWire Return Channel and Main Gate Compressor and EQ overview Channel and Main Gate Compression and EQ zoom If you have labeled your channels using the Scrib...

Page 98: ...oviews and Fat Channel Zooms Displays a Microview of the Gate Compressor and EQ Taptoopenthezoomedviewandmakechanges Each Channel and Bus features a Microview of the Fat Channel components These Microviews allow you to see whether a particular channel or bus has dynamics processing enabled If any of the dynamics processors in the Fat Channel are turned off its Microview will be grayed out To make ...

Page 99: ... the pan position The pan position is displayed numerically in the Channel Select field Channel Controls Mute Controls the Mute for Each Channel To mute a channel tap its Mute button The Mute button will turn red indicating that the channel has been muted Channel Controls Fader and Metering Controls the Level for Each Channel and Displays Each Channel s Metering To control the volume of a channel ...

Page 100: ...te Overview Aux Mixer and Graphic EQ you will find the Masters Overview This displays the metering for the Main bus Tapping on the Masters Overview will open the Masters Section page The Masters Section page displays the fader meter and Fat Channel Microviews for the Mains Subgroups 16 4 2 and 24 4 2 and Auxes 16 0 2 These parameters are controlled the same way they are controlled for channels in ...

Page 101: ...e The Aux Mix page shows the send level for each channel on each Aux and FX bus It corresponds directly to the Aux Mix tab in VSL but has been streamlined to show only the parameters you need to control when away from the StudioLive To navigate right or left touch anywhere on the screen and swipe your finger to the left or right Swiping left scrolls the screen to the left Swiping right scrolls the...

Page 102: ...ix tab will be highlighted to alert you that its individual channel send levels will be displayed below Press the Post button to engage post fader sends The Gate Compressor and EQ Microviews function the same for Auxes as they do for channels and Mains To adjust the send levels for any channel tap anywhere in its send level and move your finger up or down while maintaining constant contact with th...

Page 103: ...r sends Press the Mute button to mute the effect to its assigned buses The Gate Compressor and EQ Microviews function the same for auxes as they do for channels and mains To adjust the send levels for any channel tap anywhere in its send level and move your finger up or down while maintaining constant contact with the iPad screen These send level displays have been designed to emulate the StudioLi...

Page 104: ...up or down while maintaining constant contact with your iPad To close the Effects Editor tap the x in the upper right corner 7 3 4 The GEQ Page As with StudioLive and VSL StudioLive Remote includes a Graphic EQ page so that you can tune the room from any listening position or can dial in a monitor on stage while you are actually standing in front of it The GEQ page in StudioLive Remote corresponds...

Page 105: ...Fine Adjustments Press the button to zoom in on the GEQ view Slide your finger to the left or right to access additional bands Use the Overview Map in the bottom right corner of the GEQ page to reference your current position within the 31 bands Zooming Out ZoomsView Out Press the button to zoom out the GEQ view If you have not zoomed all the way out so that you don t have all 31 bands on your scr...

Page 106: ...the sliders or you can simply draw in an EQ curve and fine tune from there To enable EQ curve drawing tap the Draw button and slide your finger over the graphic EQ bands Each band s slider will snap to your finger as you pass over it GEQ Assignment Inserts Each GEQ on an Aux Subgroup or Main Bus Output Pair StudioLive 24 4 2 Only Like VSL and the StudioLive 24 4 2 SL Remote allows you to choose on...

Page 107: ...r for a channel or bus It also allows you to quickly scroll through every channel and bus on your mixer by sliding your finger down the right side of your screen Next Advances View to Next Channel Sub Main Bus Assigns Assigns Channel Bus to Subs or Mains FW In Engages FireWire Return Gate Controls Gate Functions EQ Controls EQ Functions Pan Controls Displays Panning Metering Displays Metering Mete...

Page 108: ...computer Once the StudioLive mixer has been connected to your computer and Capture has been installed simply launch Capture and you are ready to record This section contains general information including the basic layout and workflow of Capture and is a great place to start for new audio recording software users Versions There is one version of Capture which runs under the Windows and Mac OS X ope...

Page 109: ...diting and Undo Redo Almost every user action in Capture can be undone and redone There is no limit to how far back actions can be undone and how far forward undone actions can be redone Because of this feel free to explore without worrying you will permanently alter anything In fact just pressing buttons might be the quickest way to learn High Quality Audio To match your StudioLive s 32 bit float...

Page 110: ... use with Capture The Audio Device window will either display PreSonus FireStudio or No Audio Device the former indicates that your StudioLive mixer is connected to the computer correctly and is ready to use with Capture The Sample Rate window displays the currently configured sample rate as set on the StudioLive mixer About Capture To view information about Capture including your version number a...

Page 111: ...n Between each meter you will find a Link button When this button is active Capture will record that track as a stereo interleave file By default the routable bus pair 25 and 26 is link enabled Record Arm Button Below each meter you will find the Record Arm button for that track When this button is active Capture will record audio from that input Mouse Tools ArrowTool The default tool for access t...

Page 112: ...an be recorded based on the size of the available storage left on the hard drive to which you are recording 7 4 4 The Edit Window The Edit window is the main view of the Session page which provides an overview of the Session for editing The Edit Window contains the following Timeline Ruler Displays time increments in seconds Marker Lane Displays user inserted markers Arm All Click this button to a...

Page 113: ...er successfully Capture will display No Audio Device in the Audio Device field Creating a New Session A Session is the document type in which all recording takes place in Capture To create a new Session do one of the following 1 From the Start page click on the New Session button 2 Navigate to File New Session 3 Press Ctrl Cmd N on the keyboard Session Setup When a new Session is created a setup m...

Page 114: ...it automatically detects which type of StudioLive mixer 16 0 2 16 4 2 two 16 4 2s or 24 4 2 is connected and self configures Each input from your StudioLive mixer is represented with a mono input track in the Track column of the Session and each input track has a corresponding level meter in the meter bridge An additional stereo track will also be added to allow you to record the first pair of Aux...

Page 115: ...Software Universal Control SL Remote Capture and Studio One Artist Capture 7 4 It is possible to process each StudioLive mixer input channel with the Fat Channel before the input signal is routed to Capture To do this you will need to engage the Post button in the Dig Out section of the Fat Channel for each channel in your StudioLive mixer This routes the signal post EQ and post dynamics processin...

Page 116: ...ack must be record enabled or armed Capture provides two Record Enable buttons for each input one on the track and on the Meter Bridge To record enable an audio track click on either the Record Enable button on the track or on the Meter Bridge Both buttons will turn entirely red in color when either button is enabled and the track s corresponding meter in the meter bridge should begin to move up a...

Page 117: ...ally used as the standard file format The recommended file system for the recording partition on your computer is NTFS on Windows and HFS on Mac OS X After recording the next step in production is usually editing In the editing process recorded events are manipulated in many ways to achieve a desired sound 7 4 7 Editing in Capture All audio that exists within the timeline of your Session will be v...

Page 118: ...vents with the Arrow Tool do one of the following Click outside of the range of an Audio Event and then drag over any other events a gray box will be drawn while you drag over the target selection area Release the click once the box is drawn over all of the events you wish to select and these events will now all be selected and can be edited at once Click on any event and then while holding Ctrl C...

Page 119: ...e Split tool icon the scissors By splitting a single event you essentially create two events that can be edited independently If multiple events are selected across multiple tracks the Split Tool will affect all of the selected events in the same way EraserTool The Eraser Tool is used to delete an Audio Event Click on the Eraser Tool button or press NumPad 5 on the keyboard to select the Eraser To...

Page 120: ...ollowing describes the ways in which you can quickly navigate throughout your Session Scrolling To scroll left and right through time in your Session click and drag the horizontal scroll bar near the bottom of the Edit window Timeline Zooming You can zoom in and out of your Session with respect to time in the Edit window so that you can look at the entire length of the Session or just view a small...

Page 121: ...sion Looping To Loop the playback of any range of your Capture session do one of the following Select an Event with the Arrow Tool or select a Range with the RangeTool that you wish to loop Press P on the keyboard to set the loop range to your selection The range will be indicated by a bar drawn in the timeline with a left and right flag on either end Mouse over the gray line above the time line Y...

Page 122: ...n be mixed just like any other audio input Creating a Mix The process of creating a mix with Capture and the StudioLive mixer is quite simple You play back your recorded tracks through the StudioLive and record the main output of the StudioLive to the Auxiliary Stereo Track in Capture The process works as follows 1 In VSL select Main L R for Auxiliary Inputs 25 and 26 2 Be sure Record Arm is disab...

Page 123: ...it is possible to listen to the audio files as you are browsing in the Preview Player Click the Play button in the Preview Player to play the currently selected audio file Click the Stop button to stop playback Click the Loop button to loop the playback of the currently selected audio file Export Audio Files To export audio from your Session in Capture navigate to Session Export to Audio File or p...

Page 124: ... mix file must be a 16 bit 44 1 kHz WAV file Once you have recorded your final mix to the Auxiliary Stereo track in Capture it is recommended you export the audio from the Auxiliary Stereo track to an audio file for this purpose Once the correct audio file for your mix has been exported you may use any CD burning application to put that mix on a recordable audio CD Mixing a Capture Session in Stud...

Page 125: ...n Audio Files Directly Some audio editing applications such as digital audio workstations or DAWs do not support the Open TL format which makes the options somewhat limited when importing sessions created in other programs In this case you must manually import the Audio Events from your Capture Session into the audio editing application using whatever means possible in that program Refer to the do...

Page 126: ...W Save Session Cntrl Cmd S Save Session As Cntrl Cmd Shift S Quit Cntrl Cmd Q Edit Undo Cntrl Cmd Z Redo Cntrl Cmd Y Cut Cntrl Cmd X Copy Cntrl Cmd C Paste Cntrl Cmd V Delete Del Select All Cntrl Cmd A Deselect All Cntrl Cmd D Zoom In Cntrl Cmd or E Zoom Out Cntrl Cmd or W Zoom Full F Session Import File Command I Export to Audio File Command E Insert Marker Ins I Insert Named Marker Shift Ins Shi...

Page 127: ...tion Right Add Cntrl Cmd Shift Right Arrow Skip Right Cntrl Cmd Right Arrow Up Up Arrow Extend Selection Up Shift Up Arrow Extend Selection Up Add Cntrl Cmd Shift Up Arrow Skip Up Cntrl Cmd Up Arrow Down Down Arrow Extend Selection Down Shift Down Arrow Extend Selection Down Add Cntrl Cmd Shift Down Arrow Skip Down Cntrl Cmd Down Arrow Page Up Page Up Extend Selection Page Up Shift Page Up Extend ...

Page 128: ... Channel section for each input channel on the StudioLive mixer If the Post button is illuminated the channel s signal will be sent to your computer after it is processed in the Fat Channel if the Post button is not illuminated the signal will be sent without Fat Channel EQ and dynamics processing After setting the input channels on the StudioLive mixer for pre post processing the next step is to ...

Page 129: ...e The band you recorded the previous night comes over the next day to check out the recordings You launch Capture open the Session and begin playback through the StudioLive mixer After half a minute of tense silence while the band wonders what went wrong you realize that the band did not start the actual performance until 20 minutes after you started recording because the lead singer took so long ...

Page 130: ...using the StudioLive mixer and Capture Overdubbing In a studio recording session as opposed to recording live you might wish to record on only a few tracks or on a single track at a time and then record more later This process of adding to your recorded tracks later is called overdubbing Using Capture and the StudioLive mixer you can play recorded audio on any tracks through the StudioLive mixer a...

Page 131: ...the Aux 1 2 mix that the guitarist will listen to so he can hear himself If you record enable the Audio Track that corresponds to the guitar input channel in Capture you should see that track s level meter showing live input in the meter bridge With the Aux 1 2 mix set so that the guitarist can hear his live guitar playing and the tracks from Capture you are ready to record the lead guitar You can...

Page 132: ...o master your work create a digital version for the Web or incorporate third party VST plug ins into your recording process For more details on the Studio One Pro upgrade program for PreSonus customers please visit www presonus com Studio One Artist was designed for easy integration with both the StudioLive and Capture Sessions recorded in Capture can be opened directly in Studio One no exporting ...

Page 133: ...launch the program and the Activate Studio One menu will appear If you are a new Studio One user you will need to create a user account Follow the Create Account link if your computer is connected to the Internet Once you have created your account continue activating Studio One Artist online If your computer is not connected to the Internet visit the Studio One product page at www presonus com on ...

Page 134: ...nd tutorial material instruments loops samples and other third party content The Studio One Artist bundle includes all that you need to begin producing music Upon completing the Studio One Artist installation and activation process the Studio One Content Installer will appear If it does not appear navigate to Help Studio One Installation At the top of the installation menu select the source from w...

Page 135: ...ovides Quick Links to Configure Audio and MIDI In the middle of the Start page you will see the Setup area Studio One Artist automatically scans your system for all available drivers and selects a driver By default it will choose a PreSonus driver if one is available Selecting a Different Audio Driver from the Start Page Your StudioLive uses the same driver as the FireStudio family of interfaces I...

Page 136: ...er and a sound module The MIDI controls keyboard knobs faders etc will be set up as a Keyboard The sound module will be set up as an Instrument 1 You can set up your external MIDI devices from the Setup area in the Start page Before we set up a new Song for recording let s take a moment to configure external devices Connect the MIDI Out of your external MIDI controller to a MIDI In on your MIDI in...

Page 137: ...ntrol your external synthesizers and virtual instruments you should check the box next to Default Instrument Input This will automatically assign your keyboard to control all MIDI devices in Studio One Artist Click OK If you have a sound module you d like to connect leave the External Devices window open and proceed to the next part of this section If not you can close this window and skip to Sect...

Page 138: ...e Receive From drop down menu select the MIDI interface output from which Studio One Artist will receive MIDI data from your sound module If your sound module will not need to send information to Studio One you can leave this unspecified Click OK and close the External Devices window You are now ready to start recording in Studio One Artist The rest of this Quick Start Guide will go over how to se...

Page 139: ... those in the included content library will import at the correct tempo 4 When the Song window launches launch the Audio Setup window by going to File Options Windows or Studio One Preferences Mac and click on the Audio Setup button 5 Click on the Song Setup button to open the Song Setup window then click on the Audio I O Setup icon 6 Click on the Inputs tab in the Audio I O Setup window and you w...

Page 140: ...have access and can give them names We recommend that you create a mono output for each for the 24 FireWire returns on your StudioLive as well as one stereo output assigned to FireWire returns 25 26 to use for your stereo main output In the lower right corner you will see the Audition select menu This allows you to choose the output from which you will audition audio files prior to importing them ...

Page 141: ...o which a track is currently assigned This will bring up the inputs list You can also access the audio I O setup from here If you would like to add a track for each of the available inputs and have the routing automatically assigned simply go to Track Add Tracks for All Inputs To begin recording create an audio track assign it to input 1 and connect a microphone to the first channel on the StudioL...

Page 142: ...n you will also see them as available inputs 4 If you selected your MIDI keyboard controller as the default keyboard it will already be selected If not choose your MIDI controller from the Output menu directly below 5 To the left of the Add Track button you will find the Inspector button Click it to display more parameters for the selected track 6 At the bottom of the Inspector menu you will see y...

Page 143: ...irtual instrument patch without ever scrolling through a menu Opening the Browser In the lower right corner of the Arrange window are three buttons The Edit button opens or closes the audio editor or the MIDI piano roll editor depending on which type of track is selected The Mix button opens and closes the mixer window The Browse button opens the browser window which displays all of the available ...

Page 144: ...rop Effects To add a plug in effect to a track click the Effects button and select it or one of its presets in the effects browser then drag it over the track to which you would like to add it Drag and Drop Audio and MIDI Files Audio and MIDI files can also be quickly located auditioned and imported into your Song by dragging them from the file browser into the Arrange view If you drag the file to...

Page 145: ...me mic cable that carries the audio signal the term derives from the fact that there is no visible power cord and the voltage is not perceptible in the audio path The StudioLive sends 48 VDC phantom power from the XLR inputs only 8 1 2 Dynamic Dynamic microphones are possibly the most widely used microphone type especially in live shows They are relatively inexpensive resistant to physical damage ...

Page 146: ...the StudioLive as the likelihood of conflicting drivers is great If you are using a new or nonstandard type of microphone e g USB headset laser MEMS please consult your microphone s user s manual for power requirement and compatibility information Regardless of the microphone type you are using we recommend reading your microphone s user s manual thoroughly before engaging phantom power and if oth...

Page 147: ...nt with exact location If you are recording an amp with multiple speakers experiment with each one to see if one sounds better than the others Place a condenser microphone approximately six feet away pointed at the amp Experiment with distance Also experiment with inverting the phase of the room microphone to check for phase cancellation and reinforcement Select the fuller sounding position To use...

Page 148: ...ar into a passive direct box Connect the instrument output from the passive direct box to a bass amplifier Place a dynamic microphone an inch or two away from the speaker and connect it to a StudioLive microphone input Connect the line output from the passive direct box to a line input on a different channel of the StudioLive For recording place these signals on separate tracks During mixing you c...

Page 149: ...ng The heart of the StudioLive is the Fat Channel dynamics section What follows is an excerpt from brief tutorial on dynamics processing written by PreSonus president and founder Jim Odom It is included to help you get the most out of your StudioLive This tutorial will take you through the basics of dynamics processing and will explain the various types of dynamics processors 8 2 1 Common Question...

Page 150: ...y not overcompression is horrible That statement can be qualified by defining overcompression The term itself must have been derived from the fact that you can hear the compressor working A well designed and properly adjusted compressor should not be audible Therefore the overcompressed sound is likely to be an improper adjustment on a particular instrument unless of course it is done intentionall...

Page 151: ...ng process by reducing the amount of level changes needed for a particular instrument Take for example a vocalist who moves around in front of the microphone while performing making the output level vary up and down unnaturally A compressor can be applied to the signal to help correct this recording problem by reducing the louder passages enough to be compatible with the overall performance How se...

Page 152: ...tio the compressor gradually becomes a limiter Limiter A limiter is a compressor that is set to prevent any increase in the level of a signal above the threshold For example if you have the threshold knob set at 0 dB and the ratio turned fully clockwise the compressor becomes a limiter at 0 dB so that the output signal cannot exceed 0 dB regardless of the level of the input signal Attack Attack se...

Page 153: ...e dynamic expansion to undo compression before transmitting the audio signal This is commonly referred to as companding or COMPression followed by expANDING By far the most common use of expansion is downward expansion In contrast to compression which decreases the level of a signal after it rises above the compression threshold expansion decreases the level of a signal after the signal goes below...

Page 154: ...ost natural release of the signal Range The gate range is the amount of gain reduction that the gate produces Therefore if the range is set at 0 dB there will be no change in the signal as it crosses the threshold If the range is set to 60 dB the signal will be gated reduced by 60 dB etc Key Listen The key listen allows the user to listen to the signal that is being filtered by the gate Frequency ...

Page 155: ...arrower dynamic range It moves the vocal more up front in the mix Threshold Ratio Attack Release 3 3 dB 2 8 1 0 002 ms 38 ms Screamer This setting is for loud vocals It is a fairly hard compression setting for a vocalist who is on and off the microphone a lot It puts the voice in your face Threshold Ratio Attack Release 1 1 dB 3 8 1 0 002 ms 38 ms Percussion Snare Kick This setting allows the firs...

Page 156: ...d Ratio Attack Release 10 8 dB 1 9 1 108 ms 112 ms Synth The fast attack and release on this setting can be used for synthesizer horn stabs or for bass lines played on a synthesizer Threshold Ratio Attack Release 11 9 dB 1 8 1 0 002 ms 85 ms Orchestral Use this setting for string pads and other types of synthesized orchestra parts It will decrease the overall dynamic range for easier placement in ...

Page 157: ... to the nearest 10 Hz Note Freq Note Freq Note Freq Note Freq C 0 16 Hz C 2 65 Hz C 4 262 Hz C 6 1 05 kHz C 0 17 Hz C 2 69 Hz C 4 277 Hz C 6 1 11 kHz D 0 18 Hz D 2 73 Hz D 4 294 Hz D 6 1 17 kHz D 0 19 Hz D 2 78 Hz D 4 311 Hz D 6 1 24 kHz E 0 21 Hz E 2 82 Hz E 4 330 Hz E 6 1 32 kHz F 0 23 Hz F 2 87 Hz F 4 349 Hz F 6 1 39 kHz F 0 24 Hz F 2 92 Hz F 4 370 Hz F 6 1 48 kHz G 0 26 Hz G 2 98 Hz G 4 392 Hz...

Page 158: ...offers continuous control over the audio signal s frequency content which is divided into several bands of frequencies most commonly three to seven bands A fully parametric EQ like those in the StudioLive 24 4 2 offers control over the bandwidth basically the range of frequencies affected the center frequency of the band and the level boost cut of the designated frequency band It also offers separ...

Page 159: ...ies at once Graphic EQ The StudioLive 24 4 2 features 4 stereo 31 band graphic EQs that can be inserted on a variety of buses See Section 5 3 for details A graphic EQ is a multiband equalizer that uses sliders to adjust the amplitude for each frequency band It gets its name from the positions of the sliders which graphically display the resulting frequency response curve As explained in Section 5 ...

Page 160: ...ottom up kick snare toms hi hat overheads Each instrument resonates primarily in a specific frequency band so if you are working on your kick drum mic start with the lowest band of the EQ Tune in the best sounding low end and move on to the attack It is not uncommon to hear an annoying ringing or a twang mixed in with your amazing sounding low end and perfect attack so your next task will be to fi...

Page 161: ... 1 kHz Nasal 200 400 Hz Body 80 Hz and below Popping P s Piano 1 2 kHz Tinny 5 kHz More presence 300 Hz Boomy 100 Hz Bottom end Electric Guitar 1 2 kHz Shrill 3 kHz Clarity 80 Hz and below Muddy 125 Hz Bottom end Acoustic Guitar 2 3 kHz Tinny 5 kHz and above Sparkle 200 Hz Boomy 125 Hz Full Electric Bass 1 kHz Thin 600 Hz Growl 125 Hz Boomy 80 Hz and below Bottom end String Bass 600 Hz Hollow 2 5 ...

Page 162: ...ts System Menu and MIDI Control Software Universal Control SL Remote Capture and Studio One Artist 8 Tutorials 156 Quick Start Level Setting Overview Hookup Controls Connecting to a Computer Tutorials Technical Information Trouble shooting and Warranty Scenes Presets System Menu and MIDI Control Software Universal Control SL Remote Capture and Studio One Artist 8 3 Equalizers Table 2 ...

Page 163: ...he tonality of the instrument Vocals Pop FemaleVocals LOW ON OFF LOW SHELF LOW FREQ Hz LOW Q LOW GAIN LOW MID ON OFF LOW MID FREQ Hz LOW MID Q LOW MID GAIN ON OFF 130 0 6 2 ON 465 0 6 2 HIGH MID ON OFF HI MID FREQ kHz HIGH MID Q HIGH MID GAIN HIGH ON OFF HIGH SHELF HIGH FREQ kHz HIGH Q HIGH GAIN ON 2 4 0 4 2 ON OFF 6 0 0 3 8 Rock FemaleVocals LOW ON OFF LOW SHELF LOW FREQ Hz LOW Q LOW GAIN LOW MID...

Page 164: ... LOW Q LOW GAIN LOW MID ON OFF LOW MID FREQ Hz LOW MID Q LOW MID GAIN ON OFF 108 0 6 2 ON 385 0 6 2 HIGH MID ON OFF HI MID FREQ kHz HIGH MID Q HIGH MID GAIN HIGH ON OFF HIGH SHELF HIGH FREQ kHz HIGH Q HIGH GAIN ON 2 9 0 3 0 ON ON 8 0 N A 4 Kick Drum LOW ON OFF LOW SHELF LOW FREQ Hz LOW Q LOW GAIN LOW MID ON OFF LOW MID FREQ Hz LOW MID Q LOW MID GAIN ON OFF 108 0 4 4 ON 265 2 0 4 HIGH MID ON OFF HI...

Page 165: ...ol Software Universal Control SL Remote Capture and Studio One Artist Equalizers 8 3 Distorted Electric Guitar LOW ON OFF LOW SHELF LOW FREQ Hz LOW Q LOW GAIN LOW MID ON OFF LOW MID FREQ Hz LOW MID Q LOW MID GAIN ON OFF 320 0 5 6 ON 960 0 4 0 HIGH MID ON OFF HI MID FREQ kHz HIGH MID Q HIGH MID GAIN HIGH ON OFF HIGH SHELF HIGH FREQ kHz HIGH Q HIGH GAIN ON 3 5 1 0 4 ON ON 12 N A 0 Keyboards Piano LO...

Page 166: ...s in which subgroups can help you to create a more efficient mixing environment and a more successful live mix 8 4 1 Instrument Groups Grouping individual instruments that create a section in your mix has obvious advantages The entire group can be muted or soloed brought up or down in a mix and faded in or out for a more polished intro or outro Some of the most common submix groups are drums backi...

Page 167: ...l section to add dynamics processing and EQ to the stereo drum group Subgroup 1 s fader controls the level for the left side of your drum mix and Subgroup 2 s fader controls the right side 8 4 2 Effects Group This is perhaps one of the most creative ways in which a subgroup can be used By assigning an effects mix to a subgroup the front of house engineer can become in effect a member of the band T...

Page 168: ...oup to the Main output Because a delay can increase the signal s volume quite dramatically you may want to experiment with the delay at its most intense setting with EFX A s output turned up and use the limiter for Subgroup 3 to keep the level under control The level of the vocal delay is now controlled by the Subgroup 3 fader and you can use it to season the reggae band s performance The Tap butt...

Page 169: ...r mix is mono and is sent to a floor wedge or sidefill monitor The obvious exception is in ear monitor systems A studio monitor mix is usually stereo and is sent to a headphone amplifier so it requires both a left and a right channel input In both cases the function of the aux bus is the same 1 As an example let s create a mono monitor mix on Aux 1 To begin press the Mix button in the Aux 1 sectio...

Page 170: ...Effects Processor There are at least two advantages to using an aux bus for an effects processor rather than using a channel insert several channels can be sent to a single processor and you can vary the level sent from each channel to the processor allowing you to create an effects mix The StudioLive features two internal effects buses These are used much in the same way the aux buses are used to...

Page 171: ...o the effects processor the same way you used them to create a monitor mix only in this case you will decide which channels will be sent to the external processor and how much will be sent Let s say that you are inserting an external reverb to liven up a relatively dead room You might send a little bit of each input to the reverb but you probably will not want much of the drums and bass to be proc...

Page 172: ...e makes an audio recording sound more natural and therefore more pleasing The following parameters can usually be adjusted in a reverb effect Decay Decay is the time required for the reflections reverberation to die away In most modern music production reverb decay times of between one and three seconds are prevalent A reverb setting with strong early reflections and a quick decay are a great way ...

Page 173: ...urce signal is delayed so that it is heard later than it actually occurred Delay Time Delay time is the time between the source signal and its echo The simplest delay effect is a single repeat A short delay between 30 and 100 ms can be used to create slap back echo while longer delay times produce a more distant echo Delay times that are too short to hear as distinct echoes can be used to create t...

Page 174: ...Setting Procedure in Detail Setting the proper levels is an important part of getting the right sound The following steps will assist you in quickly setting your levels 1 Turn each of the 24 trims to 0 20 2 Press the Input button in the Meter section 3 In the Solo bus section select PFL and turn the Cue level to 12 o clock 4 Select the Solo button in the Monitor section and adjust the volume for y...

Page 175: ...We recommend that this mode be turned off when mixing live events 8 8 1 Using the Solo Bus for Monitoring When mixing live or when recording multiple musicians at once it is often necessary to quickly listen in on just one instrument or group The Solo and Monitor buses can be used together for this purpose It is important to note that if you wish to monitor with speakers rather than headphones it ...

Page 176: ...to set up the input levels for your StudioLive ensuring that you have the highest possible input level without clipping your analog to digital converters The next step is to set up your mix by dialing in the dynamics EQ and fader settings for each channel Enter Solo In Place SIP As discussed earlier in Section 8 7 most engineers start with the drums and work from the bottom up 1 To begin bring all...

Page 177: ...ion as one large console sending all channels to the Master unit s Main output Aux Sends and Subgroups optional we suggest that the unit farthest on the right be designated as the Master The unit with the lowest FireWIre Link ID greater than zero is automatically set as the Master 3 Press the System button on the cascaded unit and page down to Page 3 Digital Use the Next button to move to FireWIre...

Page 178: ... of the mixers in the chain in order to control panning for the channels on the slaved mixer 8 9 3 Internal Effects Buses Unlike the 10 Aux buses the two Internal Effects buses on each mixer are independent Using the same example as the previous section Channels 1 24 can only be routed to EFXA and EFXB on the Slave and Channels 25 48 are processed using the Master unit s two internal effects buses...

Page 179: ...n it will stop flashing and will illuminate Press the Load button to paste the Fat Channel setting 8 9 7 Local Versus Merged Buses and Inputs As discussed earlier the two internal effects buses on each mixer are controlled from the mixer to which they belong and they can only accept signals from the channels on their respective mixers The following inputs and bus are local only Talkback Microphone...

Page 180: ...Output 1kHzatunitygain 0 005 4dBu 20 Hz 20kHz unitygain unwtd THDtoMainOutput 1kHzatunitygain 0 005 4dBu 20Hz 20kHz unitygain unwtd EINtoDirectOutput 125dBunwtd 130dBA wtd S NRatiotoDirectOutput Ref 4dB 20kHzBW unitygain A wtd 97dB S NRatiotoMainOutput Ref 4dB 20kHzBW unitygain A wtd 94dB CommonModeRejectionRatio 1kHzatunitygain 65dB GainControlRange 1dB 16dBto 67dB MaximumInputLevel unitygain 16d...

Page 181: ... Artist Specification 9 1 Auxiliary Inputs Type 1 4 TRSFemale balanced 2stereopairs MaximumInputLevel 22dBu Main Outputs Type XLRMale balanced stereopair 1 4 TRSFemale balanced stereopair XLRMale balanced mono RatedOutputLevel 24dBu OutputImpedance 10kΩ Aux Outputs Type 1 4 TRSFemale balanced mono RatedOutputLevel 18dBu OutputImpedance 51Ω Subgroup Outputs Type 1 4 TRSFemale balanced mono RatedOut...

Page 182: ... One Artist 9 1 Specifications Noise Gate Expander KeyListenFilter 2ndorderresonantbypass Q 0 7 OFF 40Hz 16kHz ThresholdRange 84dBto0dB GateAttenuationRange 84dBto0dB AttackTime 0 02sto500ms ReleaseTime 0 05sto2s ExpanderAttenuationRange 2 1 Limiter ThresholdRange 28dBFS Ratio 1 Attack 20ns Hold 10ms Release 20ms Compressor ThresholdRange 56dBto0dB Ratio 1 1to14 1 AttackTime 0 2msto150ms ReleaseTi...

Page 183: ...al Control SL Remote Capture and Studio One Artist Specifications 9 1 Digital Audio ADCDynamicRange A wtd 48kHz 118dB DACDynamicRange A wtd 48kHz 118dB FireWire S400 400Mb s InternalProcessing 32 bit floatingpoint SamplingRate 44 1 48kHz A D ABitDepth 24bits ReferenceLevelfor0dBFS 18dBu Clock Jitter 20psRMS 20Hz 20kHz JitterAttenuation 60dB 1nsin 1psout Power Connector IEC Input VoltageRange 90to2...

Page 184: ... 2 19 BAS Slap 20 BAS Upright 21 GTR Rock 1 22 GTR Rock 2 23 GTR Funk 24 GTR Metal 25 GTR Jazz 26 GTR Acoustic 27 GTR Acoustic Strumming 28 GTR Acoustic Fingerstyle 29 KEY Piano Bright 30 KEY Piano Warm 31 KEY Piano Jazz 32 KEY Piano Electric 33 KEY Piano Electric 2 34 KEY Vibes 35 HRN Trumpet 36 HRN Trombone 37 HRN Sax 38 HRN Sax Solo 39 PRC Congas 40 PRC Bongos 41 PRC Cowbell 42 PRC Tambourine 4...

Page 185: ...e 35 0 15 0 T5 BRIGHT HALL Reverb Decay s Default 1 59 Range 0 79 2 39 Predelay ms Default 24 0 Range 1 00 60 0 Early Reflec dB Default 22 0 Range 35 0 15 0 T6 WARM HALL Reverb Decay s Default 1 59 Range 0 79 2 50 Predelay ms Default 50 0 Range 10 0 100 0 Early Reflec dB Default 30 0 Range 40 0 20 0 T7 GATED HALL Reverb Decay s Default 1 00 Range 0 59 1 79 Predelay ms Default 40 Range 5 00 80 0 T8...

Page 186: ...0 dB Mic Pre 48V Equalizer 36 465Hz 90 1 2kHz 380 5kHz 1 4k 18kHz H P Compressor Gate Fat Channel Level Aux 1 Aux 2 Aux 3 Aux 4 Aux 5 Aux 6 EFX A EFX B 120 10 dB Aux 10 Aux 9 Aux 8 Aux 7 Aux 7 Aux 8 Aux 9 Aux 10 Main Mix L Main Mix R Solo Bus L Solo Bus R Aux 1 Aux 2 Aux 3 Aux 4 Aux 5 Aux 6 Sub Group1 Sub Group4 Sub Group2 Sub Group3 EFX B EFX A Aux 7 Aux 8 Aux 9 Aux 10 Main Mix L Main Mix R Solo ...

Page 187: ...nel Limit D A OUTPUT BUFFER Links to Output Dim Level 14 dB Aux 10 Aux 9 Aux 8 Aux 7 Aux 6 Aux 5 Aux 1 Aux 2 Aux 3 Aux 4 Aux 5 Aux 6 Aux Out 1 Aux Out 2 Aux Out 3 Aux Out 4 Aux Out 5 Aux Out 6 Aux Output Levels 1 10 120 10 dB D A Aux 1 10 Dig Out FireWire Send TalkBack Mic to Aux Bus Aux 1 Aux 2 Aux 3 Aux 4 Aux 5 Aux 6 Aux 7 Aux 8 Aux 9 Aux 10 Aux Out 7 Aux Out 8 Aux Out 9 Aux Out 10 Aux 4 Aux 2 A...

Page 188: ... Sub Group4 Sub Group2 Sub Group3 EFX B EFX A Aux 7 Aux 8 Aux 9 Aux 10 Main Mix L Main Mix R Solo Bus L Solo Bus R Aux 1 Aux 2 Aux 3 Aux 4 Aux 5 Aux 6 Sub Group1 Sub Group4 Sub Group2 Sub Group3 EFX B EFX A Aux 7 Aux 8 Aux 9 Aux 10 Main Mix L Main Mix R Solo Bus L Solo Bus R Aux 1 Aux 2 Aux 3 Aux 4 Aux 5 Aux 6 Sub Group1 Sub Group4 Sub Group2 Sub Group3 EFX B EFX A Aux 7 Aux 8 Aux 9 Aux 10 Aux Inp...

Page 189: ... 465Hz 90 1 2kHz 380 5kHz 1 4k 18kHz H P Compressor Gate Fat Channel Equalizer 36 465Hz 90 1 2kHz 380 5kHz 1 4k 18kHz H P Compressor Gate Fat Channel Equalizer 36 465Hz 90 1 2kHz 380 5kHz 1 4k 18kHz H P Compressor Gate Fat Channel Equalizer 36 465Hz 90 1 2kHz 380 5kHz 1 4k 18kHz H P Compressor Gate Fat Channel Equalizer 36 465Hz 90 1 2kHz 380 5kHz 1 4k 18kHz H P Compressor Gate Fat Channel Equaliz...

Page 190: ...ic used_______________________________ Notes_______________________________ _________________________ Track Trim Production Notes 13 Instrument_______________________________ Mic used_______________________________ Notes_______________________________ _________________________ 14 Instrument_______________________________ Mic used_______________________________ Notes_______________________________ ...

Page 191: ...______________________ ___________________________ Monitor Send 10 Notes_________________________________ ___________________________ ___________________________ Monitor Send Level AUX In A SOURCE A Notes_________________________________ ________________________________ ___________________________ ___________________________ Level AUX SEND 1 Notes_________________________________ _________________...

Page 192: ...le via email during the same hours at techsupport presonus com Pops and Clicks Pops and clicks in your audio could be caused by momentary losses of synchronization between the StudioLive and its clock source This can be due to a FireWire card that is not suited for FireWire audio devices or to a lack of CPU resources or available memory Try closing all unnecessary programs increasing the buffer si...

Page 193: ...if using the onboard FireWire connection Installing a PCIe not PCI FireWire 400 only card with an approved chipset is a known workaround but may not allow full performance StudioLiveWill Not Connect to Computer Verify that the FireWire cable is properly connected to the StudioLive and to your computer Disconnect unnecessary peripheral FireWire devices Navigate to Page 3 of the System Menu on your ...

Page 194: ... PreSonus or its authorized service representative To obtain warranty service the purchaser must first call or write PreSonus at the address and telephone number printed below to obtain a Return Authorization Number and instructions of where to return the unit for service All inquiries must be accompanied by a description of the problem All authorized returns must be sent to the PreSonus repair fa...

Page 195: ...72 Compressor 27 Attack 28 Definition 144 Make Up Gain 28 Ratio 27 Release 28 Terminology Associated With 145 Threshold 27 Copying Fat Channel Settings 34 Creating a Back up in VSL 78 Creating a Capture Session 103 107 Creating a Monitor Mix 40 Creating an FX Mix 40 Cubase 64 D Delay Time 167 Dig Out 34 65 109 Direct Output Pin out 13 Dynamic Range 143 E Equalizer 29 Definition 152 Graphic 153 Par...

Page 196: ...on 148 Terminology Associated With 147 P Pan 33 PFL 46 169 Phase Reverse 24 Q Q Definition 152 R Range Tool 112 Record Enable Capture 110 Reverb 166 Decay 166 Predelay 166 Ribbon Microphones 139 Run at Startup 74 S Safe Modes 73 Sample Rate 59 72 Scenes Creating in VSL 78 Recalling 52 Recalling Groups 53 Recalling In VSL 81 Scrolling 114 Select Buttons 22 Session Navigation 114 Setting Input Level...

Page 197: ...s Manual Quick Start Level Setting Overview Hookup Controls Connecting to a Computer Tutorials Technical Information Trouble shooting and Warranty Scenes Presets System Menu and MIDI Control Software Universal Control SL Remote Capture and Studio One Artist ...

Page 198: ...tronics Address 7257 Florida Blvd Baton Rouge LA 70806 USA Phone 1 225 216 7887 declares that StudioLive 24 4 2 complies with Part 15 of the FCC rules Operation is subject to the following two conditions 1 This device may not cause harmful interference and 2 This device must accept any interference received including interference that may cause undesired operation Note No product support is availa...

Page 199: ...s of celery 1 lb bell peppers green or red 1 batch green onions 3 lbs rice Tony Chachere s Cajun Seasoning 1 bottle chicken stock concentrate or 3 cubes chicken bullion 1 can Rotel tomotoes with chilies diced regular hot Tabasco sauce Cooking Instructions 1 In a 16 qt pot or larger slice link sausage and pan fry until brown 2 Add ground beef and brown 3 Do not remove from pot Add diced onions cele...

Page 200: ...uraged to try to correct the interference by one or more of the following measures Reorient or relocate the receiving antenna Increase the separation between the equipment and the receiver Connect the equipment into an outlet on a circuit different from that to which the receiver is connected Consult the dealer or an experienced radio TV technician for help CAUTION Changes or modifications to this...

Reviews: