

P82 Console Installation Guide
WARNING Before you connect any cables to the console, make sure that the equipment is not connected to any external power source.
For more equipment information and troubleshooting, visit us at
www.precor.com
.
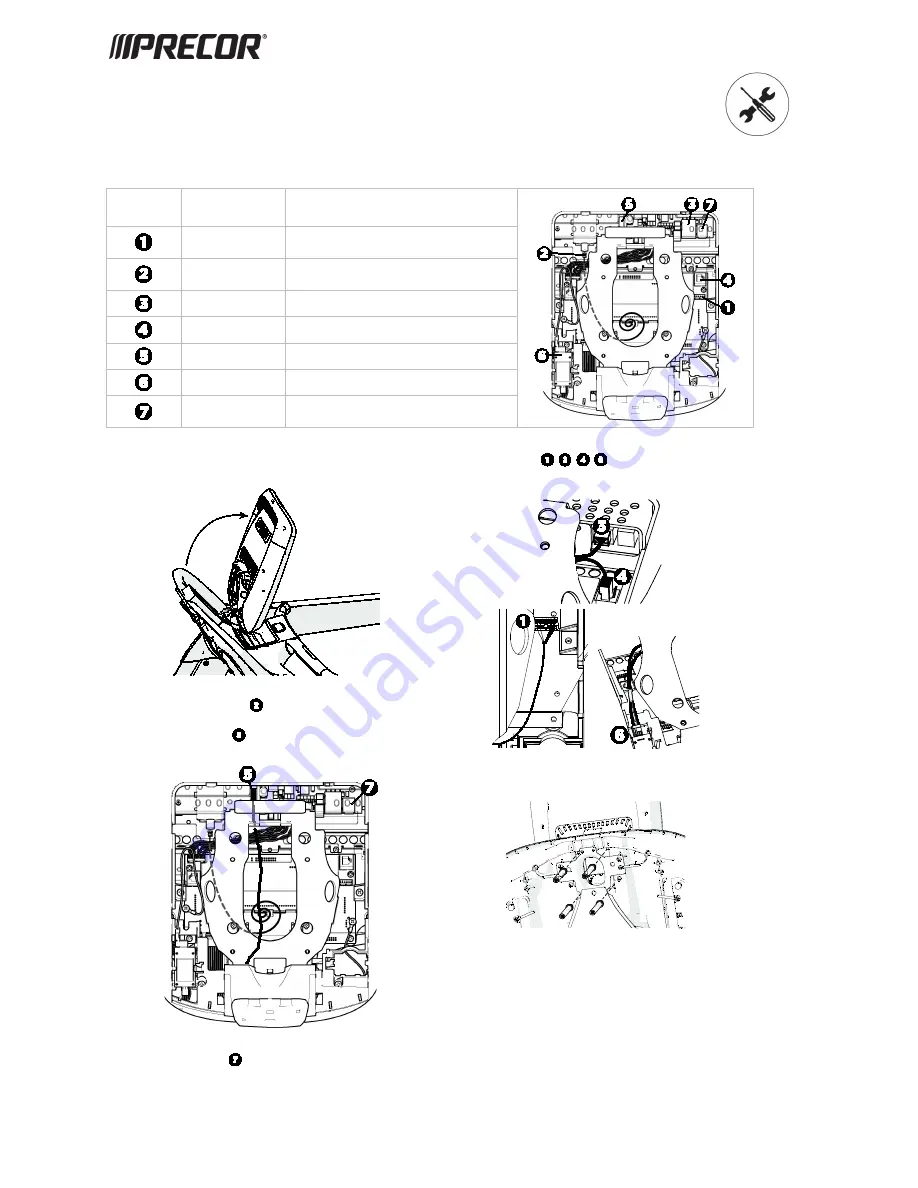
Connector
Location
Cable
Connector Type
Safety key
(TRMs only)
Six-contact strip, keyed
TV
F-type coaxial (isolator extender for outside North
America only)
Ethernet (LAN)
Eight-contact modular on round black cable
Data from base unit
Eight-contact modular on flat gray cable
Power
Two-contact plug, polarized and latched
Heart rate sensor
Four-contact strip, keyed
microSD slot
Eight-contact strip
To attach and wire the console:
1.
Set the console on the rectangular hook at the bottom of the console mount
and hold it in place (Figure 1).
Figure 1
2.
Connect the TV coaxial cable
. Make sure it is securely installed by using
a 7/16 open wrench to fully tighten the cable to the console.
3.
Connect the power cable
, then pass it through the semicircular opening
just above the console mount (Figure 2).
Figure 2
4.
Verify the microSD card
is securely mounted (Figure 2).
5.
Connect the cables
as shown below.
DO NOT attempt to route any cables through other openings or through
the steel channel above the mount.
Figure 3
6.
Tilt the console back onto the mounting bracket and secure it with the
mounting bolts, making sure to fully tighten the bolts (Figure 4).
Figure 4
7.
Follow the checklist and set of instructions on the next page to test that
the console and equipment are working.
8.
Attach the fasteners to reinstall the console rear cover after you finish
the tests.
9.
To connect to a network:
Go to
Settings
>
System Settings
>
Connectivity
.
Touch
Network Type
>
Wired
(or
Wi-Fi
) >
Go
.
Touch
Configure
. Select a network from the list and enter your
credentials to access that network.
Touch the Back button to return to the Connectivity screen. Your
settings will automatically be saved.


