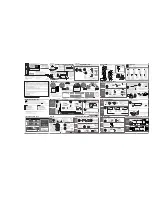
Quick install guide
Connecting your DVD recorder to the TV
set /Initial installation
Warning ! As long as the initial installation has not been carried out, the buttons on
the front of the DVD recorder remain without function.
1
Remove the aerial cable plug from your TV set. Insert it into the
ANTENNA IN
socket at the back of the DVD recorder
2
Insert one end of the supplied aerial cable into the
TV OUT
socket at
the back of the DVD recorder and the other end into the aerial input
socket of the TV set.
3
Connect socket
EXT 1 TO TV-I/O
or sockets
OUT S-VIDEO
(Y/C)
,
OUT VIDEO (CVBS)
,
OUT L AUDIO R
with the
corresponding sockets of your TV set.
My TV sets supports the functions Easy Link, Cinema Link,
NexTView Link, Qlink, Smart Link, Megalogic, Datalogic,...
Connect the scart socket
EXT 1 TO TV-I/O
at the back of the DVD
recorder with the - suitable for data transfer - scart socket of your TV set
(see the instruction manual of your TV set) using a special cable (suitable for
these data transfers).
?
4
Switch on the TV set.
5
Use
the
supplied
mains
cable
to
connect
the
mains
socket
4
MAINS
at the back of the DVD recorder with the wall outlet.
The most important features of the DVD recorder will appear in
scrolling text on the display. After the first installation is completed
this function will be switched off.
6
Switch on the DVD recorder using
STANDBY/ON
m
.
IS TV ON?
7
'
IS TV ON?
' will appear on the display.
Virgin mode
Menu Language
English
Español
Français
Italiano
Deutsch
Press OK to continue
8
If necessary, select the programme number for the input socket at the
TV set.
The initial installation menu appears on the screen.
9
Select your favourite setting using
CH-
B
or
CH+
A
.
Confirm with
OK
.
The initial installation is carried out automatically. Wait until the whole procedure is complete.
ENGLISH