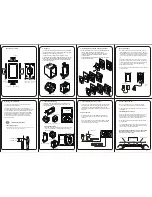
background image

Summary of Contents for 42PF9956/37

Page 1: ......

Page 2: ......

Page 3: ...cessories from our convenient home shopping network Most importantly you can count on our uncompromising commitment to your total satisfaction All of this is our way of saying welcome and thanks for investing in a PHILIPS product P S To get the most from your PHILIPS purchase be sure to complete and return your Product Registration Card at once For Customer Use Enter below the Serial No which is l...

Page 4: ...d international global safety standards for tilt and stability properties of its cabinets design Do not compromise these design standards by applying excessive pull force to the front or top of the cabinet which could ultimately overturn the product Also do not endanger yourself or children by placing electronic equipment toys on the top of the cabinet Such items could unsuspectingly fall from the...

Page 5: ...helpline 800 531 0039 Model 42 50PF9956 37 Product No Care of the screen See Tips p 26 Preparation 2 Buttons on the right side of the TV 2 Use of the remote control RC4306 3 To use the menus 5 Installation 5 Select the menu language 5 Store TV channels 6 Settings menu 6 General 6 Clock 8 Source 9 Demo 9 TV menu 10 Picture menu 10 Active Control 11 Sound 12 Features menu 12 Channels menu 13 Connect...

Page 6: ... mains at the bottom of the TV and in the wall socket Refer to the back of the TV set for the correct operation voltage Consult your local dealer if your AC power supply is different To prevent damaging the power AC cord which could cause a fire or electric shock do not place the TV on the cord Remote control Insert the 2 batteries supplied Type R6 1 5V The batteries supplied do not contain the he...

Page 7: ...r TV channels when in TV mode according to where you connected the accessory devices p 20 To type the dot for digital channels Note For most buttons pressing a button once will activate the function Pressing a second time will de activate it When a button enables multiple options a small list will be shown Press repeatedly to select the next item in the list The list will be removed automatically ...

Page 8: ...will be removed To remove a channel or source select the channel number you want to remove Press the SURF button Press the cursor right to remove Press the OK button or wait for the time out to dismiss the Surf display SCREEN FORMAT Press this button to summon a list of available display formats for showing video images in the traditional 4 3 proportions Press this button repeatedly or press the c...

Page 9: ...or left right to select Picture Sound Features or Channels Note Sometimes not all the menu items are visible on the screen indicated by a cluster of blue balls Use the cursor down or right to reveal all items Use the cursor in the left right direction to select the menu item Use the cursor up down again to select the control you want to select or to adjust Note Items temporary not available or not...

Page 10: ...nu p 12 Press the cursor right The message Searching appears and the progress of autoprogramming is displayed When Autoprogramming is complete the puck navigates to Stop A message appears confirming the completion together with the total number of channels found Note when you navigate to Stop before autoprogramming is complete you are given the option to continue Available channels with cable max ...

Page 11: ...rily being used by a TV channel during the transmission of a Closed Caption program See Closed Captions in the TV Features menu see p 12 to turn the Caption service On or Off Note This television provides display of television closed captioning conforming with the EIA 608 standard and in accordance with Sections 15 119 of the FCC rules OSD On Screen Display Select OSD with the cursor down é Press ...

Page 12: ...h the selected channel will be overwritten once the clock information has been found If Auto clock mode Manual has been selected and no clock search has been done the system will keep the entered time and day Time zone only available when Auto clock mode is set to Automatic This function allows you to select your local time zone Broadcasted time information will correct the clock display for your ...

Page 13: ...part of the automatic sequence and can only be activated separately Demo Select Source with the cursor right é Press the cursor down to select one of the external AV inputs Press the cursor right to enter the list of types of devices attached to the selected input Select the accessory device with the cursor up down Once you have named the source e g VCR this source will automatically be selected w...

Page 14: ...en set at the factory to look best in bright store environments which typically use florescent lighting As your home will likely not be as well lit as a store we recommend that you cycle through the various Auto Picture modes to find the one that best suits your own viewing conditions Most consumers will find that Natural is the correct choice Digital processing Standard line doubling eliminates l...

Page 15: ...ted picture quality setting is switched off in the right part it is switched on Note Dependent on the input signal one or more Dual screen demos may not be selectable Press the ACTIVE CONTROL button again to switch off the Active Control menu Note Active Control is not available for digital signals via HDMI Active Control DNR Digital Noise Reduction Automatically filters out and reduces the image ...

Page 16: ...Off is selected the TV will not display Closed Captions information When On during Mute is selected the TV will display the currently selected Caption Service when the mute function is active When the mute function is not active the TV will not display Closed Captions informations Features menu Press the cursor right to select Sound é Select the menu items in the Sound menu with the cursor up down...

Page 17: ...eep timer is turned off One minute before the sleep timer expires a message appears that the TV will turn off in 60 seconds or you may cancel the sleep timer by pressing the OK button You can always turn off your TV earlier or change the set time On timer Note The On timer function is only available if time information is available via the local PBS channel Select On timer with the cursor down é P...

Page 18: ...y data are sent by the broadcaster or program provider Select TV ratings lock with the cursor down A list appears showing the age based TV ratings and a corresponding content based ratings list é Press the cursor right to enter the list Select an age based TV rating with the cursor up down and enter if present the list with content based ratings with the cursor right and select one content based r...

Page 19: ...ng are currently locked a yellow colored box movies with this rating are locked a blue colored box movies with this rating are unlocked When All has been selected all items on the movie ratings list become selected All movies are locked If while All is selected any other item is unselected then All is automatically unselected When NR has been selected no other item is selected When any other item ...

Page 20: ...Pb B R L Pr Pb Y VIDEO R L R L CENTRE SUBW R L HDMI 75 ANT IN 5 6 RECORDER MONITOR OUT AV1 AV2 S VIDEO S VIDEO R L Pr Pb Pr R Pb B V H Y G Y VIDEO R L CVBS R L 3 2 75 ANT IN 1 CABLE 4 OUT IN OUT IN Connect the RF antenna cable 1 of the RF IN socket of your other AV device é Connect the RF output of the AV device to the RF input of the recorder 2 Connect another RF cable 4 from the output OUT of yo...

Page 21: ...OUT jacks 2 to the TV s AV2 jacks as described above AV1 S VIDEO R L Pr Pb Y SAT Cable Box IN CABLE OUT VIDEO L Mono R 2 AV2 R L V H S VIDEO Y G CVBS Pr R Pb B RECORDER OUT OUT IN VIDEO L Mono R 2 1 OUT SAT Cable Box Recorder and Satellite Receiver Cable Box with AV outputs Connect the satellite antenna cable or the Cable TV cable 1 to the satellite receiver s or cable box s IN jack é Connect the ...

Page 22: ...gital device further away from your TV AV1 AV2 R L V H S VIDEO S VIDEO Y G CVBS Pr R Pb B R L Pr Pb Y 1 2 DVD Cable Box 3 Devices with Component Video Output Connectors YPbPr Connect the three separate component video cables 1 to the device having component video outputs YPbPr such as DVD players laser disc players videogame players satellite receivers or other equipment and to the Y Pb and Pr jac...

Page 23: ...ll now only produce center sound the loudspeakers connected to the audio receiver will produce Surround Sound The volume has to be controlled via the multi channel Surround receiver Note No sound will be heard when a TV channel or external source is blocked via the Channel Lock menu see p 13 AUDIO R L CENTRE SUBW 2 1 Connect the digital HDMI output of your HD device e g PC DVD player Set Top Box 1...

Page 24: ... you connected your devices é Press the cursor up down Press OK Remark Most equipment decoder recorder carries out the switching itself This is however never the case with a computer connected to the HDMI input 7 8 9 0 CONTROL ACTIVE CLOCK SAP AV To select connected devices Camera Camcorder or Game Connect your camera camcorder or game as shown é Connect to VIDEO 2 and AUDIO L 3 for mono equipment...

Page 25: ...ntrol returns to TV mode After an action in the selected system mode the remote control will remain in this mode for 60 seconds and will then return to TV mode or press the Select button to return to TV mode immediately To record S VHS quality connect an S VHS peripheral directly to the recorder Record a TV program You can record a TV program using your recorders tuner without affecting your TV Se...

Page 26: ...usly for 3 seconds If that occurs go back to step 1 and begin the programming process again Now you will try to use the TV remote with the accessory device Press the Select button on the remote to cycle across the accessory mode dial Stop pressing the button when the mode you desire is lighted The light will stay on for 2 seconds and then begin blinking The blinking means that the remote is in the...

Page 27: ...yo 0162 Optimus 1050 0213 0558 0069 Panasonic 0066 1545 Penney 0222 Philips 1116 1216 1296 0418 Pioneer 0177 0558 1050 Proscan 1281 Quasar 0066 RCA 1281 0558 1050 Realistic 0222 Sansui 1116 Sharp 0213 Sherwood 0529 Sony 1185 1085 1285 Sunfire 1340 Teac 0490 Technics 0066 1335 1545 1336 Thorens 1216 Victor 0101 Yamaha 0203 0213 1203 Yorx 0222 Satellite Receiver AlphaStar 0799 Echostar 1032 0802 Exp...

Page 28: ... Proscan 0549 RCA 0549 0598 Samsung 0600 Sharp 0657 Sony 0560 Technics 0517 Theta Digita 0598 Toshiba 0530 Yamaha 0517 0572 Zenith 0618 0530 This equipment has been tested and found to comply with the limits for a Class B digital device pursuant to part 15 of the FCC Rules These limits are designed to provide reasonable protection against harmful interference in a residential installation This equ...

Page 29: ...ound the vents of the device to be certain there are no blocking walls or cabinets which would limit the air flow No sound Increase the VOLUME Check that the TV is not muted press the MUTE button on the remote control When no signal is detected the TV automatically switches off the sound This is proper operation and does not indicate a malfunction Good sound but Adjust the contrast color tint and ...

Page 30: ...ing displays bright and shown constantly or repeatedly in the same location on the TV screen Examples of still pictures also include logos computer images time display teletext and images displayed in 4 3 mode static images or characters etc Notes reduce contrast and brightness when viewing once burn in occurs it will never disappear completely Care of the screen Do not touch push or rub or strike...

Page 31: ...ce although there may be a delay if the appropriate spare parts and technical manual s are not readily available MAKE SUREYOU KEEP Please keep your sales receipt or other document showing proof of purchase Attach it to this owner s manual and keep both nearby Also keep the original box and packing material in case you need to return your product Please check your owner s manual before requesting s...

Page 32: ...ervicio después del vencimiento de la garantía llame al lugar más cercano de los abajo indicados In Canada How you can obtain efficient and expedient carry in mail in or in home service for your product Please contact Philips at 1 800 661 6162 French speaking 1 800 531 0039 English or Spanish speaking Au Canada Comment obtenir le service après vente pour les produits apportés ou envoyés par la pos...

Page 33: ...s por todo el país para la recepción de productos necesitados de reparaciones comunicarse con el centro de servicio de fabrica mas cercano para estos lugares dentro de un radio de 80 a 120 km 50 a 75 millas del centro de servicio local ATLANTA Philips Factory Service 550 Franklin Road Suite F Marietta GA 30067 800 273 1501 TAMPA Philips Factory Service 1911 US Highway 301 North Tampa FL 33619 800 ...

Page 34: ...28 ...

Page 35: ......

Page 36: ......

Reviews: