

VICTOR Nivo
®
Multimode Plate Reader
Installation Guide
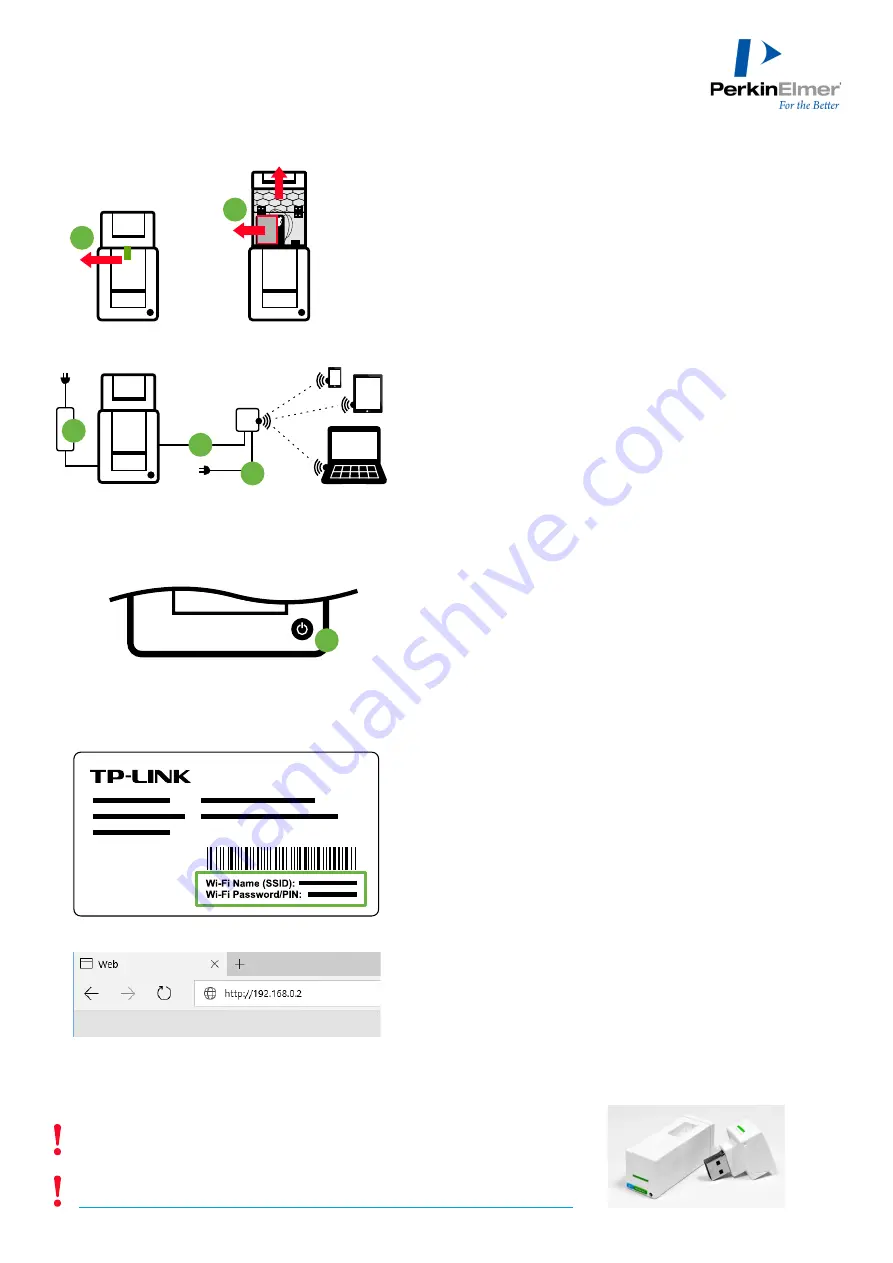
Installation with Wi-Fi
A USB stick in the VICTOR Nivo design is included in the delivery (see photo).
It contains the user manual and additional documents.
Please check on a regular basis for software updates on the PerkinElmer website:
http://www.perkinelmer.com/lab-products-and-services/resources/software-downloads.html
1
Unpack the VICTOR Nivo instrument and position it on the working
space.
Remove the green adhesive strip (
A
).
If a dispenser is installed:
Open the dispenser cover and remove the transport protection foam
(
B
).
2
Connect the power socket on the rear of the instrument to the mains
power using the external power adapter (
C
) and the power cord.
3
Connect the TP-LINK wireless router (LAN/WAN socket) to the
Ethernet socket on the rear of the instrument using the provided LAN
cable (
D
).
4
Connect the wireless router (Power socket) to the USB power supply
using the TP-LINK external USB power cable (
E
). Plug the USB power
supply into a wall socket.
5
Switch on the VICTOR Nivo using the power switch (
F
).
6
Switch on your control device with wireless network capability (e.g. a
laptop).
•
If you are using the optional laptop or tablet from PerkinElmer and
start it for the first time, the Windows 10 first start routine will
appear. Configure user name, password, language settings etc.
7
Connect your control device with the instrument:
•
Make sure your wireless adapter is turned on.
•
Connect to the wireless network (see default network name on the
router’s service card, labeled with Wi-Fi Name (SSID)).
•
Enter the password (see default password, labeled with Wi-Fi
Password/PIN).
To change the SSID network name and password of your wireless
network, please refer to the router´s manual.
8
Open your web browser to connect to the VICTOR Nivo. Type
http://192.168.0.2 into the address bar and press the Enter key.
The user interface appears and the instrument is initialized
automatically.
7
8
9
1
+
B
Instrument
LAN
Control Device
USB
Power Supply
Wireless
Router
C
D
E
F
HH
35
94
00
60 (
EN
) ·
R
ev
. C
·
20
19
-05
-16
A


