background image

SLOT-IN

ELECTRIC COOKER

WITH GAS HOB

Owners handbook

and

Installation instructions

27

Summary of Contents for U03059

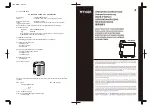
Page 1: ...SLOT IN ELECTRIC COOKER WITH GAS HOB Owners handbook and Installation instructions 27...

Page 2: ...contact with oven elements because they may catch fire l Always stand back from the cooker when opening the oven door to allow any build up of steam or heat to release l Do not place sealed cans or a...

Page 3: ...ips 22 Ultra Fan Oven Cooking Chart 23 Roasting Chart 24 Defrost and Cooling Function 25 How To Defrost Cool 25 Things to Note 25 Hints and Tips 25 General Hints Tips 26 Condensation Steam 26 Cookware...

Page 4: ...ck page of this instruction book for future reference You can also find these numbers on the rating plate on the front frame of the cooker upon opening the grill door The cooker must be protected by a...

Page 5: ...temperature is being maintained The grill neon glows when the grill is in use The Ultra Fan oven neons do not glow with the Defrost setting If the neons do not operate as the instructions indicate th...

Page 6: ...urn off any residue from their surfaces The procedure should be repeated with the grill for approximately 5 10 minutes During this period an odour may be emitted it is therefore advisable to open a wi...

Page 7: ...king Two per oven 1 grill shelf 1 Top oven shelf The grill deflector sits above the grill element and prevents fat splashing onto the grill roof The deflector may be easily removed for cleaning 1 plat...

Page 8: ...ndicator lines up with the hour hand of the clock 3 Push in and turn setting knob A clockwise until the manual symbol can be seen in the display window as Fig 2 4 The left hand Ultra fan oven temperat...

Page 9: ...tart timer indicator lines up with the time you want the food to start cooking e g 1 30 p m as Fig 6 5 Turn the left hand Ultra fan oven temperature control to the required setting The oven indicator...

Page 10: ...timer indicator will move with the hour hand of the clock until the length of cooking time is complete The oven will switch off and a buzzer will sound which can be cancelled by turning the setting kn...

Page 11: ...and adjust the setting as required TO TURN OFF ANY BURNER 1 Turn the control knob to the off position This is shown by a large dot 11 THE GAS HOB Ensure the pan supports are correctly fitted before us...

Page 12: ...with a collar support the collar must be the open wirework type otherwise the performance of the burner will be affected 12 Take care to avoid burns and scalds when reaching across the hotplate Take e...

Page 13: ...icator neon will glow when the grill is switched on We recommend you use the grill pan on shelves 3 or 5 If you use the grill pan in position 3 the shelf must be withdrawn before the pan can be locate...

Page 14: ...handle bracket locates over the front bar of the shelf To check the progress of the food being grilled the grill pan should be withdrawn on the shelf to attend to food during cooking HINTS AND TIPS M...

Page 15: ...fore grilling to minimise splashing Brush lean meats and fish lightly with a little oil or melted butter to keep them moist during cooking Accompaniments such as tomatoes and mushrooms may be placed u...

Page 16: ...amb Pork Fish Whole Trout Herring Fillets Plaice Cod Kebabs Kidneys Lamb Pig Liver Lamb Pig Sausages Steaks Rare Medium Well Done Browning e g au gratin lasagne shepherd s pie 3 5 each side 6 10 each...

Page 17: ...on and off during cooking showing that the temperature is being maintained TO FIT THE OVEN SHELF There are 5 shelf positions in the Top oven Shelf positions are counted from the bottom upwards The sh...

Page 18: ...d the baking tray or dish to allow for maximum air circulation Placing dishes on a baking tray on the shelf will prevent spillage onto the oven base and help reduce cleaning The material and finish of...

Page 19: ...roles Flaky Puff pies Shortcrust Mince pies Meat pies Quiche Tarts Flans Roast Meat Poultry Scones Shepherds Pie Souffl s Vegetables Baked Jacket Potatoes Roast Potatoes Yorkshire Puddings large indiv...

Page 20: ...own into position and place the shelf in position 1 5 Place plates in the plate rack and close the oven door 6 Turn the Top oven Warmer temperature control to the W setting for approximately 10 15 min...

Page 21: ...recommended in the chart on page 23 As a guide reduce temperatures by 20 C 25 C for your own recipes BATCH BAKING The Ultra Fan oven cooks evenly on all shelf levels especially useful when batch bakin...

Page 22: ...ended that when baking larger quantities the shelf positions should be evenly spaced to suit the load being cooked A slight increase in cooking time may be necessary The use of excessively high temper...

Page 23: ...y Puff pies Shortcrust Mince pies Meat pies Quiche Tarts Flans Roast Meat Poultry Scones Shepherds Pie Souffl s Vegetables Baked Jacket Potatoes Roast Potatoes Yorkshire Puddings large individual 2 12...

Page 24: ...in per kg 1lb up to 3 kg 7lb then 10 min per kg 1lb Duck 160 180 C 25 35 min per kg 1lb and 25 30 min over Pheasant 160 180 C 35 40 min per kg 1lb and 35 40 min over Rabbit 160 180 C 20 min per kg 1lb...

Page 25: ...n warm days defrosting will be faster than on cooler days It is preferable to thaw fish meat and poultry slowly in the fridge However this process can be accelerated by using the defrost function Smal...

Page 26: ...es will drain into the meat tin below and can be used to make gravy The trivet also prevents splashes of fat from soiling the oven interior Note The meat tin should not be placed on any heated hotplat...

Page 27: ...painted hob trims as damage may occur Ensure the hob and pan supports are dry before replacing 27 Before cleaning the cooker always ensure the cooker is cool before switching off the electricity suppl...

Page 28: ...n the pan supports Reduce the marking by regularly cleaning the pan supports and ensuring the bases of new pans are well scrubbed to remove loose deposits After cleaning the burner parts and pan suppo...

Page 29: ...uminium part is fitted correctly before placing the enamelled cap in the same orientation on top Move the cap sideways and front to back to check the cap is properly fitted CLEANING THE OUTSIDE OF THE...

Page 30: ...one hand remove the screws and washers with the other hand The screws and washers retain the trim on the top of the grill top oven doors Note the position of the trim on the door 4 Holding the door a...

Page 31: ...ers into the location holes with the other hand Give the screws one turn to ensure the glass is secure 5 Tighten the screws positively with a Pozidrive screwdriver before closing the oven door CLEANIN...

Page 32: ...eel wool pad All items of grill and oven furniture are dishwasher safe with the exception of the grill pan handle CARE OF STAYCLEAN SURFACES During normal use the Stayclean coating in the Top and Ultr...

Page 33: ...eeks REPLACING AN OVEN LIGHT BULB The type of bulb required is a 300 C 25 watt small Edison Screw 1 Make sure the cooker is cool before you replace a bulb 2 Open the oven door and remove the shelves a...

Page 34: ...e page 8 The grill does not work or cuts out after being used for a long period of time Ensure that the grill door is open when grilling Leave the grill door open and allow the grill to cool After a c...

Page 35: ...t with the oven back panel The oven temperature is too high or low Check that the recommended temperatures and shelf positions are being used See pages 19 and 23 Be prepared to adjust up or down by ap...

Page 36: ...ion to your statutory and other legal rights Exclusions This guarantee does not cover Damage or calls as a result of transportation after delivery inspection improper use or neglect The replacement of...

Page 37: ...ure you have read the details under the heading If Something Doesn t Work When you contact the Service Centre you will need to give the following details 1 Your name address and post code 2 Your telep...

Page 38: ...SALES Leask Electrical Harlsdale Symbister Whalsay Shetland ZE2 9AA NORTHERN IRELAND BELFAST M27 Owenmore House Kilwee Business Park Upper Dunmury Lane Belfast BT17 0HD WALES CARDIFF M28 Guardian Ind...

Page 39: ...4 Riverside Estate Coldharbour Lane Harpenden AL5 4UN LETCHWORTH M50 16 17 Woodside Ind Est Works Road Letchworth Herts SG6 1LA LONDON M76 2 4 Royal Lane Yiewsley West Drayton Middlesex UB7 8DL MAIDE...

Page 40: ...Kw 9554 Btu h 2 7 Kw 201 18 g h injector marking 119 083 Centre Ultra Rapid 3 5 Kw 11942 Btu h 3 5 Kw 251 48 g h injector marking 136 092 Physical Characteristics Height 907 mm Width 1192 mm Depth 59...

Page 41: ...in all poles and protected with a fuse or miniature circuit breaker at your mains fuse box NOTE It is good practice to Fit an Earth Leakage Circuit Breaker to your house wiring Wire your appliance to...

Page 42: ...the appliance should have an air supply in accordance with BS 5440 Part 2 Current Edition All rooms require an openable window or equivalent and some rooms will require a permanent vent as well For ro...

Page 43: ...e appliance If the units are intended to be fitted adjacent to the appliance but less than 400mm above the hotplate then a minimum space of 100mm must be maintained between the sides of the unit and t...

Page 44: ...y sheathed to leave 10mm bare wire to fit into the terminal Clamp bare wires into the relevant terminal fig 2 and check they are held by tugging each one in turn Clamp the mains cable securely ensurin...

Page 45: ...ce NOTE ONLY LIQUID SEALANTS TO BE USED WHEN INLET GAS PIPE IS FITTED I E DO NOT USE P T F E SEALANT TAPE Check for gas soundness after connecting to the gas supply The gas bayonet connector must be f...

Page 46: ...This is the centre line of the fixing bracket 3 Draw a line 100mm from the front edge of the levelling feet see Fig 4a and remove appliance from its position Mark off 438mm see Fig 4a back from this...

Page 47: ...e knob can be released CHECKING THE OVENS 1 Ensure that the timer is set for manual operation 2 Turn on each of the ovens in turn to the highest setting 3 Ensure that the ovens are heating up by check...

Page 48: ......

Page 49: ......

Page 50: ...BUCKINGHAM 311409504...

Page 51: ...27...

Page 52: ...esearch and development we reserve the right to alter models and specifications without prior notice This handbook is accurate at the date of printing but will be superseded and should be disregarded...

Reviews: