ParkerBrand PPG-2800, Owner'S Manual
The ParkerBrand PPG-2800 is a powerful and reliable generator that promises to keep your essentials running during power outages. With its user-friendly features and ease of use, the Owner's Manual is essential for understanding its functionalities. Download the comprehensive manual for free from our trusted website to maximize your product experience.
Share
Download


Reviews:
No comments
Related manuals for PPG-2800

P2000i
Brand: P1PE Pages: 28

030635A-00
Brand: Briggs & Stratton Pages: 16

ERA F 30 B 60
Brand: Lamborghini Caloreclima Pages: 112

WGen12000DFc
Brand: Westinghouse Pages: 103

G4 WORLD RECORDER
Brand: Grundig Pages: 84

AVRQ-5-B
Brand: Avtech Pages: 91

NI 6.6 GHz MIMO
Brand: National Instruments Pages: 20
RT068
Brand: Curtis Pages: 1

XTL-750W
Brand: Sony Pages: 44

XTL-750W
Brand: Sony Pages: 46

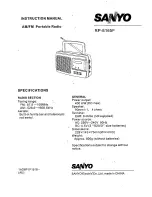
RP-59
Brand: Sanyo Pages: 2
RP-6165F
Brand: Sanyo Pages: 4

RP-5200
Brand: Sanyo Pages: 12

RP-DAB100
Brand: Sanyo Pages: 28

MM550MF
Brand: Micro Innovations Pages: 2

powerstation go
Brand: Mophie Pages: 11

8896231
Brand: HERON Pages: 11

EP3120 U1
Brand: Excera Pages: 19


