Getting started
Basic operations
Operations
Operating Instructions
Compact Stereo System
Model No.
SC-HC7
RQT9383-B
Dear customer
Thank you for purchasing this product.
For optimum performance and safety, please read these
instructions carefully.
Before connecting, operating or adjusting this product,
please read the instructions completely. Please keep this
manual for future reference.
EB
Table of contents
Getting started
Caution for AC Mains Lead ..................................... 2
Safety precautions .................................................. 2
Connection ............................................................... 3
Control guide ........................................................... 4
Read this page
fi
rst ................................................. 6
Basic operations
Listening to a music CD .......................................... 8
Recording a music CD to HDD ............................... 9
Operations
Various playback methods ................................... 10
Various recording methods .................................. 14
Convenient functions ............................................ 15
Enjoying music on an iPod,
PC or mobile phone ........................................... 16
Setting the time/Using the timer .......................... 18
Connecting to network .......................................... 19
Changing the settings for this unit,
checking information ......................................... 23
Selecting functions/Sub-menu function list ....... 24
Troubleshooting guide .......................................... 27
Handling the HDD (hard disk) ............................... 29
Speci
fi
cations/Maintenance ................................. 30
Set “Quick-Start Mode” to operate immediately after
the unit is turned on. (
➡
page 23)
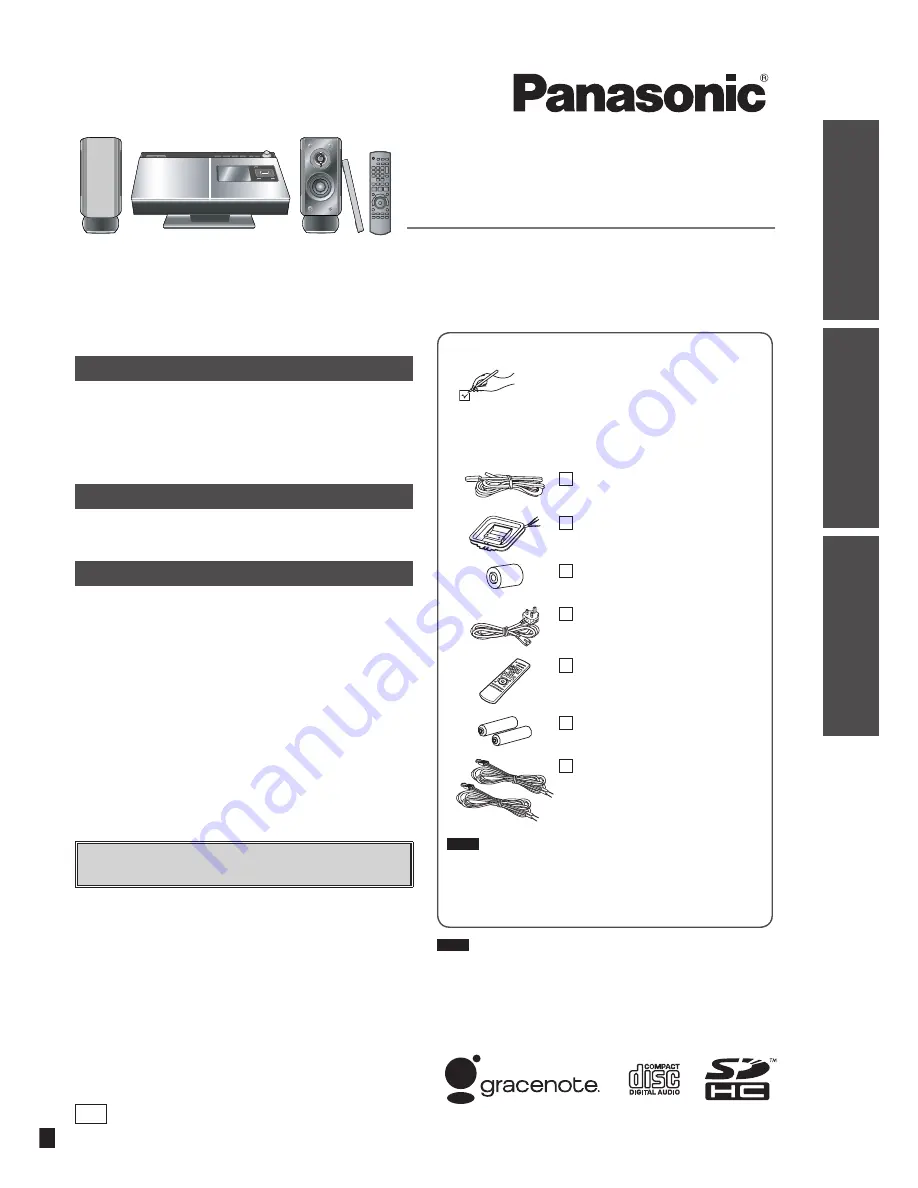
Supplied Accessories
Please check and identify the supplied
accessories.
Use numbers indicated in parentheses when asking
for replacement parts. (Product numbers correct as of
December 2008. These may be subject to change.)
1 FM indoor antenna
(RSA0007-M)
1 AM loop antenna
(N1DAAAA00002)
1 Antenna plug adaptor
(K1YZ02000013)
1 AC mains lead
(K2CZ3YY00005)
1 Remote control
(N2QAYB000383)
2 Batteries
for remote control
2 Speaker cables
(REE1472)
Note
●
The included AC mains lead is for use with this unit
only. Do not use it with other equipment.
●
Do not use AC mains lead from other equipment with
this unit.
Note
●
“EB” on the packaging indicates the United Kingdom.