background image


R


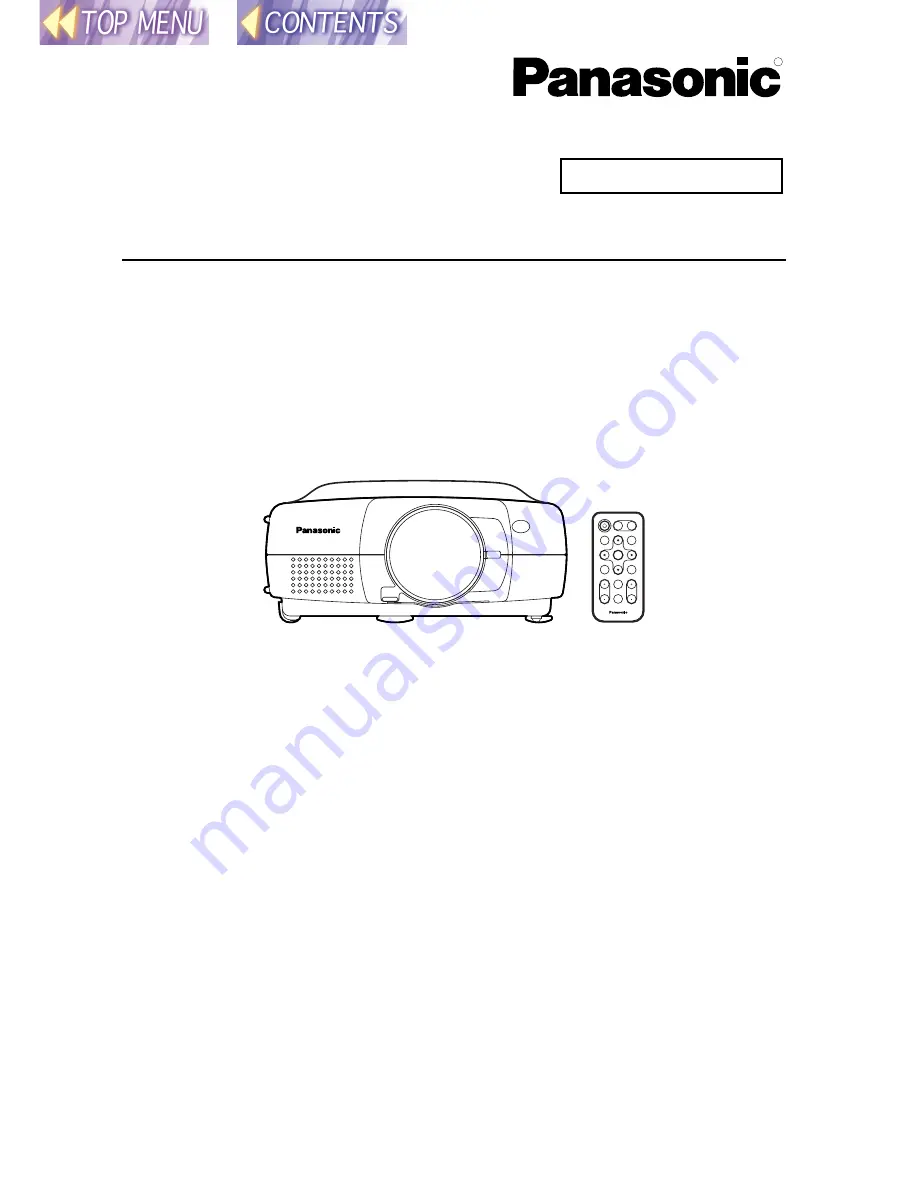
LCD Projector 

Commercial Use 

Operating Instructions 

(Wireless Function) 

Model No.

 PT-L711XNTU 

ENTER

FREEZE

SHUTTER

INDEX

WINDOW

PROJECTOR

VOLUME

D.ZOOM

STD

AUTO

SETUP

VIDEO

INPUT

POWER

RGB

MENU


• 

This LCD projector is equipped with a wireless card function. 
These Operating Instructions contain information on how to set up the 
wireless function, and on how to capture and transmit images. Please 
refer to the separate PT-L711XU Operating instructions for details on 
how to use the LCD projector. 

• 

Please read the “Read this first” booklet, these Operating Instructions 
and the Operating Instructions for the PT-L711XU LCD projector before 
use. After reading these instructions, keep them in a safe place for later 
reference. 

• 

The screen images which appear in this manual were taken from 
pre-release versions of the software. Actual screen images may differ 
from those shown. 

TQBH9002-

3


USA 

Summary of Contents for PT-L711XNTU

Page 1: ...ction and on how to capture and transmit images Please refer to the separate PT L711XU Operating instructions for details on how to use the LCD projector Please read the Read this first booklet these Operating Instructions and the Operating Instructions for the PT L711XU LCD projector before use After reading these instructions keep them in a safe place for later reference The screen images which ...

Page 2: ...arting and closing the Wireless Manager 37 Computer network settings 38 Checking communication with the projector 41 Basic image transmission examples 42 Before transmitting images 43 Capturing and transmitting computer screen images 43 Transmitting existing images 48 Other useful Wireless Manager functions 51 Using JPEG Convertor 53 What JPEG Convertor can do 53 Starting JPEG Convertor 54 Main sc...

Page 3: ... installation If this equipment does cause harmful interference to radio or television reception which can be determined by turning the equipment off and on the user is encouraged to try to correct the interference by one or more of the following measures Reorient or relocate the receiving antenna Increase the separation between the equipment and receiver Connect the equipment into an outlet on a ...

Page 4: ...ion Before touching the wireless card make sure that you earth your body to dissipate any static electric charge that might damage the card Static electricity from the human body can damage the wireless card To prevent this you should touch a nearby metallic object such as an aluminium sash or a door knob to dissipate the static charge from your body Do not install the accessory wireless card to a...

Page 5: ...ices Keep the wireless card as far away as possible from devices such as mobile telephones TVs and radios when using such devices Devices such as mobile telephones TVs and radios use different frequencies from the wireless card so that there will be no effect on either wireless card communication or on reception or transmission for such devices However radio emissions from the wireless card may ca...

Page 6: ...stria Sweden Norway Denmark Switzerland Holland Finland Portugal Greece Thailand Korea Australia New Zealand ETSI 300 328 3 1 13 2412 MHz 2472 MHz Spain ETSI 300 328 4 10 11 2457 MHz 2462 MHz Singapore IDA 5 10 13 2457 MHz 2472 MHz To check the region of intended use for the wireless card which you have purchased check the last digit of the product number which appears on the label on the reverse ...

Page 7: ... Operating Instructions Wireless Card 1 pc Names of each part Wireless card slot Slot cover Covers the card slot Card slot Insert the wireless card into here Eject switch Use to remove the wireless card from the card slot Wireless card Connector This connector is for connecting the wireless card to the projector s card slot Be careful not to touch the connector Wireless card power monitor Illumina...

Page 8: ...ages that appear on a computer screen to the projector This is possible by inserting the specified wireless cards into the projector and into the computers that are to be used More than one computer can be connected to the projector in this way System diagram Projected image Note An optional wireless card ET CDWL1 series must be inserted into the computer s ...

Page 9: ...e images Computer screens Projection images Screen shots of a whole computer screen Screen shots of the active window on a computer screen Screen shots of specified areas of a computer screen BMP JPEG and PNG images ...

Page 10: ...ing the projector The following points must always be observed Do not drop the projector or subject it to strong shocks Do not let the projector get wet Do not use unnecessary force to open and close the slot cover Do not use wireless cards which are cracked or bent Do not use the projector in places with high humidity such as bathrooms or in places which are very dusty such as warehouses Please m...

Page 11: ...Mask Limits the range of IP addresses that can be assigned to a computer when using a TCP IP connection in order to allow a network to be divided into several sub sections The parameters which divide the sub network in this way are called the subnet mask Gateway A junction point where different types of networks are connected to each other It is used to refer to the hardware and software which is ...

Page 12: ... In order to reduce this problem when using wireless LANs the frequency band can be divided into 11 channels for communication purposes The number of channels varies depending on the country However because interference between adjacent channels can occur the channels available for use are normally spaced 2 or 3 channels apart from each other SSID Abbreviation for Service Set ID Wireless LANs that...

Page 13: ...ort the CMYK sub type of JPEG file BMP Abbreviation for BitMaP This is the standard image format for the bitmapped files image files consisting of a collection of dots which are handled by Windows Color levels of monochrome 16 colors 256 colors and 16 7 million colors are supported PNG Abbreviation for Portable Network Graphics A high compression rate file format that provides restorable compressi...

Page 14: ...EIDA with the aim of realising a common image file format directory name format and file name format for the images used with digital still cameras It is based on recommendations such as Exif Version 2 1 Exif 2 1 Abbreviation for Exchangeable Image File Format This is an image file format which was established by the Japan Electronic Industry Development Association JEIDA It defines the common inf...

Page 15: ...omputer Computer Computer Inserting the wireless card page 28 Inserting the wireless card page 19 LAN settings page 22 Network settings using Wireless Manager page 38 Use Wireless Manager to check communicatio n with the projector page 41 Use Wireless Manager to transmit the images page 42 Setting example Setting item Projector LAN settings Network settings using Wireless Manager at computer IP AD...

Page 16: ...th the last number different e g If the computer IP address is 192 168 10 11 set the projector s address to something like 192 168 10 12 SUBNET MASK Use the same setting for the computer MODE AD HOC CHANNEL Use the same setting for the computer Note The computer settings can be used without further changes However if using the WEP function communication with the projector will not be possible You ...

Page 17: ...omputer Inserting the wireless card page 19 LAN settings page 22 Use Wireless Manager to check communication with the projector page 41 Use Wireless Manager to transmit the images page 42 Setting example Setting item Projector LAN settings IP ADDRESS SUBNET MASK Ask your network administrator for details on settings MODE INFRASTRUCURE CHANNEL Set to the same CHANNEL as the CHANNEL for the access p...

Page 18: ...ers a fixed IP address needs to be assigned to the projector for it to be used Ask your network administrator for further details If using the WEP function communication with the projector will not be possible You will first need to turn off the WEP function for all computers which are to communicate with the projector Furthermore when the WEP function is turned off the data encryption function wi...

Page 19: ...s Open the slot cover Insert the wireless card as shown in the illustration at right Hold the wireless card so that the power monitor is facing upward when inserting it and push it all the way in until it locks Wireless card power monitor Note Make sure the wireless card is facing the correct way when inserting it If you try to force the wireless card the wrong way into the slot it will damage the...

Page 20: ...upply for the projector while referring to Turning off the power on page 23 of the PT L711XU Operating Instructions Open the slot cover Press the eject switch When you press the eject switch it pops out Push in the eject switch and then remove the wireless card Eject switch Close the slot cover ...

Page 21: ... L C T E N T E R E S C P I C T U R E P I C T U R E M O D E N A T U R A L B R I G H T 3 2 C O N T R A S T 3 2 S E L C T A D J E S C L A N 1 E S C I P A D D R E S S 1 9 2 1 6 8 1 0 1 0 S U B N E T M A S K 2 5 5 2 5 5 2 5 5 0 H O S T N A M E P A N A S O N I C P R J 0 1 M O D E A D H O C S S I D S S I D C H 1 1 E N C R Y P T O F F K E Y 0 0 Note Please refer to the separate PT L711XU Operating instruc...

Page 22: ...cted Press the F or G button on the projector s control panel or the remote control to select STATUS and then press the ENTER button The STATUS screen will be displayed Note Refer to SETUP on page 23 for details on making the various LAN settings If the CH display appears in red it means that the selected channel cannot be used Use the SETUP menu to change the CHANNEL setting L A N S E T U P S T A...

Page 23: ...OFF Use the F or G button on the projector or remote control unit to select SELECT SETUP and then press the ENTER button to start making the settings Note When the final settings are made WAIT A MINUTE appears briefly and then the LAN is reset If you press the MENU button at any time before the final settings have been made all setting changes will be discarded and the previous settings will be re...

Page 24: ... and INFRASTRUCTURE mode AD HOC INFRASTRUCTURE Channel This lets you set the channel You must set the channel to the same channel that is being used by the wireless card of the transmitting computer In INFRASTRUCTURE mode operation is usually possible regardless of the settings used However for some access points you may need to set the channel to the same channel that is used by the access point ...

Page 25: ...he access point s SSID to one that can be used by the projector Use the F or G button to change the characters and use the I or H button to change the character position When you have finished press the ENTER button S E T U P S S I D S S I D IP ADDRESS This lets you set the projector s IP address Refer to page 15 of Wireless function preparation while making this setting However the projector s IP...

Page 26: ...and can contain capital letters A Z numerals 0 9 and hyphen Use the F or G button to change the characters and use the I or H button to change the character position When you have finished press the ENTER button S E T U P H O S T N A M E P A N A S O N I C P R J 0 1 ENCRYPT You can use this function to encrypt the image data However when encryption is enabled it takes longer for images to be transf...

Page 27: ...from 0 0 to 255 255 When an encryption key has been set you must set the same encryption key for the Wireless Manager see page 52 otherwise communication will not be possible Use the F or G button to set the numbers and use the I or H button to change the number position When you have finished press the ENTER button S E T U P K E Y 0 0 ...

Page 28: ... the order given to set up the computer s wireless card Install the card Page 28 Install the driver Page 29 Install the utilities Page 36 Use Wireless manager to make network settings Page 38 Installing and removing the computer s wireless card Installing the wireless card Hold the wireless card so that the power monitor is facing upward and insert it into the computer s PC card slot as far as it ...

Page 29: ...eck box and then click OK Select Stop Panasonic Wireless Card The screen shown at right will appear Click OK to remove the wireless card Installing the driver When the wireless card is inserted the driver installation screen appears The driver can be found on the CD ROM which is included with the projector as an accessory Install the driver by following the procedure below For Windows 98 Note The ...

Page 30: ... CD ROM into the CD ROM drive of the computer select CD ROM drive and then click Next When netcw10 inf appears click Next Driver installation will start Click OK without changing any of the detailed settings Note Use the Wireless Manager to change the wireless card settings page 38 Click Finish ...

Page 31: ... using Windows 95 refer to the installation procedure for Windows 98 For Windows 2000 When the wireless card is inserted the Found New Hardware Wizard will start Click Next Select Search for a suitable driver for my device and then click Next Insert the accessory CD ROM into the CD ROM drive of the computer select CD ROM drive and then click Next When netcw10 inf appears click Next ...

Page 32: ...ocol page 34 Checking the protocol TCP IP is used to transfer the images from the computer to the projector Check that the computer has TCP IP available For Windows 98 Note The Windows 98 Setup CD ROM may be needed while the driver is being installed Click Start point to Settings and click Control Panel Double click the Network icon ...

Page 33: ...IP is installed click Cancel and install the Configuration Utility See page 36 If TCP IP is not installed continue on to step below Click Add Select Protocol and then click Add Select Microsoft in the Manufacturers column select TCP IP in the Network Protocols column and then click OK ...

Page 34: ...95 refer to the protocol checking adding procedures for Windows 98 For Windows 2000 Click Start point to Settings and click Network and Dial up Connections Select Local Area Connection click the right mouse button and select Properties If there are several Local Area Connection entries select the one which gives Panasonic Wireless Card as the card name when you click on it with the right mouse but...

Page 35: ...TCP IP is installed click Cancel and install the Configuration Utility See page 36 If TCP IP is installed but the check box is unselected select the check box to enable TCP IP If TCP IP is not installed continue on to step below Click Install Select Protocol and then click Add Select Internet Protocol TCP IP and then click OK ...

Page 36: ...FIGURATION UTILITY on the CD ROM Double click Setup exe Follow the instructions which appear on the screen to complete the installation Start the Configuration Utility You can also start the Configuration Utility by clicking Start pointing to Programs pointing to Wireless Card and then pointing to Configuration Utility When the Configuration Utility starts the menu screen appears and an icon appea...

Page 37: ... to the projector so that they can be projected See page 43 You can also use the Wireless Manager to view a list of existing image files in folders and to select images from these folders for transmitting to the projector for display Furthermore the images can be played back automatically See page 48 The Wireless Manager is compatible with BMP JPEG and PNG image formats However it cannot handle fi...

Page 38: ...Computer network settings The computer s network settings must be correct in order to be able to send images to the projector Multiple network setting values can be stored When TCP IP settings are made or changed it is sometimes necessary to restart the computer before they can take effect Wireless Manager cannot be used to change the settings if you are using a wireless card other than the option...

Page 39: ...at you are using see page 6 TCP IP Use DHCP Select if you would like to assign an IP address so that the computer can use a DHCP server IP address Type in the computer s IP address The computer s IP address cannot be the same as the projector s IP address or another computer s IP address Refer to page 15 of Wireless function preparation while making this setting Subnet Mask Type in the subnet mask...

Page 40: ...t has been set for the access point to be used for transmissions in Infrastructure mode 2 2 2 2 Channel Set the channel to be used during Ad Hoc mode The projector must be set to the same channel 3 3 3 3 READ CURRENT SETTING Loads the setting values which are currently set for the wireless card When all settings have been completed click OK It may then be necessary to restart Windows After making ...

Page 41: ...ke to repeat the search for a projector click SEARCH Note Projector searching cannot be carried out for approximately 30 seconds after the projector power is turned on even if Search Projector is selected If the IP addresses have not been set for projectors and computers within the same network group searching may not be carried out correctly If the message No projector detected appears as shown a...

Page 42: ...or projecting Furthermore the images can be played back automatically See page 48 Example 3 Converting Microsoft PowerPoint data for projection using the JPEG Convertor Projector Microsoft PowerPoint files can be converted into JPEG files using the JPEG Convertor as described on page 53 The converted JPEG files can be selected from an image list and sent to the projector for projection See page 48...

Page 43: ...transmitted to the projector and it can also be saved at the computer Functions of the Capture window Right click the icon on the taskbar and select Capture The Capture window appears CAPTURE START button Captures screen images There are three types of capturing methods that can be used See Selecting the capturing method on page 44 for details Image capture history column Shows the image capture h...

Page 44: ...en 2 Area Captures the area selected using the mouse 3 Active Window Captures only the active window The capturing method can be changed using the Option command in the pop up menu Right click the icon on the taskbar and select Option The Option window appears Select SETTING CAPTURE in the Option window Select the capturing method from the Capture Form box Click OK Note See Setting the capturing c...

Page 45: ...pturing starts If the setting for After Capture on page 47 is Send Projector the captured image will be sent to the projector automatically without needing to click the SEND button Furthermore you can save the image by selecting Save Picture 2 Area capture This captures a rectangular area of the computer screen which is selected using the mouse Select SETTING CAPTURE in the Option window and then ...

Page 46: ... 44 for details on the Capture Form settings Right click the icon on the taskbar and select Capture The Capture window appears Click CAPTURE START Select the window to be captured Note Depending on the computer s processing speed the image may be captured while it is still being redrawn on the computer screen If this happens click CAPTURE START in Still Timer For Capture on page 47 and then set th...

Page 47: ...ey are captured select Send Projector If you would like to save the captured images to a location such as the computer s hard disk select Save Picture Furthermore click the button and specify the location to save the image You can select the same location that was used to save the previous image by clicking the G button Preview History If this is selected you can view the captured image preview an...

Page 48: ...e folder selection box If you click on an image in the image list box the selected image appears in the Preview window Only files that are in BMP JPEG or PNG format can be displayed in this way Preview window Displays the image that is selected in the Image List box H H H H button When you click the H button the next image is selected and appears in the preview window SEND button When this button ...

Page 49: ... AUTO PLAY button If you click the AUTO Play button the images displayed in the Image List box are changed and transmitted to the projector automatically in the order they appear after a certain interval of time This interval can be set using the Interval setting on page 50 1 1 1 1 Pause button If you click the pause button during Auto Play playback is momentarily paused If you click the pause but...

Page 50: ...rtor Click AUTO PLAY Auto Play will then start Note It may not be possible to send images with filenames that contain double byte characters Do not transmit images from other computers to the projector while the automatic playback function is in use Image List status settings You can change the details of some settings that affect how the image list is displayed Right click the icon on the taskbar...

Page 51: ...r Search Displays the Projector Search window Select the shortcut key to be assigned to the selected function Select the key Ctrl Alt Shift to be pressed at the same time Click Set This completes the setting Note When using shortcut keys the selected keys should be pressed simultaneously To clear a shortcut key setting select the function to be cleared and then click Clear You can check the shortc...

Page 52: ...select Option Then select Other Setting from the Option window Select Enable Encrypt Set the encryption key to the same key that has been set for the projector See page 27 Click OK This completes the setting Note To clear the setting unselect the Enable Encrypt check box The computer communciations will not be encrypted when Enable Encrypt is selected It is recommended that you assign a password f...

Page 53: ... What JPEG Convertor can do Conversion of PowerPoint files ppt extension to DCF compliant JPEG images PowerPoint 97 2000 must be installed on the computer which is being used to do the conversion Conversion of JPEG BMP and TIFF images to DCF compliant JPEG images Changing image sizes and compression rates XGA SXGA SVGA XGA XGA XGA Sorting of images B C A A B C Saving images to locations such as a ...

Page 54: ... been imported into JPEG Convertor If you right click on any of the thumbnail images in this screen the images can be displayed in actual size sorted or deleted This projector cannot be used to write data to SD memory cards File menu Commands such as Import Slide Import file Save to SD Memory Card Save to other folder and Close can be selected from this menu Setting menu Lets you select the variou...

Page 55: ...Convertor It works in the same way as the Close button 1 1 1 1 Save to other folder button Saves the JPEG images to some other location such as a hard disk or MO drive 2 2 2 2 Close button Works in the same way as the button Importing presentation files created using Microsoft PowerPoint Check the size in the Slide size drop down list box The projector can project JPEG images which are of XGA size...

Page 56: ... as the one in the illustration will appear If you wish to import all slides in the presentation click Import All If you wish to import selected slides click Prev Slide or Next Slide to display a slide you wish to import and then click Import When the import is finished click Cancel Exit Note The imported slides will be converted to an aspect ratio of 4 3 It is not recommended that you import slid...

Page 57: ...iles with the following properties even if they are in JPEG BMP or TIFF format Files which are more than 10 000 pixels in width or height BMP files which have been compressed using RLE compression TIFF files which have been compressed using LZW compression JPEG or TIFF images in CMYK Cyan Magenta Yellow Black format Importing files using drag and drop JPEG Convertor is compatible with drag and dro...

Page 58: ... check that the image has imported correctly Note You can also enlarge thumbnail images by right clicking on them and selecting Display picture from the pop up menu Sorting images Drag the thumbnail image and drop it in the place where you wish the image to appear A green dividing line appears between the images If you release the mouse button when the thumbnail image is in the desired location th...

Page 59: ...e imported files will be deleted Conversion settings for saving images The conversion settings to be used when saving images onto the SD memory card or into other folders can be set using the Preferences dialog box which appears when Preferences is selected from the Setting menu or using the Picture quality slider in the main application window This projector cannot be used to write data to SD mem...

Page 60: ...mands If a higher image quality is selected the resulting file size will be greater and if a lower quality is selected the resulting file size will be smaller about 1 5 the size compared to when high quality is selected Note JPEG is an effective compression method for natural images such as photographs Presentations created using PowerPoint and illustrations created using graphics programs may sho...

Page 61: ...lphabetic characters Double byte characters cannot be used Multiple directories using the same three digit combination directory number cannot be created Directory sub hierarchies are not supported File names File names must consist of four alphanumeric characters followed by four numerals file number followed by jpg Example abcd0001 jpg The four numerals must make up a number between 0001 and 999...

Page 62: ...in the separate PT L711XU Operating Instructions and then turn the power back on Before asking for service Check the following before asking for service Symptom Check the following The computer does not recognize the wireless card Is the wireless card inserted all the way into the PC card slot in the computer Has the driver been installed correctly Are insufficient computer system resources availa...

Page 63: ...being used In addition check if any functions that limit the way that the computer can communicate with the access point are being used Images appear in the Image List screen of the Wireless Manager but some images do not appear and errors also appear If encryption has been set check that the encryption keys are the same for both the projector and the computer Images in formats such as JPEG have m...

Page 64: ...the Display Properties window and change the Colors setting to High Color 16 bit or greater For Windows 95 open the Display Details tab The Wireless Manager screen display is misaligned and buttons do not appear correctly Follow the same procedure as above to open the Settings tab in the Display Properties window Then click the Advanced button and change the Font Size setting to Small Fonts For Wi...

Page 65: ...1 8 2 1 f 28 7 mm 36 0 mm Lamp UHM lamp 165 W Luminosity 1600 lm ANSI Scanning frequency for RGB signals Internal data point scanning method Horizontal scanning frequency 24 kHz 97 kHz Vertical scanning frequency 50 Hz 120 Hz Dot clock frequency 135 MHz or less YPBPR signals NTSC 480i 480p PAL 625i 720p HDTV 1080i 1035i Color system 6 NTSC NTSC 4 43 PAL PAL M PAL N SECAM Projection size 762 mm 762...

Page 66: ...3 jack Stereo MINI Monitor output stereo compatible 0 V rms 2 0 V rms variable Serial connector D sub 9 pin female RS 232C compatible Wireless card slot For wireless card only Cabinet Moulded plastic Dimensions Width 233 mm 9 5 32 Height 111 mm 4 3 8 Length 330 mm 13 with lens cover fitted Weight 4 0 kg 8 8 lbs Operating environment Temperature 0 ºC 40 ºC 32 ºF 104 ºF Humidity 20 80 no condensatio...

Page 67: ... depending on the operating environment Dimensions Width 54 mm 2 1 8 Height 5 mm 3 16 Length 114 5 mm 4 1 2 Weight 50 g 1 8 ozs Refer to the table on page 6 also Options Wireless card ET CDWL1U Ceiling bracket ET PK701 Full function remote control unit ET RM100 Trademark Information The SD logo is a trademark Windows and Powerpoint are trademarks or registered trademarks of Microsoft Corporation i...

Page 68: ...9 16 255 10 1 32 93 3 21 32 98 3 27 32 111 4 3 8 330 13 53 2 3 32 ATTENTION Unauthorized use or reproduction of this software or this manual in full or in part is strictly forbidden Panasonic assumes no responsibility for any results or effects arising from the use of this software and this manual The specification for this software and the contents of this manual are subject to change without pri...

Page 69: ...issions de radiophonie ou de télévision ce que l on pourra déterminer en mettant l équipement successivement hors tension puis sous tension il est conseillé de tenter de remédier au problème par l une des méthodes suivantes Réorientez ou déplacez l antenne du récepteur Éloignez l équipement du récepteur Branchez l équipement dans une prise de courant située sur un circuit autre que celui qui alime...

Page 70: ...ger votre corps à la terre vous devez toucher une masse métallique telle qu un châssis de fenêtre en aluminium ou une poignée de porte métallique Ne tentez pas d installer la carte de radiocommunication ailleurs que dans le logement prévu à cet effet dans le projecteur Vous risqueriez d endommager la carte ou l autre appareil Fréquences radio utilisées par la carte de radiocommunication La carte d...

Page 71: ... de radiocommunication si bien qu ils ne risquent pas de brouiller les communications de carte de radiocommunication En revanche les ondes émises par la carte de radiocommunication peuvent perturber la réception vidéo ou audio de ces appareils Les ondes radio émises par la carte de radiocommunication ne sont pas capables de traverser les structures d acier les plaques de tôle ni le béton armé Les ...

Page 72: ...mark Suisse Hollande Finlande Portugal Grèce Thaïlande Corée Australie et Nouvelle Zélande ETSI 300 328 3 1 13 2412 MHz 2472 MHz Espagne ETSI 300 328 4 10 11 2457 MHz 2462 MHz Singapour IDA 5 10 13 2457 MHz 2472 MHz Pour vérifier la région d utilisation prévue de la carte de radiocommunication que vous avez achetée examinez le dernier chiffre du numéro de produit qui figure sur l étiquette apposée...

Page 73: ...iques techniques du logiciel et le contenu de ce manuel sont sujets à modifications sans préavis Professional Industrial Video Panasonic Broadcast Television Systems Company Division of Matsushita Electric Corporation of America 3330 Cahuenga Blvd West Los Angeles CA 90068 323 436 3500 Technical Support 800 222 0741 E Mail pbtscservice panasonic com Panasonic Canada Inc 5770 Ambler Drive Mississau...

Reviews: