background image

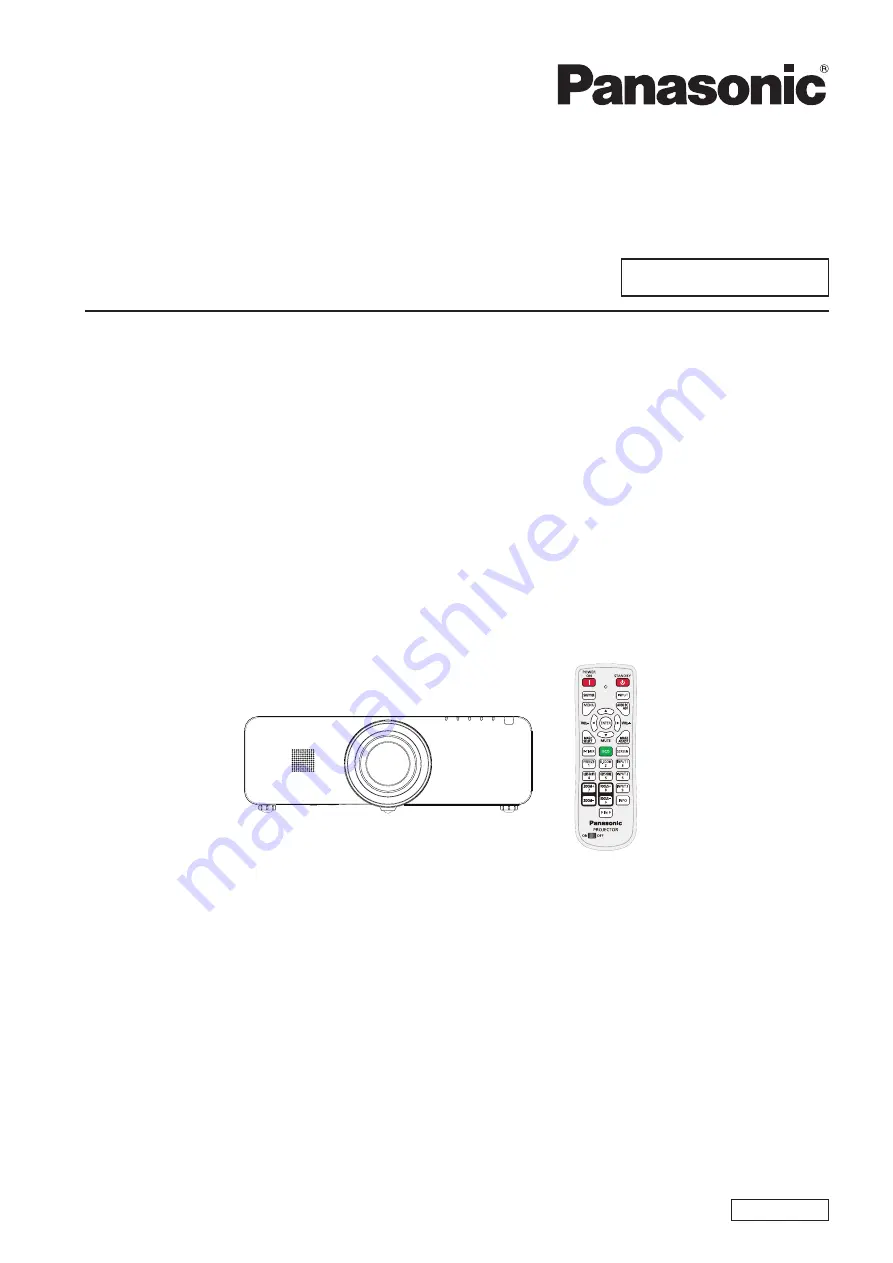
Operating Instructions

Functional Manual

LCD Projector  

Commercial Use

Model No.

PT-EZ570E   PT-EZ570EL

         PT-EW630E  PT-EW630EL

         PT-EW530E  PT-EW530EL

         PT-EX600E   PT-EX600EL

         PT-EX500E   PT-EX500EL

ENGLISH

LV4A

Thank you for purchasing this Panasonic Product.

Before operating this product, please read the instructions carefully, and save this manual for future use.


J

Before using your projector, be sure to read “Read this first!” (


J

Æ

 pages 2 to 8).

The information of these instructions are shared use with multiple models of EZ570 series, EW630 series, 

EW530 series, EX600 series and EX500 series.

Lens is optional for the projectors that “L” follows in model number.


J

Summary of Contents for PT-EW530E

Page 1: ...is Panasonic Product Before operating this product please read the instructions carefully and save this manual for future use J J Before using your projector be sure to read Read this first J J Æ pages 2 to 8 The information of these instructions are shared use with multiple models of EZ570 series EW630 series EW530 series EX600 series and EX500 series Lens is optional for the projectors that L fo...

Page 2: ...s using the provided power cord and shielded interface cables when connecting to computer or peripheral device If you use serial port to connect PC for external control of projector you must use optional RS 232C serial interface cable with ferrite core Any unauthorized changes or modifications to this equipment will void the user s authority to operate WARNING TURN OFF THE UV LAMP BEFORE OPENING T...

Page 3: ... severe electrical shock if the cut off plug is inserted into any 13 amp socket If a new plug is to be fitted please observe the wiring code as shown below If in any doubt please consult a qualified electrician WARNING THIS APPLIANCE MUST BE EARTHED IMPORTANT The wires in this mains lead are coloured in accordance with the following code Green and Yellow Earth Blue Neutral Brown Live As the colour...

Page 4: ...dust Failure to observe this will cause a fire If dust builds up on the power plug the resulting humidity can damage the insulation z z If not using the projector for an extended period of time pull the power plug out from the wall outlet z z Pull the power plug out from the wall outlet and wipe it with a dry cloth regularly Do not handle the power plug with wet hands Failure to observe this will ...

Page 5: ...ing so can cause burns or loss of sight Strong light is emitted from the projector s lens Do not look or place your hands directly into this light z z Be especially careful not to let young children look into the lens In addition turn off the power and z z disconnect the power plug when you are away from the projector Do not insert any foreign objects into the projector Doing so will cause fire or...

Page 6: ...aks do not touch it with bare hands and take the following measures if necessary Battery fluid on your skin or clothing could result in skin inflammation or injury z z Rinse with clean water and seek medical advice immediately Battery fluid coming in contact with your eyes could result in loss of sight z z In this case do not rub your eyes Rinse with clean water and seek medical advice immediately...

Page 7: ...deteriorate or result in fire Take particular care in locations exposed to direct sunlight or near stoves z z Always disconnect all cables before moving the projector Moving the projector with cables still attached can damage the cables which will cause fire or electric shocks to occur Never plug headphones and earphones into AUDIO OUT jack Excessive sound pressure from earphones and headphones ca...

Page 8: ... trademarks of Crestron Electronics Inc Other names company names or product names used in these operating instructions are the trademarks or registered trademarks of their respective holders Please note that the operating instructions do not include the and TM symbols Illustrations in these operating instructions Note that illustrations of the projector and screens may differ from the ones you ac...

Page 9: ...e is not needed with keeping the projector on The shutter management function allows you to set the timer It prevents from keeping the projector on when the shutter is closed for a long time This function is only for EZ570 series EW630 series and EX600 series Direct Power Off Function Improved connectivity Useful Functions for Presentations Shutter Function J JQuick steps For details see the corre...

Page 10: ...rd 35 ON G STANDBY R indicator 36 Turning On the Projector 37 Enter a PIN code 38 Turning Off the Projector 39 Projecting 40 Selecting the image 40 Adjusting the image 40 Basic operations by using the remote control 41 Using the SHUTTER AV MUTE button 41 Switching the input signal 41 Using the MENU button 42 Using the AUTO PC ADJ button 42 Controlling the volume of the speaker 42 Using the IMAGE S...

Page 11: ... Fan control 65 Simple mode 66 Remote control 66 RC sensor 66 Eco management 66 Power management 67 Standby mode 67 Direct on 67 P timer 67 Security 68 Shutter 68 Closed caption 69 Video delay control 69 Filter counter 70 Test pattern 70 Factory default 70 Information 71 Input Source Information Display 71 Network 72 Projector name 72 Network setup 72 Network control 72 Network status 73 Network f...

Page 12: ...o may cause z z damage to the lens and the projector Care must be taken when handling the projector do not drop bump subject it to strong forces or put other z z things on the cabinet Do not hold the lens and the peripheral part z z Cautions when installing Do not set up the projector outdoors J J The projector is designed for indoor use only z z Do not use under the following conditions J J Place...

Page 13: ...ting and cooling air from the air conditioning system directly z z blow to the ventilation ports intake and exhaust of the projector Do not place the projector in an confined space z z When it is necessary to install in a confined space install the air conditioning or ventilating installation separately Exhaust heat may accumulate when the ventilation is not enough triggering the protection circui...

Page 14: ...en Depending on where the projector is used heated air from an exhaust port or warm or cold air from an air z z conditioner can cause a shimmering effect on screen Avoid use in locations where exhaust or streams of air from projector other devices and air conditioners flow between the projector and the screen The lens of projector is affected by the heat from the luminous source Because of this th...

Page 15: ...wer greatly deteriorate the lamp and affect the lamp life In rare cases the lamp burst shortly after the projection z z The risk of bursting increases when the lamp is used beyond its replacement cycle Make sure to replace the z z lamp unit consistently When to replace the lamp unit Æ page 96 If the lamp bursts gas contained inside of the lamp is released in a form of smoke z z It is recommended t...

Page 16: ... cable x1 6103580425 for remote control unit AC power cord holder x1 6451052124 Lens cap 1 x1 6103543376 Lens mount cover 2 x1 6103468303 Lens antitheft screw 3 x1 4112195500 Attached to the projector at the time of purchase Attached to the projector at the time of purchase Only for PT EZ570E PT EW630E PT EW530E PT EX600E and PT EX500E Only for PT EZ570EL PT EW630EL PT EW530EL PT EX600EL and PT EX...

Page 17: ... Transfer Software 2 0 List of compatible projector models This is a list of projectors that are compatible with the software refer to the right column and their restrictions Multi Projector Monitoring Control Software 2 6 Windows This software allows you to monitor and control multiple projectors connected to the LAN Logo Transfer Software 2 0 Windows This software allows you to create original i...

Page 18: ...ection function Æpage 42 7 Signal Emission indicator Light red while a signal is being sent from the remote control to the projector 8 STANDBY button Turn the projector off Æpage 39 9 INPUT button Select an input source Æpage 41 10 AUTO PC ADJ button Automatically adjust the computer image to its optimum setting Æpage 42 11 ENTER button Execute the selected item 12 IMAGE ADJUST button Operate the ...

Page 19: ... Æpage 45 26 INFO button Operate the information function Æpage 45 27 Wired remote jack Connect the M3 stereo mini jack cable not supplied to this jack when using as a wired remote control Attention Do not drop the remote control z z Avoid contact with liquids z z Do not attempt to modify or disassemble the remote z z control Note The remote control can be used within a distance of z z about 5 m 1...

Page 20: ...om the exhaust vent Do not put heat sensitive objects near this side 10 Remote control signal receiver Back 11 AC IN 12 Terminals Æpage 22 13 Security Chain Hook 14 Air intake port Air filter cover Æpage 93 15 Hand Grip 16 Adjustable feet Adjusts the projection angle WARNING Keep your hands and other objects away from J J the air exhaust port Keep your hand and face away z z Do not insert your fin...

Page 21: ...ton Enter the focus zoom and lens shift adjustment mode Æpage 40 10 11 12 8 ON G STANDBY R indicator Light red while the projector is in stand by mode z z Light green during operations z z Blink green in the Power management mode z z 9 TEMP indicator Blink red when the internal temperature of the projector exceeds the operating range 10 FILTER indicator Light orange when the clogging of the filter...

Page 22: ...o equipment to VIDEO G Y B PB and R PR jacks or connect the computer output signal 5 BNC Type Green Blue Red Horiz Sync and Vert Sync to VIDEO G Y B Pb R PR SYNC HD and VD jacks 10 S VIDEO Connect the S VIDEO output signal from video equipment to this jack 11 VIDEO Connect the component or the composite video output signal from video equipment to these jacks 12 AUDIO IN 2 Connect the audio output ...

Page 23: ...65 different ID codes All Code 1 Code 64 the initial ID number is All J J Setting the ID number 1 While holding down the MENU button enter a 1 digit or 2 digit number corresponding to the desired ID code number by using the number buttons 0 to 9 2 The ID code is changed when the MENU button is released 3 The examples are as follows Code 1 MENU 1 or MENU 0 1 Code 2 MENU 2 or MENU 0 2 Code 16 MENU 1...

Page 24: ...enu Ceiling and Rear Æ page 60 Attention For optimum viewing quality install the projector in a location where screen exposure to outside light light from light fixtures z z or other light is at a minimum Also draw the curtains close blinds and turn off light fixtures Parts for ceiling mount Optional You can install the projector on the ceiling by using the optional ceiling mount bracket ET PKE200...

Page 25: ... 2 Turn off the projector and unplug the AC power cord 3 While pressing the lens release button rotate the projection lens counterclockwise and remove the projection lens Attention Be careful when handling the lens Do not drop z z Attaching the lens to the projector J J 1 Remove the lens mount cover 2 Fit the lens to the projector by aligning the red dot on the lens with the red dot of the project...

Page 26: ...Min LW Max LT Min LW Max LT Min LW Max LT 40 0 538 0 862 1 36 2 35 0 63 1 02 1 41 2 29 3 81 3 72 6 03 0 05 0 59 50 0 673 1 077 1 71 2 95 0 80 1 29 1 77 2 89 4 79 4 70 7 59 0 06 0 73 60 0 808 1 292 2 06 3 55 0 97 1 55 2 14 3 49 5 77 5 68 9 15 0 07 0 88 70 0 942 1 508 2 42 4 15 1 14 1 82 2 50 4 09 6 75 6 66 10 71 0 08 1 02 80 1 077 1 723 2 77 4 76 1 32 2 09 2 87 4 69 7 73 7 64 12 27 0 09 1 17 90 1 2...

Page 27: ...0 17 63 92 0 76 5 74 For the screen aspect ratio of 4 3 Unit m z z Lens type The standard zoom lens The lens of optional accessories Height position H 2 Fixed focus Lens Short Zoom Lens Long Zoom Lens Ultra Long Zoom Lens Model number of projection lens ET ELW21 ET ELW20 ET ELT20 ET ELT21 Throw ratio 1 1 9 3 3 1 0 9 1 1 5 2 0 1 3 3 5 4 1 5 4 8 6 1 Screen dimensions Projection distance L Screen siz...

Page 28: ...4 35 24 47 6 95 10 90 14 83 24 41 39 87 39 87 63 44 0 51 5 89 For the screen aspect ratio of 16 9 Unit m z z Lens type The standard zoom lens The lens of optional accessories Height position H 2 Fixed focus Lens Short Zoom Lens Long Zoom Lens Ultra Long Zoom Lens Model number of projection lens ET ELW21 ET ELW20 ET ELT20 ET ELT21 Throw ratio 1 1 7 2 8 1 0 8 1 1 3 1 7 1 2 8 4 6 1 4 6 7 2 1 Screen d...

Page 29: ...ion distance by projection lens for EX600 series and EX500 series For the screen aspect ratio of 16 9 Unit m z z Lens type The standard zoom lens The lens of optional accessories Height position H 2 Fixed focus Lens Short Zoom Lens Long Zoom Lens Ultra Long Zoom Lens Model number of projection lens ET ELW21 ET ELW20 ET ELT20 ET ELT21 Throw ratio 1 1 7 2 8 1 0 8 1 1 3 1 7 1 2 8 4 6 1 4 6 7 2 1 Scre...

Page 30: ...6 38 10 27 0 00 1 07 80 1 219 1 626 2 66 4 56 1 26 2 00 2 75 4 50 7 41 7 32 11 77 0 00 1 22 90 1 372 1 829 3 00 5 14 1 43 2 26 3 10 5 07 8 35 8 27 13 26 0 00 1 37 100 1 524 2 032 3 33 5 71 1 59 2 51 3 45 5 65 9 29 9 21 14 76 0 00 1 52 120 1 829 2 438 4 01 6 86 1 92 3 03 4 15 6 80 11 17 11 09 17 75 0 00 1 83 150 2 286 3 048 5 03 8 59 2 42 3 80 5 20 8 53 14 00 13 92 22 24 0 00 2 29 200 3 048 4 064 6...

Page 31: ...16 10 L 0 06763 x SD m 0 057678 16 9 L 0 06951 x SD m 0 057678 4 3 L 0 076564 x SD m 0 057678 Short Zoom Lens ET ELW20 16 10 Min LW L 0 105575 x SD m 0 055497 Max LT L 0 143744 x SD m 0 053400 16 9 Min LW L 0 10851 x SD m 0 055497 Max LT L 0 14774 x SD m 0 053400 4 3 Min LW L 0 119521 x SD m 0 055497 Max LT L 0 162733 x SD m 0 053400 Long Zoom Lens ET ELT20 16 10 Min LW L 0 236622 x SD m 0 114022 ...

Page 32: ...900 Max LT L 0 445486 x SD m 0 112800 Ultra Long Zoom Lens ET ELT21 16 10 Min LW L 0 394488 x SD m 0 212700 Max LT L 0 626457 x SD m 0 210700 16 9 Min LW L 0 405455 x SD m 0 212700 Max LT L 0 643872 x SD m 0 210700 4 3 Min LW L 0 4466 x SD m 0 212700 Max LT L 0 709212 x SD m 0 210700 Calculation formulas for projection distance by lens types J J for EX600 series EX500 series Lens type Aspect ratio...

Page 33: ...direction Projection angle can be adjusted vertically Attention Heated air comes out of the air exhaust port while the lamp is lit Do not touch the air exhaust port directly when you adjust z z the front adjustable feet If keystone distortion occurs on the projected image perform KEYSTONE from the Screen menu z z Æpage 59 Adjustable range Front adjustable feet 30 mm 1 181 Adjustable feet ...

Page 34: ...09 to 113 Connecting example Analog Out Signal Table Input terminal and Input signals Monitor Out Input 1 RGB RGB PC analog YES RGB Scart NO DVI D DVI D NO DVI D HDCP NO HDMI HDMI NO Input 2 G B R SYNC HD VD RGB YES VIDEO Video NO Y PB CB PR CR Y Pb Cb Pr Cr NO Input 3 Y PB CB PR CR Y Pb Cb Pr Cr NO S VIDEO S video NO VIDEO Video NO Attention When connecting with a video deck be sure to use the on...

Page 35: ...der correctly as Picture 1 shown Attaching J J Attach the AC power cord with the power cord clamps to the projector as follows Press the clamps on its sides and then insert the AC power cord with the power cord clamps securely to the projector as Picture 2 shown It is correctly attached until you hear the CLICK sound See Picture 3 for correct attachment Removal J J Remove the AC power cord from th...

Page 36: ...he projector is cooling down The projector cannot be turned on until cooling is completed and the ON G STANDBY R indicator stops blinking The temperature inside the projector is abnormally high and the projector is cooling down And the TEMP indicator also blinks in red Æpage 91 The projector cannot be turned on until cooling is completed and the ON G STANDBY R indicator stops blinking GREEN Lit Pr...

Page 37: ...he PIN code as instructed on the next page Note When the Logo select function is set to Off the logo z z will not be shown on the screen Æpage 63 When Countdown off or Off is selected in the Display z z function the preparation display will not be shown on the screen Æpage 63 When the Direct on function is set to On the projector z z will be turned on automatically by connecting the AC power cord ...

Page 38: ...J J Press the Number buttons on the remote control to enter a number Æpage 18 When you complete entering a four digit number the pointer moves to Set Press the ENTER button so that you can start to operate the projector If you fix an incorrect number use the button to move the pointer to the number you want to correct and then enter the correct number If you entered an incorrect PIN code PIN code ...

Page 39: ...ON G STANDBY R indicator stops blinking to turn on the projector again The projector can be turned on after the ON G z z STANDBY R indicator turns red The waiting time to restart will be shortened when the normal power off processing for fan cooling is completed compared with the time the AC power cord is immediately unplugged after the power off J J Direct Power Off function You can disconnect th...

Page 40: ...eft and right turn red This z z position is the center for the lens At positions of maximum shift the arrows disappear z z The projector stores the setting made using the lens shift function when the power is turned off z z When the position of the image is shifted the image may become a little darker z z Press and hold the LENS button or LENS SHIFT button for more than 5 seconds the lens shift wi...

Page 41: ...en use the MUTE button to release the z z AV mute function the mute function cannot be operated at the same time Switching the input signal You can switch the input signals to project buttons Press the INPUT button or the INPUT 1 INPUT 2 INPUT 3 button on the remote control The input source changes each time you press the INPUT button as follows Input 1 Input 2 Input 3 The input source changes eac...

Page 42: ...de control or on the remote control to adjust the volume The volume dialog box appears on the screen for a few seconds Note For details see Volume of Sound under Main menu z z Æpage 61 Using the IMAGE SELECT button This function allows you to operate the image selection directly button Press the IMAGE SELECT button on the remote control Note For details see Image select of Main menu z z Æpage 54 U...

Page 43: ...EEZE function You can freeze the projected image and stop the sound temporarily regardless of the playing condition of the connected device button Press the FREEZE button on the remote control to freeze the picture on the screen meanwhile volume is muted To cancel the Freeze function press the FREEZE button again or press any other button Fig 1 will appear on the screen while the Freeze function i...

Page 44: ...witch Corner correction adjustment press the ENTER button on the remote control to select the corner you want to adjust The top left corner adjustment as an example Note The white arrows indicate that there is no correction z z A red arrow indicates the direction of correction z z An arrow disappears at the maximum correction z z If you press and hold the KEYSTONE button for z z 3 seconds or more ...

Page 45: ...trol Note For details please refer to Adjusting the image z z Æpage 40 Using the INFO button This function allows you to display the information menu button Press INFO button on the remote control Note For details see Input Source Information Display in z z Information under Main menu Æpage 71 Using the P IN P button Only for EZ570 series EW630 series and EW530 series This function allows you to o...

Page 46: ... or the ENTER button 3333 The submenu appears so that you can select the sub menu item Press to select the desired sub 4444 menu item Press the ENTER button or press 5555 to enter the desired item Press to set or adjust the 6666 parameter values Press to return the previous menu 7777 Press the MENU button to exit the menu display Note Some items may not be adjusted or used for certain z z signal f...

Page 47: ...ea H 53 Display area V 53 Reset 53 Mode free 53 Store 53 Note This function will be available when the input source z z come from computer J J Image select Sub menu item Factory default Page Dynamic 54 Standard 54 Real 54 Cinema 1 54 Natural 1 54 Image 1 10 54 When input video signal to the projector these functions will be available J J Image adjust Sub menu item Factory default Page Contrast 32 ...

Page 48: ...er Auto 65 Fan control Off 65 Simple mode Off 66 Remote control All 66 RC sensor Front Back 66 Eco management 66 Power management Shut down 67 Standby mode Normal 67 Direct on Off 67 Sub menu item Factory default Page P timer Count up 67 Security 68 Shutter 2 Off 68 Closed caption Off 69 Video delay control Off 69 Filter counter Off 70 Test pattern Color 70 Factory default 70 This function is not ...

Page 49: ...e computer Check the connection between your computer and the projector The preset system is manually adjusted in the PC adjust Menu The adjusted data can be stored in Mode 1 10 PC Systems provided in this projector is chosen The projector chooses a proper system provided in the projector and displays it Mode 1 and SVGA 1 are examples Press to select System 1111 Press or the ENTER button to 2222 a...

Page 50: ...r Cr SIGNAL FORMAT If the projector cannot reproduce proper video image select a specific component video signal format among 480i 576i 480p 576p 720p 1 035i 1 080i and 1 080p Press to select System 1111 Press or the ENTER button to 2222 access the submenu Press to select the desired system 3333 Note The AV System Menu cannot be selected when selecting z z RGB Scart ...

Page 51: ...parameters The adjusted parameters from the Auto PC adjustment can be stored in the projector Once the parameters are stored the setting can be done just by selecting a Mode 1 10 in the PC System Menu see page 49 See also Store on page 53 Attention Fine sync Total dots Position H and Position V of z z some computers cannot be fully adjusted with the Auto PC adjustment function When the image is no...

Page 52: ...t dialog box Press to adjust the value 3333 The value can be adjusted from 0 to 31 z z Total dots Press to select Total dots 1111 Press the ENTER button to display 2222 the adjustment dialog box Press to adjust the value 3333 Position H Press to select Position H 1111 Press the ENTER button to display 2222 the adjustment dialog box Press to adjust the horizontal 3333 picture position For horizonta...

Page 53: ...play area V 1111 Press the ENTER button to display 2222 the dialog box Press to adjust the vertical area 3333 displayed by this projector Reset To reset the adjusted data all adjustments will return to their previous figures Press to select Reset 1111 Press the ENTER button 2222 A confirmation box appears and then select Yes z z Mode free Press to select Mode free 1111 Press or the ENTER button to...

Page 54: ...press the ENTER button Standard Normal picture mode preset on the projector Press to select Standard and then press the ENTER button Real Picture mode with improved halftone for graphics Press to select Real and then press the ENTER button Cinema Picture mode adjusted with fine tone Press to select Cinema and then press the ENTER button Natural Natural picture level preset on the projector Press t...

Page 55: ...ncrease the brightness Maximum value 63 Press decrease the brightness Minimum value 0 Color Press to select Color 1111 Press the ENTER button to display 2222 the adjustment dialog box Press to adjust the setting value 3333 Operation Adjustment Adjustment range Press increase the intensity of the color Maximum value 63 Press decrease the intensity of the color Minimum value 0 Note When input video ...

Page 56: ...splay 2222 the adjustment dialog box Press to adjust the setting value 3333 Operation Adjustment Adjustment range Press deepen blue tone Maximum value 63 Press lighten blue tone Minimum value 0 Offset Press to select Offset 1111 Press or the ENTER button to 2222 access the submenu Press to select the desired item 3333 and then press the ENTER button Press to adjust the setting value 4444 Operation...

Page 57: ...selected Note When input video signal to the projector Noise z z reduction will become available Progressive Press to select Progressive 1111 Press the ENTER button to display 2222 the dialog box Press to select the desired item 3333 An interlaced video signal can be displayed in z z progressive mode Select one of the following options Progressive cannot be selected when 480p z z 576p 720p or 1 08...

Page 58: ...button Press to pan the image 2222 When adjusted the arrows will turn red When z z reached to the correction limits the arrows will disappear Different models have different Panel sizes Panel size Model 1 920 x 1 200 EZ570 series 1 280 x 800 EW630 series EW530 series 1 024 x 768 EX600 series EX500 series Note When input computer signal to the projector True will z z be available True is disabled a...

Page 59: ...ress any button except the D ZOOM ENTER and buttons To return to the previous screen size select a screen size from the Screen Size Adjustment Menu or select an input source from the Input Source Selection Menu Æpage 49 again or adjust the screen size with the D ZOOM button Note When input computer signal to the projector this function z z will be available Digital zoom cannot be selected when Tru...

Page 60: ...t This function is used to project the image to a 4 3 or 16 9 projection screen Press to select Screen aspect 1111 and then press the ENTER button Press to choose one from the 2222 items as below This function is not available for EX600 series EX500 series Default 16 10 16 10 is the aspect of the LCD panel 16 9 Set to a 16 9 projection screen 4 3 Set to a 4 3 projection screen Note When the 4 3 fu...

Page 61: ...m value 0 You can also press VOL buttons on z z the remote control or side control to adjust the volume Built in SP Press to select Built in SP and 1111 then press the ENTER button Press to switch the Built in SP 2222 function between On and Off Off When the Built in SP sound is turned off On Mute is cancelled Mute Press to select Mute 1111 Press the ENTER button to switch 2222 the mute function b...

Page 62: ...ize J J 1 This function is used to change the display size of the On Screen Menu Press to select Menu size and 1111 press the ENTER button Press to switch the Menu size 2222 function between Normal and Double Normal Display the On Screen Menu on the screen in its normal size Double Display the On Screen Menu on the screen in its double normal size This function is only for EZ570 series Input butto...

Page 63: ...ied CD ROM Logo This function allows you to customize the screen logo with Logo select Logo PIN code lock and Logo PIN code change functions Press to select Logo 1111 Press or the ENTER button 2222 Press to choose the desired item 3333 Logo select J J This function decides on the starting up display from among following options Off Show the countdown display only Default Show the factory set logo ...

Page 64: ...lect an input source Size Select the display size Position Press the ENTER button at Position and the display position setting screen appears Selecting the Main picture or the Sub picture z z During Picture in Picture mode and being undisplayed On Screen Menu press the ENTER button to select Main or Sub picture A red frame will be displayed on the selected picture Switching Input and Source z z Wh...

Page 65: ...Press to select Lamp power and 1111 then press the ENTER button Press to select one among the 2222 modes as below Auto Brightness according to the input signal Normal The lamp power output is maximum Eco1 The lamp power output is 80 of the Normal mode Eco2 The lamp power output is 30 80 of the Normal mode Fan control Press to select Fan control and 1111 then Press ENTER button Press to select one ...

Page 66: ...elect RC sensor 1111 Press or the ENTER button 2222 Press to select one among 3333 options as below All Activate all of the receivers Front Top Activate both the front and top receivers Top Back Activate both the top and back receivers Front Back Activate both the front and back receivers Front Activate only the front receiver Top Activate only the top receiver Back Activate only the back receiver...

Page 67: ...Note When selecting Network the cooling fans may be z z running depending on the temperature inside the projector even if the projector is turned off If Standby mode is set to Eco you cannot use network z z functions when the projector is standing by Also you cannot use some RS 232C protocol commands If set to Network you can use network functions when z z the projector is standing by Direct on Pr...

Page 68: ...e remote control To unlock use the side control PIN code lock J J This function prevents the projector from being operated by unauthorized persons and provides the following setting options for security Press to select the desired items 1111 as below Off Unlocked On 1 Enter the PIN code every time turning on the projector On 2 Enter the PIN code to operate the projector once the power cord is disc...

Page 69: ...blinking Should the button be pressed in this condition the projection lamp will be turned on and the SHUTTER indicator turns off Closed caption Only for NTSC 480i input Press to select Closed caption 1111 Press or the ENTER button to 2222 enter the submenu Closed caption J J Press to select Closed caption 1111 and then press the ENTER button Press to select Off CC1 CC2 2222 CC3 or CC4 Color J J P...

Page 70: ...tically and enter the standby mode in order to protect the inner parts of the projector When is displayed please clean or replace the air filter units as soon as possible and then reset the Filter counter Filter counter reset J J After cleaning or replacing the filter unit be sure to reset the timer Press to select Filter counter 1111 reset Press the ENTER button 2222 Filter counter Reset appears ...

Page 71: ...uency of the input signal is displayed in Hz or Hz when no signal Numbers of Hz doubles when during Interlace Screen J J The selected Screen size is displayed Language J J The selected language is displayed Lamp power J J The selected lamp mode is displayed Lamp runtime J J The cumulative lamp operating time is displayed Filter counter J J The filter using time filter is displayed Power management...

Page 72: ...he gateway address if DHCP server is not used DNS1 Display of Preferred DNS server address and setting Enter the DNS server address if DHCP server is not used DNS2 Display of Alternate DNS server address and setting Enter the alternate DNS server address if DHCP server is not used Press to select Set and press 3333 ENTER button Default wired LAN settings z z The following settings are set before t...

Page 73: ...ew Express refer to the Crestron Electronics Inc website Provided only in English http www crestron com getroomview Note For more details about the AMX Device Discovery please z z visit http www amx com Network status This function shows the LAN setting environment of the currently selected projector Press to select Network status 1111 Press or the ENTER button to 2222 show the information of the ...

Page 74: ... z z Compatible OS Windows XP Windows Vista Windows 7 Mac OS X v10 4 v10 5 v10 6 v10 7 Compatible Web Browser Internet Explorer 7 0 8 0 9 0 Safari 4 0 5 0 Mac OS Communication with an E mail server is required to use the E mail function Confirm that the E mail can be z z used beforehand Use shielded LAN cable STP cable that is compatible with category 5 or above z z Use a LAN cable with length of ...

Page 75: ... page z z Projector status page is displayed Note Avoid activating two or more Web browser simultaneously to work out setting or control actions z z Change the password first of all z z Administrator privileges enable the use of all functions User privileges enable the use of only Projector z z status Network status Basic control and Change password If you want to control the projector using a Web...

Page 76: ...Status then Projector status to display the Status information page This page displays the projector statuses established for the items shown below 1 Displays the type of projector 2 Displays the firmware version of the projector main unit 3 Displays the power source status 4 Displays the video mode status 5 Displays the serial number of the projector 6 Displays the firmware version of the network...

Page 77: ... LAMP TEMPERATURE The temperature around the lamp is too high Exhaust may be blocked or Fan control mode may be set wrong See Fan control of the Functional Manual Æpage 65 OPTICS MODULE TEMPERATURE Optics module temperature is high The exhaust air port maybe blocked or the air filter is clogged LAMP REMAIN TIME The lamp runtime has exceeded the prescribed cumulative time and it is now time to repl...

Page 78: ...hen it displays SHUTTER it is only for EZ570 series EW630 series and EX600 series When it displays AV MUTE it is only for EW530 series and EX500 series Detail control page J J Click Projector control then Advanced control to display the Detail control page 1 Execute Auto PC ADJ function 2 Operations on Image adjust 3 Operations on Screen mode 4 Operations on Rear Ceiling NATURAL WIDE will not be d...

Page 79: ...ction 6 Operations on Lens shift 7 Operations on Zoom 8 Operations on Focus 9 Operations on Test pattern 10 Return to factory default setting For EW530 series and EX500 series the LEFT and RIGHT buttons will display in gray and are not available 5 6 7 8 9 10 ...

Page 80: ...z To return to the previous window click Back Complete the detailed settings and 3333 click Next When Next is clicked the next page appears enabling z z you to complete the detailed settings as desired Settings performed here are the same as the settings performed with the Network menu of the projector Click Submit 4444 z z The settings will be registered Note Changing the setting of LAN while con...

Page 81: ...O management set up page J J This page makes it possible to set the savings of power consumption Click Detailed set up then Eco management set up to display the ECO management set up page Click Submit to execute the items you have set 1 Set the brightness of the screen 2 Set the conditions of the AUTO POWER SAVE 3 Set the time of the countdown when no signal input For EW530 series and EX500 series...

Page 82: ...r so that the recipient may easily identify the originator of the e mail maximum 63 characters 5 The user can modify the minimum time interval of temperature warning mail The default value is 60 minutes In this case the user cannot send another mail for 60 minutes after sending previous temperature warning mail even the set warning temperature is reached again 6 Select the temperature of the intak...

Page 83: ...TP server is set on this page when POP SMTP authentication is required for mail transmissions Click Detailed set up then Authentication set up to display the Authentication server setup page 1 Select the authentication method specified by your Internet service provider 2 Set this if SMTP authentication has been selected 3 POP server name field Available input characters Alphanumeric characters A Z...

Page 84: ... CPU BUS OK FAN OK INTAKE AIR TEMPERATURE OK AROUND LAMP TEMPERATURE OK OPTICS MODULE TEMPERATURE OK LAMP REMAIN TIME OK LAMP STATUS OK APERTURS CONTRAST SHUTTER OK SHUTTER OK AIR FILTER OK FILTER UNIT OK Error code 00 00 00 00 00 00 00 00 Intake air temperature 31 degC 87 degF AROUND LAMP temperature 37 degC 98 degF Optics module temperature 39 degC 102 degF PROJECTOR RUNTIME 1 H LAMP ECO 500 H L...

Page 85: ...0 40 00 00 00 00 00 08 Intake air temperature 31 degC 87 degF AROUND LAMP temperature 37 degC 98 degF Optics module temperature 39 degC 102 degF PROJECTOR RUNTIME 1 H LAMP ECO 500 H LAMP NORMAL 300 H LAMP REMAIN 2400 H Current status MAIN VERSION 1 00 NETWORK VERSION 1 00 LAMP STATUS LAMP OFF INPUT NETWORK Wired Network configuration DHCP Client OFF IP address 192 168 10 100 MAC address 04 20 9A 0...

Page 86: ...user name input field 3 New password input field 4 New password input field re enter for confirmation 5 Button for executing password change User mode A user can change password only 1 Current password input field 2 New password input field 3 New password input field re enter for confirmation 4 Button for executing password change Note When changing the administrator account both Current user name...

Page 87: ... turned off VOL DOWN AV MUTE and VOL UP are not available 4 Input Select Sets the input selection When the power of the projector is turned off this operation is not available 5 Operation buttons on the menu screen Operates on the menu screen 6 Freeze image quality adjustment Sets freeze image quality details 7 Back Returns to the previous page Tools page Click Tools on the operation page 1 Contro...

Page 88: ... usage time converted value 5 Power Status Displays the status of the power 6 Source Displays the selected video input 7 Projector Position Displays the projection method of the projector 8 Lamp Mode Displays the lamp mode 9 Error Status Displays the error status 10 Exit Return the operation page User mode A user can change password only 1 Help Desk Sends or receive messages to the administrator w...

Page 89: ...HUTTER AV MUTE Blue LAMP Orange The power plug has been removed from the outlet 1 1 1 1 The projector is in the standby mode Turns on when pressing the POWER ON button on the remote control or the button on the side control 1 1 1 1 The projector is operating normally 2 1 1 1 1 The lamp is cooling down The projector does not turn on when pressing the POWER ON button on the remote control or the but...

Page 90: ...utton on the remote control or the button on the side control When the projector returns to the normal operating temperature the standby indicator ON G STANDBY R will change to on The projector will turn back on when pressing the POWER ON button on the remote control or the button on the side control The temperature indicator TEMP will remain flashing Check the air filter 4 1 1 1 The projector has...

Page 91: ...r will flash in approximately 0 5 second intervals When there is a problem with the air filter J J The status of the indicator is displayed with the following symbols Off On Flashing Off or On or Flashing Indicators Status of the projector ON G STANDBY R Green Red Orange TEMP Red FILTER Orange SHUTTER AV MUTE Blue LAMP Orange 1 1 1 1 1 The indicator notifies you when the time set with Filter count...

Page 92: ...o turn off 1 The indicator will change according to different conditions regardless of the status of other indicators 2 The indicator will flash in approximately 1 second intervals When there is a problem with the shutter Only for the models which with J J shutter The status of the indicator is displayed with the following symbols Off On Flashing Off or On or Flashing Indicators Status of the proj...

Page 93: ...not use a cloth that has an abrasive surface or a cloth that is moist oily or covered with dust z z Do not use excessive force when wiping the lens as it is fragile z z Attention The lens is made of glass Impacts or excessive force when wiping may scratch its surface z z Please handle with care Air filter unit J J Clean the air filter unit in the following cases When the replacement message is dis...

Page 94: ...d the air filter unit that the tab is in left side in the figure put the right side in the figure first and press the z z tab side until make a click sound Close and press up to lock the filter cover 7777 Make sure that the air filter cover is closed tightly z z Reset the filter counter 8888 Turn on the power and perform Filter counter reset in the Setting menu z z Attention After washing the air ...

Page 95: ...and press the tab side until make a click sound Close and press up to lock the filter cover 6666 Make sure that the air filter cover is closed tightly z z Reset the filter counter 7777 Turn on the power and perform Filter counter reset z z in the Setting menu Attention Turn off the power before you replace the air filter unit z z When attaching the air filter unit make sure that the projector is s...

Page 96: ...e lamp cover is opened If pieces of glass get into your eyes or mouth seek medical advice immediately The lamp contains mercury Consult your local municipality or your dealer about correct disposal of used z z lamp units Attention Do not use other than designated lamp units z z The part numbers of accessories and separately sold components are subject to change without notice z z When to replace t...

Page 97: ...lamp cover fixing screw and open the lamp cover Open the lamp cover by pulling it slowly z z toward the direction of the arrow Use a Phillips screwdriver to loosen 3333 the three lamp unit fixing screws until the screws turn freely Hold the used lamp unit by its handles and pull it gently from the projector Insert the new lamp unit in correct 4444 direction Tighten the three lamp unit fixing screw...

Page 98: ...Tint adjustment may be incorrect z z 55 The input source which is connected to the projector may not be z z adjusted correctly Computer cable is damaged z z No sound from the internal speaker The input terminals may not have been correctly connected z z 34 The volume may have been set to the minimum level z z 42 61 The Shutter function may have been turned on z z 41 When the AUDIO OUT is plugged i...

Page 99: ... connected devices Then turn z z the power of the projector and the connected devices back on Isn t unsupported signal cable connected z z 109 113 No sound is output from a HDMI device Set the sound channel of the attached device to Linear PCM z z If no audio signal is output during HDMI cable connection connect the z z audio cable to AUDIO IN 1 terminal and set to Audio 1 in Sound of Setting menu...

Page 100: ...rors range 0 2 6th byte Indicates other errors range 0 2 Definitions for each value from 0 to 2 are as follows 0 No error known 1 Warning 2 Error LAMP Lamp status query Parameters 1st digits 1 5 digits Lamp cumulative operating time 2nd digit 0 Lamp off 1 Lamp on INST Input selection list query The followings are returned as parameters 11 12 13 21 22 23 24 25 31 32 33 46 47 48 NAME Projector name ...

Page 101: ...e Mode 1 Protect mode Generate a 32 byte hash value from the following data using MD5 algorithm 3333 xxxxxx yyyyy zzzzzzzz xxxxxx Administrator rights user name for WEB CONTROL Default user name is admin1 yyyyy Password of above administrator rights user Default password is panasonic zzzzzzzz 8 byte random number obtained in Step 2 Command transmission method z z Transmit using the following comma...

Page 102: ...2 Response data Data section Blank Mode Termination symbol NTCONTROL ASCII string 0x20 0 0x30 CR 0x0d 9 bytes 1 byte 1 byte 1 byte Mode 0 Non protect mode Command transmission method z z Transmit by the following command format Transmitted data Header Data section Termination symbol 0 0x30 0 0x30 Control command ASCII string CR 0x0d 1 byte 1 byte Undefined length 1 byte Receive data Header Data se...

Page 103: ...male Outside view Pin No Signal name Contents NC TXD Transmitted data RXD Received data NC GND Earth NC RTS Connected internally CTS NC J J Communication conditions Signal level RS 232C compliant Character length 8 bits Sync method Asynchronous Stop bit 1 bit Baud rate 19 200 bps X parameter None Parity None S parameter None Note When AMX D D function is set to On under the Network menu the Baud r...

Page 104: ...a colon is not necessary J J Basic format with sub command STX C1 C2 C3 ETX S1 S2 S3 S4 S5 E P1 P2 P3 P4 P5 P6 When transmitting a command which does not need a parameter the operation E and parameter are not necessary End 1 byte Parameter undefined length Colon 1 byte 3 command characters 3 bytes Start 1 byte Parameter 6 bytes Symbol or 1 byte and set value or adjustment value 5 bytes Operation 1...

Page 105: ...selection Parameter PC1 PC1 PC2 PC2 RG1 RGB1 RG2 RGB2 CP1 INPUT 2 Y Pb Cb Pr Cr CP2 INPUT 3 Y Pb Cb Pr Cr VD1 INPUT 2 VIDEO VD2 INPUT 3 VIDEO SVD S VIDEO DVI DVI HD1 HDMI SCT Scart OSH AV mute function Turn off the projection and sound temporarily Do not send the command consecutively Parameters 0 AV MUTE mode off 1 AV MUTE mode on OFZ Freeze Parameters 0 Freeze mode off 1 Freeze mode on AUU Volum...

Page 106: ...SYNC VD DDC clock Pin assignments and signal names of MONITOR OUT terminal J J Outside view Pin No Signal names Not assigned GND terminals R PR G G SYNC Y B PB HD SYNC VD Pin assignments and signal names of HDMI terminal J J Outside view Pin No Signal names Pin No Signal names T M D S data 2 T M D S clock shield T M D S data 2 shield T M D S clock T M D S data 2 CEC T M D S data 1 T M D S data 1 s...

Page 107: ...ames 1 T M D S Data2 15 Ground for 5V 2 T M D S Data2 16 Hot Plug Detect 3 T M D S Data2 Shield 17 T M D S Data0 6 DDC Clock 18 T M D S Data0 7 DDC Data 19 T M D S Data0 Shield 9 T M D S Data1 22 T M D S Clock Shield 10 T M D S Data1 23 T M D S Clock 11 T M D S Data1 Shield 24 T M D S Clock 14 5V Power 4 5 8 12 13 20 21 Not assigned ...

Page 108: ...nalog signals More than 162 2 MHz Inputting PC digital signals More than 100 MHz Inputting AV analog signals 1 080p Picture in Picture is disabled when Inputting signal formats SXGA 20 WUXGA 1 WUXGA 2 WSXGA 1 WXGA 2 UXGA 1 UXGA 2 UXGA 3 UXGA 4 D 1 080p Between 100 162 MHz Only for EZ570 series Between 100 140 MHz Only for EW630 series EW530 series EX600 series and EX500 series More than 162 MHz On...

Page 109: ...A A AA 1 080p 1 920 x 1 080 33 750 30 000 74 250 A A AA 28 125 25 000 74 250 A A AA 27 000 24 000 74 250 A A AA 67 500 60 000 148 50 B B AA 56 250 50 000 148 50 B B AA 1 080psf 30 1 920 x 1 080 33 750 60 000 74 250 A A AA 1 080psf 25 28 125 50 000 74 250 A A AA 1 080psf 24 27 000 48 000 74 250 A A AA 1 920 x 1 080 60 1 920 x 1 080 67 079 60 020 172 80 B B B MAC 1 280 x 960 75 000 75 080 126 00 A A...

Page 110: ...61 664 A AA A 58 030 72 000 74 745 A AA A 1 024 x 768i 36 000 87 170 47 300 A A A 35 522 86 960 44 900 A A A SXGA 1 152 x 864 64 200 70 400 94 560 A A A 1 152 x 900 61 200 65 200 92 000 A A A 71 400 75 600 105 100 A A A 61 850 66 000 94 500 A A A 1 280 x 1 024 62 500 58 600 108 000 A A A 63 900 60 000 107 350 A A A 63 340 59 980 108 180 A A A 63 740 60 010 109 497 A A A 71 690 67 190 117 004 A A A...

Page 111: ...120 59 900 122 430 A A A 64 030 60 010 108 160 A A A 62 500 58 600 108 000 A A A 64 744 59 948 101 000 A A A 65 317 59 978 121 750 A A A WXGA 1 400 x 900 55 935 59 887 106 500 A A A 1 400 x 900 74 918 60 000 161 850 B B A WSXGA 1 1 680 x 1 050 65 290 59 954 146 250 B B A WUXGA 1 920 x 1 200 74 556 59 885 193 250 B B B 5 74 038 59 950 154 000 B B AA D 480p 720 x 480 31 470 60 000 27 000 A A A H D D...

Page 112: ...1 94 964 AA A A 57 675 72 004 97 817 AA A A 1 280 x 800 49 600 60 050 79 360 AA A A 41 200 50 000 68 557 AA A A 49 702 59 810 83 500 AA A A 63 980 60 020 108 000 AA A A 58 289 69 975 98 858 AA A A 60 044 71 995 102 795 AA A A 62 790 74 928 106 492 AA A A 71 553 84 879 122 498 AA A A 1 360 x 768 47 700 60 000 86 670 A A A 56 160 72 000 100 190 A A A 1 366 x 768 48 360 60 000 86 670 A A A 46 500 50 ...

Page 113: ...ten in the format list Where Plug and Play is unmarked and nothing is written in the format list difficulties in projecting image may occur even when computer and projector appear to have same resolution Only for EW630 series and EW530 series Only for EZ570 series D 480i and D 576i are only for HDMI input Note The number of display dots is 1 920 x 1 200 for the z z EZ570 series 1 280 x 800 for the...

Page 114: ...Horizontal 33 75 kHz Vertical 60 Hz 625i 576i Horizontal 15 63 kHz Vertical 50 Hz 625p 576p Horizontal 31 25 kHz Vertical 50 Hz 750 720 50p Horizontal 37 5 kHz Vertical 50 Hz 1 125 1 080 50i Horizontal 28 13 kHz Vertical 50 Hz HD SYNC and V terminals are not compliant with 3 value composite SYNC z z for Video signal including S video Horizontal 15 75 kHz 15 63 kHz Vertical 50 Hz 60 Hz for HDMI sig...

Page 115: ...o 2 0 V rms valuable output impedance 2 2 kΩ and less SERIAL IN 1 D sub 9 pin RS 232C compliant for computer control use LAN 1 for RJ 45 network connection PJLink compatible Power cable length 3 0 m 118 1 Cabinet Molded plastic Dimensions Width 489 5 mm 19 27 Height 164 mm 6 46 when front adjustable feet shortened Depth 370 1 mm 14 57 4 including protractions 433 8 mm 17 08 5 including protraction...

Page 116: ...racket which is not purchased from an authorized distributors or environmental conditions Remove an unused ceiling mount bracket promptly z z Ensure to use a torque driver and do not use an electrical screwdriver or an impact screwdriver z z For details see the work instruction manual packed together with the ceiling mount bracket z z The model Nos of the accessories and the parts sold separately ...

Page 117: ...anguage 62 List of compatible signals 109 List of Picture in Picture 108 Logo 63 M Main menu 47 Maintenance 93 Manual PC adjust 52 Menu Menu position 62 Menu Navigation 46 Mute 61 N Natural 54 Natural wide 58 Network 72 Network connections 74 Noise reduction 57 Normal 58 O Offset 56 ON G STANDBY R indicator 36 Optional accessories 17 Other terminals 106 P Picture in Picture 64 PIN code 38 PJLink p...

Page 118: ...al service or the point of sale where you purchased the items Penalties may be applicable for incorrect disposal of this waste in accordance with national legislation For business users in the European Union If you wish to discard electrical and electronic equipment please contact your dealer or supplier for further information Information on Disposal in other Countries outside the European Union ...

Reviews: