background image

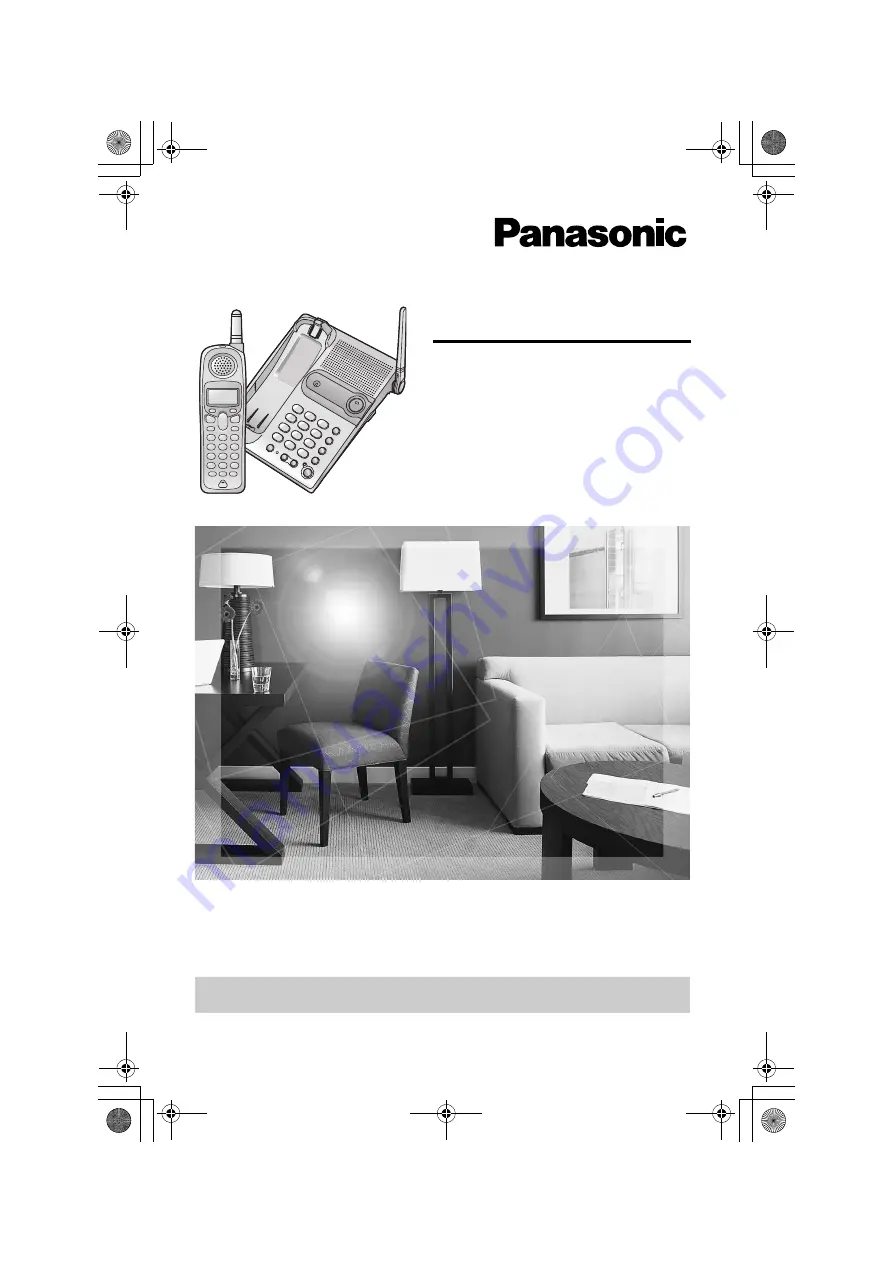
Digital Cordless Phone

Operating Instructions

Model No.

  KX-TG2340JX

Pulse-or-tone dialing capability

The unit is Caller ID compatible. To display the caller’s phone number, you must 
subscribe to Caller ID service.

PLEASE READ BEFORE USE AND SAVE.


Charge the battery for 6 hours before initial use.

PQQX14670ZA.book  1 ページ  2005年2月22日 火曜日 午後12時0分

Summary of Contents for KX-TG2340JX

Page 1: ...ulse or tone dialing capability The unit is Caller ID compatible To display the caller s phone number you must subscribe to Caller ID service PLEASE READ BEFORE USE AND SAVE Charge the battery for 6 hours before initial use PQQX14670ZA book 1 ページ 2005年2月22日 火曜日 午後12時0分 ...

Page 2: ...s of dealer Accessories included Caller ID Service where available is a telephone company service After subscribing to Caller ID this phone will display a caller s phone number AAC Adaptor p 8 one ATelephone Line Cord p 8 one ABattery p 9 one AHandset Cover p 9 one ABelt Clip p 50 one AShoulder Rest Attachment p 50 one PQQX14670ZA book 2 ページ 2005年2月22日 火曜日 午後12時0分 ...

Page 3: ...te If you use the handset near a microwave oven which is being used noise may be heard from the receiver or the speaker Move away from the microwave oven and closer to the base unit If you use the handset near another cordless phone s base unit noise may be heard Move away from the other cordless phone s base unit and closer to your base unit Raise the antenna Away from electrical appliances such ...

Page 4: ...r 30 Storing Caller Information in the Phone Book 31 Erasing Caller Information 32 Phone Book 33 Storing Names and Numbers 33 Dialing from the Phone Book 35 Chain Dial 36 Editing an Item in the Phone Book 37 Erasing an Item in the Phone Book 37 Intercom 38 Making Intercom Calls 38 Answering Intercom Calls 39 Transferring a Call 40 Conference Calls 42 Call Share 42 Special Features 43 Temporary Ton...

Page 5: ...y Instructions 58 Specifications 59 Useful Information Important Throughout these Operating Instructions and are used to indicate with which unit an operation can be performed Perform with the handset Perform with the base unit Perform with the handset and base unit separately Perform with the handset and base unit together Handset Base Unit Handset Base Unit Handset Base Unit Handset Base Unit PQ...

Page 6: ...kerphone Button and Indicator p 23 HOLD CONF Conference Button p 23 42 MUTE Button p 43 FLASH CALL WAIT Button p 43 44 LOCATOR INTERCOM Button p 38 Hook p 51 Charge Contacts p 10 TONE Button p 43 Antenna p 3 Speaker IN USE Indicator p 24 DIAL LOCK Button p 47 DIAL LOCK Indicator p 47 PQQX14670ZA book 6 ページ 2005年2月22日 火曜日 午後12時0分 ...

Page 7: ...hroughout these Operating Instructions The soft keys are indicated by what is displayed above the keys Ex Press Mute indicates Press the soft key below Mute The navigator key is indicated by the arrows d or B Antenna Display Receiver Soft Keys see below OFF Button p 11 20 MENU Button p 11 Navigator Key d B see below Back side Speaker Headset Jack p 52 C TALK Button p 20 s Speakerphone Button p 20 ...

Page 8: ...ne unit is used the units may interfere with each other To prevent or reduce interference please keep ample space between the base units If the unit is connected to a telephone line with DSL service you may hear noise from the receiver or speaker during conversations or the unit may not display caller s phone number properly We recommend connecting a noise filter contact your DSL service provider ...

Page 9: ...attery Charge Place the handset on the base unit Charge for 6 hours before initial use The unit beeps once the CHARGE indicator lights and Charging is displayed When the battery is fully charged Charge completed is displayed Battery strength You can confirm battery strength on the handset display Battery strength is indicated by the icons shown in the chart to the right Display prompt Battery stre...

Page 10: ...mbination of how often the handset is in TALK mode and how often it is in Standby mode Clean the charge contacts of the handset and the base unit with a soft dry cloth once a month Clean more often if the unit is subject to grease dust or high humidity Otherwise the battery may not charge properly If the battery is fully charged you do not have to place the handset on the base unit until Recharge ...

Page 11: ...ayed p 54 and or error beeps will sound Make sure the handset and base unit are not being used The handset must be operated near the base unit and while off the base unit 1 Press MENU The main menu is displayed p 12 2 Scroll to the desired item by pressing d or B 3 Press Select to select the desired item 4 If the item has a sub menu select the menu item p 12 Repeat steps 2 and 3 until the desired ...

Page 12: ... the soft keys p 53 Handset Voice enhancer Talk Caller ID Initial setting Auto talk Key tone Set tel line Dial lock Set base unit LCD contrast Set dial mode Set flash time Set line mode Ringer tone Incoming call Talk Caller ID Date and time Ringer tone Incoming call Ringer volume Ringer setting Main menu Sub menu I Sub menu II p 14 p 44 p 47 p 22 p 27 p 16 p 18 p 19 p 14 p 45 p 15 p 46 p 19 p 45 p...

Page 13: ...hen press Select 3 1 Enter 2 digits each for the day month and year Ex To set June 15 2005 enter 15 06 05 2 Enter 4 digits for the time hour and minute Ex To set 9 30 enter 0930 If you enter a wrong number press d or B to move the cursor to the incorrect number Enter the correct number 4 Select AM or PM by pressing AM PM 5 Press Save If the handset beeps 3 times the date and time were not set corr...

Page 14: ...ssing d or B then press Select 4 Press Select at Set dial mode 5 Select Pulse or Tone by pressing d or B 6 Press Save then press OFF 1 Press MENU 2 Scroll to Initial setting by pressing d or B then press Select 3 Scroll to Set tel line by pressing d or B then press Select 4 Scroll to Set line mode by pressing d or B then press Select 5 Select A or B by pressing d or B 6 Press Save then press OFF H...

Page 15: ...ion after you lift the handset to answer a call leave the Auto Talk feature turned off 1 Press MENU 2 Scroll to Initial setting by pressing d or B then press Select 3 Scroll to Auto talk by pressing d or B then press Select 4 Select On or Off by pressing d or B 5 Press Save then press OFF Handset Initial setting Back Select K dB L Auto talk Back Select K dB L Auto talk Off Back Save K dB L PQQX146...

Page 16: ...or the Dial Lock is turned on p 47 You can adjust the ringer volume while an outside call is ringing Press d or B while the handset is ringing Temporary ringer off While the handset is ringing for an outside call you can turn the ringer off temporarily by pressing OFF The handset will ring again as normal the next time a call is received 1 Press MENU 2 Press Select at Ringer setting 3 Press Select...

Page 17: ...lume press VOLUME To stop ringing press 0 To turn the ringer off press and hold VOLUME until 2 beeps sound To turn the ringer on press VOLUME or The base unit will ring at the low level You can adjust the ringer volume while an outside call is ringing Press VOLUME or while the base unit is ringing To turn the ringer off press and hold VOLUME until 2 beeps sound Base Unit PQQX14670ZA book 17 ページ 20...

Page 18: ...it is not being used 1 Press MENU 2 Press Select at Ringer setting 3 Scroll to Ringer tone by pressing d or B then press Select 4 Select the desired ringer tone by pressing d or B The handset will ring and the ringer tone will change If the ringer volume has been turned off the handset will not ring p 16 You can also select the ringer tone by pressing 1 to 7 5 Press Save then press OFF Press VOLUM...

Page 19: ...lume has been turned off the base unit will not ring p 17 You can also select the ringer tone by pressing 1 to 7 6 Press Save then press OFF 1 Press MENU 2 Scroll to Initial setting by pressing d or B then press Select 3 Press Select at LCD contrast 4 Select the desired contrast by pressing d or B The contrast will change 5 Press Save then press OFF Handset Initial setting Back Select K dB L Set b...

Page 20: ...the length of the call 3 When the other party answers talk into the microphone 4 To hang up press OFF or place the handset on the base unit Hands free Digital Duplex Speakerphone For best performance please note the following Talk alternately with the other party in a quiet room If you or the other party has difficulty hearing press d to decrease the speaker volume While talking using C you can sw...

Page 21: ... redial list To erase an item scroll to the item then press Erase If No items stored is displayed the list is empty 1 Enter a phone number If you misdial press Clear Enter the correct number If a pause is required when dialing press Pause where needed p 44 To cancel press OFF 2 Press C or s 3 To hang up press OFF or place the handset on the base unit Press C or s then press REDIAL 1 Press REDIAL T...

Page 22: ...e off To turn this feature on press VE during a conversation J is displayed To turn this feature off press VE again J disappears from the display After hanging up a call the on off setting will be retained When the handset is not in use you can also turn this feature on or off by programming as follows 1 Press MENU 2 Scroll to Voice enhancer by pressing d or B then press Select 3 Select On or Off ...

Page 23: ...lashes To return to the call press SP PHONE The handset user can also take the call by pressing C or s If another phone is connected on the same line p 8 you can also take the call by lifting its handset If a call is kept on hold for 6 minutes an alarm tone will start to sound After 4 additional minutes on hold the call will be disconnected 1 Press SP PHONE The SP PHONE indicator lights 2 Dial a p...

Page 24: ...ff temporarily by pressing OFF while the handset is ringing for an outside call The handset will ring again as normal the next time a call is received 1 Press C or s You can also answer a call by pressing any button except d B or OFF 2 To hang up press OFF or place the handset on the base unit 1 Press SP PHONE 2 Talk into the MIC 3 To hang up press SP PHONE To transfer the call to another person s...

Page 25: ...d in the phone book p 33 If the unit does not receive Caller ID information one of the following will be displayed Depending on the radio communications with the base unit the handset may not display Caller ID information immediately after the ring If your unit is connected to a PBX which does not support Caller ID you cannot access Caller ID service If the name and the time date display service i...

Page 26: ...e phone book If the unit does not receive Caller ID information the unit will announce Call from out of area or Call from private caller If the ringer volume of the handset and base unit is off caller names will not be announced The announcement is heard at the handset or base unit ringer volume p 16 17 If this feature is turned off caller names will not be announced p 27 Name pronunciation may va...

Page 27: ...ssing d or B then press Select 3 Select On or Off by pressing d or B 4 Press Save then press OFF 1 Press MENU 2 Scroll to Initial setting by pressing d or B then press Select 3 Scroll to Set base unit by pressing d or B then press Select 4 Scroll to Talk Caller ID by pressing d or B then press Select 5 Select On or Off by pressing d or B 6 Press Save then press OFF Handset Talk Caller ID Back Sele...

Page 28: ...he Caller List Rcvd calls will not be displayed After viewing the missed call entries missed calls will disappear from the display Viewing the Caller List If you do not press any buttons for 60 seconds the unit will exit the Caller List 1 Press Rcvd calls d or B to enter the Caller List 2 To search from the most recent call press d To search from the oldest call press B 3 Press OFF to exit the lis...

Page 29: ...e number of times the same caller called is displayed 2 to 9 The date and time of the most recent call will be recorded After viewing a caller s information 2 to 9 will be replaced with Calling Back from the Caller List In some cases you may have to edit the number before dialing p 30 If a phone number is not displayed in the caller information you cannot call that caller back from the Caller List...

Page 30: ...n the phone book press MENU 1 Press Rcvd calls d or B to enter the Caller List 2 Scroll to the desired caller by pressing d or B 3 Press Select 4 Press Edit 5 Add or erase digits to the beginning of the number as desired To add a digit enter a number To erase a digit press f or 6 To make a call to the edited number press C or s To store the edited number in the phone book press MENU If the phone n...

Page 31: ...s Save a If there is no name information for the caller Enter name will be displayed You can enter a name by performing the following steps 1 enter the name p 34 2 press d and 3 press Save If a name is not required press d then press Save b If there is already name information for the caller the item will be stored To continue storing other items repeat from step 2 To exit programming mode press O...

Page 32: ...ing d or B then press Erase To erase other items repeat step 2 To exit the Caller List press OFF 1 Press Rcvd calls d or B to enter the Caller List 2 Press All erase 3 Press Yes All entries in your Caller List are erased Handset 2 missed calls Rcvd Phone calls book K L 2 missed calls Scroll list All erase dB K 18887776666 12 20A 12JAN Erase Select K L Erased Rcvd Phone calls book K L 0 missed call...

Page 33: ...press P A pause is stored in a phone number as one digit p 44 5 Press d If you want to change the name press Edit The display returns to step 3 Change the name If you want to change the number press B The display returns to step 4 Change the number 6 Press Save To continue storing other items repeat from step 2 7 Press OFF When the Dial Lock is turned on p 47 only numbers stored in the phone book ...

Page 34: ...shown below For example to enter Tom If you make a mistake when entering a name or number Use f to erase the incorrect character Each time you press f a character is erased Re enter the correct character To erase all characters press and hold f Keys Characters Keys Characters 1 1 6 m n o M N O 6 2 a b c A B C 2 7 p q r s P Q R S 7 3 d e f D E F 3 8 t u v T U V 8 4 g h i G H I 4 9 w x y z W X Y Z 9...

Page 35: ... on page 36 Ex To find Frank press 3 repeatedly until the first item under F is displayed If there are no items beginning with the character you selected the first item in the next alphabetical index will be displayed 4 Press d repeatedly until the desired name is displayed 1 Press Phone book 2 Press Search 3 Scroll to the desired item To scroll down press d To scroll up press B 4 Press C or s The...

Page 36: ...m phone book 18000123456 Calling card access number The voice guidance may be announced 2 Search and dial from phone book 1234 Calling card PIN 3 Search and dial from phone book 15550123456 Destination number If you have rotary or pulse service you need to press before pressing MENU in step 1 to change the dialing mode temporarily to tone Keys Index Keys Index 1 Symbols 1 6 M N O 6 2 A B C 2 7 P Q...

Page 37: ... d then go to step 5 5 Edit the phone number then press d If you do not need to change the number press d then go to step 6 Each time you press f a digit is erased To erase all of the digits press and hold f 6 Press Save To continue editing other items repeat from step 3 7 Press OFF 1 Press Phone book 2 Press Search 3 Scroll to the desired item by pressing d or B then press Erase To search for the...

Page 38: ...ss SP PHONE or LOCATOR INTERCOM 2 When the paged party answers talk into the MIC 3 To disconnect the intercom press SP PHONE or LOCATOR INTERCOM The indicator light goes out During an intercom call If you have difficulty hearing while using the handset speakerphone and base unit speaker decrease the speaker volume by pressing VOLUME on the base unit or d on the handset If an incoming call is being...

Page 39: ...s 1 Press C s or HOLD INTERCOM You can also answer a call by pressing any button except d B or OFF 2 To disconnect the intercom press OFF 1 Press SP PHONE or LOCATOR INTERCOM 2 To disconnect the intercom press SP PHONE or LOCATOR INTERCOM When the ringer volume is turned off p 16 17 the handset and the base unit will ring at the low level for intercom calls You cannot change the ringer tone for in...

Page 40: ...he outside call 2 Base unit Press SP PHONE or LOCATOR INTERCOM to answer the page 3 Handset To complete the transfer press OFF 1 Base unit During a call press LOCATOR INTERCOM The call is put on hold If the paged party does not answer press LOCATOR INTERCOM to return to the outside call 2 Handset Press C s or HOLD INTERCOM to answer the page You can also answer a call by pressing any button except...

Page 41: ...eturn to the outside call for the base unit press SP PHONE to return to the outside call If the paged party does not answer within 60 seconds after you hang up your phone will ring and the call will be returned to your phone You may speak to the caller again by pressing C s or SP PHONE If you do not answer the call within 4 minutes the call will be disconnected 1 During a call press HOLD INTERCOM ...

Page 42: ...hold can resume the full conference by pressing Conf on the handset or HOLD CONF on the base unit Call Share This feature allows the base unit or the handset to join an existing outside call To join a conversation Call Share Press C or s Conference is displayed Press SP PHONE 1 During a call press HOLD INTERCOM The call is put on hold 2 Press Base 3 When the paged party answers press Conf on your ...

Page 43: ...sh To release the mute press Mute again If you press C or s to switch between the receiver and speaker the mute will be released Press MUTE The SP PHONE indicator flashes To release the mute press MUTE again For Call Waiting Service Users Press FLASH CALL WAIT if you hear a call waiting tone during a conversation The first call is put on hold and you can answer the second call To return to the fir...

Page 44: ... Dialing mode or the mute p 43 Selecting the flash time The flash time required depends on your telephone exchange or host PBX You can select the following flash times 700 600 400 300 250 110 100 or 90 ms milliseconds The factory preset is 700 ms If PBX functions do not work correctly consult your PBX supplier for the correct settings 1 Press MENU 2 Scroll to Initial setting by pressing d or B the...

Page 45: ...elect at Ringer setting 3 Scroll to Incoming call by pressing d or B then press Select 4 Select On Off or 2 by pressing d or B 5 Press Save then press OFF 1 Press MENU 2 Scroll to Initial setting by pressing d or B then press Select 3 Scroll to Set base unit by pressing d or B then press Select 4 Scroll to Incoming call by pressing d or B then press Select 5 Select On Off or 2 by pressing d or B 6...

Page 46: ...s ON 1 Press MENU 2 Scroll to Initial setting by pressing d or B then press Select 3 Scroll to Key tone by pressing d or B then press Select 4 Select Off or On by pressing d or B 5 Press Save then press OFF Handset Initial setting Back Select K dB L Key tone Back Select K dB L Key tone On Back Save K dB L PQQX14670ZA book 46 ページ 2005年2月22日 火曜日 午後12時0分 ...

Page 47: ...MENU 2 Scroll to Dial lock by pressing d or B then press Select 3 Enter a 4 digit password This password is required when canceling the Dial Lock If more than 4 digits are entered the last 4 digits are the password 4 Press Save 5 Press Yes then press OFF Dial lock on is displayed 1 Press DIAL LOCK The DIAL LOCK indicator flashes 2 Enter a 4 digit password If more than 4 digits are entered the last...

Page 48: ...service center 1 Press MENU 2 Scroll to Dial lock by pressing d or B then press Select 3 Enter the password set when the Dial Lock was turned on 4 Press Save 5 Press Yes then press OFF Dial lock off is displayed If you entered the wrong password the handset beeps 3 times and Save error is displayed Enter the correct password 1 Press DIAL LOCK The DIAL LOCK indicator flashes 2 Enter the password se...

Page 49: ...set beeps 3 times and Error is displayed an error occurred Try again from step 1 You can stop registration by pressing OFF on the handset and pressing LOCATOR INTERCOM on the base unit 1 Base unit Press and hold LOCATOR INTERCOM until a beep sounds The CHARGE indicator flashes 2 Handset Press and hold FLASH CALL WAIT until Handset Registering is displayed When registration is complete a beep sound...

Page 50: ...ree during a phone conversation To attach the shoulder rest attachment Attach the included belt clip to the handset see above then attach the shoulder rest attachment to the belt clip as shown below You will hear a click when the shoulder rest attachment is in place To remove the shoulder rest attachment Slide the base of the attachment in the direction of the arrow as shown below PQQX14670ZA book...

Page 51: ...uld face upward Fasten the AC adaptor cord to prevent it from being disconnected 4 Install screws using the wall template below Connect the telephone line cord Mount the unit then slide it down Raise the antenna 5 To charge the handset battery Rest the handset on the charge contacts 1 then push the top of the handset so the hook snaps into the slot at the top of the handset 2 The unit beeps once a...

Page 52: ...only the Panasonic KX TCA89BX headset Connecting the optional headset Open the headset jack cover and insert the headset plug into the headset jack as shown below To switch to the speakerphone while using the headset Press s To return to the headset press C Headset Jack PQQX14670ZA book 52 ページ 2005年2月22日 火曜日 午後12時0分 ...

Page 53: ...pattern 1 3 4 7 Melody pattern 1 4 p 18 Incoming call tone for handset 1 3 1 On 2 Twice 0 Off p 45 Date and time 4 Go to Step 3 on page 13 Voice enhancer 5 1 On 0 Off p 22 Dial lock 6 Go to Step 3 on page 47 Talking Caller ID for handset 9 1 On 0 Off p 27 LCD contrast 0 1 1 6 Level 1 6 p 19 Key tone 0 2 1 On 0 Off p 46 Auto talk 0 3 1 On 0 Off p 15 Dial mode 0 5 1 1 Pulse 2 Tone p 14 Flash time 0 ...

Page 54: ...n later Error When you tried to re register the handset the handset and base unit could not link for some reason such as interference from electrical appliances Move the handset and base unit away from any electrical appliances and try again Phone book full When you tried to store an item in the phone book the phone book memory was full Press OFF to exit the programming mode To erase other items f...

Page 55: ...tall the battery p 9 and fully charge it Static sound cuts in out fades Interference from other electrical units Move the handset and base unit away from other electrical appliances p 3 Walk closer to the base unit Raise the base unit antenna If the unit is connected to a telephone line with DSL service you may hear noise from the receiver or speaker during conversations We recommend connecting a ...

Page 56: ...in Other electrical appliances connected to the same outlet may be interfering with Caller ID Telephone line noise may be affecting Caller ID The caller requested not to send his her Caller ID information p 25 If a call is being transferred to you the Caller ID information will not be displayed If a separate Caller ID box is connected between the base unit and the telephone wall jack disconnect th...

Page 57: ...he battery has been discharged Fully charge the battery p 9 Check battery installation p 9 You charged the battery fully but Recharge battery is still displayed and or 7 continues to flash or Charge for 6h and 8 are displayed Clean the charge contacts and charge again p 10 The battery may need to be replaced If you install a new battery fully charge it p 9 Time setting is erased and E Press MENU f...

Page 58: ...If noise prevents the conversation from being understood at the handset approach the base unit to lessen the noise 2 The handset should be used at the HIGH volume setting when the reception tone is difficult to hear 3 The handset should be fully recharged on the base unit when Recharge battery is displayed and or 7 flashes 4 The handset antenna should not be touched during use because of its high ...

Page 59: ...r telephone company Specifications n Base Unit Power Supply AC Adaptor 220 240 V AC 50 60 Hz Power Consumption Standby Approx 2 0 W Maximum Approx 5 4 W Frequency 2 4 GHz 2 48 GHz Dimensions H x W x D Approx 85 mm x 175 mm x 200 mm Mass Weight Approx 460 g n Handset Power Supply Ni MH battery 3 6 V 830 mAh Frequency 2 4 GHz 2 48 GHz Dimensions H x W x D Approx 208 mm x 52 mm x 39 mm Mass Weight Ap...

Page 60: ...Panasonic Communications Co Ltd 1 62 4 chome Minoshima Hakata ku Fukuoka 812 8531 Japan PQQX14670ZA F0205 0 D PQQX14670ZA book 60 ページ 2005年2月22日 火曜日 午後12時0分 ...

Reviews: